Black Friday Deal: Save Big on Avid Media Composer!

Black Friday Deal: Save Big on Avid Media Composer!Power and Precision for Every Editor
Avid Media Composer | Ultimate gives professionals the speed, precision, and creative tools to tell their best stories. Trusted by top film and TV editors, it combines ACE-certified tools with reliable media management to streamline every stage of production. Work faster and with complete confidence in every cut.

Seamless Collaboration Anywhere
Media Composer | Ultimate makes teamwork easy. Share bins, projects, and media with editors and producers locally or remotely through Avid NEXIS and MediaCentral. Collaborate across platforms—including Premiere Pro and Final Cut Pro—and keep everything in sync with Cloud Remote support

Advanced Tools to Elevate Every Story
With ScriptSync, PhraseFind, and Symphony included, you can find clips fast, color grade with precision, and finish projects with a professional polish. Media Composer supports HDR, 8K, and a wide range of formats while integrating seamlessly with Pro Tools and Avid hardware for stunning visuals and sound.

Upgrade Your Productions with TriCaster Bundles

Upgrade Your Productions with TriCaster Bundles

November 10, 2025

NDI November is a month-long, free, virtual event series dedicated to exploring the power of NDI technology for modern live production. Throughout November 2025, we’ll bring together industry experts, vendors, dealers, and system integrators to deliver an in-depth look at NDI workflows and innovations shaping the future of IP-based production. Join Vizrt on November 11th at 3pm EST to see how Vizrt TriCasters can fit into your workflow
Register for FREE now and don’t miss this ultimate NDI event!


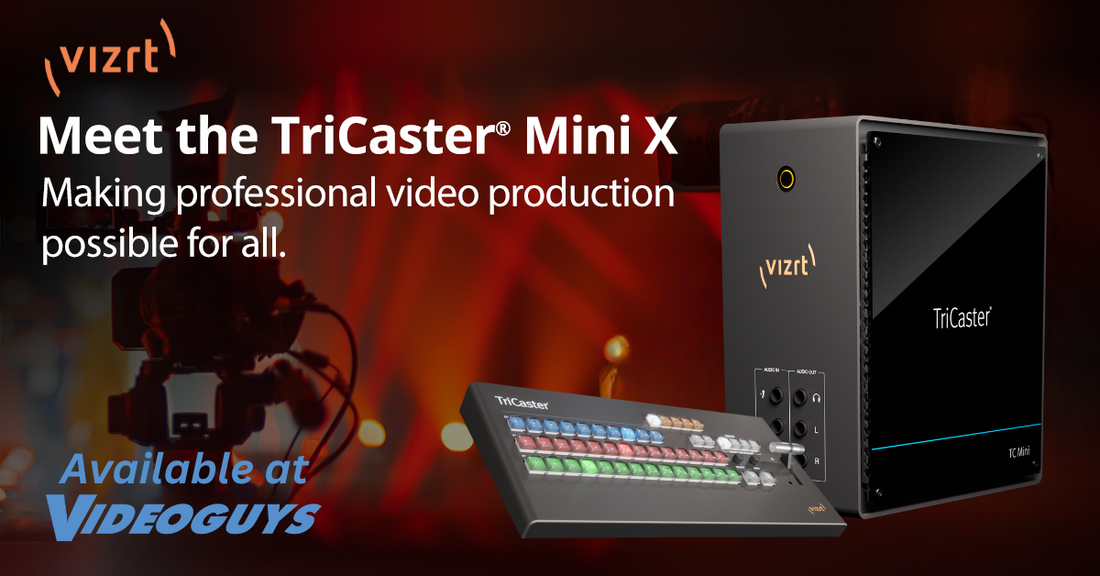
TriCaster Mini X gives producers at any level the freedom to create and share video wherever and whenever they want – truly demonstrating the power of software-defined visual storytelling. The ideal traveling partner for TriCaster Mini X, the Vizrt Control Surface, as a bundle provides studio-style control and a small footprint to deliver professional results…from the office, an event, or anywhere. Call Videoguys at 800-323-2325 for free tech advice!

Vizrt TriCaster Mini X with Control Surface Bundle

Save $600!

The compact, plug-and-play design, intuitive layout mapped to the TriCaster Mini X interface, large backlit buttons, and premium T-Bar make this controller a perfect match for faster, more precise, and comfortable live production.

$10,595.00 reg.

$9,995.00 PROMO

Offer expires 12/31/25

Accessibility, Unlocked
Bringing the possibilities of professional live video production to anyone with a story to tell – without vast investments in infrastructure.
Flexibility, Attained
Off-the-shelf HDMI devices connect directly to the Mini X in minutes creating professional-level productions without having to purchase any new equipment.
Scalability, Achieved
As part of the Vizrt ecosystem of products, users can take advantage of the many ways to scale up their productions to suit any need.

Save $200!

Easy to set-up and with hundreds of capabilities, TriCaster Mini X puts expert tools at your fingertips, without you having to be a production expert.

$8,195.00 reg.

$7,995.00 PROMO

Offer expires 12/31/25


Take your production to the next level with TriCaster and Flex—the winning combination for professional live video workflows. Choose from five powerful configurations tailored to fit any production environment and save big when you bundle. Call Videoguys at 800-323-2325 for free expert advice, help finding the perfect setup, or to connect with a local integrator from our nationwide dealer network. Offer expires Dec 31st, 2025

A compact solution built for small to mid-sized productions with essential IP workflows.

$19,995.00 reg.

$15,495.00 PROMO

Offer expires 12/31/25

A scalable system designed for larger productions, offering 16 external inputs and UHD switching.

$25,490.00 reg.

$20,995.00 PROMO

Offer expires 12/31/25

An advanced platform with premium features like Live Call Connect, Live Story Creator, and real-time remote workflows.

$32,490.00 reg.

$27,995.00 PROMO

Offer expires 12/31/25

A rackmount system tailored for professional studios, supporting 8-channel switching with powerful automation.

$45,490.00 reg.

$30,995.00 PROMO

Offer expires 12/31/25

A rackmount system tailored for professional studios, supporting 16-channel switching with powerful automation.

$45,490.00 reg.

$32,995.00 PROMO

Offer expires 12/31/25

A high-performance tower system built for enterprise-level productions, delivering 16-channel switching, UHD capabilities, and maximum expandability.

$47,490.00 reg.

$32,995.00 PROMO

Offer expires 12/31/25

Learn More About TriCaster + Flex Bundles Here

The Friday Roundup – Movavi Video Editor 2026 Released

Movavi Video Editor 2026 – New Tools and Effects for Faster Editing The Movavi Video Editor is pretty much like the rest of the pack for when it comes to the development of the program and the timing of major updates. They generally come out with…

Epiphan EC20 PTZ Camera with Pearl System Bundles

Epiphan EC20 PTZ Camera with Pearl System Bundles

NDI November is a month-long, free, virtual event series dedicated to exploring the power of NDI technology for modern live production. Throughout November 2025, we’ll bring together industry experts, vendors, dealers, and system integrators to deliver an in-depth look at NDI workflows and innovations shaping the future of IP-based production. Join Epiphan on November 6th at 1pm EST to see the new EC20 PTZ Camera and Pearl System Bundles
Register for FREE now and don’t miss this ultimate NDI event!


Epiphan has just launched the new EC20 PTZ Camera, along with exclusive bundles that pair it perfectly with Pearl Systems for seamless integration and powerful performance. Contact Videoguys at 800-323-2325 for free tech advice on which bundle is right for you!

  • 4K60p
  • 20x Optical Zoom
  • NDI|HX2, SRT, TCP/IP,
  • HTTP, RTSP, RTMP(s) Outputs
  • 1/1.8 inches CMOS Sensor
  • 60° field of view

$1,899.00

Event Streaming Bundle
A compact all-in-one kit with a PTZ camera and encoder that makes it easy to stream and record professional quality events, from corporate town halls to live productions, without the complexity of a full control room.
  • 1x EC20
  • 1x Pearl Nano

$3,419.00

Lecture Capture Bundles
Higher-ed AV/IT professionals looking for a plugand-play video capture solution that’s reliable, easy to deploy and manage, works with their existing workflows, and can scale across campus.

$4,729.00

Studio Bundles
Corporate, media, or podcasting organizations looking for an automated or self-serve video studio that can be operated by anyone to get reliable recorded or live video content

$5,179.00

Production Bundles
Built for organizations that need professional multi-camera production without broadcast-level complexity, ideal for corporate studios, production teams, and content creators seeking scalable flexibility

How to Use YoloBox Ultra to Level Up Your Zoom Meetings

How to Use YoloBox Ultra to Level Up Your Zoom Meetings

What if your Zoom meetings could look like a live broadcast instead of just another video call?
In this Streaming Alchemy workflow, you’ll learn how to transform your Zoom sessions using the YoloBox Ultra for professional, directed layouts — from clean host shots to interview-style side-by-sides.

This guide walks you through how to:

Manage and route audio with Voicemeeter Banana

Configure Zoom’s dual-monitor mode for production-style control

Use the YoloBox Ultra to switch layouts, record, and stream a polished program feed

Perfect for teams, educators, and event producers, this setup brings structure and broadcast quality to every online session — all without leaving Zoom.

[embedded content]

Learn more about YoloLiv below:

Read the full transcript:

Most Zoom calls look like Zoom calls, a grid of faces or a single speaker view. But what if you want something better? Something streamlined with professional layouts and the ability to feature a participant right beside you interview style? That’s exactly what I’ll walk through here. Built around the Yolo Box Ultra, a laptop, and a few supporting accessories. And with that, we can take our Zoom meeting from a default look to something deliberate and designed. To start, I’ll quickly show the gear and connections we used to make this work. I built this setup around four core pieces. A laptop to run Zoom, a Yolo Box Ultra to build and switch layouts, a USB headset with mic for the host, and a USB webcam for the host camera. On the laptop, I also installed software called Voice Meter Banana. It’s a free audio routing tool that lets us send a single audio source to multiple destinations at the same time, like Zoom, headphones, and the Yellow Box. And that’s something we need for this setup, and it’s not something Windows can do on its own. The USB headset plugs into the laptop, giving the host both a microphone for Zoom and a way to hear the meeting. From there, a 3.5 millimeter cable runs from the laptop’s headphone jack into the Yolo Box line. And this ensures the host voice doesn’t just go into Zoom. It also becomes part of the program feed for recording and streaming. To link the two systems, I connected the Yolo box back to the laptop over USBC. And this allows every Yolo box layout to appear in Zoom as if it were just another webcam. For the meeting content, an HDMI cable carries Zoom’s second monitor output from the laptop into HDMI input one on the YOLO box. That will be the feed we use to send a participant’s video over to the YOLO box, ready to be framed into different layouts. And since the host needs to appear in those layouts, I connected a USB webcam directly to the YOLO box. That camera becomes the anchor shot for the host throughout the production. With all the wiring and software in place, the next step was setting up the layouts inside the YOLO box. Now, inside the Yolo Box Ultra, I set up five layouts that we could switch between during the meeting. The first is a full screen of HDMI 1. Whenever I pin somebody in Zoom to that second monitor, that participant will fill this layout. Next is a full screen of the host webcam. That one came in automatically when the webcam was connected. The webcam layout didn’t need any changes, but HDMI 1 needed a quick tweak. I cropped it to remove the extra Windows elements, keeping it clean at 16×9, so the pin participant fills the frame. To build interaction, I created a sidebyside layout with the host webcam on one side and HDMI one on the other. This gives us that interview look where the host and participant appear together in equal balance. For presenting content, I added a layout that shows the slide deck full screen and I imported the slides as a PDF, copied that file to an SD card, dropped it into the YOLO box and selected it as an input. And finally, I built a news style layout that combines slides with the host. This way, the host stays present on screen while walking through material. The classic presenter with graphics frame. With these layouts ready, we had everything needed to move from a basic zoom view to something that feels like a polished production. Earlier, I mentioned Voice Meter Banana. This is the free audio routing software that makes this setup possible. You can download it from VB Audio’s website. And once it’s running, it works like a virtual mixing board inside your computer. When you open Voice Meter, the layout is always the same. Inputs are on the left, outputs are on the right, and what comes in on the left can be sent to whichever outputs you choose on the right. On the input side, there are two kinds. Physical inputs are real devices, the things you plug in. In this setup, hardware input one is the USB headset microphone. Virtual inputs are audio feeds from software. Here, voice meter’s VAIO carries the meeting audio coming from Zoom. On the output side, it’s the same story. Physical output sends sound to hardware. In this setup, A1 goes to the USB headset so the host can monitor the meeting. A2 goes to the laptop’s line out jack feeding the YOLO box and A3 goes to the laptop’s HDMI port which also feeds the YOLO box. Virtual outputs on the other hand send sound back into software. For this setup, B2 is the virtual audio out that Zoom can use as a microphone input. With that picture in mind, here’s how the routing works. The headset microphone comes in on hardware input one. I send it to B2 so Zoom gets the host mic as its input. I also send it to A2, the line out. So the Yolo box hears the host microphone as part of the program feed. The Zoom meeting audio comes in on the virtual input voice meter viio. I send it to A1 which drives the USB headset so the host hears the meeting and I send it to A3 which routes through the HDMI into the YOLO box. So the meeting audio is also part of the program as well. The result is clean and balanced. Zoom only hears the host. The host only hears Zoom and the Yolo Box hears both sides together as one program feed. In other words, everybody hears what they should and nobody hears what they shouldn’t. By letting voice meter handle the routing, a Windows limitation becomes a flexible, reliable audio workflow. And with the routing in place, the next step was dialing in the mix on the Yolo Box Ultra. Now on the YOLO box, I opened the audio mixer and enabled HDMI 1 and line in the two sources carrying meeting audio and the host mic. I balanced the levels so the host and participants sat naturally together. And with that done, the YOLO box was ready to capture the program feed. And here’s the real payoff. When you press record, the YOLO box is recording the layout you built, not Zoom’s tiles and menus. And if you go live, that same polish feed can stream directly to YouTube or any other platform. You’re not just screen grabbing a meeting. You’re producing something that feels put together. So with recording and streaming in place, I turn back to Zoom to make sure its settings match this workflow. With the YOLO box and voice meter configured, the last step is setting up Zoom so everything connects the right way. In Zoom’s video settings, I select the Yolo Box Ultra as the camera. Because the Yolo Box is connected over USBC in a UVC mode, whatever layout I switch to on the Yolo Box shows up in Zoom as the camera feed. That means that the directed program coming from the Yolo box, not just the ROAR webcam, becomes the view for everyone in the meeting. In Zoom’s audio settings, I set the microphone to voice meter output B2. That’s the virtual output carrying only the host mic. This way, participants hear the host clearly without any doubled audio. For the speaker, I set it to voice meter viio. That’s the virtual input device that takes Zoom’s meeting audio and brings it into voice meter. From there, voice meter splits it to the host headset and into the YOLO box so both get the same clean feed. The last step is enabling dual monitor mode in Zoom. This gives us two windows to work with. Monitor one will be where we manage the meeting. Monitor 2 is actually the HDMI input on the YOLO box. We can pin individual participants here to drive layouts like the sidebyside interview frame. So the division of labor is clear. Monitor one is for running the meeting itself, while monitor 2 feeds the YOLO box the participant video it needs for production. Working together, these two screens give you that director level control inside a Zoom call. With Zoom configured, the workflow is complete. And now we can see how it plays out in practice. Now imagine hosting a Zoom meeting with this setup. The Yolo Box feed is spotlighted so participants always see the clean layouts, whether that’s full screen, slides, or a side by side. If somebody raises their hand, you can pin their video to the second monitor and tap the side by side on the YOLO box. And in one move, you’ve placed them next to you in a professional interview frame. That simple combination, pin and zoom switch on the Yolo box turns a standard meeting into something that feels produced. It not only looks better, it also encourages people to take part. They’ll know that they can be featured cleanly and that their perspectives matter. And with both Spotlight and Pinning working together, you stay in control of exactly how the meeting looks to your audience. Hopefully, this has sparked a few ideas on how to elevate your own Zoom meetings, keeping what’s familiar, but giving it a more structured and polished look than your typical video call. We built this using the Yolo Box Ultra, which makes it easy to create professional layouts and manage a meeting like a production. But the concepts we’ve covered here, routing audio cleanly, framing layouts, and managing participants across two screens, those can be applied to almost any setup. And if you ever need to scale beyond meetings into something more eventlike, where you’re coordinating multiple guests, mixing content sources, or streaming to a wider audience, a tool like our live to air Z can extend the same ideas to that level of production. But whatever tools you use, the goal is the same. To create online sessions that look polished, sound clear, and keep people engaged. Thanks for taking the time to watch, and I hope you take what we covered here and make something amazing with it for your next Zoom meeting.

Kiloview High-Quality & Low Latency NDI Converters

Kiloview High-Quality & Low Latency NDI ConvertersRegister for FREE to watch Kiloview on NDI November
NDI November is a month-long, free, virtual event series dedicated to exploring the power of NDI technology for modern live production. Throughout November 2025, we’ll bring together industry experts, vendors, dealers, and system integrators to deliver an in-depth look at NDI workflows and innovations shaping the future of IP-based production. Join Kiloview on November 5th at 10:20am EST to see how NDI powers seamless Kiloview workflows
Register for FREE now and don’t miss this ultimate NDI event!


Power Your NDI Workflow with Kiloview Solutions from Videoguys

Videoguys is your trusted source for Kiloview NDI products, including their full line of NDI converters and the CUBE system for NDI recording. Call us at 800-323-2325 for free expert advice on integrating these solutions into your workflow.

Kiloview’s Cradle Series RF02 is a powerful 2RU rack-mounted media platform that supports up to 18 modular cards for encoding, decoding, media gateway, and bonding. Its modular design replaces multiple devices with one streamlined AV-over-IP solution for broadcast, medical, education, and live event applications.

$2,999.00

with 10% off special when you populate it

with the module cards needed for your workflow

18 x Kiloview Video Encoding / Decoding / NDI I/O / Media Gateway

1x High Performance 12-Port 1Gbps / 2.5Gbps / 10Gbps Network Switch

1x Service Management Server

Kiloview CUBE R1 and X1

Discover the Kiloview CUBE R1 and CUBE X1—powerful NDI recording and routing solutions designed to simplify your IP video workflow with reliability and flexibility.


Streamline Your IP Workflow with Kiloview NDI Converters

Kiloview NDI converters make it easy to bridge SDI, HDMI, and NDI workflows with high-quality, low-latency video transmission. Reliable, versatile, and built for professional production environments.

4K 12G-SDI to NDI Bi-Directional Converter

$999.00

4K HDMI to NDI Bi-Directional Converter

$799.00


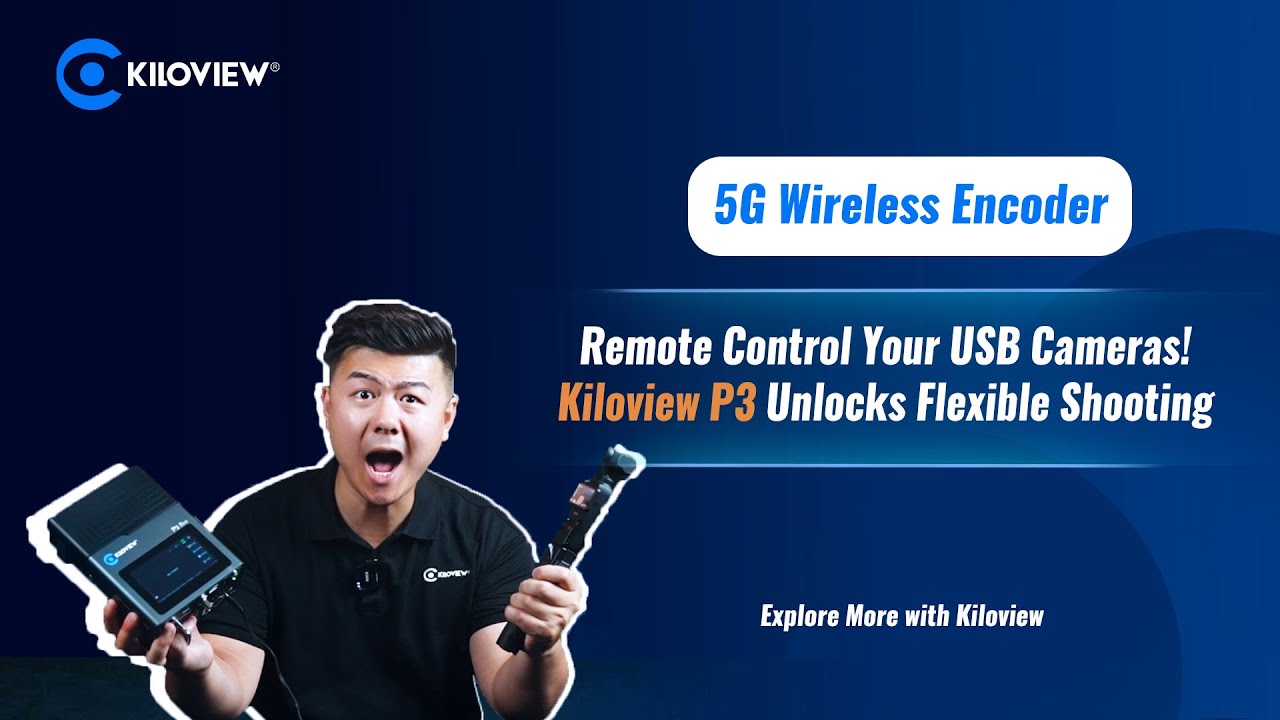
Portable, Powerful, and Reliable—Meet the Kiloview P3 & P3 Mini

The Kiloview P3 and P3 Mini bring broadcast-quality 4G/5G video encoding to any location. Compact yet powerful, these field-ready encoders deliver stable, high-quality streams for news, sports, and live events.

YoloLiv YoloBox Extreme Review: The Ultimate All-in-One Live Streaming

In this article by Anthony Burokas for StreamingMedia, we take an in-depth look at the YoloLiv YoloBox Extreme — a powerful all-in-one live production and streaming device that continues YoloLiv’s legacy of innovation in portable video production. The YoloBox Extreme stands out as the flagship model in YoloLiv’s Android-based ecosystem, combining the flexibility of software, the robust connectivity of hardware, and the convenience of a tablet-sized form factor. Competing with alternatives like Magewell Director and Cinetreak, YoloLiv remains the pioneer and leader in the all-in-one tablet streaming category, offering solutions that scale from the compact YoloBox Mini to the feature-rich YoloBox Extreme reviewed here.

YoloLiv YoloBox Extreme Review: The Ultimate All-in-One Live Streaming

What Makes the YoloBox Extreme Stand Out

The YoloBox Extreme elevates live production by providing the tools of a full studio within a sleek 11” OLED touchscreen tablet. Designed for professionals who need to stream anywhere, the Extreme offers up to eight HDMI inputs (five 4K and three HD), two HDMI outputs, and multiple connectivity options, including Gigabit Ethernet, Wi-Fi, internal cellular, and USB bonding. With 1,000 nits of brightness, the display is easily viewable outdoors, making it ideal for live events, sports, or remote broadcasts.

This next-generation device allows users to record both program and ISO feeds, stream to up to three destinations simultaneously, and leverage auto-switching capabilities that can follow audio cues for dynamic production control. Its built-in audio mixer includes features like solo monitoring, mix-minus, and channel-specific control—ensuring clean, professional sound for both hosts and guests.

Enhanced Monitoring and System Feedback

One of the most impressive updates in the YoloBox Extreme is its enhanced system monitoring and feedback tools. The new on-screen CPU load and detailed status menus display performance metrics such as temperature, memory usage, and encoding status. These additions give creators better visibility into how hard the device is working—an essential feature for a system that packs so much into a compact form factor.

YoloLiv also provides clear warnings when changing advanced settings, like using dual HDMI outputs or hot-swapping cables, helping users maintain optimal performance and reliability during live events.

A Streamlined Yet Powerful Interface

The YoloBox interface remains one of the most intuitive and user-friendly on the market. Designed for fast, efficient operation, it allows users to execute complex production features with just a few taps. Want to enable a green screen effect? Seven taps. Create a side-by-side multiview with borders and background? Seven taps. Invite remote guests? Just six taps.

Despite its simplicity, the system offers robust customization and professional-level control. The new Director Mode introduces a dual-screen layout with both preview and program monitors, streamlining workflow for those familiar with traditional switcher setups. While there’s room for further refinements—such as separate “Cut” and “Auto” transition buttons—the Extreme already delivers exceptional control for live producers.

Final Thoughts

The YoloLiv YoloBox Extreme is a game-changing tool for creators, educators, event producers, and live broadcasters who demand professional quality without the complexity of a multi-device setup. It’s an 8-input live production powerhouse that combines ease of use, versatility, and portability in one elegant device.

Whether you’re streaming a live concert, managing a sports broadcast, or producing hybrid corporate events, the YoloBox Extreme delivers professional-grade results with remarkable simplicity.

Learn more about YoloLiv below:

Remote Control Your USB Cameras Anywhere with the Kiloview P3 Wireless

Remote Control Your USB Cameras Anywhere with the Kiloview P3 Wireless

In this video from Kiloview, Dayu Liu demonstrates how the upgraded Kiloview P3 wireless bonding encoder redefines remote video production. Designed for professional live streaming, reality shows, and mobile event coverage, the P3 now makes it possible to remotely control USB cameras directly through the P3 web interface or a connected PTZ controller — all without needing a crew on-site.

[embedded content]

No Crew? No Problem.

Remote production often means setting up cameras in multiple locations and hoping every angle is perfect. Once the shoot begins, making real-time adjustments like zooming, tilting, or reframing can be nearly impossible without local operators. That’s where the Kiloview P3 changes the game.

With its latest upgrade, the P3 gives producers the power to adjust camera settings, positions, and zoom levels remotely. Whether you’re using compact USB cameras such as the DJI Pocket 3 or similar lightweight models, you can now position them anywhere and maintain full creative control from the control room or even while on the move.

Wireless, Flexible, and Efficient

The Kiloview P3 is built for wireless freedom and production efficiency. Its bonding technology ensures stable transmission even in challenging environments by combining multiple network connections. This allows teams to produce professional-quality video from virtually anywhere — no cables, no crew travel, and no compromises.

Key advantages of the Kiloview P3 include:

  • Remote USB Camera Control: Operate compatible USB cameras through the P3 web interface or a PTZ controller.
  • Real-Time Monitoring: Make live adjustments from your control room without being on location.
  • Total Wireless Flexibility: Go fully mobile with bonded network connections for rock-solid streaming.
  • Manpower Savings: Reduce on-site staff and production costs while maintaining top-quality output.

Unlock a New Level of Remote Production

For producers, broadcasters, and content creators, the Kiloview P3 opens the door to a new era of remote, wireless video production. It simplifies multi-camera management, reduces setup complexity, and delivers greater flexibility for every kind of live event or field shoot.

With the ability to remotely control cameras like the DJI Pocket 3, the Kiloview P3 ensures that you can capture every moment perfectly — even without a crew on-site.

How BirdDog’s NDI Solutions Are Powering the Future of Live Production

How BirdDog’s NDI Solutions Are Powering the Future of Live Production

During IBC 2025, BirdDog revealed how its NDI technology is transforming productions across entertainment, corporate, sports, and streaming environments. Led by Suso Carrillo, the session highlighted how BirdDog’s PTZ cameras and converters simplify connectivity, reduce setup time, and open the door to next-level creative workflows.


These real-world success stories prove why BirdDog remains a leader in flexible, scalable IP video solutions. Check out more in the video below:

[embedded content]

Learn more about BirdDog below:

Read the full transcript:

Welcome everybody. I’m Sus from from Berto. Uh our mission actually is redefine live video production but let’s focus in in NDI use cases in in this presentation. So first of all uh who is Berdock? No. So uh so Berdo was one of the first companies working with with NDI since the since the very beginning. Indeed we released the first hardware with NDI inside. Um since there we have created a complete ecosystem that is focused but not just related to PT set cameras, converters, software and and connectivity and right now like I think it’s like almost 10 years after the company was founded I can say that we are trust worldwide and we have a really nice reputation not just in in NDI but also in the in the live uh video space. So as I said we have been working with with NDI so since the very beginning indeed we we have been always truly believers in in the protocol. So we have been working with with NDI since the very beginning. Indeed we released the the first NDI hardware a while ago. Um and right now I think that some of our uniqueness is that actually we have NDI in our our whole portfolio. So it doesn’t matter the verdoc product. It doesn’t matter if it’s a camera, it doesn’t matter if it’s encoder, a software or whatever. NDI is uh at as at its core. Um we really think that the protocol have everything it needs for you know uh reaching the level of quality that is required in the broadcast industry and also of course the low latency that is needed and all the reability and flexibility that that an IP protocol um provide. And this is something that I wanted to to focus is is about why these kind of success stories matter. So we are true believers in creating stories with our customers because they tell the truth of how the equipment and the protocol and you know the technology is being is been used. So it’s um um it’s really important to prove that everything is is working. It’s really important that what other people is doing, you know, it’s can be relevant for you and understand how other people is is resolving its workflows because right now video is all over the place and and every video project and any video solution, it has maybe a dedicated workflow and there’s a lot of people doing original and and different things all all over the place and when it comes to use NDI technology jointly with with Berdo technology. So I think that we can say or what our customers say from us is that um it’s really easy to deploy. It’s really reliable on the field. We will see a couple of examples of live events with with concerts and that kind of of um of productions. And also we try to make things really smarter, easy to connect and to uh and to use but also you know keep them in a cost effective uh budget um uh I forget the word in English. I’m Spanish sorry but you know just to keep things uh cost effective. So this is the first uh success story that I want to to highlight and this was really important for us because so for us a camera is not just a camera for us a camera is the beginning of your workflow and that’s like a different angle when designing a camera. Um so that’s why all of our cameras has NDI but not not all of our cameras have the same flavor of NDI. when these guys from Macau came to us. So they were looking to do um the kind of video workflow where King Kong is taking a selfie or yourself in a casino. Uh the company was actually using by that time our converters to some full NDI to SDI and SDI to full NDI um conversion that was happening. Um but at that time the camera that we selected and the camera that we think was the most appropriate for this for this project was our X1 Ultra. S1 Ultra is an HX3 camera. So when we we we tell them to them you know it’s like the oh my we have been working with full NDI we don’t know much about HX3 and that stuff and indeed I think that is still a bit of luck when when NDIHS3 is been adopted. So the thing is like we convince them because our vision is that NDIS3 is like the best of two worlds. You are having a lot of quality, lowest latency but you don’t need the you know the computing capabilities needed to to get full NDI and you don’t have that kind of high bit rate that full NDI is providing. Um so the solution was to provide this X1 P set. So all the video was happening just with an NDI HS3 HS3 workflow and then the camera at the same time was providing an RTSP stream to the to the graphic engine. So everything was working and the thing is that also they leverage the the autotracking from the camera. So the camera detects when someone is entering into into that hole and then it frames then king cones appear and plop they take the selfie and it’s funny something that is really great is that once this company try HX3 they don’t want to know nothing about about full NDI that’s not bad that is that each flavor of NDI needs to be used in each use case of NDI for us it’s related to high-end productions where that is needed but HS3 in this uh let’s say AV installation is is perfect and you know he has been working in this industry uh for a while so at at the very beginning he he was using a lot of fiber optics really expensive gear in their in their setups and and right now he is just using Berto PT set cameras in this case the X4 that is also wirelessly with Ber play that is a a a small device that enables NDI all over the place. So, so right now what what we are getting is that he needs like fewer operation and and he’s getting like the quality he needs the reliability he needs but just using NDI streams all over the place to send you know the different video contributions from the camera from the venue that they are places all over the place and just you know the PT set cameras that need also less um less uh less operation. So, so he’s coming from, let’s say, an uncompressed world with fiber optics, with huge racks, with a lot of people, you know, uh running cables and that stuff into something that is like Ethernet base, IP, flexible, reliable, you know, and and even more cost effective. Indeed, Brett that is one of the guys that maybe know more about uh live music is not coming back to those workflows anymore. And then you know another different story and this is I think this is the magic that is happening right now. So um Cory Evans that actually right now is a DJ and and life producer he really was a musician that when you know the pandemic came he needed to reinvent itself and right now he’s doing a lot of live video production but in a small events okay so it’s like weddings and and that kind of stuff. So for him uh NDI was the the the cornerstone when he decided to jump into this industry. So because for him was super easy to understand due to his previous you know IT IT knowledge and how everything was was managed and with a single setup he’s doing a lot. He’s just using like two cameras. he’s uh uh leveraging the capabilities of using NDI within Wi-Fi networks that it’s easy for him, you know, to set up the camera in those places whereas they are really easy to place and don’t need to run cables all over all over the hall or whatever. And and right now it’s uh pretty much what what he’s doing. And when we ask him you know about would you come back you know to use another kind of video workflow it’s not no I want to be NDI and wireless for him that’s the that’s the key to his it success you know and we are providing that wireless capability with our X4 camera that has its own Wi-Fi 6 transmitter and receiver so that that’s easy that’s easy to do and the last use case that I want So to put um to highlight is that so it’s like the same like we were seeing before in in live music. So life sports you know it’s also a a nice place for NBA especially this kind of of sports like climbing and this happen this happened really really recently where you know you need to have like a production that and you don’t know exactly what what is going to happen and when it’s going to happen. So this guy uh these guys from sports climb in Victoria that is a climbing competition happening in in Australia they they got a lot of X1 X4 and X5 cameras and they deployed all over the place just using the an Ethernet network. I just need to remember that getting a plugging an NDI camera is as easy as getting the Ethernet cable boom and you are done. You have absolutely everything that that you need and and that’s magic. And when it it comes to this kind of a sports then you know you were the action was supposed to happen there but then it’s happening there and you need to make changes in the last minute or something like that. This is really easy to accomplish using whether an um an standard Ethernet network or using NDI bridge to send the stream from the camera from one place to another or or whatever. Indeed, these are other kind of company that once that they have taste NDI, they are not coming back to to use um let’s say bassband video because you know for them it doesn’t make any sense and those are the four use cases. So why verdoc and NDI? Well, I think that you know since we are working with NDI from the very beginning, I think we are our expertise is is really trust uh worldwide and as I said before we try to simplify everything and making make it really uh reliable. Um and something that is important and that’s in the at the core of the company is that I always say that you are buying a Berdo product today that is going to be a better product tomorrow. That’s why because we don’t we are continue developing you know and try to include features and trying to get the most of the technology constantly. of each fware version that we are going to release about the product is going to make your product better. You are buying a nice product today and that product is going to be better tomorrow and that’s uh at our core. And if you want to see all of this technology working, come to hall 7 book C3 and more than happy to to show you. Thank you.

Mastering Camera Placement for Houses of Worship: Building a Strong Fo

Mastering Camera Placement for Houses of Worship: Building a Strong Fo

Video has become an essential ministry tool for churches. Your live stream is often the first impression for new viewers, making camera placement key to creating meaningful connections.

Start with one main camera centered on the stage for clear, eye-level coverage. This is your anchor shot for sermons, music, and prayer. PTZOptics Move 4K 30X cameras deliver powerful zoom and 4K clarity, even from the back of large sanctuaries.

Add a second camera for variety—one can focus tightly on the speaker while the other captures wide shots of worship or the choir. With auto-tracking and preset controls, even small media teams can achieve professional results.

A thoughtful camera setup helps ministries share their message beautifully and effectively with every viewer. Check out the video for more:

[embedded content]

Learn more about PTZOptics below:

Read the full transcript:

Video production has become a vital ministry tool for houses of worship. Whether you’re reaching homebound members, sharing services with a global community, or archiving moments for future generations, the way that we capture and present our worship experiences matter more than ever. For many, the live stream is their worship spaces online front door. the first impression, the welcome mat, and often the only connection that the viewers may have for weeks or even months before attending in person. That’s why a thoughtful video strategy is essential for any house of worship. And at the heart of that strategy is camera placement. Where you place your cameras directly impacts how your message is experienced. It shapes the emotions of your audience, highlights moments of meaning, and invites viewers into the sacred atmosphere of your space, whether they’re sitting in the front row or watching from across the world. In this video, we’ll guide you through the essentials of camera placement in worship environments. Whether you’re working with one camera or five, capturing music or spoken word, we’ll explore camera angles that enhance your storytelling and elevate your message. Let’s explore how to create a dynamic video experience that supports your ministry and inspires your community. Before we talk about camera angles, let’s talk about what you’re capturing. The style of worship you’re streaming, whether it’s spoken word, live music, or a blend of both, will shape your camera placement choices in important ways. If your service is centered on sermons, readings, and prayer, your camera setup should prioritize views of the main speaking area. You want clean, head-on shots that keep your audience focused on the message being delivered by your speaker. But if your service features musical performances, choirs, praise bands, acoustic sets, or organ pieces, you’ll want to incorporate more dynamic and expressive angles. Musical performances are often full of emotion, and your camera placement can reflect that with creative side angles and wider shots that capture the atmosphere. Many worship services blend both a message and a musical experience. That’s why in this tutorial, we’ll explore camera placement recommendations for both spoken word and music, beginning with just one camera and building up from there. This video will be a flexible guide to give you best practices and ideas for your worship productions. Use whatever matches your ministry style. Whether you’re in a cathedral, a converted gym, or a mobile church setup, these principles can help you make the most of your cameras and create an engaging experience for your viewers. Now, let’s start from the beginning with just one camera and how it can become the anchor of your entire broadcast. Camera one, main camera. Every great broadcast begins with a foundation. And in the world of worship production, your main camera is that foundation. If you’re starting with a single camera, your goal is coverage that is clear, centered, and meaningful. This camera should be positioned on the center line of your worship space, facing the stage or pulpit. It’s your all-purpose shot, the one that captures everything from sermons to music to candle light services. Think of it as your anchor. It should be at eye level with those on the platform, creating a sense of intimacy and presence. When a presenter speaks, it should feel like they’re looking directly at the viewer. Here’s a pro tip. Just because you have a PTZ camera doesn’t mean it should be constantly in motion. One of the most common beginner mistakes is moving the PTZ camera while it’s live. With settings that are too fast and jerky for the broadcast. If you’re using a single main camera to capture multiple angles, try cutting to a full screen graphic or an alternate video feed while repositioning your PTZ camera. Once it’s set in the new position, you can cut back to it seamlessly, ensuring a smooth and professional viewing experience. If you do wish to move the camera while live, make sure your pan, tilt, and zoom speed settings are nice and slow so that the movements look more cinematic and less jerky. With one camera, you’ll want to get two essential shots. The medium tight shot for speakers, which is just the individual from head to shoulders conveying the emotion and expression of their presentation. a wide full body shot for music or multiple people on stage, giving room for movement and context. You can slow down preset speeds on your camera to make sure that the transitions between a medium shot and a full body shot are graceful when done on camera. If you’re streaming to seniors at home, newcomers online, or members traveling afar, this camera is their window into your worship space. Take the time to get this right and you’ll build trust, clarity, and spiritual connection. Most churches are fairly large spaces, and that presents a unique challenge for camera selection. Your camera needs to be able to zoom in quite a lot in order to show meaningful views of people on stage. That’s why the PTZ Optics 30X camera model is one of the most popular PTZ cameras for long-d distanceance shots. With a 30x optical zoom lens, this camera can be placed 75 ft away and still deliver crystal clear head and shoulder shots of a worship leader. At the same time, it can zoom out to show an 86 ft wide angle view, giving you the flexibility to adapt from everything from solo sermons to choir performances, all from a single mounting location. If your worship space is larger, you can use a Move 4K 30X camera, which can capture a pastor at a head and shoulders from up to 150 ft away. Whether your camera is mounted at the back of the sanctuary, tucked into a balcony, or installed in a control room, the appropriate amount of optical zoom ensures that your viewers don’t just see the service, they feel like they’re part of it. And for ministries growing their live stream outreach, that level of quality and connection makes all the difference. Camera two, your second perspective camera. Once you’ve established your foundation with camera one, the next step is to add versatility and the second perspective camera with camera 2. Where you place your secondary perspective camera depends on what you’re capturing most often. If your focus is primarily preaching and teaching, camera two should be placed right next to camera one at the center line toward the stage at the back of the sanctuary. This setup allows you to switch between two essential shots without a potentially distracting angle change on camera. One camera can deliver the tight shot with a head and shoulders for facial expressions and intimacy, while the other can do the head and toe shot or a slightly wider angle. Perfect for capturing gestures, body language, or operating with multiple speakers. Something special happens when you have two cameras set up. When you have a PTZ joystick controller to move one camera to prep your next cut while the other camera is live. This allows you to capture many different angles throughout your worship space with just two wellpositioned PTZ cameras. By keeping both cameras aligned, your transitions will feel smooth and professional. Ideal for emphasizing clarity and consistency in message delivery. In this setup, you can use camera one for your head and shoulders view and transition to camera 2 to follow your worship leader as they walk up on stage. If you’re using a PTZ optics camera with autotracking, such as the Move 4K, you can set up this camera to automatically follow a speaker while they walk on stage. This is handy for small teams who don’t have a dedicated camera operator to follow the worship leader throughout the entire broadcast. Now, if you’re doing more music and worship, if your worship productions include choirs or bands, you may want to use camera 2 in a more creative role. Instead of sitting next to camera 1, shift camera 2 to a slash angle about 45° off center, pointed toward the stage. This angle perspective adds depth, motion, and visual variety that the flat straight-on shots just can’t provide. It gives your online audience with the sense of being there in the room watching from the pews. You’ll see the musicians profiles, hands on the instruments, and the subtle interplay between worship leaders and the congregation. And if your worship leader tends to move to one side of the stage, say always walking from the right from the pulpit of the lectern, that’s where you want to place this second camera. Follow the flow of your space and your worship leaders. The nice thing about installing your camera too at a slash angle is that you can also capture views of the other side of the worship space. Ideal for times when people are such as the choir are walking down the center aisle. So whether you’re staying center line for message clarity or exploring angles for music richness musical richness, your second perspective camera gives you the flexibility to enhance the experience without overwhelming your workflow. Camera three, the story telling camera. With two cameras in place, you’re already covering the essentials. But adding a creative storytelling camera opens up the door to dynamic live direction, especially when you’re using PTZ cameras with programmable presets. This third camera gives your production team more flexibility and dimension and allows your PTZ operator to bring the worship experience to life through thoughtful movement and shot selection. Typically, you’ll want camera 3 positioned on the opposite side of camera two, creating a balanced pair of slash angles that flank the stage. With camera one still at the center, you now have a three angle triangle that allows your director or PTZ operator to cut between center focus, left perspective, and right perspective, keeping the visuals engaging and immersive. Once you get into visual storytelling, cinematic camera movements become more important. And that’s why we’ve built two new cinematic PTZ camera movement tools into PTZ Optics Hive. The first is called Cine Center, which allows users new to PTZ camera operation a simple point-and-click solution for cinematically moving the camera to a specific place the user clicks with their mouse. What could be easier? The next is called Cine Frame. Cine frame allows an operator to use their mouse wheel to define a specific area of the worship space they would like the camera to move to. Once they click, the camera will gracefully move into that cinematic direction using pan, tilt, and zoom at the same time to frame that specific area. The great thing about these cinematic movements is they aren’t hard to perform. because they’re initiated with the click of a mouse. This makes it easier to empower your worship media team with tools they can pick up easily and use effectively. Did I mention Hive is completely browserbased? That means members of your team can be camera operators from anywhere, making it that much easier for them to serve. If you’ve chosen to place camera one and two in the center, camera three will be your first angled camera used for storytelling. If you’re using a PTZ camera controller like the Superjoy or Hive, consider setting up presets like these. Preset one can be a wide slash angle of the full stage, perfect for group worshiping or transitioning between songs. Preset two can be a tight profile of the worship leader at the podium for a creative, more cinematic sermon shot. Preset three can be zoomed in on a soloist, a keyboardist, or other musicians from an angled view. Preset four can be a reaction shot of the congregation or choir from the side capturing emotional moments and participation. Preset five can be a creative atmosphere shot like a lit candle table, a stained glass window, or a cross used during player or music musical transitions. These presets give the PTZ camera operator a pallet of options to work from, minimizing the need for manual adjustments and enabling smooth camera switching during live services. With three cameras and thoughtful presets, your worship broadcast becomes cinematic, emotional, and deeply engaging, creating an experience that resonates just as powerfully online as it can in the room. Camera four, the reverse view camera. With the reverse view camera, you can shift perspectives, giving your audience an important view into your worship space. Unlike your first three cameras, which are directed toward the stage, camera 4 faces the congregation, offering a powerful reverse angle view that captures the heart of the worship space in action. The reverse view camera is often positioned high above the stage, mounted securely on a wall, beam, or lighting grid. This camera offers a bird’seye perspective that can be one of the most versatile and emotional tools in your entire setup. Depending on your space, you may want to capture a lower over- the-sh shoulder style view for this camera or a higher, more bird’s eyee perspective. This view can do something special. It lets the audience at home see the community, not just the stage. It reveals the life, the responses, and the spirit in the room. This is a great camera to show viewers your worship space as one that’s available for them to join. Many worship leaders like their viewers to be able to see that there’s open space available for new families to attend in person. In essence, this view removes any doubts about there potentially not being enough space for a new family or person to join the service. This camera can also be used to capture an overhead shot of the organist or piano player showing hands-on keys and a wide variety of instruments in use. This camera is great for congregational worship moments where the focus isn’t just on who’s leading, but who’s participating. This camera can show raised hands, swaying choirs, or moments of prayer in the pews. Here’s a few suggested PTZ camera presets for camera 4. Preset one can be an overhead of the organist or piano focused on the hands and the keyboard. Preset two can be the center aisle wide shot, ideal for children’s programs or others walking down the pews. Preset three can be a wide congregation shot to capture the communal worship moments. Preset four can be a tighter, more zoomed in area for bell ringers or other specific instruments that are played during ceremonies. Preset five can be a mid pew focus shot showing rows of attendees during prayer or reflection. Here’s a tip. If you’re using PTZ Optics Hive for panilt zoom camera control, each preset will get a little picture to represent the locations. You can use these pictures with the name and label them so that each preset is easy to know exactly where it’s going to go with confidence when you click it. This camera also creates incredible transitions during worship, shifting from the leader on stage to face those who are being led, reminding online viewers that worship is a shared living experience. PTC camera operators, use this camera to establish atmosphere and capture emotion. Look for moments where the congregation is reacting, singing, clapping, standing, and cue a wider or midshot to capture these moments. Keep movement minimal and intentional. Wide gliding movements or static presets often work best from this high angle. With a thoughtful onstage placement and a few well-crafted presets, camera 4 becomes the soul of your multi- camera setup, connecting your online audience not just to the platform, but to the people and spirit that makes the worship real. Camera 5, your dynamic center. As your production setup grows, you begin to see not just what you need to capture, but how you want to capture it. That’s where the dynamic center comes in. This camera builds on your center line, placed along the back of your worship space near camera one. But instead of simply duplicating the same views, it gives you expanded control, flexibility, and creative layering, especially when there’s a lot happening on stage. With multiple speakers, dramatic moments, or larger worship teams, Camera 5 provides additional tight shots, full stage coverage, or alternative framing options that complement the other angles you’ve already built. And because this is a PTZ camera, it’s not locked to just one perspective. It can adapt dynamically each service, whether that means tracking to a pulpit or lectern, centering on a guest musician, or covering the scene unfolding on the far end of the stage. Here are a few suggested PTZ presets for camera 5. Preset one can be a tight closeup on the speaker’s face for emotional storytelling moments. Preset two can be a full body shot of a soloist, worship leader, or speaker. Preset three can be a midstage focus preset for performances or dramas where you want to show a bit more of the stage. Preset four can be a duo shot or an alternate lectern location for guest speakers or readers. Preset five can be a wide cinematic view of the full platform from a slightly higher angle. This camera becomes especially valuable when you’re mixing live elements with production flexibility. It’s your floating angle, ready to step in with coverage that fills gaps and enhances transitions. If you have a VIP up on stage, you might want to dedicate this PTZ camera to autotracking that subject the entire time. Here’s a few PTZ camera operator tips for this camera. Think of camera 5 as a switch hitter. When the other cameras are committed to key angles like side views and reverse shots, camera 5 can be flexible and respond to what’s unfolding in real time. Camera 6 is the ever popular wireless camera. Not every camera in your worship production needs to be fixed or mounted. Camera 6 can introduce mobility and with it motion, intimacy, and spontaneity. A handheld wireless camera can add something truly special to your live stream, a human perspective. It follows the action, captures the emotion, and places your viewers in the middle of the moment. These cameras are typically connected via a wireless HDMI or SDI transmitter, which sends the video feed back to your production system in real time. Whether it’s a mirrorless DSLR camera, or even a camcorder, this mobile unit is a tool for capturing movement. The ideal uses for camera 6 are close-ups of the choir, musicians, or instruments midperformance. Candid moments of the congregation, like clapping, praying, or connecting are perfect for the wireless camera. Creative B-roll during transitions, pre-ervice welcomes, or postservice community time. The handheld camera helps bring the viewer into the scene. Use sparingly and thoughtfully, it breaks the fourth wall, turning your live stream into something that feels alive and responsive. Here’s a tip. You can use your smartphone as a wireless camera. If you’re not ready to invest in a fully wireless camera system, this is a simple alternative to test out. Using the Wi-Fi in your sanctuary, you can download the NDIHX camera app for your smartphone, which is available on both iOS and Android. This app turns your phone into a wireless NDI camera, which you can use to send video over your Wi-Fi network to any NDI compatible software. So that means it will work with OBS, it will work with V-Mix, it will work with Wirecast. The list kind of goes on and on. If you’re using software with computers, this setup gives you a more budget friendly, fully mobile camera solution that can integrate seamlessly into your existing video production. Whether you’re using a high-end wireless system or smartphone with Wi-Fi, Camera 6 adds the heartbeat of the live production. A sense of presence, motion, and movement that makes your worship experience feel truly alive. Camera 7, the atmosphere camera. With your foundational camera placements available, you may find there’s still more you want to show. the beauty, the details, the atmosphere. That’s where fixed cameras come into play. This camera isn’t just about coverage. It’s about creativity. Fixed cameras allow you to capture atmospheric angles to show areas that define your worship space and draw viewers deeper into the worship experience. It may not be used for every moment of the service, but it’s perfect for pre-live stream views and outros that keep viewers engaged. Thanks to the simplicity of PoE, power over Ethernet, and technology like NDI, setting up a camera like this is easier than ever. You can use a single Ethernet cable to power the camera, connect it to your network, and send highquality video directly to your switcher with no need to for any power adapters or complex routing. Here are some creative ideas for fixed cameras. An overhead shot of the praise band drummer capturing movement and rhythm during high energy worship moments. A tight zoom on a stained glass window used for transitions, scripture reading, or prayer interludes. A fixed shot on the altar or a candle table, perfect for moments of reflection or quiet music. Also, aisle level views of the congregation used for communion or processions. It can be used as a zoomedin view of handbells or ceremonial elements from an angle that the other cameras just can’t simply reach. For this kind of work, we recommend the PTZ Optics Studio SE or the Studio 4K fixed cameras. These compact networkfriendly cameras offer excellent image quality and are ideal for locked off shots or subtle zoom movements. Whether mounted on the wall, ceiling, or discrete beam, atmosphere cameras remind us that worship isn’t just about what is said or sung. It’s about what is felt. And sometimes it’s the silent, sacred visuals that speak the loudest. Keep in mind, these cameras can zoom in and out remotely, so you can have a camera that gets a closeup and a nice atmospheric wide shot from the same fixed camera angle. Every camera tells a story and together these seven camera placements create a powerful visual language for worship. A way to share your message, atmosphere, and community with clarity and beauty. Whether you’re starting with a single centerline camera or building a full multi- camera production with dynamic presets, mobile cameras, and creative angles. You’re not just recording a service, you’re inviting people into an experience. Thanks to tools like PTZ cameras, PoE and NDI, and software like Hive, V-Mix, OBS, or Wirecast, this kind of storytelling is more accessible than ever for sacred spaces of all sizes and styles. Remember, start simple with the center camera. Get clear audio and a heartto-reach people. Build intentionally, adding cameras and angles that serve your space and your message. Use PTZ presets wisely. They’re your shortcut to consistency and professionalism. Focus on connection because the real power of video ministry is spiritual, not just technical. If you’d like a deeper dive, check out our tutorials. our camera control guides or our realworld case studies from houses of worship using PTZ Optics gear. We’ve linked to everything below to help you move forward with confidence. That’s all for this video. I hope you take the time to hit the like button, subscribe, and if you’ve got a question, leave it in the comments below. We are the type of company we always answer the comments and questions that we get. Thanks again and see you in the next one.