Wirecast Empowers Single Operators to Run Multi-Camera Live Streams with Ease

Wirecast Empowers Single Operators to Run Multi-Camera Live Streams with Ease

Running a professional multi-camera live stream as a one-person crew may sound impossible, but with Wirecast by Telestream, it’s not only achievable—it’s efficient. By combining capture cards, PTZ cameras, and a joystick controller, a solo operator can switch between multiple camera angles in real time while maintaining broadcast-quality production. Wirecast acts as the central hub, managing HDMI and SDI sources, PTZ over NDI, and audio from a USB interface. Its intuitive layer-based workflow allows operators to easily organize audio, camera feeds, and pre-recorded media, while Stream Deck integration ensures fast switching at the push of a button. The result: smooth, professional multi-camera productions without the need for a full crew. Check out the video:

[embedded content]

Learn more about Wirecast below:

Read the full transcript:

I am moving on my gear in for yet another multi-camera live stream setup now if you have the budget and the crew to have multiple camera operators each run in the camera for you these aren’t too hard but when you’re trying to do one by yourself it’s a little bit different we believe now in an earlier video I took a quick look at how I do these live streams but in this video I’m going to go in depth and show you step by step how to do a one-man band live stream complete with multiple cameras and animated graphics so let’s take a look at how I pull off these live streams by myself so you will need a piece of software to take the video from your cameras encode it and broadcast it live to the web there are several options you can use including vmix OBS or the software I use which is made by telestream and is called wirecast this software can do all sorts of things and we will be taking a look at some of its abilities in this video so there’s a variety of ways to get video into wirecast the first way I’m going to talk about is using a capture card capture cards bringing video into your computer via HDMI or SDI you can use an external capture card or an internal capture card if you have a desktop but as I have a laptop I’m using an external capture card there’s a variety of these capture cards from magewell Blackmagic and Elgato these capture cards will let you bring in professional video cameras or dslrs anything that has an HDMI or SDI output can be brought into your computer moreover you don’t have to just hook one of these up you can hook two or more cameras up and switch back and forth between the two cameras using wirecast as a video Switcher foreign is to hook up several cameras to an atem mini and pre-switch the cameras and bring them into wirecast wirecast will see the atem mini as one source and you will switch on the switcher itself instead of in-wire cast now from a solo operator’s point of view there’s one thing wrong with either one of these options and that is that you need camera operators if you ever want to change any of the shots on any of your cameras well when you’re one-man crew and you don’t have camera operators what is another option the best option is probably using ndi to hook up multiple PTZ cameras which you can then control with a joystick and here I’m going to show you how to do that so I’ll post links to the Gear I used in the description field of this video first of all we’ll need a Poe switch Poe means that one ethernet cord delivers video signal from your camera to the computer power from the switch to the camera and control of the camera to the joystick controller we’ll also need a thunderbolt 4 dock from OWC to give us a bunch of extra ports to hook up everything that we need for this live stream we will need some way to bring audio into the computer this is a Behringer USB audio interface which allows us to bring audio in from a dedicated audio mixer a stream deck while it’s not essential is really nice because you can use it as both a switcher to switch between your different cameras and you can bring in animated graphics and titles with it and I’ll show you how to do that later you’ll also need a couple PTZ cameras and the joystick controller to control these PTZ cameras for purposes of this demonstration I’m also going to use an external capture card to hook my Sony fx6 up so that I’ll have three different camera sources so here’s a look at the OWC Thunderbolt Dock and what I plugged into each port and here’s what goes into each port on the poe switch thank you and here’s how I set up the audio interface foreign TZ cameras and the joystick controller a stream deck and an external keyboard and mouse are connected to the OWC Thunderbolt dock a thunderbolt ethernet adapter is connected to a second Thunderbolt port on the laptop I want to keep all broadcast traffic separate from my internet connection so my Poe switch is only for the cameras and the joystick controller the high-speed internet line to stream the video out on connects to this external adapter next let’s get the joystick controller and the PTZ cameras communicating with each other first you’ll have to open a free app from PTZ Optics go to the settings menu and choose multi-camera settings in the box that pops up you will enter IP addresses for both cameras 1 and 2 which correspond to the two PTZ cameras I’m not an I.T expert but basically the cameras and joystick controller need to all be in the same range the first three sets of digits should be the same I didn’t want these to be anywhere close to my actual network settings for connecting to the internet so I changed the default IP addresses I entered the following IP addresses camera 1 169.254.150.10 and camera2169.254.150.11. now we need to go into the joystick controller and add those IP addresses for each of the PTZ cameras we will add a device here and then we will enter the IP address for Camera one [Music] and Camera 2. Then we will go into setup and we will set up the IP address on the joystick controller let’s take a look at this whole setup I’ve got a capture card running to my fx6 an Ethernet Line running to PTZ camera one looking out my front window and another ethernet Line running to PTZ camera number two looking out my son’s bedroom window now let’s go into wirecast we’re going to start things off by adding the audio interface now wirecast works with layers much like Photoshop or most mles I’m going to put the audio on the bottom layer because we want the audio to be present at all times now on layer 2 I’m going to start adding my visual sources wirecast allows you to add pre-recorded media files in this case we’re going to add a still because every live stream needs bars now this still doesn’t have the correct aspect ratio for my project so I’m going to just scale it up and send it live now let’s bring in a pre-recorded video we’ll add another source choose the video and it will be imported on layer 2. This allows you to cut away from live cameras to pre-recorded videos that your viewers can watch live cameras now let’s start to go add in our live sources any video that you want to bring in Via capture card will be found under the video sources Tab and there is the capture card that has the fx6 on it next let’s bring in the PTZ cameras now these are not connected via HDMI or SDI to a capture card instead they’re connected on the network so we’re going to have to go into the network tab to find the PTZ cameras so there’s PTZ camera one and PTZ camera 2. I’m going to take quick screenshots of the view that each camera sees for use with the stream deck next we’re going to start up the stream deck software and drag the screenshots I just took with a view of each camera on them to a button on the stream deck I will then map each button to the corresponding camera this one is the fx6 shot I will then repeat the process for PTZ cameras one and two these pictures are mapped to the physical LED buttons on the stream deck and when you press a button the corresponding camera is selected into preview and wirecast and ready to be taken live foreign ly let’s add some animated graphics and titles to do that we’re going to use a piece of software called new blue title live I’m going to select four pre-made animated graphic templates to bring into our broadcast. Now let’s go back over into wirecast to bring these animated graphics in now we want these animated graphics to show up over the top of the video so we’ll add them on the layer above the video layer we’ll add a source these sources will be found under the network tab these are ndi sources because they are on the network even though they’re on the same computer however we have a little bit of a problem here we want to bring in four separate animated graphics we are already using level 1 in wirecast for audio and level 2 for camera sources there are five levels in wirecast which leaves us with only three available levels luckily wirecast allows you to Nest levels and side levels which basically gives you an unlimited number of levels that you can use in wirecast here we’ll Nest all four animated graphics inside One graphics level and then map each of these four animated titles to a button on the stream deck so now we have the stream deck set up with four animated graphics and three cameras that you can call up all with just the touch of a button here you can see me switching between the three different camera shots I have and with just the touch of a button I can bring in animated graphics as well thank you and I can change the shot with the joystick controllerforeign  so that’s a look at how I pull off multicam live streams as a single operator thanks for watching and I’ll see you on the next one.

The Friday Roundup – HSL Color Control in PowerDirector

The Color Grading Tool You’ve Been Waiting For – PowerDirector A few years back now the folks at CyberLink were receiving more and more demands from users to extend the capabilities of PowerDirector in certain ways. The problem for them at the time was that introducing…

YoloBox Extreme Review – Pros, Cons, and Who It’s For

YoloBox Extreme Review – Pros, Cons, and Who It’s For

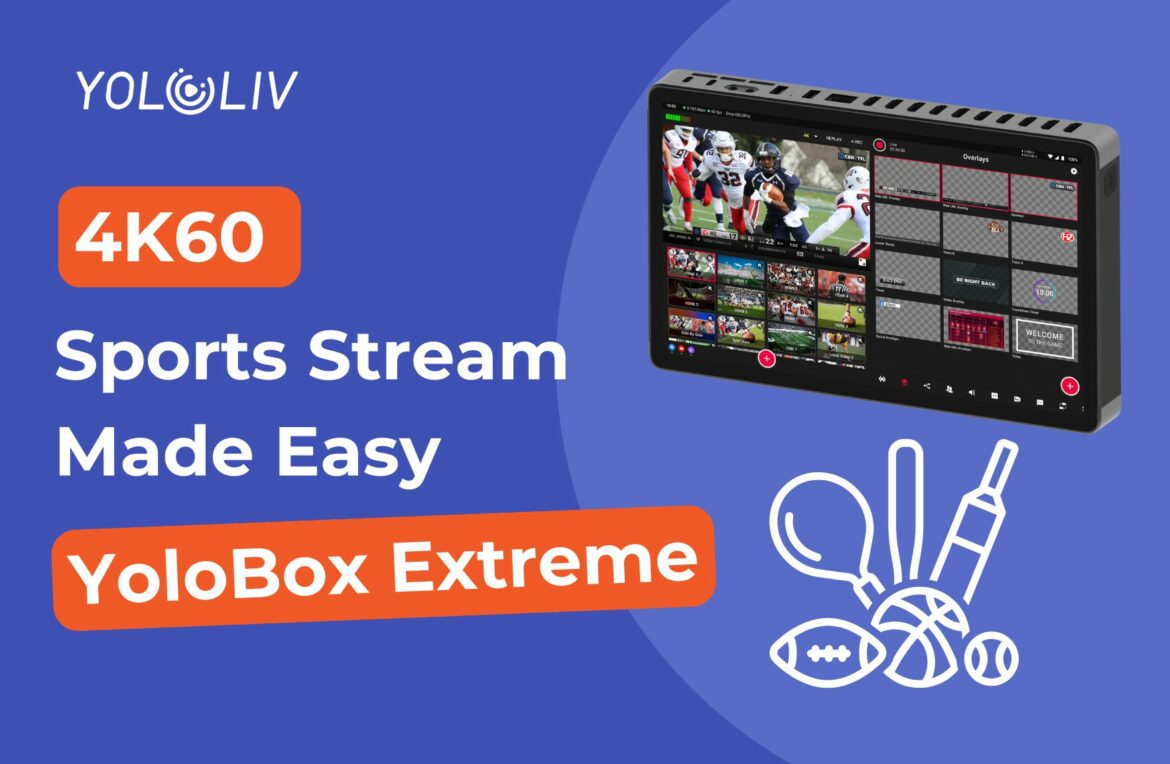
At $2,000, the YoloBox Extreme offers incredible versatility with 8 HDMI inputs, 4K 60fps streaming, multi-platform outputs, and built-in media playback, but it also raises questions about who truly needs it. Its touchscreen interface is responsive and flexible, but lacks the speed and tactile control of hardware buttons, making it better suited for slower-paced productions like podcasts, live events, and mobile field setups. While the lack of SDI and professional broadcast features may limit adoption in permanent installs, creators who need portability, multi-source flexibility, and integrated graphics without a full studio setup will find the YoloBox Extreme a powerful all-in-one live streaming solution. Check it out:

[embedded content]

Learn more about YoloLiv below:


Read the full transcript:

This is not a tablet. It’s actually an 8 input 4K video switcher, recorder, and encoder. It’s the YoloBox Extreme from Yolo Live. And they sent it over to me to try out and make a video about to kind of show you guys how cool it is and all the things it can do. Don’t worry though, they’re not getting any input into this video. All the opinions are my own. And I’m going to talk about the things I like, the things I don’t like, and things that I hope they improve for the future versions. So anyway, let’s actually take a look at it. First of all, even though it looks like a tablet, I mean, it kind of is, you control the whole thing via this giant touchcreen. Let’s take a look at the rest of the hardware, though, before we actually dig into the rest of what’s going on here. So, up on the top here, we actually have eight HDMI inputs. So, the first three of them are just 1080p, but then the last five are 4K inputs. So, that’s awesome. It means you can feed in a ton of 4K sources into this bad boy. Right after that, we have two HDMI outputs. So these can be, you know, multiv- view out, a program out, whatever it is you need out to an extra monitor. Though again, this whole thing is your giant display. So for your main multiv- view, you don’t really need that. You can kind of just put it right here. Then you have a network port, so you can actually hardwire this thing into your network. Two USB ports, two mic line jacks, a type-C port, and a type-C charging port. On the sides, they have these little proprietary antenna connections for their little antennas because this thing also has Wi-Fi as well as 4G cellular. So, you can connect it to whatever you need to if you’re out in the field. On the bottom, you have an audio out, headphone jack. Love to see it. An SD card slot as well as a SIM card slot for that 4G connectivity we were talking about. There’s a quarter20 mount and a power button. And that’s it for IO on this guy. Oh, just kidding. And there is a big speaker on the back as well if you count that for I/IO, you know, whatever. So anyway, this thing is pretty hefty. It’s definitely not something you really want to sit here and hold for a long time, which is why it’s nice that they have that quarter20 mount on the bottom. I will say though, if you’re putting it on any kind of tripod or anything, you better hope that it’s a pretty steady one, especially once you start plugging things in because it’ll get kind of heavy and topheavy. Let’s go ahead and power this guy on. I’m going to do my best to actually record what’s going on on the screen with this camera. So you guys bear with me because unfortunately everything happens directly on this screen. So it’s a little bit hard to show in video when I’m actually interacting with it. So when it boots up, you have two options. We can go into live streaming or we can go into monitor mode. Now both of these actually have similar functionality except that if you actually want to stream, you do this one. If you want to just switch and do a local recording, you’ll do monitor mode. Before we jump into any of those things, though, let’s actually take a look at the settings that we can find over here. First of all, you have the option to log in with a Yellowcast account. I have one, so I logged in, but you don’t have to have one in order to use this. Next up, you can actually add different streaming platforms. So, whether you want to stream to Facebook, YouTube, Twitch, or just custom RTMP or SRT or HLS locations. You can set up connections. So, this is where you can connect to Wi-Fi, as I’ve already done. Set up your Ethernet or cellular or USB dongle, hotspot, you know, you name it. This thing has a lot of different connections that it can have, which makes it great to use out in the field. You’re going to have a lot of options to actually get connected to the internet. Got some settings here for showing the CPU usage, settings about the versions you’re running, language, date and time, the keyboard you’re using, uh, display, brightness, storage management, FAQs, conus, you know, normal stuff here. So, now that we’ve looked at that, let’s go ahead and enter monitor mode here. So, right now, we are looking at a little bit of a multiv- view. There’s not a lot to see because we don’t actually have any sources connected. So, let’s go ahead and connect some sources, shall we? All right. So, here we are. We got some things plugged into the top here. I don’t know if you could tell, but it uh looks a little silly with all these things coming out the top. And at this point, I only have two HDMI cables and two hard drives coming out. You can only imagine if I was actually trying to use all eight inputs, as well as another hard drive, a power, an Ethernet, an audio cable. like this thing can get a little ridiculous looking as you start adding things to it and get a little unwieldy. So, you kind of need some sort of base like this to mount the quarter 22 if you’re going to use it in any kind of realistic scenario. I kind of wish that they had a way to just kind of lay it flat on the table. I mean, the only way you can is if it’s sitting flush, but then it’s hard to kind of see what’s actually going on with it. So, I wish there was yeah, some sort of a stand. I mean, obviously you could prop it up on something, anything really, but it’d be nice if there was something built in, some sort of kickstand, especially since this thing is a little hefty. But anyway, this works. We’ll use it like this for now and kind of show off the rest of the software here. All right, so first off, you can see we have two different video inputs showing up here. We have uh this camera that I’m looking at here showing up as HDMI 5, and then we have HDMI 4, which is actually a camera right right here, right here. Um, and it’s just showing what’s on this screen. Now, I don’t know if you guys can see that in the recording, but uh, even though the preview monitor is pretty nice and uh, smooth, those multiv- views are really delayed there, the little preview inputs. So, just something to know. They’re a little laggy, a little delayed. So, definitely don’t use those as something you’re really paying attention to. But, as we look at this page here, we are in what they call director view. So, we have our preview up here. We have our program over here. We have all of our inputs on the side here. And then over in this corner, we have different settings, and we’ll kind of dig in those in a minute. So, at this point, it kind of just works like a normal video switcher like you’d expect. Um, if I hit preview to program, great. That’s just a little cut there. You also have fade to black. You can change the transition type, whatever. But I can cycle between my inputs. One thing that’s really cool about this is the type of inputs it supports. So, obviously, I have two cameras plugged in right here, but I also have two hard drives plugged in. So, let’s add some sources. It grays out all the HDMI and the USB ports because those are just going to get pulled in automatically if they’re video sources, whether they’re cameras or if you plug like a webcam into one of the USB ports. But let’s say I want to add a video. Well, there’s an SD card on the slot and it checks there first, or you have internal storage, which you can load things to, but you also have USB storage. So now it’s grabbing things directly from the flash drives that I have plugged in here. So I can grab any video I want from here. So, say this drone shot and uh this B-roll here. And then I can hit done. And now they’re dropped right in there. And I can use that just like I could any other source. And that’s awesome. Let’s cut up those over there and pause that. But we also have other types of sources, not just video. You can also do images. So, same thing. Grab that. Go to the USB storage and let’s grab a picture here if we wanted that as a source. Finally, you can also grab. I mean, look at all these things. You’ve got PDF, live stream, NDI sources, SRT, SRT listener, RTMP, RTSP, web. So, you can be pulling in all sorts of things. Look at this. We could put in a website as a source directly on here. Now, Google.com probably is not an amazing source because it’s not exactly super dynamic. There we go. I can have google.com as a source. Obviously, you can’t interact with it. So, not a good source. But if you had a site where you had some sort of a dashboard or some other video feed showing up on it, that’s something that you could do. You can also use multiv- views as your sources. So let’s say I wanted a side by side here. Then I can select two different inputs that I want side by side. Put a little background in there. Or I could add an image to use as a background. So let’s get crazy with this, right? We’ll grab this image. Done. Use that. Add some border thickness. change the color and give it a little spacing. There we go. So now I have this awesome side by side that looks super cool. Everybody likes to see this one, right? And let’s cut it over. So you can see it’s super powerful and super quick to add and remove sources like that. You can then zoom in so you can see them a little bit better or zoom out so you get a little bit more space. If you want to remove a source, you just hold down on it and hit the trash. You can also rearrange sources if you want them to be in different places. So, you can see I think this would be a little bit slower in a fast-paced environment to cut because you’re kind of jumping around with your finger like that. But the flexibility you get from it is kind of amazing. You know, the ability to add and remove sources that quickly and set things up so fast and make these multiv- views really quickly. I mean, this device is really responsive and that’s pretty sweet. All right, let’s go ahead and look at the settings we have over here in the bottom right. So, first off, we have overlays. So, let’s just uh cut over to a normal shot here. Um, if I want to add an overlay, it’s as easy as just hitting that and then it pulls it up and I can hit it to turn it off. We can also create new overlays through this menu. They have a lot of um templates here and different types, you know, but they’re really easy to customize as well. So, like if I want to just change that text, great. If I want to change the size or the color, you know, like I said, this thing is super fast and responsive, which I actually think is really cool. You can set a duration so that it autohides after you’re done. But anyway, we can throw that on and boom, there you go. We’ll take it off. So, overlays are really easy to make here. And yeah, they just live here and they’re super quick to use. Next up, you have your audio panel. And so, you can see audio coming in on my different sources here as I scroll through them. Um, you can set them on or audio follow video or adjust some settings just like you could on any other switcher. Here you have your recording settings. Um, you can choose where you want to record to if you’ve got media plugged in and also the quality settings here. You can go in and dial those in to exactly what you need them to be. You also have your streaming settings here. Same thing, setting those settings exactly how you need them to be for your stream. Uh, you have a scoreboard feature. So, if we turn that on, great. we can take that and we can add some points. And in a similar manner, you can customize your scoreboard. So, if you’re using this in a sports scenario, this is something that’s really easy to do as well. Let’s go ahead and turn that off. You have a replay function um to be able to actually replay the last few seconds of something that’s happened. So, that’s really cool to see something like that built in. You can add background music, so if that’s something that you need to do. And here we have transition settings that I actually played with earlier. And then finally, you can choose what does or doesn’t show up on this menu bar and also rearrange them as you need to. So there’s a lot of flexibility there. Finally, we have this little gear icon right here. And this gives you a few different settings. So we can choose whether or not we want to see that CPU usage up in the corner. If we want to see kind of some zones there to make sure we’re not going over things we shouldn’t. We can change the way that we switch. So we can actually just set up a double click to switch. Um oh, we have to turn that in on in director mode specifically. Okay, there you go. And I can just do that. So, that’s a little bit faster way to actually switch our videos. You have local video settings, your input settings, how they respond, what the frame rate is, etc. And then what you want to come out on your outputs and whatnot. So, again, all of this stuff is really just right here. Your recording file management and other configuration. And then finally, we can change out of director mode to just into classic mode if we want, which is just a little bit different where um instead of having that preview program, you just have this one view on the side here. And then your settings over here on the right. Personally, I prefer director mode. I think you see a little bit more information and that preview program is nice to have. But you can see there’s a lot of settings here, a lot of customizability, and it’s all kind of right there. You know, one of the benefits of your switcher having a touchcreen like this is you don’t need companion software in order to control it like you would on like an ATM or something, you know, to get into those nitty-gritty settings. Instead, it’s right here on your switcher. I think they can be good and bad because if you need to change things live during a show with one person while another person is directing and switching, that’s going to be hard to do because it’s all on the same device. But if you’re setting things up ahead of time or on the fly and it’s a pretty slow event, you’re able to do that really easily right here without having to have a separate companion computer in order to do that. Finally, I didn’t show this before, but the button right up here that says wreck, you can use this to actually start a recording of whatever it is you’re doing. So that is the monitor view. So let’s go ahead and go back to get out of this and let’s go into the live streaming view instead. So this is going to be very similar except you’re actually going to live stream what’s on the output instead of just being able to record or monitor it. Now you can live stream to all sorts of different platforms with this thing. But I think the big thing that Yolo Live really wants you to do is use their Yolocast software and platform. you can stream to their platform directly. And it has some sort of extra settings to make sure that it’s buffered really well and that you hopefully don’t experience any lag with any of that. But if we go in here to our live stream, let’s go ahead and create one. Um, you know, we’ll call it test. We’re not going to give it a description or anything like that, but you can go ahead and open that. And you can see once we’re here, it’s honestly a very similar view to what we were already in before. Um, but we can change all of our streaming settings and whatever. Um, and then just start our stream. We can connect this to multiple different streaming platforms all at once. So, you know, YouTube, Facebook, Twitch, whatever, and do a multistreaming directly from this device. Then, when we’re ready to go, we just hit go live right here at the top. Now, one of the selling points of this device is the ability to stream actually in 4K natively, which is really cool. You don’t often see that directly on the Switcher for one, and there’s not a ton of devices out there that do stream in 4K. So, that’s a big selling point of this device for sure. Now, as you’re streaming and you’re pulling in sources and whatnot, you do have to keep an eye on that CPU usage up here because that is going to make a difference in how well it’s performing because you have one device that’s doing everything. Every single thing that you add to it, every overlay, every video, every input, whatever it is you’re doing is going to add to that CPU load. So, you do need to be careful that you’re not overloading this device. The keen eyed among you might also have noticed that this is basically just running a custom version of Android. So, you do get some interesting things here. If you swipe down, you can see some network settings. You can see more stats right here for whatever it is you’re doing. You can change the brightness of the device as you need to change the volume on your headset, whatever, whatever. So, that’s kind of interesting. One more feature that this has that I think is actually really cool built in is the ability to bring in guests into your uh live stream. So, you can go here to invite guests and send them an email. And then essentially it gives them a web portal that they can log into and set up their webcam and mic and they can actually come and be a video source into your stream. And on their side they see the program feed. So if you wanted to have a conversation with remote guests, you can actually do that directly from this box, which again is not something that we do in our church, but if that’s part of your workflow, it’s really cool that you can do it directly through here. I did notice it was a little bit choppy on the video when I tested that, but really not bad at all. Finally, it does also have an auto switching feature. I haven’t specifically tried this out because again, it’s not something that I need to use for my church, but if you were to use this in a podcast setting and you wanted to set up a couple different cameras and have it automatically switch based on where the audio was coming from, it can do that. So, if you’re looking to use this in a podcast studio, that might be something that’s really helpful for you. Anyway, you may have noticed that I don’t actually have power plugged into this, and that’s because it does have a battery. I really wouldn’t rely on it for anything super missionritical, but it’s cool to know that you can unplug it and take it on the go if you need to, especially if it’s for something fairly quick, you know, or it’s just moving from one place to the other while you’re still streaming, you know. It’s more of a nice to have than a I’m going to rely on this having a battery and run my entire production off of it. So, that is the Yellowbox Extreme. It’s a very unique switcher, as you guys can see, but honestly, it does a lot of things really, really well. Right now, you can pick it up for $2,000. And that price point is really interesting to me because when I’m thinking about other switchers that are like not pro switchers, um $2,000 feels like a lot. But also, this has 4K inputs, can do 4K recording and streaming. It can do multistreaming. It can combine different networking solutions to stream kind of from anywhere. You know, it’s a really cool device that feels portable and can set up a really great stream kind of from anywhere. And at $2,000 when you’re thinking about all of the things that it does, I think that price point actually does make sense. But if I’m thinking about churches, you know, which is kind of my frame of reference for these things, most of the time we’re in a more permanent setup. And so a device like this, you know, that has like the weird touchcreen instead of physical buttons that probably shouldn’t be powered on constantly, um, is a weird form factor. Like I mean, good luck making this look nice on your desk. I don’t know that I can really recommend it to churches unless it’s like, hey, you’re having services out in the the lawn every week or something like that, you know, and you just need something really easy to set up. It’s also not completely professional, you know, all of your connections are HDMI. There’s no SDI to be found anywhere on this thing. So, like, it’s clearly targeted more towards like the consumer proumer market. And at that point, I’m like, do we really need to be streaming in 4K? Could we have brought the price down a little bit if we kept this as an HD device? Which I do think some of their other devices are like that. So maybe that’s a moot point, right? Maybe I’m comparing the wrong item. I’m just wondering if a 4K version of this really needs to exist at all. But like I mean I could see some use cases for it. Again, if you’re someone who needs to stream from kind of random locations and you don’t want to pack a ton of gear, it’s not a super fast-paced environment. So you are able to rely on just a touchcreen to be able to cut cameras. Um, if you like the flexibility to be able to call up videos on the fly and not have to have like a separate media machine to do all of that because I mean that’s the thing is now we’re talking about it’s replacing Proresenter a little bit, right? Because we’re bringing in lower thirds and graphics and videos more on the fly there. So it has a lot of flexibility packaged into this $2,000. Um, so honestly it’s a cool device. It’s not for me, but if it’s for you, like let me know down in the comments and if you’re looking to buy one, use the link in the description cuz I get a small kickback from that. But let me know what it is you’re going to use this for because I think it’s really cool, but I just wish I had something I needed it for. You know, like it’s this really cool tool. It works really well. It’s really snappy. I’m honestly surprised at how well it works. But I mean, there you go. I’ve been really happy with it. And I just like I’m just struggling to know who it’s for. And you know, maybe that’s just on me. Maybe I’m not being imaginative enough. But I feel like this is a product without, you know, it’s solving a problem that doesn’t necessarily exist. But if you have that problem, let me know. Anyway, I’m going to go play with this some more because maybe maybe I’ll think of it. But anyway, until next time. I feel like I’m being overly negative right now and I don’t mean to be cuz again, I really do like this. I really I really want to use it. I’m just struggling to think of what that would be. You know, you ever you guys ever have that? You’re like, man, I really want this. I really wish I needed this because that’s where I’m at. But anyway, buy it or don’t. You know, you do you, I guess. Like, if you need it, you know it. And if you don’t need it, you you know it. I don’t know. But also, really, this thing really is a It is a chunker. I mean, this whole thing wobbles with this thing on it. Like, I don’t know. I don’t know if that’s good. Yeah. It’s a uh it’s a solution without a problem, you know? It’s like this is cool, but like who really needs it? I don’t know. That’s that I guess. Oh well.

Save $300 on Canon PTZ Camera Bundles — CR-N100, CR-N300 & CR-N500 + RC-IP100 Controller

Save $300 on Canon PTZ Camera Bundles — CR-N100, CR-N300 & CR-N500 + RC-IP100 Controller

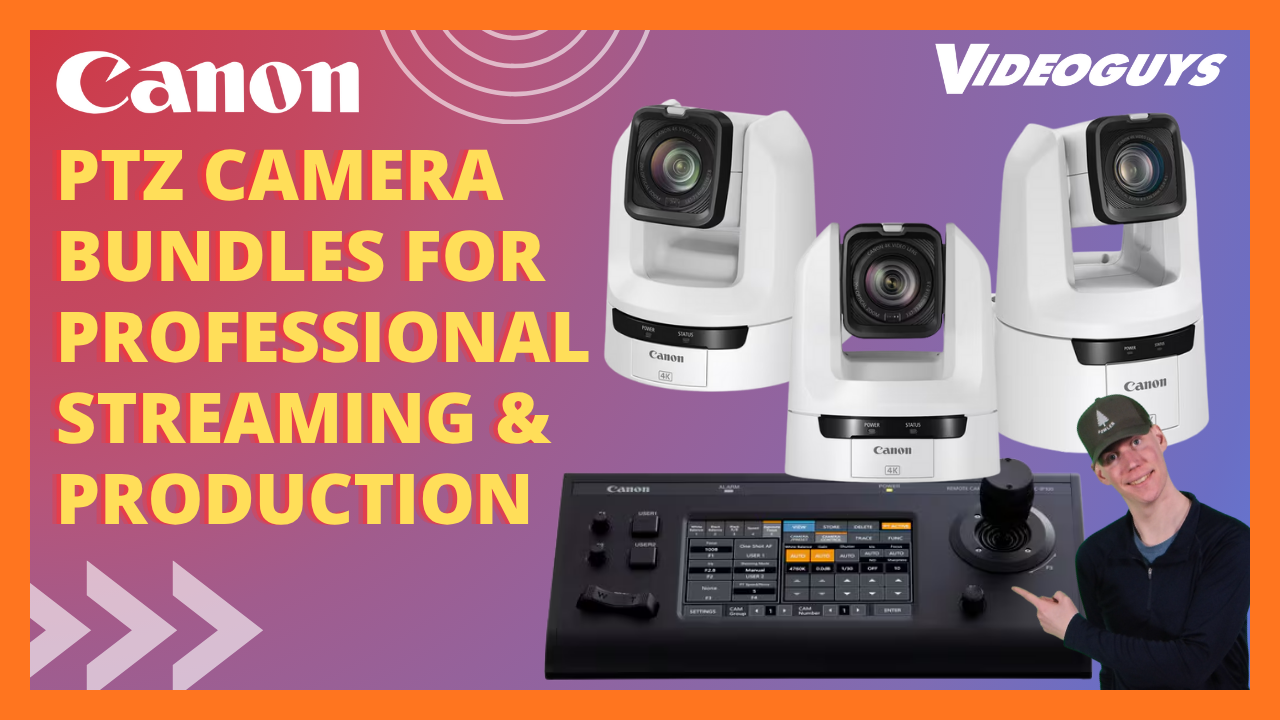
Canon has officially launched limited-time PTZ camera bundles — and they’re perfect for live streaming, houses of worship, schools, studios, and event production teams looking to level up their workflow. These new bundles include three Canon PTZ cameras and the Canon RC-IP100 PTZ controller, giving you $300 in savings through October 31.

Available with the Canon CR-N100, Canon CR-N300, or Canon CR-N500 cameras, these bundles provide professional-grade camera control, powerful auto tracking, advanced connectivity, and seamless integration with other Canon products — making them an excellent investment for any live production.

[embedded content]

📸 What’s Included in the Canon PTZ Bundle

Each bundle includes:

  • Three Canon PTZ cameras — your choice of CR-N100, CR-N300, or CR-N500 models
  • One RC-IP100 controller, capable of controlling up to 100 cameras
  • $300 instant savings when you bundle

The RC-IP100 controller offers intuitive operation with a joystick, zoom rocker, and a large touchscreen display. With Canon’s XC Protocol, users can manage camera settings, save and apply presets, and control compatible camcorders and Cinema EOS cameras. This is perfect for users already in the Canon ecosystem, ensuring smooth integration and workflow efficiency.

🤖 Free Auto Tracking Included

All Canon PTZ models in this bundle — CR-N100, CR-N300, and CR-N500 — come with free built-in auto tracking. The free version includes fixed framing, automatic zoom, and instant subject detection.

For more advanced control, the CR-N500 also supports an optional $800 Advanced Auto Tracking License, unlocking custom framing, sensitivity adjustments, and zone settings to give your production even more flexibility.

🎨 Seamless Color Matching Across Canon Cameras

One of the biggest advantages of Canon PTZ cameras is their shared color science across PTZ models, camcorders, and Cinema EOS cameras.

This ensures a consistent, professional look across your entire production.

📹 Canon CR-N100 & CR-N300 — Compact and Powerful

Both the CR-N100 and CR-N300 offer impressive 4K30 and 1080p60 streaming capabilities with hybrid autofocus and 20x optical zoom.

  • CR-N100: HDMI, NDI|HX, USB (UVC), and PoE+ support.

  • CR-N300: All of the above plus 3G-SDI output for additional connectivity options.

These models are excellent for live event coverage, worship services, classrooms, and multi-camera productions.

🎥 Canon CR-N500 — Advanced PTZ with Superior Imaging

The CR-N500 steps things up with a large 1” CMOS sensor for stunning low-light performance and shallow depth of field.

  • 4K30 with 4:2:2 10-bit color
  • 15x optical zoom (30x advanced digital zoom in 1080p)
  • Dual XLR audio inputs and Genlock support
  • 3G-SDI, HDMI, NDI|HX, SRT, RTSP/RTMP
  • Advanced image stabilization for rock-steady shots — even in environments prone to vibration, such as balconies or elevated mounts.

This makes the CR-N500 a top-tier choice for high-quality live streaming and professional broadcast applications.

🕒 Offer Ends October 31 — Don’t Miss It

These Canon PTZ camera bundles are available through October 31 with $300 in instant savings. Whether you’re upgrading your worship production, outfitting a studio, or enhancing a live streaming workflow, this is the perfect opportunity to invest in reliable, high-quality Canon PTZ cameras and a professional controller.

📞 Call 800-323-2325 to speak with an expert and find the perfect PTZ solution for your production.

Learn more about the Canon bundles below:

Read the full video transcript below:

Hello everybody. My name is James. I’m a video production specialist here at Video Guys. It is Tuesday. It is about 3 o’clock Eastern, which means it is time to talk about some live streaming equipment. And boy, do we have some exciting news today. We’re going to be talking about Canon’s new bundles that are available. Uh these are available with the CRN 100’s, the CRN 300’s, and the CRN 500’s. And basically what this bundle is, you get three cameras in a controller and you get $300 off of your order. Um, and you can do that with the 100s, the 300’s or the 500s. So let’s break it down. So again, we have this available in the CRN 100’s, the CRN 300’s, and the CRN 500’s. And as you can see, um, at the end of the bundle, you can see that it is $300 off for the three cameras and the controller. Now, this is going on until October 31st. So, definitely make sure that you take advantage of these bundle prices um, while they’re available. Now, the way that I wanted to break this down is we’re going to talk about the things that are included in all of the bundles, which would be the controllers. We’re going to talk about the controller first. Then we’re going to talk about the features that are available on all of the cameras. Then we’re going to talk about the CRN 100 and 300. And then we’re going to talk about the features that are available only on the CRN500. So let’s get right into it. So the Canon RC IP controller is the controller that is included in this bundle. Now this is a controller that can control up to 100 cameras. It has your joystick on the lefthand side and it has your zoom control on the lefthand side as well as some color control as well. Um, and then it has a nice big touchcreen on it that allows you to control all of your settings with literally the touch of um, you know, at your fingertips. The other cool thing about the RC IP 100 and all of the Canon PTZ cameras and even some of the camcorders and um EOS models of the cinema cameras is they use their own uh protocol called the XC protocol. So that controller if you are already in a Canon um ecosystem has the ability to control some of your other cameras as well. Obviously, it wouldn’t be able to control your pan and your tilt, but you can control your zoom and you can control your color settings. One of the cool things about the Canon um XC protocol is the ability to save camera settings and then copy and paste them to another camera. And you can do that all through that XC protocol. So, it is very cool to have that in this bundle and you’re going to get top-notch control of your PTZ cameras. The next thing that is included in all of these cameras is the free autotracking um that is available on uh the CRN 100, 300, 500, and it is also available on the 700. Now, the free version of the autotracking um has auto detect and it’s going to have fixed values. Um so, when you’re doing your autotracking, the subject will always be in the same spot. The auto zoom is always going to be on. The sensitivity is set to level nine. Um, and the tracking is going to be on all the time. It’s it’s it’s immediate. As soon as you turn on the autotracking, it’s it’s just going to start tracking that subject. Um, if you want to though, you can get the advanced autotracking, uh, which is an add-on, and this is available on the 500. Um, and that’s going to give you more advanced, uh, autotracking. So you can set your framing. Um you can set, you know, dead zones so the camera will stop tracking. All of that stuff is available uh with the autotracking license and that’s available uh on top of it as an add-on for $800. Now, we were talking about the XC protocol and how the XC protocol is available and used on all of the PTZ cameras and even some of the camcorders and the cinema EOS cameras. Another thing that is shared between the PTZ cameras, the camcorders, and the uh Sydney Sydney model cameras is that they all are using the same color space. Um, a lot of these cameras are using the same sensors and lenses as the camcorders. So again, if you’re already in a Canon ecosystem, getting a couple more cameras, uh, PTZ cameras, they’re going to color match perfectly in your workflow. Um, for instance, the CRN 300 is the same lens and sensor as the XA65 uh camcorder and the N the CRN 500 is the same lens and sensor as the XF 605 camcorder. So again, if you are already using these camcorders, these PTZ cameras are going to be a perfect and easy match to um expand your workflow. Now, let’s talk about the Canon CRN 100 and the CRN300. Now, these cameras are very similar. So, let’s start off by talking about the CRN 100. The CRN 100 has a 1 over23 uh SIMOS sensor. This can record and stream up to 4K at 30 fps and it has the ability to record and stream at 1080 up to 60 fps. It has their hybrid autofocus, a 20x optical zoom, and it does have NDIHX and SRT capabilities built right into the camera. You don’t have to pay anything extra for um a license. It has a tally light on the top of it right here. Um it has a web gooey that you can control everything. And even on the back of it, it does have a 3.5 um audio input. It also has a USB uh output for uh UVC to plug it into your laptop or computer of any sort um to use as basically a webcam. And it has HDMI output as well. So, it has NDI, HDMI, and USB output. And this camera is PoE plus compatible. So, it’s going to be about 30 watts um on your network. Now, we’re going to talk about the CRN300. On the CRN300, almost everything is exactly the same. It’s the same uh one over two/3 SIMO sensor, same 4K 30 capabilities um with 1080 60 fps. The main difference between the 100 and the 300 is going to be the SDI out on the CRN 300. Um that the CRN 300 has a 3G SDI output, so you can get 1080 60p out of that camera. Now, like I said, most of these features are exactly the same. That’s the main difference. Let’s talk about some more things that are similar with these cameras. Both of them again have a 4K sensor built into them that can go up to 4K 30. Um, but if you wanted to stream at 1080, you’re going to get the most crisp sens uh image off of uh these cameras at 1080 because they’re oversampling and processing that HD image. Um, so you can still get 108060p and it is going to be some of the best looking 108060p image because you’re using um a 4K sensor and oversampling that 1080 signal. Again, they have their hybrid autofocus um that combines high precision contrast autofocus and um phase difference autofocus technology um to confirm the autofocus on the cameras. These cameras all have uh face detection as well. So, it is going to track that face. You can do a full 360 and it will still be able to track that head and face. Um, and let’s face it, when you are, you know, focusing on a person, um, you don’t want to focus on here. You want to focus on their face. Make sure their eyes are in focus. And so, these cameras both offer that. The next thing that I want to talk about is some of the different scenes and modes that are available in these cameras. Now, these are presets that you don’t have to go in and manually adjust these. You can put the camera into any one of these four settings and it will, you know, automatically choose optimized settings for those. So, if you put it into portrait mode, it’s going to lower the f-stop, um, make it so it has as much of a shallow depth of field. uh you put it into low light, it’s going to take advantage of the wide dynamic range on these cameras to be able to, you know, make sure that you’re not losing your low lightss. And then if you put it into sports mode, it’s going to increase your shutter speed, increase your frame rate, um so you get the most crisp action um capturing available. And then it also has spotlight mode. again taking taking advantage of the wide dynamic range um making sure that your subject is not going to be overexposed when they are in the spotlight. Um so all of these are presets that you don’t have to do anything to do um to set up comes right in the camera but at the same time you can just use the web guey and be able to go in and you know really fine-tune the settings on all of these cameras. Um, all of these also have very similar outputs and interfaces. Um, like I said, the only difference is that the CRN300 has 3G SDI output. So, as you can see on the right hand side, you’re going to have your HDMI, your 3G SDI for the CRN300, and you’re going to have your USB and IP outputs, um, which again, these cameras all support NDIHX, which is great. You have standard serial RS422 for IP control with uh the the RCIP 100, but you can also use thirdparty controllers and uh control softwares as well. Um and then these cameras also have a 3.5 mm minijack in for audio. and that’s going to embed right into your stream uh to be able to make sure that your audio is in sync and then being able to transfer uh transport that audio with your video in sync across your network across the HDMI or um in the CRN300 the uh SDI as well. Now, let’s talk about the CRN 100 and 300’s big brother, the CRN 500. Um, this bundle is available again, $300 off if you get the three cameras and the controller. So, just over $19,000, $19,96 for three CRN500s plus the RC IP100 controller. Now, the main difference with the CRN 500 is that it has a 1 in SIMO sensor on it. Now, that is a very large sensor. A lot of cinema cameras will have that kind of uh that large of a sensor on them. Again, talking about being able to put the camera into a portrait mode with you having a larger image sensor, your depth of field is going to be a little bit smaller or in this case a lot of bit smaller. So, your background will be out of focus, your foreground will be out of focus, and your subject um will look nice and uh crisp in focus. Also, having a larger image sensor means that it has the opportunity for more light to hit that sensor to be able to work even better in low light situations. Uh, this camera can also go up to 4K 30 with 42:2 color space at 10 bit. It has a 15 optical uh 15 times optical zoom lens. Um, and one thing that we’re going to get into is the optical image stabilization that is available on the CRN 500. has a 3G SDI output. Um, in terms of being able to bring audio into it, it actually has two XLRs that you can bring into it as a gen lock on it. And again, it is compatible with the XC protocol, NDIHX. It can do SRT output, RTSP, RTMP, um, and 3D support. This is also a POE plus camera, so about 30 watts, uh, power. And again, uh, it comes with the free autotracking, but if you’d like to, you can get the add-on for the, uh, advanced autotracking as well as the auto loop add-on, uh, which will you can set presets and then the camera will just go back and forth between those presets. Uh, really great for like crowd reaction shots and things like that. The thing that I really wanted to focus on especially in like a house of worship is the four axis um image stabilization and correction mechanism. Um you know a lot of the times in houses of worship um these cameras are being placed on balconies and and on the walls and sometimes especially in concert venues too when people are you know really getting excited and singing along and potentially clapping along. um you don’t you don’t realize how much your walls or balconies are going to vibrate or shift a little bit as these people are dancing along. Um so being able to have um image correction, image stabilization built right into the camera. So when you’re fully zoomed in um is is just great to make sure that your image is as as smooth as possible and you’re not seeing, you know, those tiny little vibrations. This also has the dual pixel um auto fa uh autofocus as well. Um really targeting the uh the face and the eyes. It also has the ability to prioritize face or just lock on to the face. Um, again, great for presentations, um, houses of worship, concert venues, things like that where you really want to make sure that your host or presenter is is locked in on the focus and then also on the uh, autotracking. We’re talking about being able to zoom into your subject and not worrying about those vibrations. One of the cool things about the CRN500 is um it has a 15x optical zoom built in, but if you put the camera to output at 1080, you can digitally zoom in and get an an additional amount of zoom. So, you can have that 15x optical zoom now becomes a 30x um lossless digital zoom. And that is a feature that is built right into the camera. So, if you put the camera into 1080, it will automatically be able to zoom in that additional distance and you won’t notice any difference because it’s just zooming into that 4K image sensor and just exporting um or outputting at 1080. Um, so this is really great if you need to be able to uh zoom in at far distances. Now, again, these bundles are available until uh October 31st. I’m sorry I didn’t put it on this slide, but they are available um until October 31st. So definitely take advantage of them while they last. This is again available in the CRN 100, the CRN 300, and the CRM500. You get three cameras plus the controller, and you get $300 off of the order. Um so definitely take advantage of that while this bundle is still available. And if you are looking for, you know, a little bit more, the CRN700 is still available as well. It’s not included in the bundles, but you can still get the CRN700. This has a very similar image sensor to the CRN 500, but it does let you go up to 4K 60p at 4:22. Has the same 15x optical zoom with 30 advanced uh 30x opt uh advanced zoom. Has the same image stabilization on it. Um, but it does have multiple SDI outputs, including one 12G and one 3G. So, if you need uh full 4K 60 uh through the SDI, the CRN700 is going to be perfect for you. And this is available for 8749. And then also the RCIP 1000 PTZ controller is available as well. Um, the RC IP 1000 PTC controller allows you to control up to 200 cameras. And again, using that XC protocol, you can control some of the cinema EOS cameras, the XF 605 camcorder. Um, one of the really great things about the RCIP 1000 is that touchscreen can control the cameras, but it also has the ability to display up to nine cameras right on there or one larger input. Um, all of these are in stock and available at VideoGuys. If you have any questions about figuring out which is the right camera for your workflow, the CRN 100, the 300, the 500, or the 700, absolutely feel free to give us a call at 800 3232325. Um, again, my name is James. Thank you for watching, and we will be live next Tuesday at about 3:00 Eastern. We’ll see you then. Video Guys is available Monday through Friday. Give us a call at 1-8003232325. Don’t forget to follow us on Twitter and Instagram to stay connected with all of our updates. And you can like us on Facebook. Keep an eye out for our live videos and don’t forget to subscribe to our YouTube channel. Thanks for watching.

Why YoloBox Extreme is the Best 4K 60fps Live Streaming Device

Why YoloBox Extreme is the Best 4K 60fps Live Streaming Device

Exclusive to the YoloBox Extreme, 4K 60fps live streaming with instant replay, director mode, customizable multiview, and dual HDMI outputs delivers broadcast-level production in a single device. NDI support comes included, letting you bring in multiple wireless sources while also outputting via HDMI, NDI, or USB as a 4K webcam. Powered by a Snapdragon processor and a massive 10,000 mAh battery, the YoloBox Extreme runs long shows smoothly and reliably, even off-grid. With pro features like PTZ camera control, chroma key, and scoreboard overlays, this rugged, all-metal streaming powerhouse is built to handle everything from esports to local sports, church services, and professional productions.

[embedded content]

Learn more about YoloLiv below:

Read the full transcript:

This thing has eight HDMI inputs. I’m going to plug something to all of them. Eight HDMI ports on a mobile device this size sounds a bit extreme, but it’s actually 10 HDMI ports if you count the two outputs. The word extreme is literally part of the product’s name cuz we are looking at the YOLO box extreme. What we’re also looking at is me completely underestimating the sheer quantity of cables involved to hook up eight input sources. This is also the exact same Yolo Box Extreme, except now I’ve got a bunch of inputs hooked up to this which do not require any physical connections. Just because there’s a ton of ports on this thing, doesn’t mean you’re limited to only HDMI cables. You can mix and match all sorts of inputs to all sorts of outputs on this. So even though for example now I’m running a fully wireless setup I can plug this monitor into my HDMI out one and while this is cooking over here this is actually displaying a live program out from the YOLO box extreme wirelessly functioning as an NDI receiver and this monitor here is receiving the multiv- view out from the YOLO box extreme. So, there’s just such an overwhelming amount of options offered on this. To the point, this is a singular chunky tablet which can cover just about any use case because it’s practically got everything. To paint you a picture, I’m going to list all the ways you can get an input into this as well as all the outputs this can send. We’ll start with inputs. This has eight HDMI inputs, five of which can take signals up to 4K. two USB inputs if you’re using webcams as a video source. This can also take NDI inputs up to six for HX and two for full NDI. This can also be an SRT listener. So that’s another virtual input. Then you can still have remote guests call in to your session via a web browser. Then finally, you can load media in through an SD card or portable drive. Now outputs. Starting with the most straightforward ones. HDMI, two of them. USB webcam out up to 4K 30p. This can also output NDI. And instead of just being an SRT listener, this can also be a caller. And finally, you can output to a maximum of three streaming services concurrently. So that’s a lot of inputs which can be mixed into a lot of outputs. It can be a bit overwhelming at first, but that’s what you get on this $2,000 YOLO box. Being the extreme version, there are some very special features which are exclusive to this. One of the most exciting ones is being able to live stream directly from this in 4K at up to 60 frames per second. The Yolo Box Ultra was the only other Yolo Box capable of 4K streaming, but I believe that was limited to 30 fps. I did try doing a multi-cam stream with the Xreme in 4K 60. Quite a resource inensive stress test for the YOLO box considering it has to mix and encode multiple 4K 60 sources live. And we also had live replay enabled. So, it was doing some degree of recording as it was streaming. I’ll share a link below to watch the YouTube replay of that exact live stream. you would be watching a recording of the stream, but it was recorded on the receiving end of YouTube, meaning that’s exactly how it would have looked like if you were to watch it live. So, I’ll link that below as living proof of exactly why I’m not a professional streamer. Choked on my speech. That’s That’s live streaming for you. Good thing I’ve got my little standing copyright. While streaming, if you’re not recording internally on the Yolo Box Extreme, you can have up to five 4K 60p inputs. If you want to ISO record your inputs while streaming, that’s also possible, but you wouldn’t have to spec things down to 4K 30p. This way, you can stream with up to four cameras while being able to record three of those inputs. That’s because the Xreme still needs to work within the capabilities of the Snapdragon processor. It’s running on. This chip is already 1.8 times more powerful than the one in the Yolo Box Ultra. But as much as the Yolo Box engineers, I believe, would like to let you full send all the inputs while recording each and every single one of them, the system will only let you enable and scale its features to the extent of its processing power. This will advise you if things are about to exceed limits and there’s a CPU monitor to help keep an eye on resources. Same goes for the HDMI outputs. Even though both outputs can support 4K 60, the menu recommends only one output be set to 4K. Having two HDMI outs though is a feature exclusive to the Xreme, and it’s one of my favorite features because you can choose to display different things on each of the two outputs. Program out is of course an option, but you can also route one of the inputs to always be displayed on that output. You can mirror the YOLO box UI or you could output a multiv- view, which is extremely customizable. not just between a few layouts, but to the extent of being able to drag and drop to move chunks around. The USB output is currently program only, but your device should see the Xreme as a 4K webcam. This goes up to 30p, so if you prefer streaming from a computer, you could still hook up the YOLO box as an interface switcher in the more traditional sense or just use it as a 4K capture card. Another sort of an unfair advantage you get only with the extreme is how NDI compatibility is included as standard. On other models of Yolo Box, including the Ultra, NDI is an optional $99 license, but this round it’s included in the price you pay for the product. For full NDI FX sources, the Unolox Extreme can handle two of those as inputs, but for NDIHX, the Xreme can take up to six of them. There’s also a little toggle in your settings page which enables NDI output from the YOLO box. Cool thing is it’s not limited to outputting just the program feed. It’s possible to send only one of your inputs out via NDI, essentially functioning as an NDI enabler for any of your cameras which do not have NDI. If that’s the only function you’re going to be using this for, then a $2,000 device might be a touch overkill. But considering this is a fully mobile, fully independent batterypowered device, such a use case is not exactly that far-fetched if you happen to already own one of these. And since we brought battery up, battery life is actually spectacular on the Yolo Box Extreme. During our test stream, the battery level dropped by only 4% after streaming for 13 minutes in 4K 60p with multiple sources. So, the battery powered aspect of this is not just a safety net in case of power failure. You can actually run a show on battery power alone. This is housing a 10,000 mAh battery which contributes to it being a hefty bit of tech. Something a bit different from previous YOLO boxes as well is how this has a metal shell on the top, the bottom, as well as the entire back of it. This is built like a tank. For the first time on the Xreme, you can also attach the included external antennas for improved Wi-Fi reception. There’s four rubber feet on the back of the YOLO box, which functions not just to keep it in place when you place it flat on a table, it also provides a bit of clearance for the exhaust vent on the back. There’s also a/4in thread on the base for mounting, but this thing weighs a kilogram and a half, so do factor that into account when it comes to mounting. It’s a big YOLO box, but it’s actually a really nice size. It’s got a super bright 1,000 nitin OLED display this round. And it’s a 2.5K 11.2 in screen, so about the same screen area you would get with an 11in iPad Pro. The size is of course great news for operability and a new switching layout that’s currently exclusive to the Xreme is director mode. It’s essentially the program preview workflow where selecting a source puts it up on the big preview monitor without actually cutting the program to it yet. That only happens once you manually commit what you see on preview to program. Certain elements like overlays will still go live on program right away once you select them. Transitions are also accessible in a more upfront manner in director mode. Everything we’ve talked about up until this point are just the new features on the Yolo Box Extreme. This is built on top of everything else the Yolo Ultra does, which are also features included in the Xreme. I won’t be talking about all of those in detail, but just to quickly list some of those features down, we’ve got gigabit Ethernet, nanoLT SIM slots, customizable overlays, scoreboards, customizable multissource layouts, timed auto switching, auto switching based on video follows audio, remote operation via Android app or web browser, chroma keying, streaming simultaneously to three destinations, overlaying comments from the live stream, multicam replay, as well as the ability to control PTZ cameras. As of filming this, the only feature that’s currently not available yet is vertical streaming. That’s been said to be coming in a future firmware update, which hopefully will let you stream directly to Instagram and Tik Tok directly from the Yolo Box Extreme, just like how that’s possible back on the Yolo Ultra and I believe the Instream as well. The YOLO live team does have a really good track record of pushing new features out via updates. So, I am quite interested to see how this product evolves with time. I’ll put links below for anyone interested to check the Yolo Box Extreme out. And I’ll be seeing you around.

BirdDog XL Ultra and O4: Next-Gen PTZ Cameras Redefining Indoor and Outdoor Production

BirdDog XL Ultra and O4: Next-Gen PTZ Cameras Redefining Indoor and Outdoor Production

BirdDog unveiled two powerful PTZ innovations at IBC—XL Ultra and O4. The XL Ultra is designed for broadcast, XR, and studio environments, featuring a cinematic 4/3″ CMOS sensor, 20x optical zoom, dual 4K60 outputs, advanced AI tracking, and whisper-quiet movement for cinema-quality control. Meanwhile, the O4 brings unmatched durability outdoors, delivering professional-grade video and next-gen AI tracking for stadiums, city infrastructure, and live events in extreme environments. Together, these cameras expand what’s possible for high-end productions indoors and out. Check out the recap:

[embedded content]

Learn more about BirdDog below:

Read the full transcript:

Hello everyone. Thank you for joining us on a special IBC episode of Bird Dog Live Session. Hi, my name is Anthony Barcus as you can see right down here and that’s going to stay there for the whole show because upgraded the studio to be uh it’s a new studio uh built from scratch just for today’s show and uh those won’t go away but that is that is life in the live uh studio. You also notice that my background is different and it’s because I am traveling for the next few weeks and uh we just really wanted to get you the news of BC. So, I am traveling. This is a makeshift studio, but uh I thank everyone for being there. So, welcome to today’s show. I don’t have a green logo shirt. I don’t have a green screen behind me. This is actual like real uh location and that far from IBC, but I am not on the show floor. I’m hoping maybe somebody from the show floor will check in. Uh we will see if we can make that happen if there’s enough cell cover at IBC in Amsterdam. Uh, speaking of Amsterdam, where everyone is watching from. So, feel free to chime in in the comments where you are watching from because this is a live show. You are here. We are here. The whole point of being here together for this live show is that we’re we’re here together. And as such, this is your opportunity to chime in. What questions do you have about the products? Now, that announcement was made early this morning. It is now 4:00 in the afternoon here in well in Germany and in central Europe time it is now 4:00 in the afternoon. So the big already been made. So uh we’re going to just go over them if you haven’t already heard. Um, but as always, one key another key reading us on the live show is that you have a chance to win a one year of Bird Dog Connect. And you do that by filling out this form. You can use uh your phone. If you’re watching this on a computer or a laptop or iPad or something, you can use your cell phone, point it at this QR code, and that will take you to the entry form. And then uh you or you can type in bit.ly/bd entry bird dog entry which in another tab in the same browser of where you are and you can start to enter to win one year of bird dog connect. So it’s day trial. It’s not a 30-day trial. It’s not the same thing everybody else is getting. This is this is one one full year subscription to Bird Dog Connect. And it does a lot of things. Uh, so if you had an opportunity to check that out, this is your chance to really drive it, see what bird dog entry can do for you. And uh, I can see that somebody has the QR code already for participating in the show. And again, in addition to being in Bird Dog entry, uh, one year of Bird Dog Connect, I once again remind everyone as we talk about today’s announcements, feel free to throw your questions into the comments. This is a dialogue. You, this is your opportunity, basically have tech support on the line and answer your questions. And uh I will tell you right now that here I am um on vacation and I don’t have the products with me. So I will not hold them up. But I do have someone I have Christian the product manager from Bird Dog will be able to really walk us through these products. So with that, let me bring Christian on to the show. Christian, thank you very much for being here. I appreciate you uh joining me on today’s show. Oh, let’s see. I don’t hear you yet. And it didn’t resize everything. Okay. No, I’m not hearing you. Did you unmute your mic? Did I Did I mute you? I don’t think I muted you. No, it does not say that you are muted. So Christian’s going to work on that. Uh if everyone I’m going to leave him on so I can hear it when that does click through. And if everyone has already heard the news, if you haven’t already, uh we’re going to need a drum roll. This is there. Drum roll, please. Uh what are the big announcements from IBC? announcements are the X130X. The X130X is that X1 that we all know and love the successful and people have been asking and I having done these shows several times, a lot of people when when it when I think we got one right here. Uh when will the X1 30X be available? Uh, I hear you starting to come in. The question is when will the X1 30X be available? So, when Christian comes back, uh, we will have him be that. I can’t answer that, but we do know with Bird Dog 2.0 that the they do not want to announce things until to go. That was part of Bird Dog 2.0. And the fact that these they’re being announced here means it should mean that they are ready to go. Oh, he’s going he disconnected. He’s going to try to come back in again. Let me try to bring you in here. Do I have you now? One, two, three. It’s it’s it’s it’s coming in. It’s coming in. This is the magic of live. It’s coming like I hear a little bit of static and then it goes away. A little bit of static and then it goes away. Hear consistent audio. All right. Am I better now? Wait. Yes, you are better. Great. Yeah. The X130X. Um because luckily I was able to hear while I was trying to uh get my mic sorted out. Um yeah. Yeah. There’s not going to be a really long wait at all for the uh X130X. So, we already have them um assembled. We’re just finalizing the firmware. So, it’s just going to be um a matter of weeks um until we’re able to get the logistics processed and get them uh out to warehouses. So, it’s going to be a pretty quick turnaround from uh the announcement today to when they’re going to be in hands. So, if you put in an order today, uh it won’t be long until it it hits your hands. And I think uh just because there has been such interest in a longer zoom um this is going to be a hot product. But also one of the really interesting is this now has a filter thread which for people who are outdoors. A lot of people have been, you know, haven’t really like talked about filter threads, but there’s not a lot ofies with filter threads to put adapt, you know, different things on the front just because it’s a balance issue. Yeah. So, we we saw in like the last like the first year that the X1 was out that there were a lot of folks that were using it in um in places and scenarios that were a little outside of like what we originally like expected people to use it for. So, yeah, just adding it on um we think gives it the ability to be more successful in in more places. Yes, definitely. because I know like if you’re in a really bright area and you know you’ve got a lot of sunlight and everything, being able to like control the aperture so it’s not closing all the way down to a pinhole um really does help the image quality. You know, being able to put on an ND filter on there can really make a difference for certain outdoor sports. Yeah. And if I remember correctly, it’s a 52 millimeter uh filter ring as well. I think we have that on the our specs page which kind of digs into everything on the next slide I think. Uh yeah, let me go to the next slide. Am I ahead of myself? Amazing. Yeah. So the 52 millimeter filter ring. So that Yeah. So it should be pretty universal. Um just as long as you grab any 52 millimeter ring, it’ll screw right on. And I think uh a lot of people are also interested you know people ask about portrait mode. So what is this now that you can do is is the sensor the sensor is not rotating in there is it? Nope. It’s uh cropping the the native image to a 9 by6. Um so what I can do actually um I can show it uh right now actually. All right. Before talking about it, let me share my screen. Yep, I see it. Let me add to the scene. Yeah. So, I’m just in the our web UI for the X130X just like all of our cameras. Um, but in the cam control tab, there’s the image ratio where you can toggle between traditional 16×9 or 9×6. And then you’ll notice in the frame, it’s a little hard where I’m zoomed in here, but you’ll notice on the left and right that it’s a little grayed out to help you frame what’s going on. But on the actual NDI feed um you will just see the center portion. Oh, interesting. So that way if somebody is you know broadcasting vertical content just to Instagram or Tik Tok, you’re able to like easily see what the framing is for that vertical crop and not be like, you know, oh that was a little too I you’re not guessing where those edges are. Correct. And then here, let me change what I’m sharing real quick. So that’s so this is the actual studio monitor of that same camera. So you can see that you just have the black bars on either side. So you’re only showing out that 9 by6, not a faded view. Me ramp my speed down here. So you can come in. So what we’re getting a lot of interest in was using PTZ cameras in like Tik Tok shop. And so now you can frame up somebody for portrait mode really easily. cap. It sounds really complicated, but at the end of the day, it’s a it’s I think it’s a really straightforward feature that’s going to uh be really dynamic for a lot of users. I think we lost Anthony. But I can keep carrying on in the in the dead space. Um, so the X130X is um kind of like the cousin of the the X1. It uh is a grown-up version of it being Zoom certified. Um, you know, it has the same color profile, the same feature set. Um, just gives you that 30x zoom. um but is also debuting some some of the new features like the 9×6 mode that’s also going to come to um the pre-existing X1 and uh the X1 Ultra and uh Max I believe as well. All right. So that’s the vertical crop there. Yeah, it still has the decoder and um the Wi-Fi available on it. Very cool. You can see the color is is still great. Um it’s everything that we’ve uh grown to really love about the X1. Definitely. Definitely. And in terms of uh let’s go back to the go away uh specification my web interface because I’m remote I’m I’m remoting into this uh the 9 by6 um mode is new and you were talking about the zoom certified And it keeps everything else, the Halo tally, the e- in display. There’s nothing else. You’re not losing anything. You’re just sort of gaining the longer zoom if and the 16 9 by 16. And what I think we understate too is the multi-exposure HDR. So um the color is just going to be more uh dynamic than uh on the pre-existing X1’s that we have. So go through that again. The multi-exposure HDR Yeah. So, HDR is going to give you a high dynamic range. So, it’s going to give you uh my favorite way of thinking about HDR is like boxes of crayons where when you’re going from a standard color space to a high dynamic range, you’re adding more crayons to your box. So, there’s more shades that you can work with. Um, and it’s going to give you a more dynamic uh feel of color. Interesting. Interesting. Uh, we got a question come in. Um, the AI face as a focus mode on the X130 specs. Is this an update going to be coming to the X1 Ultra? Uh, yeah. So, we’re really uh keen to a lot of the the features like this that we’re uh debuting on the X130X uh will trickle along to uh the X1 and the X1 Ultra as well. Not very far behind at all. So, those firmwares as the X130X hits the market will have the firmware for the X1 and the the Ultra out as well. All right. And the 30X is just HD right now, correct? Right. So, if you like the X1, anyone? Yeah. Uh, form factor, but you want even more zoom. Um, we are really close to launching. So, we’re announcing that we’re bringing a teleconvert feature um to the X1 Ultra and to the Max where when you are in 1080p um you’re able to double the zoom so that you can get a what is it a 40x yeah if you’re basically doubling your 20 to 40 because it doubles your zoom. Yeah, exactly. Exactly. I always get mixed up in my brain whether which one’s the 12x and which one’s the 20. So I think it’s going to be like a 24x zoom. So, a lot of people who were not, it’s like, listen, I’ve got the 4K if I need it, but then if I’m doing a show and I would rather have and it’s going to be HD and I would rather have longer zoom, I could then leverage that additional sensor crop to come in and delivers still pixel for pixel HD, but now it’s as if I had a longer optical zoom, which I think is uh a really really good uh feature enhancement without actually changing the way the camera operates, too. Yeah. So, that’s that’s coming along as well. So, it’s it’s what we’ve kind of started to hang our hat on a little bit is reinventing, you know, the products almost with pretty uh fundamental changes to what the products can do even after we’ve launched it. So, I think it’s a real value ad to the entire X1 line in addition to having a brand new product available in the the 30X version. Right. Right. So, let’s continue along with this. See if I can bring that slide deck back up. My interface is being a little sluggish today. Probably because of I don’t know, I’m in German. The next one up is the uh 04. I saw this and I was like, “Whoa, this thing looks like a tank.” It is. And it says built like a tank. Um and then when I started looking at the specifications for this thing, I was like, “Oh my goodness.” Uh on the website it’s like minus40 degrees to uh plus60. Yeah. Plus that is designed for all conditions. Yeah. And then of course I and um it doesn’t have a windshield wiper but no but what it does have um you know since it is our brand new standalone outdoor unit uh the really modern and kind of spacey looking you know glass on the front is actually hydrophobic so dirt water all runs off of Right. Um, so we thought a lot about our pre-existing series, so like the A series, like the A200 for instance, that had a wiper and there were a lot of folks that had issues with a wiper, whether it was something hit it or just, you know, mechanical things that happened over time. When you have a a part, a moving part up on something that’s mounted up, you know, wherever is it’s a lot harder to access and to maintain and it’s another, you know, risk factor. So, we opted to go with the hydrophobic glass rather than a wiper because we wanted to reduce the maintenance aspect of it. We didn’t want people to have to get, you know, the scissor lift out to go and, you know, take a look at the camera. We wanted fix you put the camera up and you leave it alone. And if you go back a slide too, actually, um, I had, uh, I made sure we included these really great pictures of the mounting experience of it as well. Um because it look we we tried really hard to give it a really clean look like that’s the actual mount uh for it that you can either do upside down or um a traditional where the camera head would be up. Yeah. Um where it looks really clean. All of your cables run through the back. You don’t have things uh hanging out. And then for the O4 actually we have a corner mount available as well as a pole mount also. Nice. So three different mounts. Wall mount, pole mount, and corner mount. Correct. And I think one of the big things that people will like about the ’04 is if they used our uh any of our A series cameras, they had like what we called a tail where it was like this black wire that came out of the back that had a bundle of cable connections at the end of it um that you plugged everything into. But the O4 um is really similar to the rest of our PTZ cameras where all of your ports are directly um on the camera itself. And we have three little ports. Do we have a picture of it? I don’t think I have one pulled up. Let me see. I got one on the website. There’s one on the website, I think. Um I’ll pull it up as I talk about it. But uh what’s really great is you’re able to uh just connect what you need and not expose anything else. so that you’re able to have it look really really professional and clean without uh sacrificing the install experience um or risking the uh weather exposure. So, here we go. So, and then you have um it talks about how we’re going to bring up your slide here. You have the 30x optical. Yep. And that like we just talked about with the teleconvert. So if you’re running all of a sudden you’re talking 60 in HD. Yeah. So these So those are like little grommeted uh entry points for the cable. Exactly. Exactly it. Um, so depending on where you’re coming from from or how many um connections you’re you’re hooking it up to, you’re not uh going to want to slam your head into a concrete wall when you’re trying to install it. And I think uh a few of our uh us on the team really like the idea that you can now just set the O4 on a tabletop or you can install it on a tripod. Um, it’s not, you know, exclusive to being mounted anymore, uh, like previous outdoor cameras that we had where you had to have it on a mount or it was as heavy as Earth is [Laughter] what is it? It’s only like 7 and a half kilograms. So, it’s not small, but it’s there’s there there are definitely, you know, situations where it’s like, listen, it, you know, not every outdoor camera is going to be mounted permanently. There are people who want to do live events, but you also need to be weather ready. So, it’s sort of like, hey, we’re going to, you know, we’re going to do this game. There’s a chance of inclement weather, so it’s going to be on a tripod. The tripod might get wet. it’s going to be, you know, you know, mounted to a a a genie boom lift, you know, up in the air. And if it gets wet, we’re not worried about it because the camera is designed to work in an Yeah. And so many of those outdoor events, like I think of like outdoor concerts, um, where your tech booth is all the way in the back. So now if you just want to leave the camera, you know, in the sound booth with the 60x zoom you can get in teleconvert mode, you can zoom in and have, you know, close shots to the talent on stage without having to have dedicated cameras on stage. And then also the fact that you’re able to export dual NDI. Yeah, I think this is huge and we’ve gone a really long time without mentioning it. uh but this is a reintroduction of high bandwidth NDI to our portfolio and it’s not exclusively high bandwidth uh but you can also do NDIHX3 simultaneously right and and that’s what I think one of the interesting things is because um the silicon 2 update for the older cameras took the HX cameras high bandwidth and enabled them to also do HX3 and thus far the X series and I guess the O4 is not necessarily an X series per se but it it’s you know the core thinking technology is X it it’s now that’s reintroducing the high bandwidth. Yeah, it it is it’s a really powerful camera and that second encoder that you can use the HX3 on. If you’re using, you know, high bandwidth NDI and you’re like, I don’t need the HX, um you could also simultaneously encode, you know, SRT, RTMP, or uh RTSP um out of it. Um, do you want another So that second encode doesn’t have to be NDI. Yeah. So this one’s also going to answer um another big question that people have had for a really long time. If if you comb through the tech specs on the ’04 and you look at the network protocols, you’re going to see Dante AVH, uh, which can be unlocked in, uh, your Dante activator. So, it’s Dante ready. Dante AVH ready. So when you connect it and hook it up, um all you’ll have to do is go to your Dante activator and then activate uh that license and you know take care of the your fiduciary things with Dante and then um you can use it just like any AVH Yeah. source. So, we’re talking, you know, uh Bird Dog has been all in on uh NDI, but now uh I think I lost you, Anthony. Yeah. So, like we we’ve been really forward with having NDI as a primary, you know, IP protocol that we’ve been using. Um, but we’re really diversifying the portfolio that we’re using from high bandwidth NDI to NDIHX3. Um, to now bringing Dante AVH to the table. Um, so no matter what video over IP or bassband workflow you’re doing, we have a product that can really fit in any of those environments across uh the fleet. So, as we round out, you know, our whole lineup of of PTZ cams, uh, we really complete, um, the full workflow for for multiple different types of solutions and environments, um, and budgets. All right, it looks like Anony’s going to work on rejoining us. Um, so I guess I’ll dig into uh more of the technical end of stuff uh with this while we wait for Anthony to come back. Uh, we do have a large sensor on this. So it’s a one over 1.8 Sony sensor uh similar to what we have in the X4 Ultra. Anthony is now back. It is great. It’s It’s I’ll stop my boring rant through tech specs. I apologize for that. that it is uh I’m remote. I’m on a trip and that is the nature of trying to connect through whatever internet is available wherever you’re at. So I have to refresh the the my browser connection and uh hopefully yeah uh the Dr. NDI cut Anthony off. No, thank you. Thank you very much Niels Niles for the comedy. Yes, I apologize, but uh doing the best I can with the connectivity that I have where I am. Uh and I’m going to agree with Randy. Dante AV availability availability is great news because you know there’s competition in the market now and I think competition is great and Bird Dog is showing that they are um they’re out. They’re they’re in it, you know, for real. And you know, Dante is a wellestablished protocol and them adding video to this wellestablished audio protocol uh is going to bring a lot of people over to video over IP that might not have already come over just because of the reliability that Dante has shown over so many years. Uh Randy has a good question though. Uh, love the dual encoding, but does it also have NDI decoding? The O4 does not have a decoder built in, but what it does have built in is a SFP port on it. So, if you’re mounting it in a really remote location and you don’t want to run a 300 ft, you know, RJ45 cable, you can run essentially an infinite length of SFP to wherever it’s at for your uh connectivity and power it locally if you want. That’s that that can be very handy too because sometimes um running fiber is a lot easier than running coax or Ethernet. Absolutely. Uh so what did somebody say? He says, “Is this going to be able on the Machis?” Uh the Oh, does this go back to the nine n 16? Um so we have it on the we either I can’t remember off the top of my head if we’ve launched it on the Maky Live or if we’re if it’s launching really soon. It’ll come to the uh Maky Live and then we’re uh looking at it on the Altrris. Wow. So the portrait mode is something that is going to be is is is definitely an initiative. we could say it’s it’s not just coming out on this one model. It’s going to be growing. Yeah, that is very cool. Uh Randy says, “Really happy about the 30X, but he didn’t see SDI in the list.” And I’m guessing he’s talking about the um the 30X on the X1. Yeah. So the X1’s um don’t have the SDI port. So just a part of like how our uh lineup is built. So, we introduce the SDI port on our X4 Ultra. Um, so our X4, X5, 04, and then what we’ll see next with the XL will all have SDI. So, um, kind of our foundational lineup in the X1s um, don’t have SDI, but when you’re looking for that, uh, we do have models available that do have it. And speaking of models with SDI, the X1 Ultra XL XL Ultra, it’s covered over by some graphics I have in the producer view. The XL Ultra um 43 sensor. That’s not That’s not a That’s not even a one inch sensor. It’s that’s a big sensor. It’s It’s huge. Um it’s technically also a 5K uh sensor well as well. So is are you guys doing windowing or are we doing a down sample? Um I’ll defer to Dan. I didn’t mean to put you on the spot. No, you’re good. You’re good. I I just don’t know the answer off the top of my head to that one. Yeah, because with a 5K sensor, I mean, there’s there’s a lot of capability there because I just saw a demo of Apple’s new phones that the selfie camera has center stage and it’s a square sensor. So, it can pull vertical, it can pull square, it can pull horizontal because it’s taking one big image and then just giving you whatever you decide to want. and and and similarly if you’ve got a a large 43 inch sensor in a camera you have the ability to do a lot of flexible things. So you know I can’t promise anything down the road now because we’re not announcing what you know isn’t ready to ship but this definitely does give a lot of future capability to this camera. It does. Um, we really like I feel like we’ve talked for the last year and a half uh since we launched the X series on like we’ve listened this is all the feedback we’ve gotten and here’s how we’ve incorporated it and the XL is really the crowning jewel of that. We wanted to check as many boxes as possible about uh what people have been looking for and what they ask for um so that we can have a camera that meets um nearly as many me needs as possible while still performing at a really high level and uh not going to cost you, you know, an arm, a leg, and a kidney. And and one of the key questions, especially with something cinematic, I know because Sony has, you know, full-frame sensor DSLRs that they’ve made into PTZ cameras. Um, this is a PTZ camera now with a larger sensor. Now, it may not be, you know, full 35mm frame, but still a 4/3 sensor is a fairly large sensor. Um, in terms of shipping, John asks, “Um, is this is this one the XL going to be shipping? What’s the timeline on the XL?” Um, so the XL will be shipping, um, in October. Um, and the the timeline is early October that it’ll be shipping. So, we’re talking next month. Yep. And then the O4 is right behind that as well at the uh, middle to end of October. Uh, UNV asks, can you show what you mean when you say independent control of the camera? What control is available for the secondary cam? I don’t understand the question. Oh, I do. So, uh, I think what’s an important thing to point out is so we have the the main camera head, the the PTZ head, that’s the 4/3 sensor. And then down a little bit below the little power light, we have our secondary camera. So there’s two cameras. Oh, right. Right. In the XL. Um, so our little wide angle 1 over 1/8 lens at the bottom. You can actually get a feed out of each camera individually. And you can set the resolution of each of those cameras individually. Um, you can set your exposure, your white balance, um, you know, your color settings to each of those individually. Interesting. Okay, that’s that’s what you that’s what it means. Now, unfortunately, that little camera in the base is also not going to rotate, though. It’s not going to pan. It’s not going to tilt, but um we do have a little recessed screw on the bottom of the camera where you can, you know, tilt up or down, um that lens to be able to get the the view that you want, the angle you want, depending on, you know, where you have it positioned. So technically, like in in a church, you could utilize that as a wide view of the whole sanctuary, the whole hall. that’s always there. It’s just there. And then, you know, you got a little bit of adjustment to get that framing just right when you mount it. It’s like, okay, that’s my wide shot. It’s always there. It’s always available. And then this one, I can zoom around and get my other shots. Yeah. And what’s really dynamic about having the two cameras is um using like the the house of worship example, having the camera in the back, the wide angle lens um can actually inform uh the AI tracking of the main camera head. So, it gives you that wider profile to know where people are at, you know, who to switch between on stage. Um, what your zone positions are on stage. Um, so if you’ve really grown to to like and to have more interest in the some of the advanced um AI tracking features that we have on the X1’s and the X4, uh, the XL and uh, the O4 for that matter have taken those to another level. Uh they’re smarter. There’s way more options um that you can do for customization. Um and like I kind of said, I know it’s kind of like cliche, but it I think it checks a lot of the boxes of things that people have been asking for. It it definitely does because I think with the release of cinema PTZ cameras, people have been, you know, I having done these shows, I’ve have heard several times, is Bird Dog going to release a larger sensor camera. And even with that, I think people were thinking 1 in sensor as a larger sensor because, you know, most of the PTZ camera sensors are very small and understandably so. But to go all the way to a 4/3 sensor is is is a big jump forward. So I think that’s going to please a lot of people who have been asking about that. Yeah. And it’s a big camera, but it’s not, you know, immovably large. Um, so I think a lot of people are like, how big is it? Pan over to it. Um, here maybe. Did my preset take? The preset did not take earlier. So, we’ll do it. We’ll do it live. All right. What What direction is what? So, those two cameras. So, that’s uh the XL on I think your left and then right next to it, that white camera is the uh X130X. So, it’s significantly larger, you know, than the X1, but it’s not, you know, a monolith of of a camera. And for And what’s the weight difference of the two? So the XL is uh is 4 kg where the X1 I’m relying on other specs is um one and a3 kilograms. Okay. So it is it’s also distinctly heavier too. Yeah. But we’ve built the box to be sturdier. Yes. So, uh, a larger sensor needs larger glass. Larger glass needs bigger motors. Bigger motors. Everything everything sizes up. And that’s why, you know, it it has been a thing to create a large sensor camera because everything has to get larger. You can’t just put a large sensor in a tiny uh zoom in body because it just doesn’t work. big you you need big glass for big sensors which is why panovision lenses are so big and you know that’s one thing you know to to relate that um you think how big a panovision lens is and that could be for a super 35 sensor which is not that far off from uh micro four thirds and to be able to get a long zoom with a big sensor is a real challenge. Yeah, it was a really exciting uh task to be able to take on. And I think uh like I’ve been really blown away with my experience with the XL and what um the image can do in uh really close-up scenarios. You know, it’s one of those things where when you just have a camera on your desk and you’re testing it and you um zoom it in on yourself and you’re like, “Oh my god, is that what I look like?” because it it’s like it’s better than what my eyes are. Uh, speaking of that, FK Mobile says, “What does the cinematic image look like?” I’m sure you guys are going to have a properly done demo. Not we’re not trying to do create a cinematic, you know, either in your office or on my travels. Uh so I I’ll I’ll wait till the team produces a properly made uh demo of the of the sensor capability in terms of being cinematic and delivering a nicer a shallower depth of field. Yeah, that’s not something we’re going to be able to uh cover in a live show. But as always, thank you for the question because you know if you have questions about the stuff we’re talking about today, throw them into the comments because that’s the whole magic of being here for the live show. In addition to wait it wait for it wait for it. You have the opportunity to win uh one year of bird dog connect. You can just go to bit.ly bird dog entry or if you’re watching this on a laptop or a desktop. I gota it’s it’s going to be a fun show today. Um you could use uh your phone scan this QR code fill out the form and enter to win. And let me go just double check that. uh see how many entries we’ve got. We’ve got seven entries so far. So, you have whoever enters next has has a one in eight chance of winning. Uh but I can see the entries come in live on this form. And then what we’ll do is I will put them into the uh wheel of names that we use every show just so that we have an opportunity during the show to give away uh one year of Bird Dog Connect. So that’s how you would do that. Bit.ly bird dog entry if you want to type it in on your device you’re using or you can use this the code to scan. So continuing on with the announcements, uh we’re going to continue past that one. And you’ll notice on this one that the mounting looks very similar to the ’04. Y because it is. We kind of took the same, you know, design theory of the ‘ 04 um mounting hardware and applied that to the XL as well. Um so where your wall mount like that, how it’s mounted uh flipped um or you can mount it traditionally vertically um is very clean, your cables are all hidden um as well as um having the pull mount. Um is it pull mount or a coin? Um, I think those are just the ’04. I have to double check my list, but the the the shroud that covers everything to the wall, is that metal? Yeah, it’s a metal um mount. Yeah. So, that also can be important in terms of security too, you know, keeping people from getting access to the cables to mess with them. Uh uh I’m trying to not All right, there we go. This way. Uh FK Mobile says, “Can’t he win the XL Ultra?” Um I think you’re able to win an XL Ultra um by placing an order for one. I think it’s a really exciting uh uh winning opportunity for when it shows up at your doorstep. That is the ultimate. Um Oh, Amazon just showed up. What is it? It’s my XL Ultra. Absolutely. Yes. Uh that is not what I’ll just be clear. No, the XL Ultra is not part of the giveaway during the live show. Just being clear. You enter to win uh a year of Bird Dog Connect. That’s what it is. you know, just for the sake of, you know, putting it out there, which will work with your XL Ultra that you purchased. Oh, let’s just see. I love XLR ports for analog. I wish more cameras would use them or neutri. Yeah, that it was a big thing that we got. We we noticed that a lot of folks weren’t using the um adapter for the for the mini XLR that we did on the P240 um and just having the accessory was uh a larger barrier than a lot of folks uh were comfortable with. So, putting the the full XLR with phantom power directly on the camera, uh, I think is going to allow the XL to fit in more pre-existing environments where, you know, there just needs to be a small upgrade, you know, piece by piece as well as for, uh, you know, more professional environments. Right. Right. Continuing, let’s see. 4/3 sensor, dual stacked sensor, 20x optical zoom, 40x in HD, dual 4K 60 outputs, two times NDI. It just it’s just like ticking the boxes of everybody’s wish list. Buzz word. That was the goal. Um I think my favorite aspect of it is the PDAF, the phase detection autofocus. Um, so we’re sometimes you go through with cameras with autofocus and it breathes a little bit or it get um it’s hunting to find the focus. Um, the phase detection autofocus is a much more advanced version of it where when you move the camera and you, you know, stop moving it and you land on your target, it immediately just snaps into focus. um instead of taking you know those those moments to breathe or to find the object, it is a near immediate focus. Yeah. Yeah. And and we’ve all we’ve all been there, especially at the the further end where it’s like, is it is it here? Is it there? And it’s just looking around and it’s just and as a director, you’re sitting there waiting for it to stop. Okay. Now, so it’s nice to have something just just snap on. And like you know if people watch this show normally it’s like normally I have a camera that can do that just it just grabs that focus super fast and that is a very very handy thing especially in a fast-paced show. You just you don’t want to have to like wait for it to like double check itself triple check itself and everything. Just stay there. Oops. Sorry. Don’t knock your microphone down. So, continuing along, we also have uh I mean, I think the key word for today’s announcement is big. It’s a big announcement. You know, not just are the cameras big, but the zoom is big, the sensor is big, the the capability like the O4, the capability is big. I mean, you know, trying to find a place where that thing isn’t going to work is going to be pretty darn hard. It is. And here, I’ll I’ll do one last share here, Anthony. Actually, um, if I can figure out which tab I have. Here we go. Thankfully, the internet issue seems to have cleared up a bit. All right. So, this is our web UI for the XL Ultra. Um, so you’ll see it looks uh remarkably just like all of our other uh cameras. Yeah. Uh so what’s cool is having the uh your close-up and your panoramic camera. Uh you can view the stream uh information independently um as you can have them uh configured differently. So you can just tab through right on the dashboard. Yep. and view them in uh your AV setup tab. Uh we have them tabbed out here as well where you can configure your streams independently of each other. And then also in cam control, you can see both cameras them as you’re going through and setting your your image settings and your white balance and your color matrix and to rotate between which one you’re you’re setting. You’ll notice this red box. So the image parameter control um the one that has the red border is the one that you’re configuring. So, if I switch over to this one now, I’m controlling the the main head. So, if I making it very clear which one you’re adjusting, I think that that right there being able to have them both on the screen at the same time. And again, you’re not taking up um this is somebody who’s you’re using the web interface, right? Yep. So this way you’re not taking up production. You know, who’sever switching, whoever’s got the multiv- view, you know, that’s somebody else and you can sit here on a web interface on a laptop, you know, like, you know, a new Mac with a new retina display that’s, you know, super stunning. You could come in here and really dial in those colors side by side independently of what the production is doing. Yeah, it’s we because we’ve I think as as users as much as anyone else have uh been frustrated with when you click through and um with the web preview and be like, “Oh, let me go back to look at it to see the changes that I’ve made or I need two windows open.” So, right, trying to improve the the user experience, you know, as we’re evolving uh to make it more dynamic and and especially with this one, I want to say camera that has two cameras, but one device that has two cameras in it, you’re definitely going to want, but these two cameras to match. So being able to like toggle back and forth between them and see, you know, your changes live in real time, side by side on the same monitor, not two different monitors, but this one single screen, I think really does make it easier for end users to be able to like know that they’ve nailed it. Absolutely. And because there’s also so many so many options uh that you can do in the UI as well. Uh, I think one thing, uh, that’s pretty nifty that I didn’t touch on at all was, uh, you know, area management. So, if you’re, um, doing AI tracking on, you know, like a house of worship stage, but you don’t want the camera to ever go to uh, the steps of the stage on, you know, the far left and the far right, you can block those off um, as like no-go areas so that the the tracking will never go to those areas. So you keep the camera um defined to the space that you set up. Definitely. Definitely then see we do have the auto framing here that um gets asked about. And then um a really cool thing that’s going to be brand new um with the XL because there’s so many options that you can do um as far as protocols having the two different cameras and you’re like oh my gosh like what can I actually like use together um so if you click this configure button um it is almost like a little interactive game um where you can uh define out and configure what camera you’re using for what video format and to actually know which ones can be used together. Wow. And to make sure that your configuration works. So if I reset my matrix here, I’ll turn off that. We’ll turn off that. And so I see that I have four processing units that I can work with and that I can do two output formats per camera. So if I want to use NDIHX on the main camera and let’s say RTSP on the wide camera. So I see now that I can’t do HX on the wide camera with having these configured together. Um, but what if I also want to do RTMP out of the main camera? Okay. It’s it’s it’s like a very visual way like you said, it’s it’s gamification, but it makes it easy because the CPU is only going to be able to do so much. And you know, this this allow shows you, okay, you’ve used up all the CPU resources. This is what it’s going to be able to do. I see a lot of tools out there in this space that try to be super simple, but then people run into um problems where they ask the device to do too many things. And what this does is this basically visually indicates you’ve hit the limit. That’s all it’s going to do. But these things that it is doing are going to be done reliably. It’s just that it can’t do anything more than these things because everything else is disabled. You’re not going to be able to you’re not even going to be able to make it try and do those things and then you get dropped frames and every’s like Yeah. While you were showing that uh somebody wrote in uh about the they had a a question about the cameras themselves. When the e in screen is off, it turns white. Could you make a feature to change it in settings white to black because in a dark room it’s really frustrating feature that we’ve definitely like looked at and we um are working on road mapping into the cameras to be able to do right because one of the neat things about e in is you know when when you set it to be a certain thing and the camera powers down that’s just how it stays. It doesn’t use any power to stay that way. Yep. So yeah, thank you uh Martinez Martins Martins, thank you very much for that. And like we said, this is definitely an interactive show. So if you had questions about the today’s announcements, feel definitely throw them into the comments if you’re watching. And uh I’m going to throw this up one last time. is if you were also uh late to the show and you didn’t see me put this up at the beginning of the show, you could uh enter to win a chance to win Bird Dog Connect. And again, it’s not a 30-day test. It’s not a 15-day trial. It’s not a limited time. It’s a full year to use all the features of Bird Dog Connect. So, you can try it out, you can test it, and then a month from now, you can say, “Oh, you know what? There’s this tool. let me go see if this will if it’ll do this and then a month after that, oh wait, I heard this thing has a built-in switching capability and you know format conversion and all this stuff and you can really spend a full year digging into this. So BD entry bitly bird entry or uh just scan the QR code with your phone or other mobile device and that will take you to an entry form and that will enable you to give you a chance to win. Not everybody wins. Just want to be clear, you know, fill in this form and you will win. No, fill in this form and you have a chance to win. So, you shared your screen and let me throw it to show a little feature that uh I think can go a little understated. Um I don’t have it set up in a great spot because you’ll see it’s kind of blocking, you know, our wide view camera. Uh but I’ve enabled uh picture and picture um in the NDI feed where I have you know the wide view camera picture and picture to the main camera head. So as I you know move interesting so it’s actually doing like a little video mixing in itself. Correct. And I can move it. So, that is pretty cool if somebody wanted to have uh a picture and picture of both the wide and a closeup of someone talking. And it could be a concert, too. You get a close-up of the person singing and you’ve got the wide shot of the crowd responding at the same time in this shot from the camera before you even get it to the video mixer. Absolutely. Very interesting. So, but there’s a lot of cool things like we, you know, we’ve been talking about all the new cameras for, you know, an hour. Um, you know, we could probably spend, you know, over an hour on each of the cameras going over the things that it has. There’s so many things to cover. Yeah, there’s so many things. There’s um it’s really really exciting. If you’re out in Amsterdam, I would, you know, highly encourage you to run by the booth um and check it out. Um they have both all three of them on display with, you know, our entire fleet um you know, with KBDs connected for control. We didn’t even talk about that, but you know, all three of them are integrated with the KBD um and work just like the rest of our fleet. Um, so there won’t be any uh delay or you’re like, “Oh, I need an update for the KVD to be able to use my new XL.” Now we’ve taken care of, right? Let’s see. I do this. And what I wanted to do was also just reiterate for people that uh what we’ve been talking about today is IBC. Uh we talked about the XL Ultra uh coming out to audiences. Oo, look at this. I can dynamically scale the image. The XL Ultra uh really delivering uh image quality. You have the O4 again. People were saying, “Well, when’s uh Bird Dog going to have an outdoor camera again?” Here it is. It’s out right now. And this one takes all the learnings from the original camera and improves on them. more mounting capability, better connectivity, and um you know, is it I I it seems like it’s definitely able to do new colors, but also able to handle more heat. Yeah, I think I think that mentions two things about the O4 that we didn’t even talk about. So, the O4, our last series of outdoor cameras, we only had available in white, but the O4 is available in gray and white. and the mounts correlate in color. Um, so if you have it, you know, in an outdoor environment against a concrete wall, you can go with the gray one and kind of have it disappear more into your environment and not stand out like a sore thumb, right? And then we talked about the the water uh resistant, not water resistant, water phobic, the glass. And then it has an integrated heater to uh prevent uh like lens fog up as well, right? And then being able to the the new feature of being able to use 4K capability for a longer zoom. So you’re giving it up to 60x zoom. And when you do that in tandem with the 500 meter IR laser, um, especially even if you put it into black and white mode and you have it on the outside of your building, if you want to use it more in like, oh, what would it be like if I started using like an NDI camera for the security at our building or you’re able to get really high, you know, quality imagery from a really far distance in really extreme conditions. So, it a little outside the box of, you know, traditional environments, but it’ll still fit into traditional, you know, ABM broadcast environments extremely well. Right. We talked about uh connectivity is in it and you just run whatever cables you want into it and it’s got the tracking NDI like you said and it can be it looks good. It it can be set upward you know vertic how do you say upwards and downwards traditionally and flipped. There we go. I thank you very much. And then the last one we covered is or the first one we covered was the X1 30X. I love this phrase. We’ve got the zooies. And I think this this camera is going to be a a really hot product because people have been asking about 30X for from Bird Dog, you know, cuz you guys had a 30X in the first series and looking for it to come back. And this includes all of the other advancements that have been put into the X series, you know. So, it’s not like, oh, we got you the 30X back again. But, but there’s no butts. That’s the thing. There’s no butts. There’s like everything that you liked about the X series and now in 30X. And then, of course, you know, and lens threads. And lens threads. Yes. And and lens threads. And you know, not new for IBC, but if people are looking at the bird dog, you know, the new uh control surface for Maki Studio, the new we do have a really cool new partnership with the Maky Studio that we’re announcing um with New Captivate software with when you purchase uh Maki Studio, you’ll get a Maki Studio version of New Blues Captivate uh to be able use to be able to um do more advanced NDI titling. And so it’s really cool. We’re trying to make it um as accessible as possible to use all of those dynamic uh production features that you can get on the Maky Studio. So, uh, trying to really bring, um, the NDI titling and more advanced production to, uh, areas and workflows that don’t really have it because it is, you know, at a really economical price at $6.95 to be able to start really high level productions for not a lot of an upstart cost. And then uh for those who don’t know the new blue titlers, they’ve been that’s been their new blues thing is titling and it is professional titling software. So it’s not just like oh there’s a titler built into it. Now you’re basically saying you get to like hook into this other professional titling software into your you know live production studio with the same purchase price. Bird Dog Connect where you get, as I mentioned with everyone watching, you have the opportunity to win Bird Dog Connect. One last entry opportunity right here. And as I was mentioning, it does everything with in terms of conversion, uh, routing. It can uh switch, it can record, it can uh take an NDI feed and stream it to a destination, multiple destinations. Um, it includes the retransmitter, the bridge, connect audio, and connect presenter. So, there’s there’s a lot of different pieces to this software. And it might even take you a full year to try and figure out how to use all of the different tools to their full potential. And I really don’t want to leave out the 4K converters. guys have been doing a ton of work with Silicon 2 in terms of birectional capability, 4K capability with all of these converters. It’s almost like breathing new life into hardware that’s been out for how many years. Several four or five. Yeah, they they’ve been out for a while. So being able to say, “Hey, those c those converters that you bought because this they were able to accept four signals, well now you can do two and two. Well, now you can do all these other cool things, too.” So just building in new capabilities into the hardware that people already own. Yeah. And at the show, um, they’re demoing a new feature that we’re going to be bringing to the, uh, 4K HDMI and 4K SDI really soon called fast switching. or if you’ve used like our central pro or uh software or NDI router where um you’re you know changing your NDI sources uh really quickly without you know the effect of you know like unplugging a device and plugging it back in right um so really that’s actual switching experience um so that way when you switch on uh the 4K HDMI or SDI um it is faster like it is a video switcher um like that effect instead of what it is now where you know it’s killing the source that you’re using and then booting up the the next one. It is a much faster experience. So it it is bringing some of that uh video switching um experience um to the product as well which is another you know huge upgrade um to these converters. And then last few things on this page, KBD. Don’t forget about KBD. A whole new experience with the built-in screen, the built-in capability. Uh being able to access the bird dog device capabilities without even having to go into a web page on a laptop. I I think that that those features alone make it worth it. let alone the better build, um the the new fine-tuned control and things like that. Those those are things that really do set this one apart. Yeah, it’s one of my favorites by by I literally have a KBD connected on my desk like 247. And then you got the Max, which is your little boardroom buddy. It’s like the X1, but you know, if you’re not going to you don’t need the Wi-Fi and you don’t need the return feed capability, the Max is this nice little thing that just does its job in the corner of the room and also gives you a bit wider field of view, especi which is especially important in in small meeting rooms. 4K 30 with a 90 degree field of view. And then it’s also going to be getting our teleconvert update where you can get now a uh 24x zoom when you’re using 1080p 30. There you go. There you go. So, it’s it’s the best of both because you know you can you know if it’s a 4K camera but you’re only web conferencing in HD now you’ve you’ve got that increased reach in terms of the zoom and pod. Tell us about pod. Pod’s really exciting. I think we all know about pod. Um I don’t have a date uh for anybody that’s asking, but um no, like we’re just uh we’re testing and rounding out and the final version of the firmware so that way when it hits your hands, you don’t bring your pitchforks out for us. Um, but you know, it it works and we’re using it and we’re really really excited for it and once we, you know, have it in the warehouses and and shipping, we’re going to tell you as soon as we have that date, we’ll let you know. And I think there’s been a lot of excitement for POD because it’s something that has been on its way for a while, but also because other companies, I just saw another company uh release one and there was Hubhub because you it’s like, oh, you’re able to convert NDI into USB. And I’m like, yeah, but you can’t switch between four different sources. I’m like, this is gonna be like, you know, well, here, let me show you the laptop. Click. Now let me show you this camera. Click. Now let me show you that camera. Click. And I think that just takes that capability, you know, I would say to the next level, but four levels because it’s got four inputs. Yeah, it’s it’s really dynamic and I’m really really excited for once we’re able to get it in uh everyone’s hands. All right. Well, Christian, I do thank you for your time. I think you have you and I have spent uh the better part of the day um talking about all the different announcements from IBC, the other different products, answering questions. I did see something else came in. Uh are we any closer to the Wi-Fi wireless adapter shipping? Um it’s in QA for uh running out our final firmware. Um, you know, similar to what I was saying on the pod, you know, once I have a shipping date for it and and it’s going out the door, we’ll we’ll give you that date and that timeline exactly once we have it. Yes. And I and I think you know as someone who does use NDI wirelessly and I have experienced the same thing and I you know I am very keen just like you know on screen creations here I am very keen on the uh Wi-Fi adapter for NDI because not every wireless adapter is created equal. I mean I have a pro router in my home office um my home office studio and that pro router does not handle a and an NDI stream very well at all, let alone two. So, um, you really need hardware that is designed for NDI and to handle these bandwidth streams and just get the frames across as fast as possible. So, this thing is going to be huge in terms of delivering what the cameras are built to deliver, but when people pair them with subpar wireless hardware, they think it’s the camera’s problem when it’s not. It’s the wireless adapters problem. Yeah, there’s the whole the path of that it has to walk down. It’s the whole path. Uh Niles asks, “Does the studio app do transparency?” And yes, it it has uh m multiple uh I think it has titling and transparency layer that you can bring in uh other graphics and things like that as well as a web source. So I believe that’s how um the uh new blue titler is going to be used. is going to be coming in via web source, right? Yeah, it’ll come in. Yeah. So, you’ll put in your the NDI address, the IP, and um you can also even do like HTML graphics um through Maki Studio as well. Yes. UNV also recommends the Netgear Orbee series. And and that’s the thing, you know, because while the other problem with the consumer’s hardware is I’ve had hardware like for years I used to use uh a Google Wi-Fi puck and then Google, you know, went through an update and then the next day it didn’t work as well. And you know, you can’t go into those, you know, consumer hardware and tell it not to update. They’re designed to be able to be remotely updated for security reasons. And that makes sense because they’re wireless routers. They’re they’re they’re a whole lot more than just access points. And I that’s the thing I I look forward to a dedicated piece of hardware to do this task that only does this task, but it does it really well. Yeah, it’ll be good. All right, Christian. Uh we’ve answered all the questions. You’ve helped me walk through all of the latest announcements. I thank you very much for your time and uh I will wish you a a great weekend today. And I want to get uh to the audience and give this give this um copy of connect away. Thank you. Amazing. Thank you so much. So thank you to all of you have watching the show. Let us come over here to our bird dog entries. Uh you will click on this screen right here which will show that the entries are right here. We have uh two through nine. I’m going to copy these live in front of you so that you can see me copy these names. I will go over to the contest wheel, the bird dog contest wheel for IBC. I’m going to paste these names in and then I am going to click to spin the names and we will see who wins. And the winner is Olaf’s. Congratulations, Olafs. Uh, you are the proud winner of this show’s copy of Bird Dog Connect. I thank you all for being here for the show today. Uh, I especially everyone who persevered through the internet issues at the very beginning of the show. That’s part of doing a live show on the internet is that you don’t have control of the internet itself and producing in the cloud. I’m at a new location. Christian’s at a different location. Uh, I thank you all for being patient with us as we went through that and thank you all for being here for today’s show. I look forward to talking to with you next time on Bird Dog Connect. [Music]
YoloBox Ultra + SanDisk Creator Bundle: Stream, Record, and Replay in 4K with Ease

YoloBox Ultra + SanDisk Creator Bundle: Stream, Record, and Replay in 4K with Ease

In this live demo, Videoguys video production specialist James walks through the new YoloLiv YoloBox Ultra + SanDisk Creator Series 256GB SD Card Bundle — the ultimate portable solution for creators who want to stream, record, and replay in 4K.

Whether you’re producing live sports, church services, or corporate events, this bundle gives you everything you need for high-quality, on-the-go live production.

[embedded content]

What Is the YoloBox Ultra?

The YoloLiv YoloBox Ultra is an all-in-one monitor, recorder, and encoder that brings studio-level production to a portable 8-inch touchscreen tablet. It’s designed to handle every step of your live stream — from camera switching to recording and multicam replays.

Key YoloBox Ultra features include:

  • 4 HDMI inputs + 1 HDMI output for multicam workflows

  • USB-A, USB-C, and Ethernet ports for flexible connectivity

  • ISO recording for each camera angle

  • NDI HX input support (with optional license)

  • 4K30 streaming and recording capability

  • Vertical streaming mode for TikTok, Instagram, and YouTube Shorts

With its built-in battery, you can stream for up to six hours without external power — perfect for creators on the move.


Why Pair It with the SanDisk Creator SD Card?

The included SanDisk Creator Series 256GB SD Card is engineered specifically for content creators. With 280 MB/s read and write speeds, it’s ideal for handling 4K video recording and multi-source capture on the YoloBox Ultra.

Its signature blue design makes it easy to identify Creator Series gear, and the card’s performance ensures smooth, reliable recording without dropped frames or buffering — even during demanding multicam shoots.


Record, Stream, and Replay with Confidence

With the YoloBox Ultra, you can record:

The system allows for program and ISO recording, giving you separate video files for each camera. That means easier editing later and built-in redundancy for your productions.

James demonstrates how easy it is to set up NDI sources, record directly to the SanDisk Creator SD Card, and even create instant multicam replays for sports or event coverage.

If you’re streaming to Facebook, YouTube, or Twitch, the YoloBox Ultra’s internal recording ensures you always have a backup copy — even if your stream encounters connectivity issues.


Adding Graphics, Videos, and PDFs

YoloBox Ultra makes it simple to enhance your live productions. You can upload:

  • Logos and overlays for professional branding

  • Pre-recorded videos and commercials

  • PDFs for presentations or slideshows

  • Animated elements or GIFs for engagement

All of these can be stored on your SD card and accessed instantly within your live production — no extra computer or software required.


Vertical Streaming for TikTok and Social Platforms

Another standout feature of the YoloBox Ultra is its ability to stream vertically or horizontally. Switch easily between formats to broadcast to TikTok, Instagram Live, or YouTube Shorts — all directly from the YoloBox interface.

It’s like having both the YoloBox and Instream combined in one device, giving creators full control over how and where they share their content.


YoloBox Ultra vs. Other Models

Videoguys carries the full range of YoloBox systems, including:

  • YoloBox Mini – Compact and travel-friendly

  • YoloBox Pro – Great for small productions with three HDMI inputs

  • YoloBox Ultra – 4K-ready with NDI support and vertical streaming

  • YoloBox Extreme – 8 HDMI inputs and advanced 4K60 workflows

Not sure which one is right for your setup? The Videoguys team can help you choose the perfect YoloBox for your workflow.


Bundle Available Now at Videoguys

The YoloBox Ultra + SanDisk Creator 256GB SD Card Bundle is available now for just $138 — giving you a ready-to-go storage solution for your next live production.

📦 Shop the Bundle: Videoguys.com
📞 Call for expert advice: 1-800-323-2325

Learn more about YoloLiv below:

Read the full video transcript below:

Hello everybody. My name is James. I am a video production specialist here at video guys. It is Wednesday and we are live at one o’clock. We had some technical difficulties yesterday with our stream so we wanted to just try again today and so we are broadcasting to both YouTube and Facebook on uh video guys. Um, as always, if you have any questions about anything that we talk about today, absolutely feel free to give us a call at 800 3232325 or feel free to comment down below, whether you’re watching on Facebook or YouTube. Uh, we put together a bundle with the Yolo Box Ultra and a SanDisk uh, Creator Series 256 GB uh, card. And we talk about the Yolo boxes a lot on this show. And I wanted since we put this bundle together, I wanted to kind of walk through what you can do with the storage and pairing it with a Yolo box Ultra. Now, before we get into our demo, I do want to just let everybody know that we have uh all of the Yolo Boxes still available. Everything from the Yolo Box Mini to the Yolo Box Pro to the Yolo Box Ultra and the uh newest system, the Yolo Box Extreme. Um, if you need help finding out the right YOLO box for your workflow, give us a call and we can help find the right one for your workflow. So, like I said, we put together a bundle where we are bundling the Yolo Live Yolo Box Ultra with a SanDisk Creator Series 256 GB SD card. Now, quick overview of what the Yolo Box is. It is a monitor, recorder, encoder, um, allin-one. It is a portable system. Uh it’s a tablet. It’s about 8 in across. Um and it’s designed to be able to, you know, have all of your live streaming uh necessities on the go to be able to do your streams. There are four HDMI inputs on the Yolo Box Ultra. Um there is one HDMI output. That one HDMI output can be either your master program feed or it can be your multiv- view layout. um if you wanted to connect that to a larger monitor to be able to um you know just have a bigger screen to see everything that’s going on on your ole box. Um it has two USBA inputs and then it has one USBC input. Uh these can be used for external storage. These can be used for webcams. Um these can also be used for cellular data for modems if you wanted to go down that route. It has an 8 in screen on it and uh it has the ability to do ISO recording. It has the ability to do program recording. It has the ability to do um live replays uh multicam replays. Um and also this is the only Yolo box that can do either vertical streaming or horizontal streaming. Um so it’s basically a Yolo box and an instream combined. Um it has a gigabyte Ethernet port on it. It also is compatible with Wi-Fi and again you can use cellular data with either the 4G LTE SIM card slot or USB modems. Um, one thing that I didn’t mention in the inputs is that the Olbox Ultra also has the ability to input up to three NDI HX sources connected to it um, after you purchase the onetime $99 license. So you can have the four HDMI inputs, up to two USB inputs, and up to three NVI inputs. all connected to the Yobo Box at the same time. Now, included in this bundle is also the uh 256 GB SanDisk Creator Series SD card um which I have right here. Um one of the cool things about these cards and all of the SanDisk Creator Series is that they are this very distinct um blueish color. Um, and the way that SanDisk is, uh, basically talking about these cards are they are specifically designed for creators such as yourself. Um, you know, a lot of the times you don’t want to have to worry about, okay, is the read and the right speed going to be fast enough for my workflows. SanDisk is saying if you see this blue color whether it’s their uh hard drives, their SD cards, their micro SD cards, um basically it will work for your um you know your 1080 and 4K workflows without any uh hassle. This card specifically has 280 megabits per second of read and write speed sustain, which is more than enough to be able to record again a 4K workflow. And that’s something else that the Yoloax Ultra does do. It can stream and record up to 4K 30. Um, so again, as for HDMI inputs, you have ISO recording, which we’re going to get to in a moment here. When compared, obviously to the Yolo Box Pro, it has a stronger GPU. It has the ability to use cellular bonding. Again, you can use uh USB modems in the USB slot. Plus, it has that 4G LTE SIM card slot. You can stream and record up to 4K30. With the NDI HX license, you can um input up to three NDIHX sources. It has a bigger battery than the Yoloax Pro and uh you can stream and uh have the device on up to six hours and then it has a bigger and brighter screen. Now, we’re talking about what you can do with the SanDisk Creator Series 256 GB SD card with the Oolbox Ultra. And one of the things is you can record on the Olbox Ultra. Now, there are a couple different ways that you can record on the Oolbox Ultra. Um, and depending on what frame rate and resolution that you are recording at will determine how many sources you can record. At the most, you can record up to four HDMI inputs or NDI inputs if you have the uh NDI upgrade. Um, and one program recording uh at 108030p. As you increase your frame rate or resolution, the number of sources that you can record is going to lower all the way down to if you want to record at full 4K 30, um, you can record up to three inputs total. So, you can record one 4K30 input and uh three, excuse me, four inputs total. One 4K 30 input and then the other three have to be at 108030. If you want to record one 4K30 input and have a 108060p recording, um you can have up to two. So, you can have one 4K 30 and one 1080. Um but if you record everything at 108030, you can record up to five sources including your program. um or and then a mix and match of either HDMI, NDI, USB inputs. Now, I will show you exactly how easy that is to set up on our Yolo Box Ultra here. So, what I want to first show off is, and again, I forgot to turn this camera on. Um, as you can see, I have my two HDMI sources here, but if I wanted to add another source, uh, especially the NDI source, I’m going to show you exactly how easy it is to do that. So, I’m going to click on the add video source button. And I have already set up the NDI license on our YoloBox Ultra here. So, I’m going to click on add NDI source. And what the Yolo box is doing now is scanning our network uh for all of our NDI sources. And currently, we have couple PTC optics cameras connected to our network. We have a Kil View N60. Our tririccaster is connected to our network. So, you can see all of those screens as well. Uh but what I want to do right now is I’m just going to add our top down camera and then I will add uh one more camera just so you can see you know it is very easy to add these NDI sources and then mix and match them with your um your other HDMI or USB sources. Now that I have a bunch of different cameras connected to our Yolo Box uh Ultra here, I’m going to slide on this bar on the bottom right here, and I’m going to go over to the record tab. Now, as you can see, this is where you can choose what frame rate and resolution you want to record at. Um, I have this set up at 1080p, 30 frames per second, and as you can see, I can record up to five inputs. I have my four cameras plus my program. And I let’s say I just want to record uh our top down shot here and our main uh camera HDMI camera plus our program feed. I can also choose my frame rate which I have it set to 30 fps. You can choose your end code format either H.264 or H.265. H.265 is going to compress that file even more so you save space. Um one of the cool things is you can also set recording limits when you are doing your recording. So, you can record 10, 20, 30, 60, or continuously. Uh, when you set it to continuously, basically, the um the YOLO box will record all of those inputs until you run out of storage. Um, so I’m just going to leave it at 10 minutes just just for the demo’s sake. Um, and here under storage settings, that’s where you can choose where it’s going to send uh that footage, where it’s going to record to. In our case, we’re recording to that SanDisk Creator Series, but again, you could record to an external hard drive if you had one connected to it. And this is where you would choose that. So, now that I have my three um sources selected, all I need to do in order to start recording is on the main program feed here, you can see in the top right it says record. and I’m going to choose to start recording at 1080p 30 frames per second and it’s going to record directly to our SD card. So now I’m going to hit start. And as you can see that um record light in the top right is blinking which means it is recording right now. And if I hit the record again, it’s going to ask me if I want to stop recording. I can say yes or done. And um then after just a a moment or so um it will write that footage to the SD card. Um and then you can take that SD card out, you can plug it into a computer and you can access all of those files. Now there are different things that you can do with these recordings. Um let’s say in a house of worship example, um you know that your pastor is going to be making a long sermon and you want to make a highlight reel of that sermon. Well, you can record just the camera that is going to be pointed at the pastor and then after the sermon ends, you can, you know, download that footage, put it onto a computer, and then you can edit that, shrink it down to a highlight reel, one to two minutes, put it on YouTube shorts, put it on uh Facebook shorts, wherever you want to put that footage, and you can you can do that. The other thing that you can do when you are recording your main master program is that’s a backup. A lot of people will say, “Well, I’m streaming to Facebook or YouTube. I’ll have my main master program there.” Well, what happens if Facebook goes down for the day or YouTube or your house of worship is experiencing internet connection uh issues and you’re not able to get a smooth stream to Facebook or YouTube. Well, now you can have that entire service with all of your cuts and edits baked right into that SD card and then you can post on Facebook and say, “Hey, you know, we had a little bit of issue streaming to Facebook today. We’re going to upload the entire service and here it is.” Um, so you don’t have to worry about that. So having that physical backup is always a good idea. The other thing that you can do with recording on the Yolo Box Ultra is you can do multicam replays. Now, these are going to be especially important for um if you’re doing some kind of sporting event and you want to be able to replay that footage. And again, it’s really easy to set up. You can choose between uh 1080 and 720p um resolutions, and then you can choose the replay speed. And you can also add like an intro or an outro if you have a video added to it. So again, all I’m going to do is I’m going to slide on this bottom piece here. I’m going to choose the option to the left of the record button. And now you can see that I have my replay. Um I have my You can choose uh your what sources you want to be able to replay. Let’s say in this example, I’m going to want to replay with Adam over there. And I’m going to turn on the replay. From here, you can choose your replay settings. Um, you can choose your replay playback speed. It can be all the way from 0.25x all the way up to 2x speed. Um, and then you can decide if you want to have audio included in that. You can choose your frame rate, your resolution, um, and all of that good stuff. So, now that I have my replay selected, I can, what it’s going to do is I have it set to 10 seconds. So, what it’s going to do is as soon as I hit the replay button on uh our YOLO box here, it’s going to say that the uh the replay has been generated. And what it will do is it will then play back that last 10 seconds or you can store it onto that SD card and play it whenever you want. And as you can see now, it is replaying at very slow speed, Adam waving at us um with the instant replay. And all of this is capable by having a uh storage device connected to the Yolo box. And it’s very easy to set up your recordings for your program and your ISO recording. And it’s very easy to set up these instant replays as well. Now, what can you do in terms of uploading content from the SD card to the Yolo Box? Well, there’s tons of different things that you can do. You can add images. You can add graphics and overlays. You can add pre-anned videos. You can add PDFs. And you can add animated elements like uh GIFs. Now, I will show you how to upload all of these. Um all of these except for an animated GIF. I didn’t I didn’t find one to upload, but I’ll show you how to upload an image. An image is very easy to upload as well. So, again, if I want to go to add video source, I’m going to select images. And now I have my SD card connected to the uh the Yolo Box Ultra. and I have already uploaded some images. So, let’s say I want to upload this Yolo box ultra stats uh page. Now, that will show up as one of my sources on my YOLO box and I can click on that and it will bring up that image full screen. Now, in terms of graphics and overlays, we’ll go back over, you know, we we’ll take Adam off the screen. We’ll have myself on the screen here. Um now, let’s say um I wanted to add some kind of graphic. Let’s say I want to add our uh our video guys logo to this this frame here. So, instead of adding it as a video source, I’m going to slide over to my layers tab and I’m going to hit the plus, the red plus on the bottom there. And then I’m going to simply choose images. And as you can see again, I have our SD card. I have some PGs uploaded to it already. I’m going to click on video guys. And as you can see, it brings it up on the screen. Maybe I don’t like that one because it’s a little hard to read. Let’s see if the white one looks better. Ah, that’s much better. You can choose the scale and then you can choose the position for that as well. So, I want it in that bottom left there. And I select done. And now that will show up in my overlays tab. And if I click on that, it will fade onto the screen just like that. And you can do this with uh PGs, you can do this with GIFs, um any any kind of source that you want connected um on your Yolo Box. All you have to do is upload it to the Yolo box uh uh to the SD card and then connect the SD card. Um in terms of videos, if you want to add a video, it’s very easy. Again, you click on add video source. I’m going to select video. And as you can see, there’s all of our recorded uh videos that we took um just a few minutes ago. And uh I also had some videos that were uh some of our product spotlights um uploaded to that SD card. And let’s say I want to add this YOLO box uh YOLO deck product spotlight. And now under video, you can see there it is. It’s playing off of that SD card. And uh you can scrub through this. You can make it full screen. Uh you can do whatever you want with this video. So if you have to play some commercials or something like that during your sporting event or um whatever event you’re doing that super easy to add video to your production. The last thing that I want to show you is how to upload a PDF. Let’s say you’re doing a presentation um in some kind of corporate event and you want to upload your PDF. So again, I’m going to go to my ad video source. I’m going to select PDF. And what I happen to find here is I ended up just putting the Yolo Box Ultra’s uh uh manual, product manual on here. One of the cool things is when you are uploading a PDF, as you can see, there’s the little arrows on the screen now. and I can actually choose what page I want to be on in that PDF. So again, it’s just uploading it and then it’s as if you’re, you know, let’s say opening up a PowerPoint presentation and now you can scroll through those at whatever pace you need and then go, oh, I want to go back to this camera. Oh, they’re talking about something that’s on that slide again. I can switch to that. And you can even set up some multi- views as well. Um, so very easy to set that up. And it’s the same thing for the animated gifts. You would just add it as a video source or as a graphical overlay. Let’s say you want to have like a little animation of like a subscribe button. Um, you can upload that to your overlays and then just have that appear on your screen as well. Now, we mentioned this at the top of the show that the Yolo Box is the Yolo Box Ultra is basically like the Yolo Box um and the Instream uh had a baby. And so, the Yolo Box Ultra can stream to your normal Facebook, YouTube, um LinkedIn, Twitch, any of those horizontal uh streaming video platforms. Um, but then you also have the ability to stream to a vertical platform such as Tik Tok or uh maybe YouTube shorts or Facebook shorts or Instagram. Um, you can directly do that and I’ll show you really quickly how to do that on uh the Yolo Box here as well. So, I’m currently in monitor mode on our Yolo Box here and I’m going to exit monitor mode. And then now what you can see is you can choose either live streaming which will be your uh horizontal framing or you can choose vertical framing and that’s going to be for again uh Tik Tok, Instagram, any of your vertical video uh platforms. But we’ll just stay in uh monitor mode to be able to show you um what’s going on in my little demo here. Again, you have tons of different inputs and outputs that you can record with the uh the Yolo Box Ultra. Your four HDMI inputs that can all go up to 4K 30. You have your two USBA inputs, one USBC input. You can have local videos uploaded from an SD card right onto it. Same thing with images, um PDFs. You can also use uh an RTMP as a source being sent to the Yolo Box. Of course, that’s going to have a little bit more delay. Um, and again, with the one-time $99 license, you can have up to three NDI HX sources being connected to the Oolbox. And what you can actually do with that as well is have your master program feed be sent back onto your network, which is pretty cool. Um, and then also you can have one SRT input um, ingested into the OBOX Ultra, and that’s going to have very low latency. Um, and that’s how they do a lot of like news presentations. They’ll send an SRT fee to um, your production. Now, we’re talking, we talked about also at the top of the show that we do have the entire range of Yolo boxes available, including the Yolo Box Extreme. Yolo Box Extreme allows you to have eight HDMI inputs. Um, five of those are going to be 4K 60. The remaining three are going to be 108060. Um, you have two HDMI outputs instead of one. Um, one of them can be your main master program, one of them can be a preview program, or it actually has the ability to change what the uh output’s going to be. You have two USBAs, one USBC uh for inputs. The uh second USBC is going to be power, just like on the Yolo Box Ultra. The Olbox Extreme has an even bigger screen at 11.2 in, and that is a 2.5K screen. Uh, one thing that separates the Ultra and the Extreme is that the Extreme can actually record all of its inputs, um, and does have the director mode, but it does have the same gigabyte Ethernet, Wi-Fi, um, and, uh, 4G LTE um, compatibility. Now, I’m going to quickly just go through these uh to talk about uh some of the features that are available on the Extreme. And a lot of these are also available on the Ultra, including the overlays. Just like in that demo that I just showed you on the Olbox Ultra and the Olbox Extreme, you can upload overlays. Also, just like on the Olbox Ultra, the Olbox Extreme has the ability to multiream to three platforms at the same time uh for no extra cost. The Olavox Extreme does have the ability to have that customized multi- view out. That’s not available on the Ultra. You can you can just choose between um preview and um uh full program output. Both of them do have the ability to do 4K recording and streaming. The Olbox Ultra can record and stream up to 4K 30. The Olbox Extreme can record up to 4K60. Both of them have the uh remote caller feature where you can send a link to um an email link to a guest, have them join as if they were joining a team’s call or a Facebook call, and now all of a sudden you have their video feed as a source on your Yolo Box. Both of them have the ability to use web URL overlays. Um, we’re big fans of Flowix here at Video Guys and you can use those more advanced graphics with the Olbox Ultra and the Olbox Extreme. You can have video follow audio and vice versa, audio follow video, um, which just makes your switching a little bit smoother if you are using, you know, onboard uh, cameras. And then both of them also have the ability to do uh, chroma key, which is great. Last thing that I want to talk about is the Olavox Pro. This is still available as well. Uh, the Olbox Pro has three HDMI inputs, one HDMI output. It has an 8 in screen on it. The Yolo Box Pro can only record the master program feed. Um, and just like the other ones, it has Wi-Fi, Ethernet, 4G, um, LTE, has a little bit smaller of a battery, so about 3 to four hours of continuous um, streaming uh, from a single battery charge. Uh the last thing that I want to talk about is the Yolo live yolo deck. Uh this is the control panel 15 button control panel that is available. Um this can be uh used with the Yolo box pro, the Yolo box ultra and the Yolo box extreme uh to you know simplify your your workflow. We do have a product spotlight on all of these devices. So definitely make sure to check out our YouTube channel where you can find um product spotlights on the Yolo Box Pro, the Olbox Ultra, the Yolo Box Extreme, and the Yolo Deck. Um the other thing that you can do is if you do have more questions specifically about how the Yolo Deck interacts with the Yolbox Ultra or the Olbox Extreme or the Yolo Box Pro, feel free to give us a call 800 3232325 and we’ll be more than happy to answer those questions. The last thing that I want to leave you with is just a quick overview chart of all of the Yolo boxes that are available. The Yolo Box Mini, Yolo Box Pro, Yolo Box Ultra, and Yolo Box Extreme. I’m going to ask Adam to bring this up full screen. Thank you. Now, we’re not going to go through this whole chart. Um, if you would like to feel free to pause the video right now, look at these stats. Um, and again, if you need help figuring out the right YOLO box for your workflow, absolutely feel free to give us a call at 800 3232325 and we would be more than happy to figure out which one is right for you. Um, again, we have this bundle available for 138 for the Yolo Box Ultra with the um, Sandis Creator Series 256 GB SD card. Um, thank you for tuning in today and we will see you next Tuesday at 3 o’clock Eastern. So until then, we’ll see you then. Video Guys is available Monday through Friday. Give us a call at 1-8003232325. Don’t forget to follow us on Twitter and Instagram to stay connected with all of our updates. And you can like us on Facebook. Keep an eye out for our live videos, and don’t forget to subscribe to our YouTube channel. Thanks for watching.

YoloBox Extreme: 4K60 Sports Live Streaming Made Easy

YoloBox Extreme: 4K60 Sports Live Streaming Made Easy

In this article for YoloLiv written by Meredith Jia, we look at how the YoloBox Extreme is transforming 4K60 sports live streaming for teams, schools, leagues, and creators with its all-in-one portable production power.

Sports live streaming is in higher demand than ever, as fans want the excitement of courtside or stadium action from anywhere in the world. The challenge? Producing professional, broadcast-quality streams without the high cost and complexity of traditional gear.

The YoloBox Extreme solves that problem. Compact, powerful, and feature-packed, it’s an all-in-one live streaming device built specifically for sports. Here’s why YoloBox Extreme is the ultimate tool for creating 4K60 sports broadcasts, backed by real customer streaming setups.

Setup for This Stream
Equipment used: Sony FX6 connected to YoloBox Extreme via HDMI, internal 4G SIM card (Simple Mobile), and CSG m519 5G Router (Verizon), with YoloLiv Network Bonding for stable, professional live streaming.

Crystal-Clear 4K60 Live Streaming & Recording
Sports move fast, and every detail matters. YoloBox Extreme delivers 4K60 live streaming and recording, capturing every play, reaction, and highlight with smooth motion and razor-sharp clarity.

Replay, Branding & Highlight Playlists
Replays elevate the fan experience, and YoloBox Extreme makes them seamless:

  • Add custom logos, intros, and outros for team branding

  • Create instant highlight playlists during breaks or halftime

  • Tag and thumbnail moments for quick replay access

Custom Scoreboards & Professional Overlays
Keep fans engaged with custom scoreboards styled in your team colors. Add image overlays for stats, sponsors, or logos — delivering a polished, broadcast-ready look without third-party software.

Web Graphics Overlay Integration
Bring in advanced web-based graphics and scoreboard systems directly into your stream. YoloBox Extreme makes it easy to integrate animated graphics for next-level sports production.

Real-Time Fan Interaction
Audience engagement drives modern sports streaming. YoloBox Extreme lets you view and pin live comments on-screen, making your broadcast more interactive and fan-focused.

Local Video Playback for Sponsors & Halftime
Insert pre-recorded videos anytime — from sponsor ads to hype reels to halftime montages. YoloBox Extreme keeps your stream flowing like a professional sports broadcast.

The Future of Sports Streaming with YoloBox Extreme
From youth leagues to professional tournaments, YoloBox Extreme empowers anyone to deliver broadcast-level sports live streaming. With 4K60 video, replay tools, custom graphics, and interactive fan features built in, it’s the ultimate portable live streaming solution for sports.

[embedded content]

YoloBox Extreme Review: Automated Podcast Studio Setup

YoloBox Extreme Review: Automated Podcast Studio Setup

In a video from YouTube channel Tographer, the YoloBox Extreme is highlighted as the ultimate all-in-one switcher, streamer, and recorder for building a fully automated podcast or live streaming studio. This powerful device records both program and ISO feeds, supports NDI devices (including smartphones with the NDI app), and offers auto switching between cameras using timers or audio detection. With adjustable settings for switch sensitivity, thresholds, and audio triggers, creators can achieve smooth, hands-free camera switching based on who’s speaking. While full ISO recording works best at 1080p, the YoloBox Extreme also allows 4K program recording, making it flexible for podcasts, live events, and multi-cam productions. Because it operates as both the switcher and computer, no extra laptop is required—just balance your workflow to avoid maxing out the CPU. Easy setup, fast optimization, and wide input support make the YoloBox Extreme a game-changing live production tool for content creators.

Watch the full video from Tographer below:

[embedded content]

Learn more about YoloLiv below:

Read the full video transcript below:

I want to show you how to make a fully automated podcast studio. Damn, that looks super cool. This is the Yolo Box Extreme and it’s a switcher, streamer, and recorder allin-one. Is this system recording each camera independently? So, it’ll do the program and then it’ll do ISO version. So, right now it’s recording me as part of the program feed, but it’s also recording me as a backup, your cameras as a backup, and the computer as a backup. You can think of it as the brains of the entire operation. And it even has support for NDI capable devices. This is what blew my mind. Take over any phone that has the ability to download the NDI app. And pairing it was probably the easiest thing I’ve ever had to do from a technical standpoint. It just connected seamlessly. The Yolo Box Extreme has everything you would want, but the real magic happens here under the auto switch menu. You can auto switch based on timers. So like if you didn’t care what it cut to, you could just have it do this. And what it does is it cuts to each angle back to its master and then it’ll cut cycle through each camera. But what you really want to do is use video follows audio. But how loud do I have to be in order to Hey, Right. Basically, what’s going to happen is as the audio gets louder or quieter, that’s going to trigger the cameras to switch. There’s the microphone itself, the volume that it’s recording on the camera in the board. You tell it what level to detect. And there’s always this fine balance between a little too loud, a little too quiet, where that cut off is for it to actually hear and trigger. So depending on the condition, you can change your switching action. Meaning, if I’m talking, it’ll cut to my camera, but if audio is detected on this other input, it’ll switch to a different camera angle. As long as every microphone is run to its own camera, you can auto switch between them on the Yolo Box Extreme. That is pretty cool. Although I don’t get my own single. You have control over the switch sensitivity, the minimum switch duration, as well as the threshold or the decibel level needed to be reached in order to switch annunciate. I like that they give you all these different conditions. So whether it’s one camera input or if it’s combinations, you can change the switching action to go to any one of your other inputs. It’s very customizable and intuitive. Thankfully, this is just listening to volume, and that’s all it cares about, which is really nice if you get it dialed in. Right now, it’s limited to a maximum of three audio sources, and you can’t separate left from right, but I’m hoping that they add this in the future via firmware because I want more audio channels and more audio triggers. The problem is, even if I’m not talking, this microphone is still hearing you a little bit. So, if that sensitivity is too low or too high, one or the other, however you look at it, it’ll trigger this mic even if you’re talking way over there. So, you got to dial the sensitivity in. And then there are options in here to combo mic. So, you can do both of those as a third camera option. Wow. If all you want recorded is that auto switched version, you can just record the program at 4K resolution. You can even add some ISO tracks as backup for editing later in post-production if you want. But if you want to record all of your ISO tracks, you’re going to have to reduce the resolution. 4K is just too much for everything. Once you drop it down to 1080p, you should be good to go. Just so many features they’ve thought of and all in one thing. It’s important to know this is your switcher and computer allin one. So there’s no extra computer or laptop or phone required. Everything can be handled right by the Yolo Box Extreme. Except you should know you can overwhelm the system with too much. If you try and max it out, it will be too much for the CPU. So, you have to find that balance between what you need and what the board can handle. If you want a lot of different camera angles all recorded in ISO, 1080p is the way to go. But, if you just want that one auto switch sequence, you can get that plus a few others in 4K. There’s a wide of the room, the iPad if we had some kind of Zoom call or if we were watching a video. You would never call this Coco. We would never call it Coco. So then if I pause that and I manually switch back to me, back to you guys. Close up on David or you can use the video follows audio and then it does it automatically. How about that? I’ve got a computer hooked up to an external display also going into the board. This monitor is for external recording and monitoring. Cameras everywhere. 1 2 3 4 5 6 7 live. It’s a really cool piece of technology, and I’m just scratching the surface. There’s so much more this thing can do for any kind of live event, podcast, or multi-cam production. Just be aware of those CPU limits if you’re trying to max everything out at 4K. I will say, how long do you think it took me to get dialed in? 20 minutes, maybe. with more time, with more optimization, even this studio is kind of just hodge podgeed together. There’s cords everywhere. It’s not clean. It’s not tidy. It was just to prove a point. And now that it’s all set up, if I did refine it and dial in, I think it would be a lot better. The computer can just do it itself. That’s a game changer.