
Custom fields are among WordPress’s most powerful features. They allow us to customize the front and back end of a website, and there are all manner of creative uses for them. Everything from displaying niche content to changing page layouts based on field values is possible.
Traditionally, using custom fields meant navigating obstacles. They require coding knowledge or a plugin to render field data. Implementing them can be time-consuming and out of reach for some users.
The WordPress Block Bindings API removes some of these limitations. It allows us to “bind” custom field values to a WordPress block. You don’t need a plugin to use them, as the function is built into the Block Editor. Registering fields still requires code, though.
Regardless, using the API is a time saver for developers. Here’s a look at how it works, along with a real-world example.
What You’ll Need to Use the Block Bindings API
The WordPress Block Bindings API streamlines the rendering of custom field data. However, you’ll need a few things to use it:
- The latest version of WordPress;
- A theme with a
functions.phpfile or a custom plugin to house your code;
That’s all there is to it! The API works with both block and classic themes. Use a block theme if you prefer a no-code experience.
We should also note some of the API’s limitations. As of this writing, it works with the Paragraph, Heading, Button, and Image blocks. Data types are also limited to content, text, URL, etc. Check the documentation for more details.
With that out of the way, let’s see an example of the Block Bindings API in action.
Example: Let’s Bind a Custom Field to a WordPress Block
Our example is an homage to WordPress’ blogging roots. We’ll create a custom field called “Now Playing,” which we’ll fill out on each blog post. The field will contain a favorite song, movie, or TV show of the moment.
We’ll register the custom field in our theme, add it to the post template, and bind the field to a paragraph block.
We’re using the Twenty Twenty-Five default block theme. That means we can edit templates with the Site Editor.
Step 1: Register the Custom Field
First, we’ll register our custom field by adding code to our theme’s functions.php file. This lets WordPress know that our field is associated with posts.
Note the field’s slug, as we’ll need it later: now_playing
Step 2: Display Custom Fields in the Block Editor
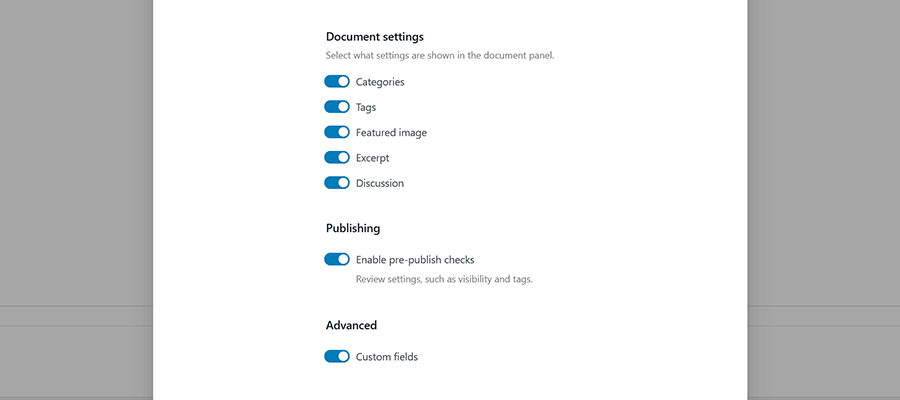
By default, custom fields aren’t displayed in the Block Editor. So, we’ll have to enable the feature:
- Open a post or page in the WordPress admin.
- Inside the Block Editor, click on the Options menu (⋮).
- Click on the Preferences link.
- Go to the Advanced heading and turn on Custom fields.
WordPress will refresh the screen and display a custom fields UI at the bottom.
Step 3: Add a Custom Field to a Blog Post
Next, we’ll add our custom field to a blog post:
- Navigate to Posts > Add New in the WordPress admin.
- Give your post a title and add content.
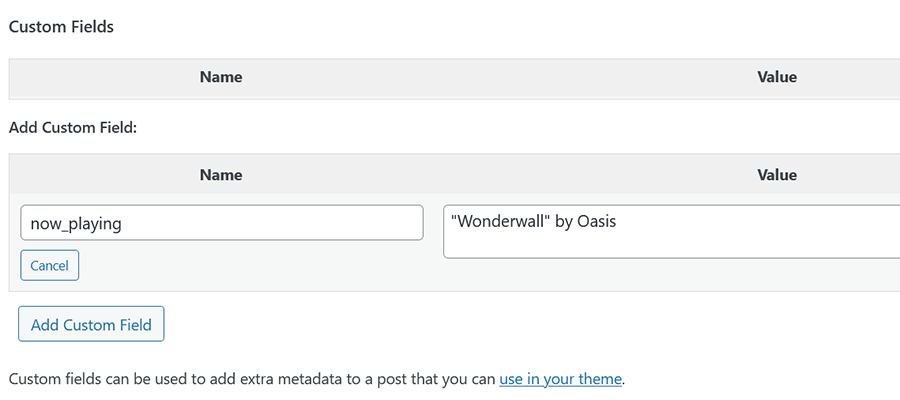
- Scroll down to the Custom Fields area of the editor.
- Under the Name column, click the Add New button.
- Enter the custom field slug in the Name field:
now_playing - In the Value field (right column), enter the name of a song, movie, or TV show.
- Publish your blog post.
Step 4: Bind the Custom Field to a Block
Now, it’s time to bind our custom field to a block. Since we’re using a block theme, we’ll navigate to Appearance > Editor.
We want to add custom field data to single blog posts. Inside the Site Editor, click on Templates, then click on Single Posts.
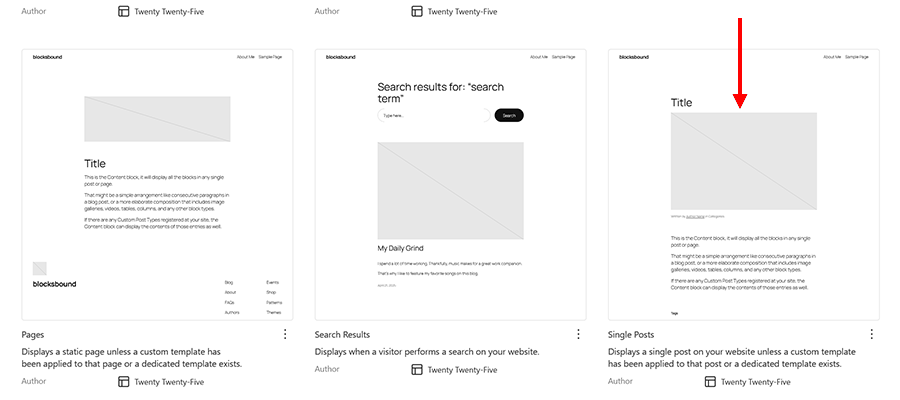
Next, we’ll choose a spot for our custom field in the Single Posts template. Just above the post content seems like a good choice.
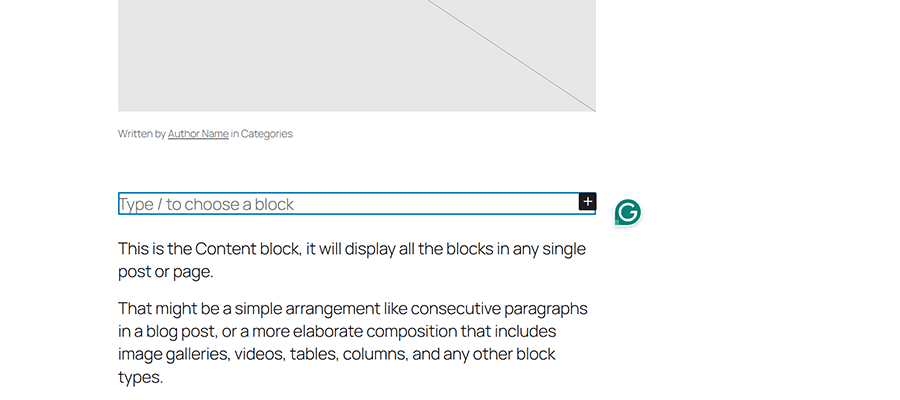
- Add a Paragraph block to the chosen spot in the template. Don’t add any content to the block.
- Select the Paragraph block (click into the block or select it from the List View panel).
- Click the “+” icon in the Attributes tab on the right column of the editor.
- Select “content” from the Attributes list.
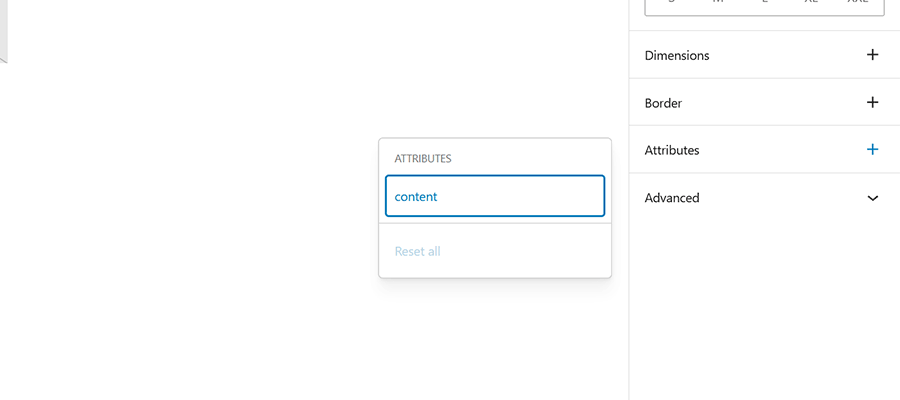
- Click on “content” in the Attributes tab. A list of registered custom fields will appear. Select
now_playingfrom the list. You might also add custom formatting to this area to make the field stand out. We chose the “Subtitle” style from the block settings.
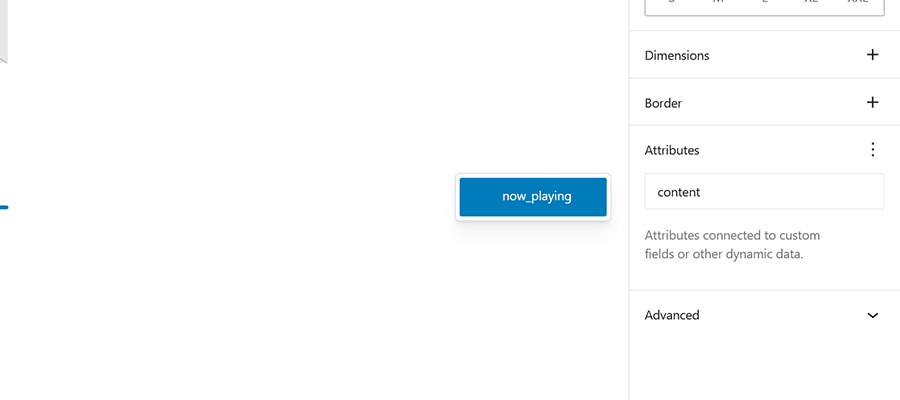
- Save the changes you made to the template.
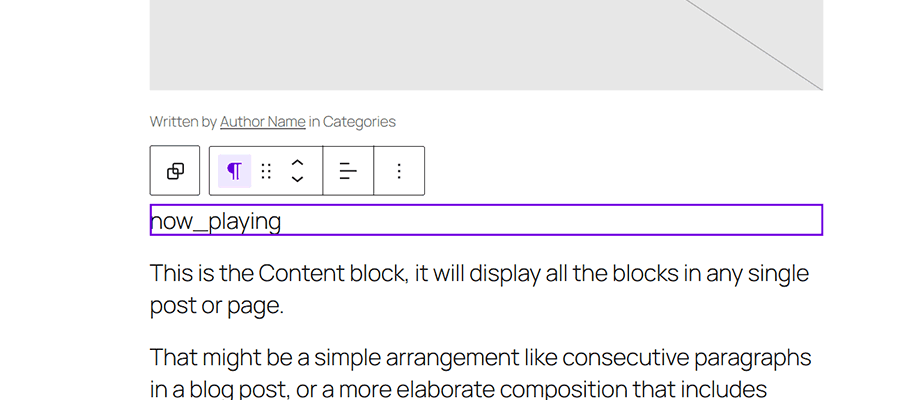
Notice that clicking on the Paragraph block reveals a purple outline. This denotes that the block is bound to a custom data source.
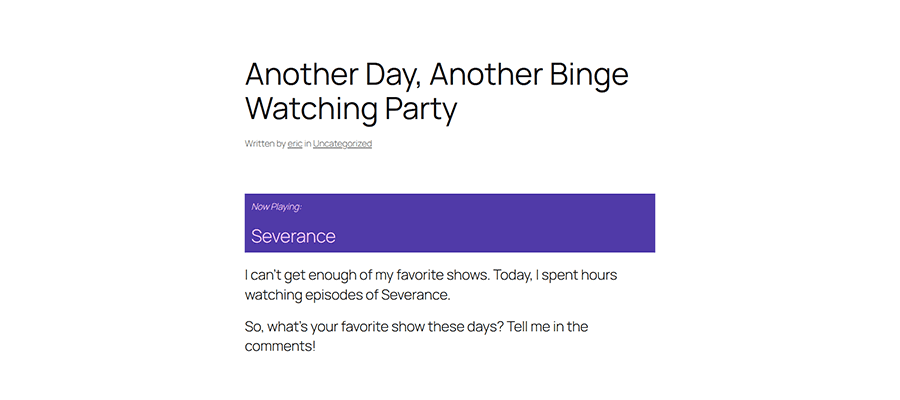
Step 5: View the Result on the Front End
Let’s see how our custom field binding turned out. We’ll visit our blog post to see how it looks.
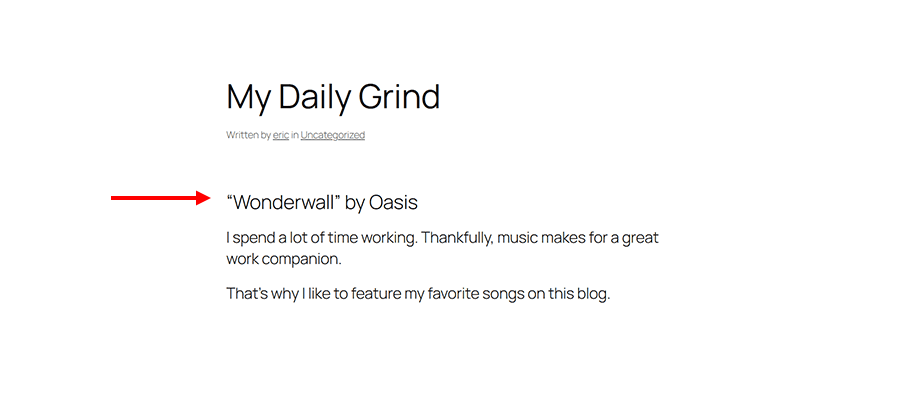
It’s working! Our song (“Wonderwall” by Oasis) is displayed above the post content.
The technical side of our example is done. However, we might want to tweak the styles or add another paragraph that says “Now Playing:” above the field. That would improve the feature’s look and accessibility.
An Easier Path for Using Custom Fields
Using WordPress custom fields is easier than ever. The Block Bindings API helps with simple use cases like the one above. It all works within the Block and Site editors.
That means less hassle for site builders. You don’t have to install a plugin or get tangled up in layers of PHP.
Plus, the feature is expected to evolve. For example, we may see more data types supported and a code-free way to register custom fields. It will be exciting to see what comes next.
Features like the Block Bindings API bring WordPress ever closer to a code-free experience. That puts a custom website within everyone’s reach.