Technology means “science of craft”, and it is what this category is all about. Here you will find articles covering technological advances, innovations, and solutions based on science, computers and systems, engineering, etc…
Comics have served as an inspiration to many of us. They impact every corner of our culture. Just try going to the movies without at least one comic-based film showing. It seems nearly impossible.
Their style has also crept into web design. We see it in bold colors, outrageous typography, and unique layouts.
Advancements in both CSS and JavaScript allow designers to bring these styles to life. There is no shortage of ways to add comic-inspired flair to your website.
So, how are web designers bringing comic styles online? Let’s check out a few examples of what a combination of code and creativity can do.
Comic Style Text Bubbles – CSS
Created by Josetxu
This snippet demonstrates a classic comic book style. Large, bold text screams on top of colorful backgrounds. CSS Grid is used to line up the various layout pieces. Bonus: click on a word to edit the text. Wow! That was cool.
Here’s an example that adds movement to the mix. The side-scrolling hero area makes for an attention-grabbing experience. The animated text provides contrast and an element of fun.
This experiment ponders a comic book UI. It’s a small starting point inspired by Spider-Man. However, imagine expanding it to cover every element of a website. That’s a way to stand out from the mere mortals.
Let’s go a step further with a comic-inspired UI. This page manages to balance bold styling and legibility. The layout is fun but remains super clean. It shows that “comic” doesn’t have to mean inaccessible.
This humorous bit pokes fun at developers. It also shows some impressive use of CSS. The black-and-white comic takes advantage of clip paths, gradients, and flexbox. The strip is also responsive.
Use this snippet to generate comic-style text. Click into the box and then start typing. You’ll get a classic comic book font on top of a halftone background.
It can be a challenge to make an accessible comic strip. The fonts aren’t always legible. And what if you’re using images? This snippet aims to fix these issues. It offers a “CC” mode that provides text descriptions of each panel. The result is an improved user experience.
It’s easy to admire the groundbreaking illustrations in our favorite comics. This example combines beautiful artwork with the power of code. Click on the presentation to regenerate a new version of this crystal field.
Not every website requires a staid corporate look. Comic styles offer an alternative for these sites. You can use this technique to create a fun and memorable UX.
What’s more, you don’t have to go over the top to find success. Even subtle elements of comic design can make a positive impact. Look no further than some of the examples above for proof.
Want to see even more examples of comic styles? Use your superpowers and head on over to our CodePen collection!
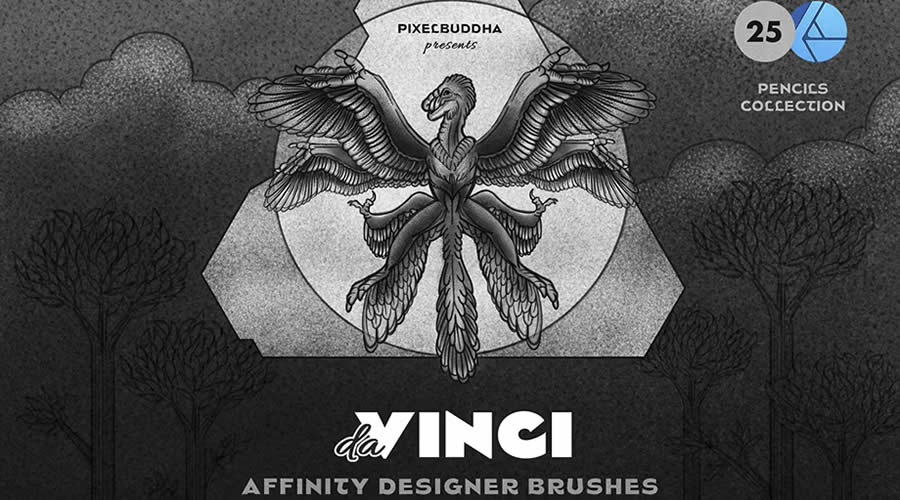
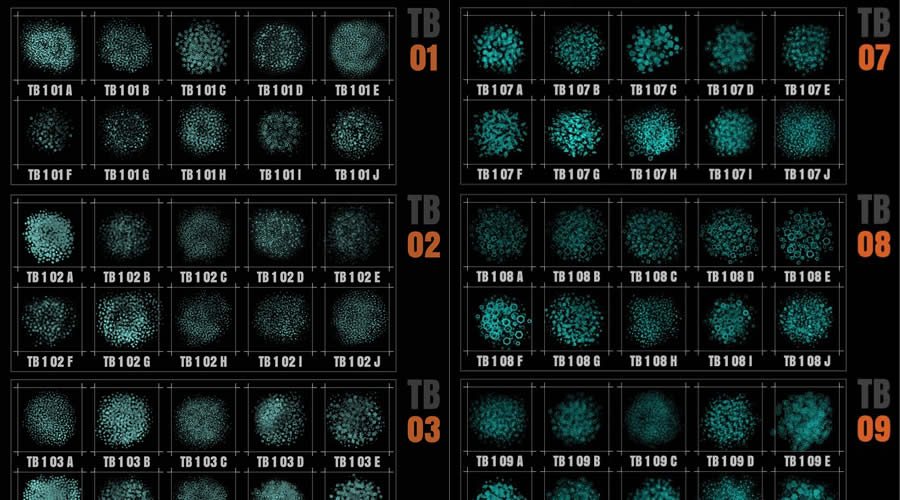
Affinity Designer is a popular graphics editor that allows artists and designers to work on vector and raster projects within one application. This makes it perfect for most design and digital art tasks, from logo creation to complex illustrations.
One of the key features that makes Affinity Designer so valuable is its support for brush sets. As most designers will know, having a collection of brushes on hand is crucial for adding depth and texture to your digital artwork.
Brushes allow for the creation of detailed and professional artwork. They can imitate everything from watercolor textures to fine pencil lines, allowing you to bring your creativity to life with precision and flair.
Whether working on a digital painting, designing a character, or creating a logo design, the right brush set can make all the difference in achieving that perfect finish.
Ink & Painting Affinity Brushes
These Affinity Designer brushes bring traditional ink and paint textures to your artwork. They’re ideal for artists looking to replicate classic techniques digitally.
This set of 30 free brushes offers various textures and stroke styles. It is for digital artists who want to replicate traditional ink painting techniques.
This free set of Affinity Designer brushes allows you to replicate the texture and feel of painting on canvas. It includes standard, angled, narrow, messy, and light vector canvas brushes.
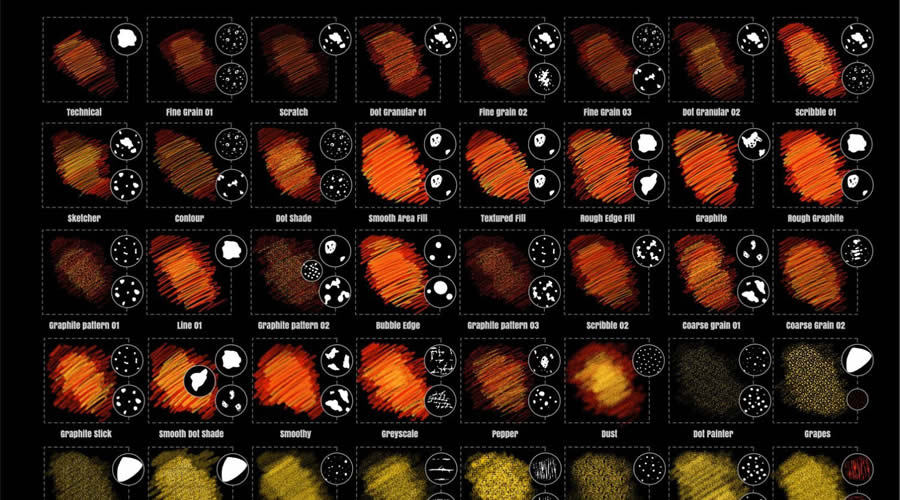
Pencil & Pen Affinity Brushes
Designed to replicate the precision of pencil and pen sketches, these brushes provide a range of line weights and textures, perfect for drafting, sketching, and detailed illustration work.
This brush set is ideal for designers who want to create digital art with the textures and shading capabilities of traditional pencil drawing. The set includes 25 brushes.
These free ink and pencil brushes will add subtle depth, texture, and a hand-drawn feel to your digital illustrations. This set includes 30 pencil and 35 ink brushes.
Created using real Prismacolor marker pens, this free vector brush set can be used to achieve a hand-drawn, marker-like appearance in your artwork. You will also get a Prismacolor-inspired swatches library.
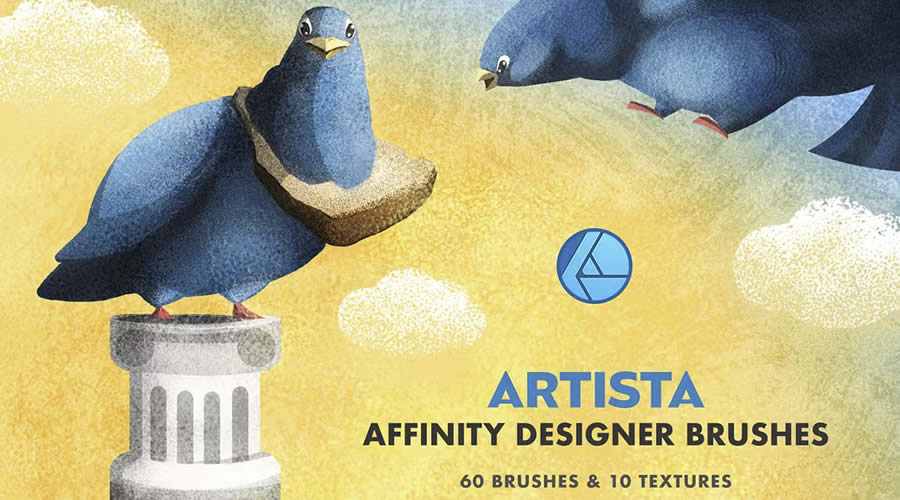
Artista is the perfect brush set for any Affinity digital artist. It includes sketch, spray, hatch, textured, and pencil brushes and, as a bonus, ten grunge textures.
Hand-Drawn Affinity Brushes
Replicate the charm of hand-drawn art with brushes that offer irregular lines and textures. These brushes are great for adding a personal touch to your designs.
This hand-drawn brush set will help to improve your illustrations by giving you unique textures, line work, and artistic effects. They allow you to give your work with a more organic, handcrafted feel.
With these ten free textured brushes, you can replicate traditional charcoal with grainy and expressive strokes. They’re ideal for rough sketches, tonal shading, and moody artwork.
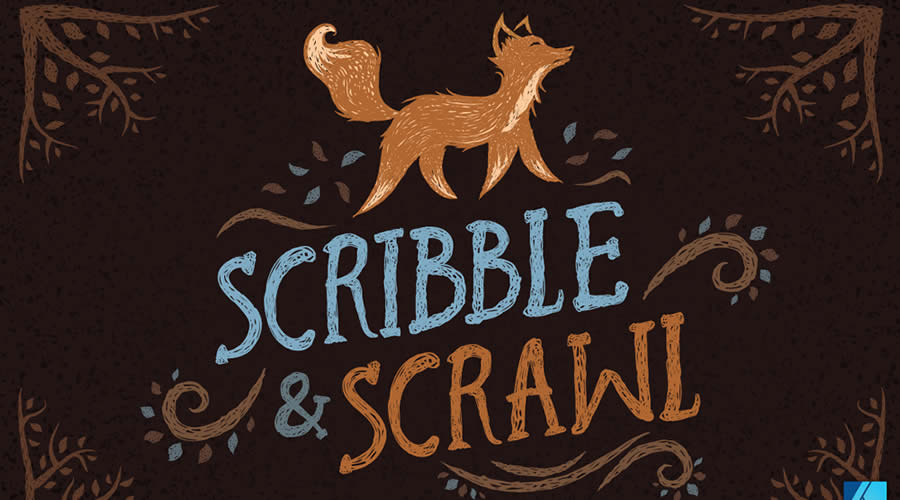
The Scribble & Scrawl free brush set has been designed to create hand-drawn, scribbled, or scrawled effects in your digital art. This free set includes standard, long, squared, and messy scribble brushes.
Vintage Affinity Brushes
Add a touch of nostalgia to your projects with brushes that offer textures and patterns from bygone eras. They are perfect for retro-themed artwork and designs that need an aged look.
This free collection of brushes allows you to add retro or vintage-style banners to your artwork. They are particularly useful for creating nostalgic designs.
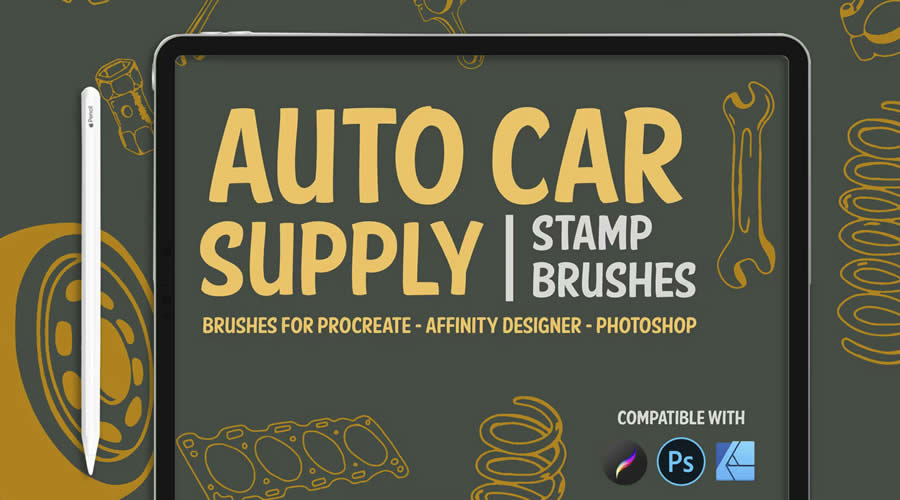
Stamp Brushes for Affinity Designer
These stamp brushes offer crisp, predefined shapes and motifs that can be easily applied to your projects. They’re ideal for creating patterns, decorative elements, or themed designs.
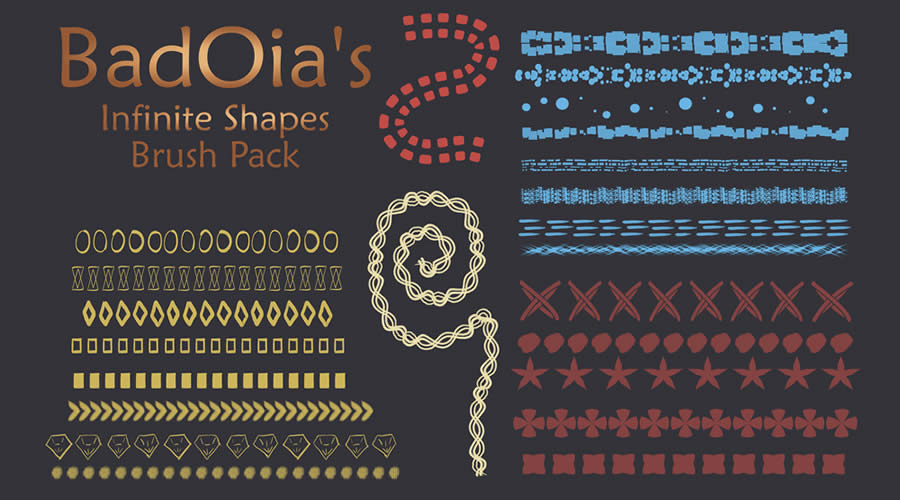
This massive set includes over 200 vector shape brushes. And, as a bonus, they are also all repeating patterns. They’re a must-download for anyone who uses Affinity Designer.
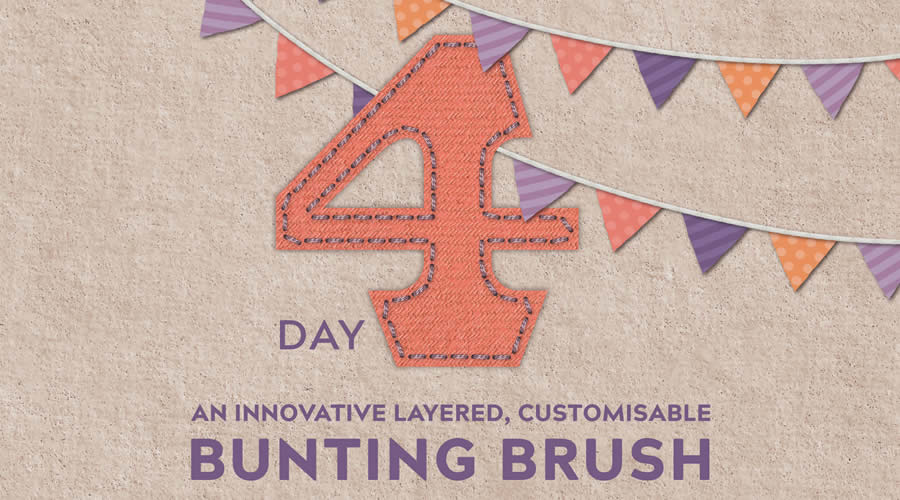
This free brush set lets you add banner-style decorations to your design projects. It is particularly useful for adding festive, celebratory elements to your designs.
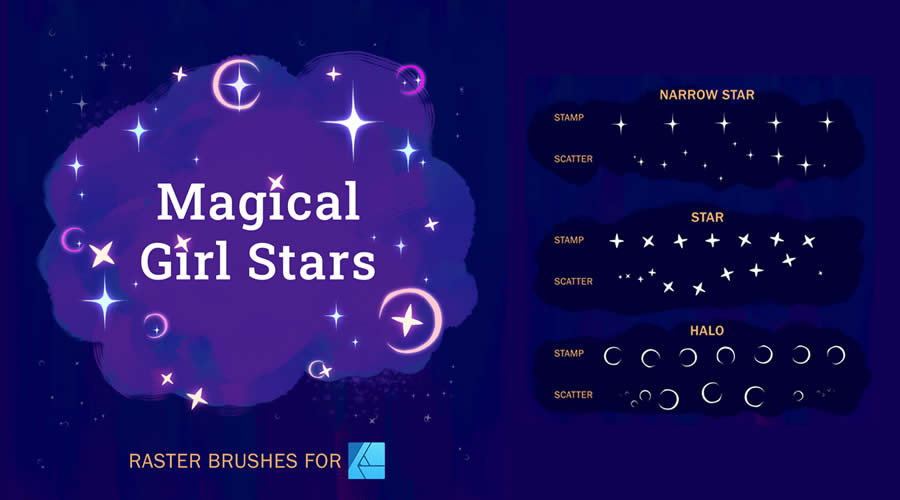
This free Affinity Designer set includes stamp and scatter brushes for adding cartoon-style stars and halos to your artwork.
Line Brushes for Affinity Designer
These Affinity Designer brushes offer clean, varied line work. They’re helpful for projects that rely on strong, consistent linework, such as technical drawings or minimalist designs.
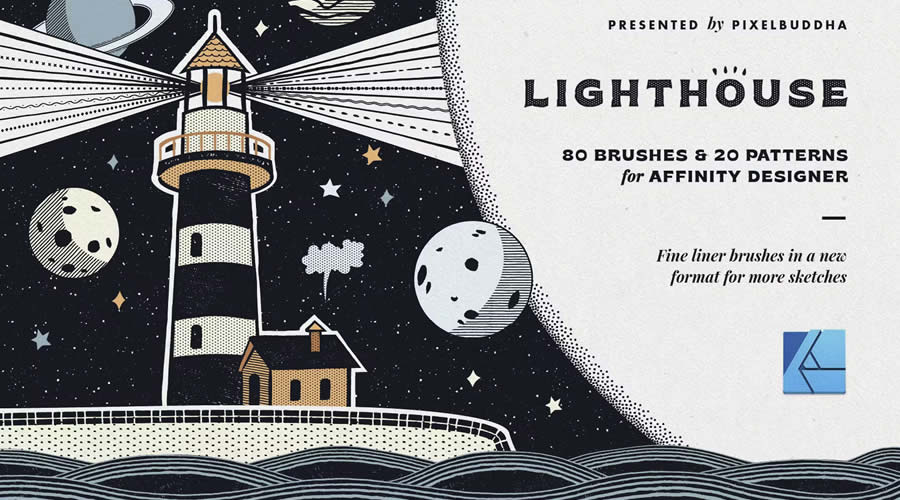
The Lighthouse brush set allows you to add detailed linework to your illustrations, sketches, or any project that requires precision. This set includes 80 Affinity Designer brushes and 20 seamless patterns.
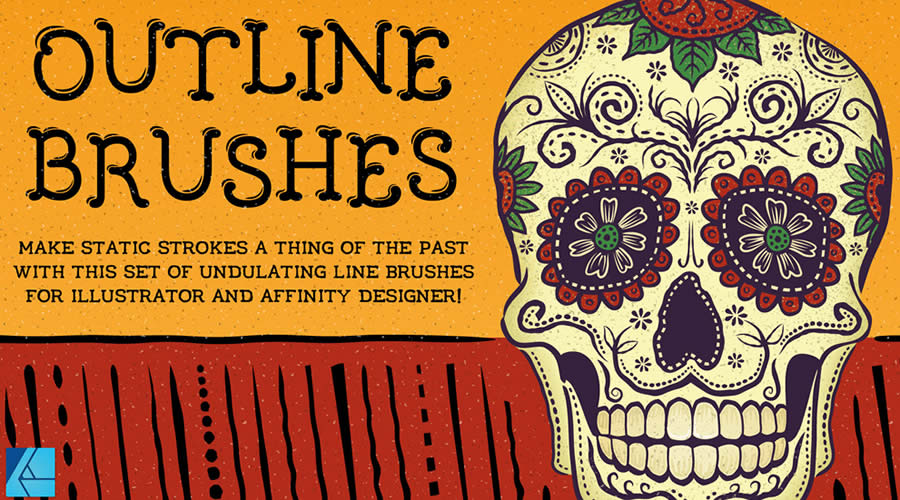
The Outline brush set is helpful for varied-thickness linework or adding a lifelike look to the edges of objects in your artwork. This free set includes dashed, fat, thin, round, short, and abstract outlined brushes.
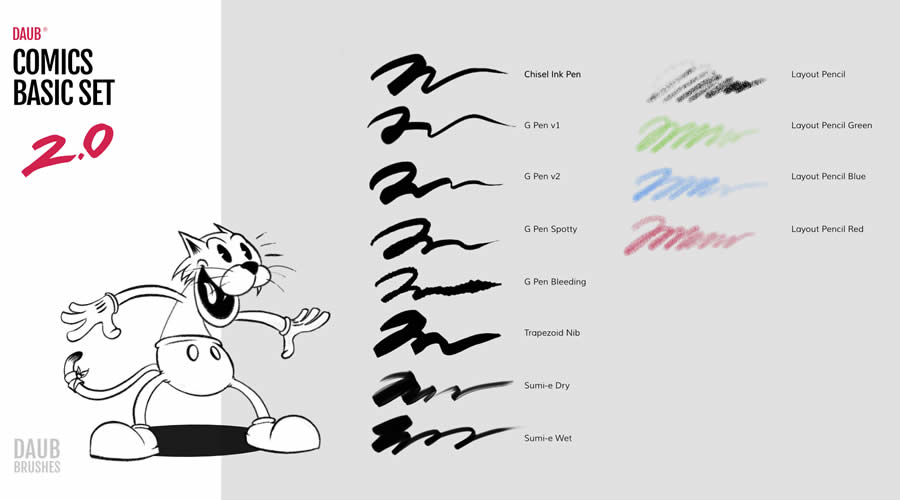
This free brush set includes a selection of brushes tailored for comic book artists and illustrators. It offers a range of textures and stroke styles ideal for creating dynamic and expressive comic artwork.
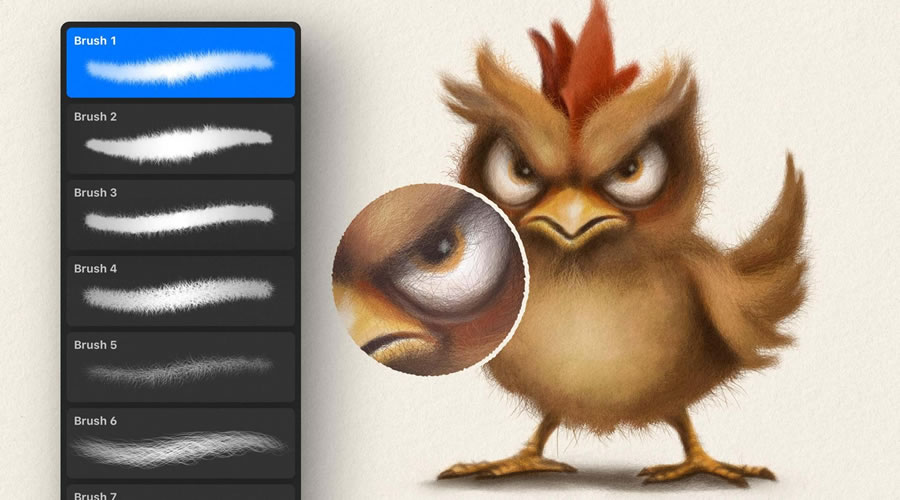
These realistic brushes will allow you to create textured fur or hair. They’re great for animal illustrations, fantasy creatures, plush textures, or adding realism to characters.
These free brushes will add the textured, dynamic effects of wax crayons to your digital artwork. This set can be handy for adding a playful, handcrafted touch to your illustrations.
With these free Affinity brushes, you can create glowing strokes that replicate neon signage. They’re great for retro designs, futuristic art, or bold digital illustrations.
These dot brushes can be used for various creative purposes, such as adding depth and texture to your illustrations or highlighting the detail in characters or objects.
Sourced from various real-life textures, this free brush set will allow you to add depth to your illustrations, giving you a range of effects from rough surfaces to fine, detailed patterns.
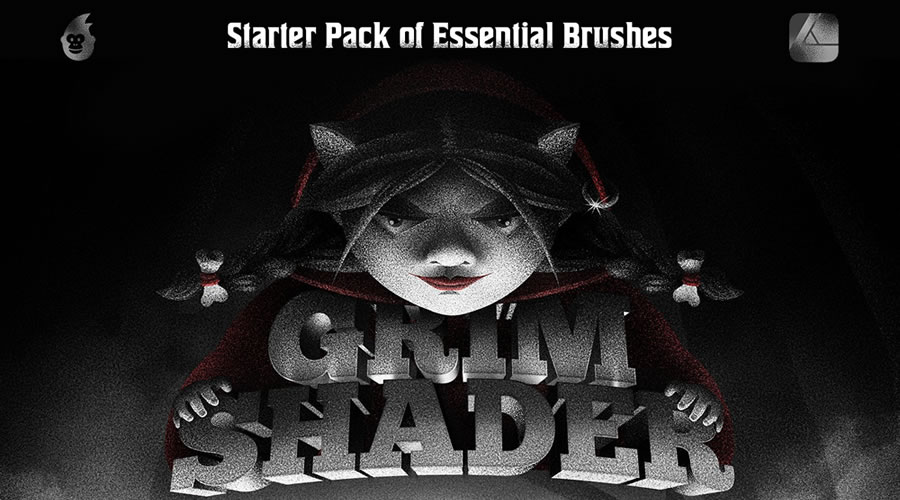
Grim Shader is a collection of ten free textured brushes that you can use to add depth and dimension to your digital art. They’re perfect for vintage illustrations, comic book designs, or engraving-style artwork.
This free Affinity Designer brush set includes textures and effects to add realism to your artwork. They will help you create rich art by giving you various shading options.
Affinity Designer Brushes FAQ
How do I install brushes in Affinity Designer?
To install brushes, download the brush file, open Affinity Designer, go to the Brushes Panel, click on the menu, and select Import Brushes.
Can I use Photoshop brushes in Affinity Designer?
Yes, you can use Photoshop brushes in Affinity Designer by importing the .abr files. You can find a huge selection of free Photoshop brushes here.
Can I use Illustrator or Procreate brushes in Affinity Designer?
Illustrator or Procreate brushes are not directly usable in Affinity Designer due to differences in file formats and brush engines. They would need to be converted into a compatible format, though this may not perfectly preserve the original brush’s properties.
How can I create my own brushes in Affinity Designer?
You can create custom brushes by selecting new brush categories in the Brushes Panel and clicking the New Brush option. This allows you to customize settings like width, opacity, and texture to suit your specific needs.
These Affinity Designer brushes offer the flexibility and precision needed to bring your creative visions to life, whether through delicate linework or bold textural effects.
By using these free resources, artists of all skill levels can expand their repertoire, experiment with new styles, and achieve professional-level results.
You can write custom code to make WordPress do all manner of things. Whether creating custom plugins or tweaking your theme’s layout, there’s a way to make it happen. As they say, code is poetry.
Writing code is full of ups and downs, though. You may have the perfect idea for achieving a goal – if only for that nasty bug you can’t resolve. Just think of how many hours we’ve spent debugging. They account for many long days and nights. Full disclosure: I still feel the effects of such trauma.
Thankfully, troubleshooting code is a strength of artificial intelligence (AI). These tools are skilled at understanding syntax and have in-depth knowledge of WordPress. Combine those ingredients, and you have a solution to most (if not all) coding issues.
In my case, ChatGPT has saved me hours, not to mention a whole lot of stress. I’ve also learned a few tricks for getting the best results and want to share them with you. They’ll help you get the most out of troubleshooting with AI.
Here we go!
Identify the Basics and Share Them With AI
Aim for simplicity when troubleshooting code. This applies to using AI as much as reviewing with your own eyes.
The first step is to identify the issue you’re having. You don’t need to know the cause (that’s what AI is for). But it helps if you can determine the following:
The code snippet causing issues;
Any error messages generated by your code;
What you’re trying to achieve (what the code should do);
Your web server’s configuration and version of PHP;
Start your debugging journey by sharing the offending code snippet with your AI tool of choice. This may be all the tool needs to do its job. Issues like syntax errors can be found quickly.
The other details above are also helpful. Share any errors, your server configuration, and the expected behavior. This provides more context when all else fails.
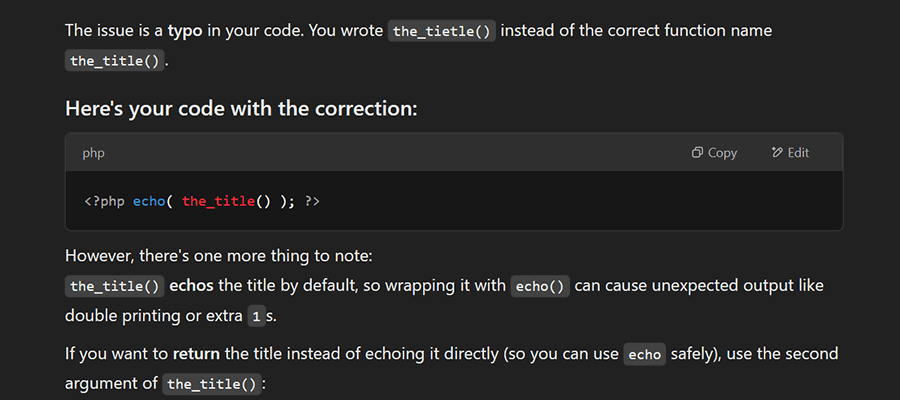
Example Prompt:
I'm having trouble with the following code snippet on my  WordPress website:
<?php echo( the_tietle() ); ?>

It's supposed to display the title of the current page.

I received the following error:
Function the_tietle() not found.

I have an Apache server running PHP 8.2. What's wrong with my code?
Upload Files for a Full Code Review
Tools like ChatGPT can work with more than code snippets. You can also upload files for further analysis.
This is handy if you’re unsure where an issue is coming from or want a full code review. For example, you might want to check if the code’s output is sanitized. AI can look through the file and inform you of any issues.
But that’s not all. Some tools will troubleshoot multiple files simultaneously. That allows you to upload a ZIP archive containing files and a nested folder structure.
The response may take a little longer. But it’s still more convenient than copying and pasting into the tool’s UI.
Troubleshoot One Issue at a Time
You could ask ChatGPT or a tool like Plugin Check to point out all the errors in your code. It’s nice to get an overview of what’s happening. But don’t let it go to your head.
AI may or may not be confused by code with multiple issues. Humans generally are, though. Thus, it makes sense to work on one problem at a time.
There are advantages to taking it slowly. You’ll achieve better results and get a good mental exercise. It reminds us to focus on the current task instead of scattering our attention in too many places.
A measured approach takes some of the stress out of the process. Another bonus: It keeps your AI chat threads nicely organized. That’s helpful when you want to reference it later.
Read the AI Tool’s Response Carefully
It’s tempting to copy and paste AI-generated code without a second thought. It’s not much different from the snippets on Stack Overflow or similar communities. It must work, right?
It’s more complicated than that. Some coding issues are cut-and-dry. Syntax errors, once fixed, don’t require further attention. That’s more of an exception than a rule, though.
AI tools attempt to explain why our code isn’t working. They also point out other possible solutions. Like humans, their initial diagnosis may not be correct.
Pay close attention to these responses. For one, it’s an opportunity to learn the reason behind the problem. It may also save you from using code that doesn’t work.
AI will sometimes take your prompt out of context. And what if you misspoke? The tool’s response may do more harm than good.
So, slow down. Read the explanation and review the code. At worst, you’ll have a little more peace of mind.
And please remember to back up your work before changing your code. You never know!
A Helping Hand for Debugging
Every developer gets stumped by a buggy piece of code at some point. Previously, that meant wasting hours (if not days) attempting to fix it. Meanwhile, progress on your to-do list came to a halt.
That no longer has to be the case. Your favorite AI tool can detect the source of coding issues and help you repair them. It saves you untold time and keeps you on task.
The technology isn’t perfect. However, the tips above can help you navigate AI’s quirks while getting your code running.
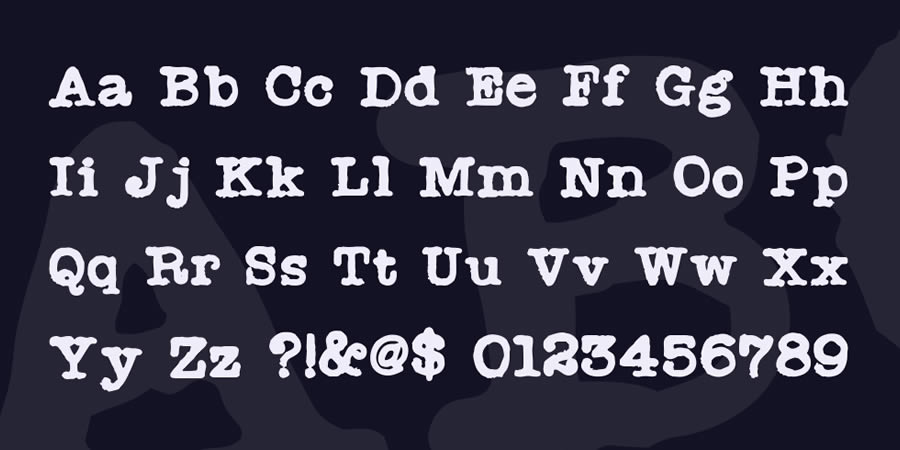
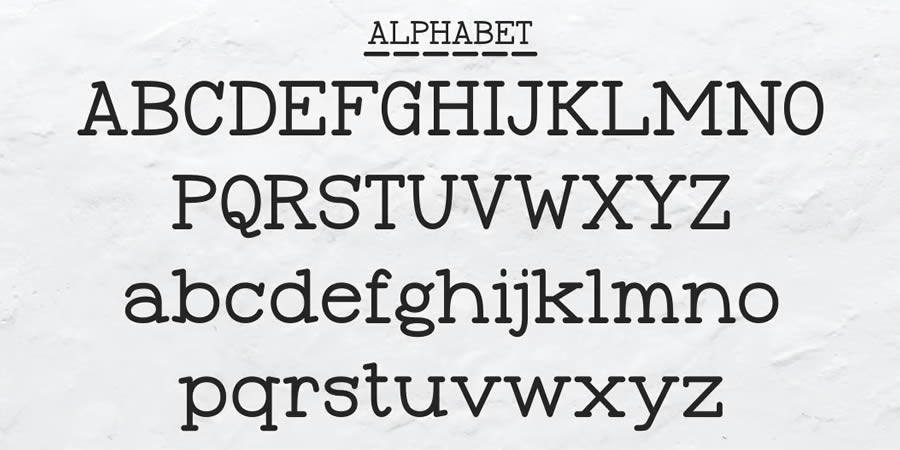
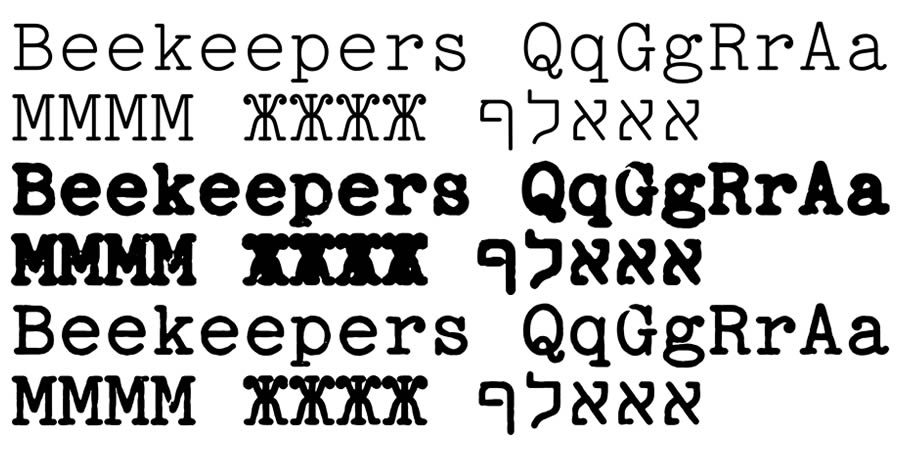
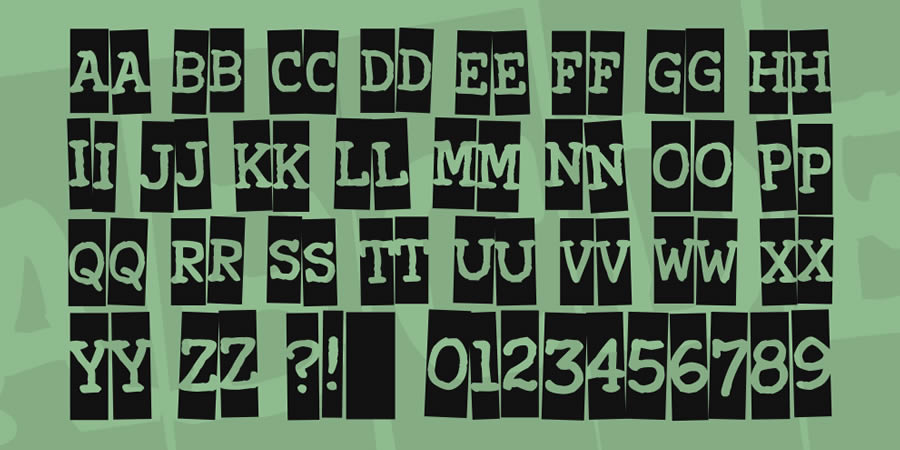
Typewriter fonts can bring a unique style to your creative projects. Their worn-out letters and subtle ink blots replicate those characteristics you associate with vintage typing machines. They are great for projects like posters, branding, or invitations that need a vintage aesthetic.
Most of the fonts in this collection have been digitally designed and inspired by classic typewriters. But we have also included some fonts that have been scanned from the typed text of real typewriters and have those original peculiarities like faded ink and uneven keystrokes.
Whether you’re looking for something clean and refined or a more worn, authentic feel, in this collection we share some of the best free typewriter fonts to help give your projects a classic touch.
Free to Download
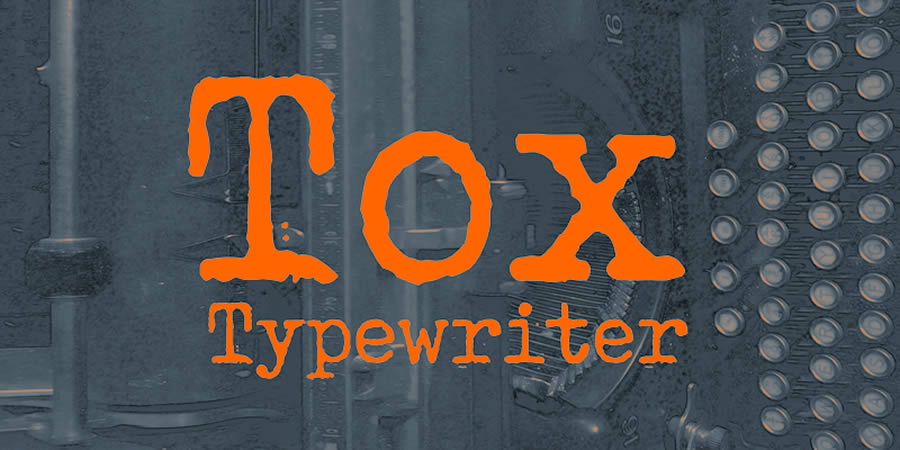
The free font Tox replicates the pressed ink-on-paper effect you typically find when using old-school typewriters. Its rough and uneven edges make it perfect for vintage or industrial projects.
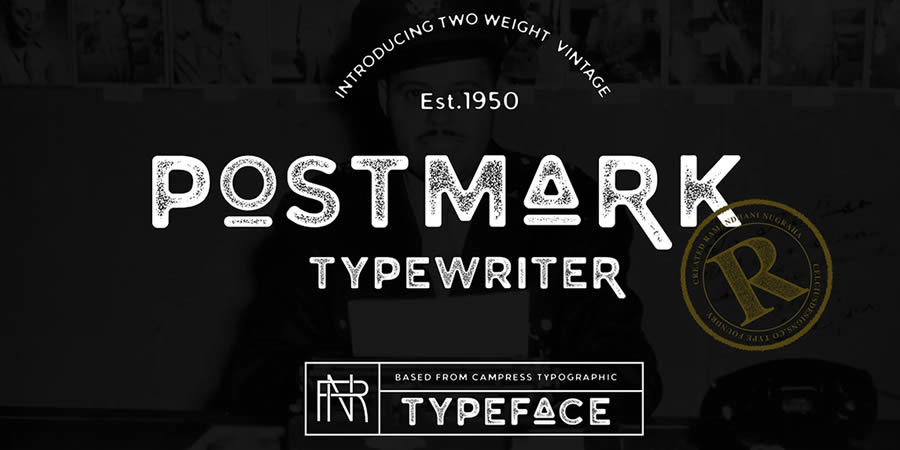
Postmark Typewriter has a clean yet slightly distressed style. The regular weight’s thin lines and occasional ink blot give it a nostalgic feel. This font suits projects that need an authentic typewriter aesthetic.
Free to Download
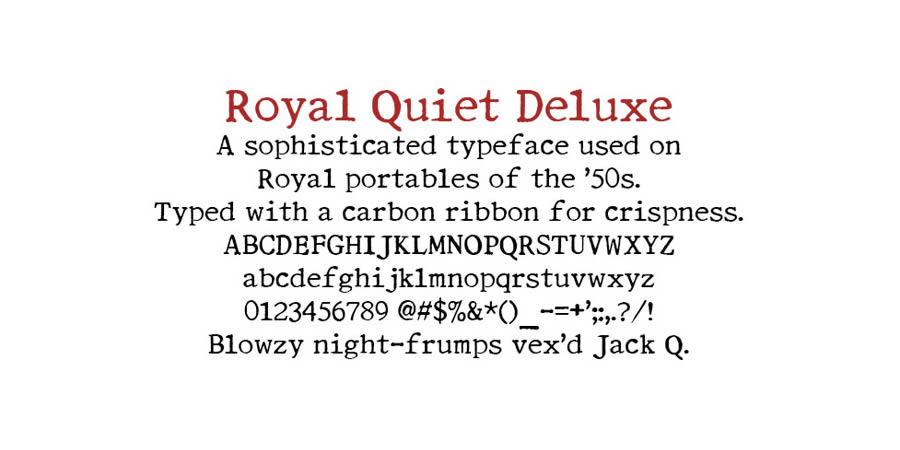
Royal Quiet Deluxe is a free font created using real typed letters from a 1950s Royal Portable typewriter. If you’re looking for a typewriter font with a crisp and uniform style and authentic glitches and flaws, this is the font for you.
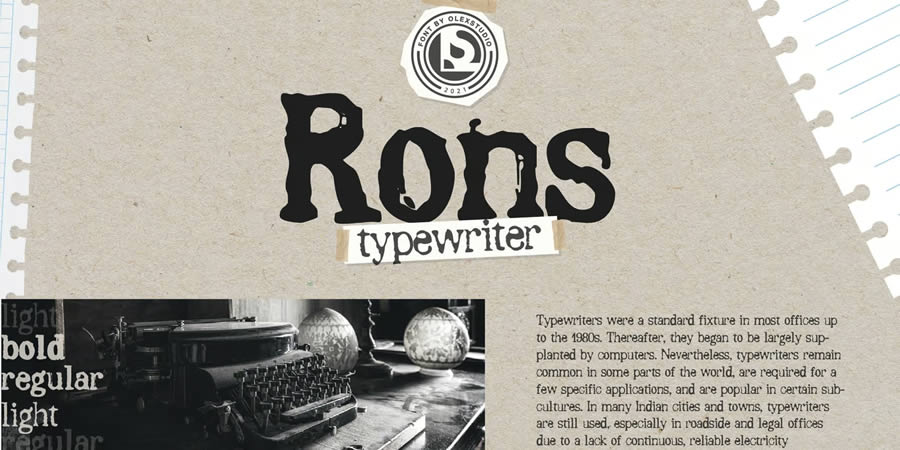
With its strong strokes and worn characters, Ron’s Typewriter feels heavy and dramatic, making it perfect for poster design. This serif font comes with regular, light, and bold weights.
Free to Download
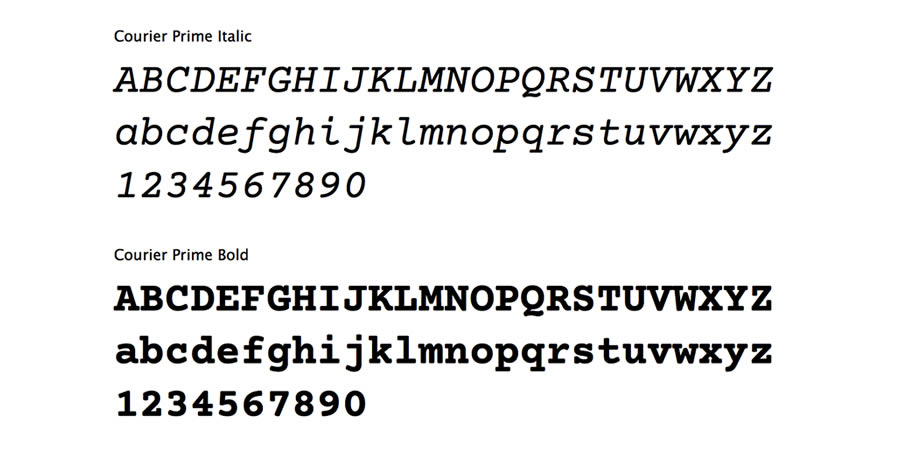
Courier Prime modernizes the classic Courier font while maintaining its monospaced design. It’s clean, easy to read, and versatile. This font works well for code or any other text-heavy documents.
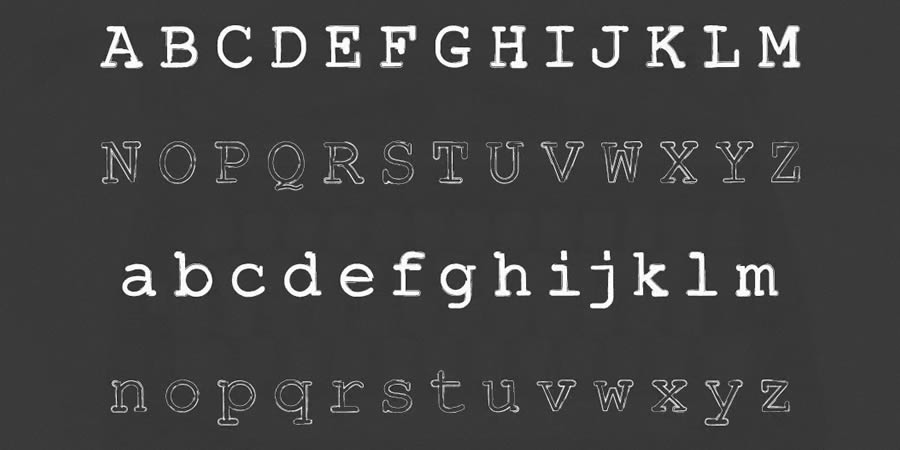
This font combines a typewriter’s classic structure with a handwritten feel. The ink-smudged appearance and uneven character spacing give it an organic and personal touch. It includes regular, outline, and italic weights.
Free to Download
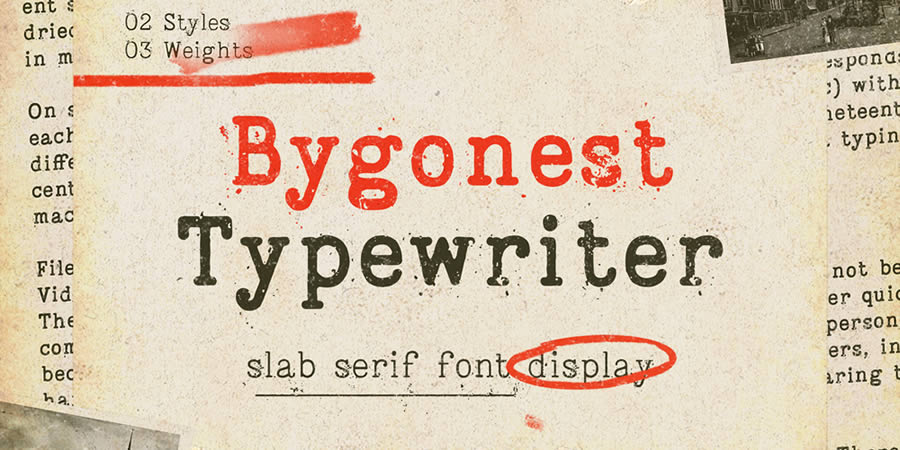
Bygonest Typewriter is a worn and weathered free font with uneven strokes and faint imprints. Its rough edges make it look aged and used, creating the feel of old documents or typewritten letters.
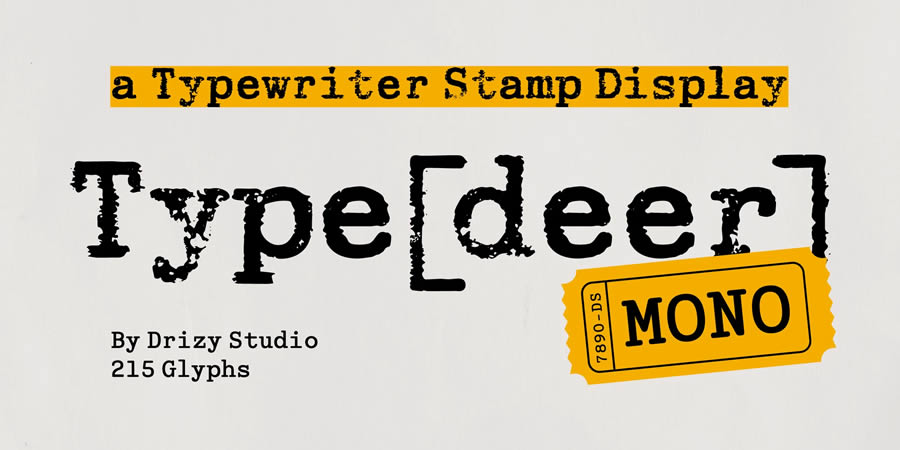
Typedeermono is a typewriter font with a slightly distorted, hand-pressed appearance that has been designed to look as though a rubber stamp created the letters. It includes both regular and stamp variations.
Free to Download
Radio Newsman is a strong typewriter font that has been inspired by mid-century newsrooms. Its bold characters make it perfect for headlines or vintage-themed designs.
Taking inspiration from traditional typewritten text, Frontype is a clean serif font with slight imperfections. Those subtle blots give the impression of a freshly inked typewriter ribbon. It is perfect for retro projects that need to be legible.
Free to Download
TT2020 offers a contemporary twist on classic typewriter fonts. Its precise lines make it feel modern while still retaining the irregularities that give typewriter fonts their character. This free font comes with six varied styles.
Free to Download
Xerography is a free serif font that imitates the look of a worn-out typewriter or copy machine. It has slightly rough edges with faded characters and a solid stamped background. This typewriter font would be perfect for bold poster designs.
Free to Download
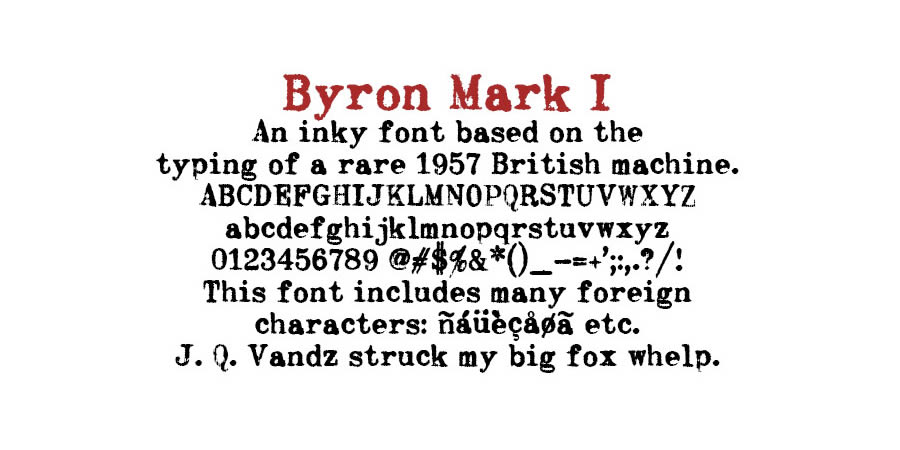
These free fonts were created by scanning the characters typed on Byron’s classic Mark I and Mark II typewriters. The slight imperfections are real and will add vintage character to any design project you’re working on.
Free to Download
Dull Boy is a free typewriter font with varying letter shapes and uneven spacing. Its bold style makes it excellent for projects that need a worn-down look.
Free to Download
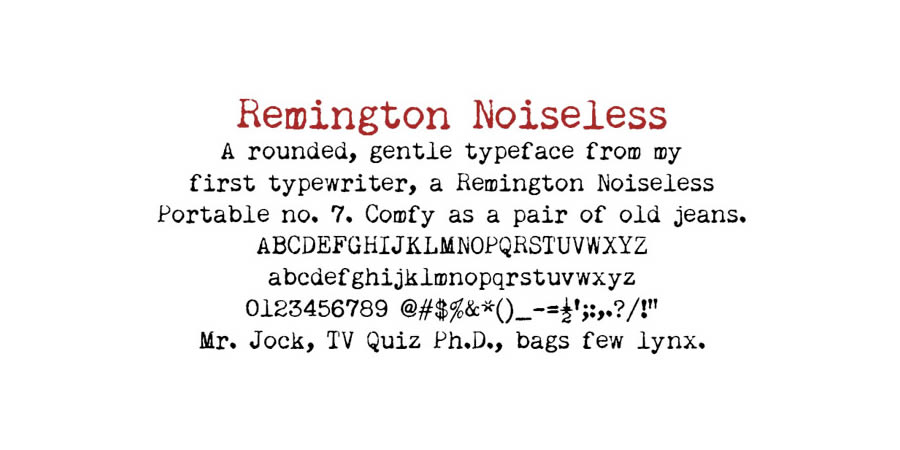
This free font was created using a Remington Noiseless typewriter. It is a slightly rounded and gentle typeface with all of the imperfections you would expect to see in vintage typewritten text.
Free to Download
Veteran Typewriter has a rugged, worn look, with rough edges that perfectly replicate the characteristics of a well-used typewriter. This free font would be excellent for designs that need an antique aesthetic.
Free to Download
Special Elite is a grungy typewriter font that has taken inspiration from the Smith Corona Special Elite (where its name comes from) and Remington Noiseless typewriters. This free font is available on Google Fonts.
Free to Download
Adler is a free typewriter font with heavily distressed characters, replicating the text of a heavily used classic typewriter. If you’re looking for a heavily smudged and grungy typewriter font, this is the font you want.
Free to Download
Punk Typewriter is an edgy typeface with strong imperfections and erratic character shapes. Its bold, chaotic appearance would work well for projects that need a touch of rebellion.
Free to Download
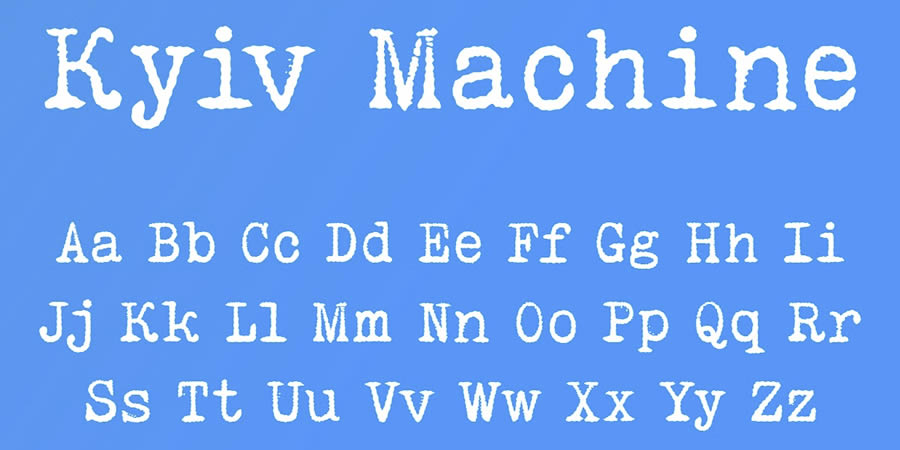
Kyiv Machine is a free typewriter font with industrial and mechanical aesthetics. Each character appears worn and uneven, giving the font a sense of history.
Typewriter Font FAQs
What are typewriter fonts?
They replicate the typed text of traditional typewriters. They tend to have irregular letters, ink imperfections, and grungy design quirks.
Can typewriter fonts be used for logo design?
Yes, they are great for logo design. They are excellent for adding vintage character to your designs.
Are all typewriter fonts monospaced?
Most typewriter fonts are monospaced, but some may have inconsistent spacing.
Are scanned typewriter fonts less polished than digital versions?
Scanned fonts are more authentic, while digital versions tend to be cleaner and more uniform.
Can typewriter fonts be paired with other fonts?
Yes, typewriter fonts often pair well with modern fonts, giving your designs a more balanced contrast.
Do typewriter fonts work best in large text sizes?
Yes, they do. The larger the text, the more you will see their unique details, like uneven strokes and ink imperfections.
Are these fonts free for commercial use?
Some fonts are free for commercial use, while others require a license. You should always read and review the terms and conditions of each font.
There’s nothing like the feeling of launching a new website. It’s the excitement of a happy client and a great addition to your portfolio. You can even admire all the cool things you did with WordPress. But as that chapter ends, another one begins.
We’re talking about website management. It’s all about keeping your client’s site in tip-top shape throughout its lifecycle. But there’s more to the process than hitting the “update” button every so often.
Modern websites are more complex than ever. Thus, there are also ongoing tasks for performance, accessibility, and security. The services and technologies surrounding websites also require regular attention.
Those responsibilities multiply for each site under your watch. So, how do you keep it all from going sideways? Keep reading to discover best practices for managing your client’s WordPress websites.
Take Note of Unique Features and Configurations
Every WordPress website has a story to tell. While some may be similar, some features make them unique.
For example, several clients may use the same theme. However, their websites could have key differences. Perhaps one uses WooCommerce and sells products online, while another might include a learning management system (LMS) plugin.
Seemingly similar websites can have many differences, including:
Commercial licenses for plugins and themes (with differing expiration dates);
Custom code that modifies WordPress behavior;
Domain registrars;
PHP versions;
Plugins and custom modifications to them;
Server resource requirements (storage, bandwidth, CPU cycles);
These differences may be fresh in your mind when the site launches. However, it’s easy to forget them as time passes. You’ll be left searching for clues when it’s time to work on the site again.
The solution is to document the unique aspects of each site. Put them into a text or word processing file. It’s a handy reference for those little details and could save you a few headaches. Future maintenance will be that much easier.
Create a Website Maintenance Schedule
WordPress websites require frequent maintenance. Updates to the core software, themes, and plugins are plentiful. Thus, it pays to keep a watchful eye on each site you manage.
Updates play a key role in site security and stability. Missing a new version could mean exposing the website to hackers or a poor user experience. It’s not something to take lightly.
WordPress can perform automatic updates – and it’s a viable option. However, updates don’t always run perfectly. If something does go wrong, you won’t be around to notice. That could mean a buggy site or worse.
The better option is to create a website maintenance calendar. Pick a day each week (or two) and dedicate a portion to installing updates. It also helps to stay flexible – you never know when a critical security update will surface.
We get it – logging into every site you manage is tedious. Thankfully, you can streamline the process using a unified dashboard service like ManageWP or MainWP. You’ll have access to each site and can perform maintenance tasks – all from a single screen.
Regardless of how you do it, keeping a regular schedule will help this part of maintenance become second nature.
Stay Informed About WordPress and Web Development
Things change rapidly in web development. Software (such as WordPress), programming languages, and server technologies evolve. Like that iPhone you bought last year, things become obsolete before you know it.
These shifts impact your existing sites just as much as new ones. PHP versions are a prime example. Web hosts often stop supporting legacy releases. Thus, your website had better be compatible with a recent one. Wait too long, and you might have a broken site to repair.
Changes in WordPress are also worth paying attention to. New features are added to the core software, and some may benefit your clients. For instance, the Site Editor lets you build custom theme templates without knowing how to code. It may be the push your client needs to approve a redesign.
Meanwhile, themes and plugins come and go. It’s risky to leave abandoned software on your site. The sooner you know about a potential issue, the sooner you can address it.
And we can’t forget about third-party tools and services. Our sites often depend on them for functionality. A change to an API or even a billing policy could be impactful.
Such frequent changes make it more important than ever to stay informed. You don’t have to know everything – just the subjects relevant to the sites you manage. The project documentation we mentioned above can help you decide where to focus.
Put Security First
The burden of website security is a heavy one. It should be a top consideration in everything we do. The same goes for keeping client data safe.
In site management, that means not taking any risks. Ensure that software is updated, use strong passwords, enable two-factor authentication (2FA), track user activity, and use security tools. They help defend against hackers and provide a little peace of mind.
Security at the server level is also critical. For instance, ensure the correct file permissions for your WordPress installation are set. Scan the server for any suspicious files. Your web host may take care of some items – but it doesn’t hurt to verify them.
Any sensitive client data (like passwords and payment info) should be stored securely. Use encrypted services, when possible, to keep prying eyes away.
Security may be the most difficult part of website maintenance. Do your best to keep your websites, clients, and yourself safe.
Manage Your Client Websites Like a Pro
There are many aspects to managing a WordPress website. But they all have a few things in common.
First, you’ll need a deep understanding of every website you manage. Note the details in what theme and plugins they use, their hosting configuration, and the services they depend on. Gather every bit of information you can for future reference.
Second, pay attention to what’s going on. Stay aware of what’s changing and how it impacts the sites under your care. That will help you catch potential problems before they strike.
WordPress maintenance isn’t rocket science. Some basic organizational skills are a must. From there, it’s about creating a workflow that makes sense for your business. Take advantage of any tools that save time and increase efficiency.
Follow the tips above, and you’ll become a pro in no time!
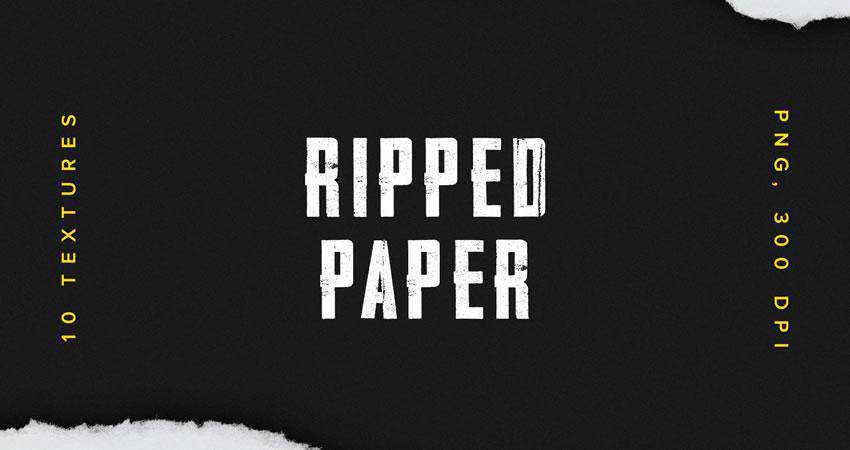
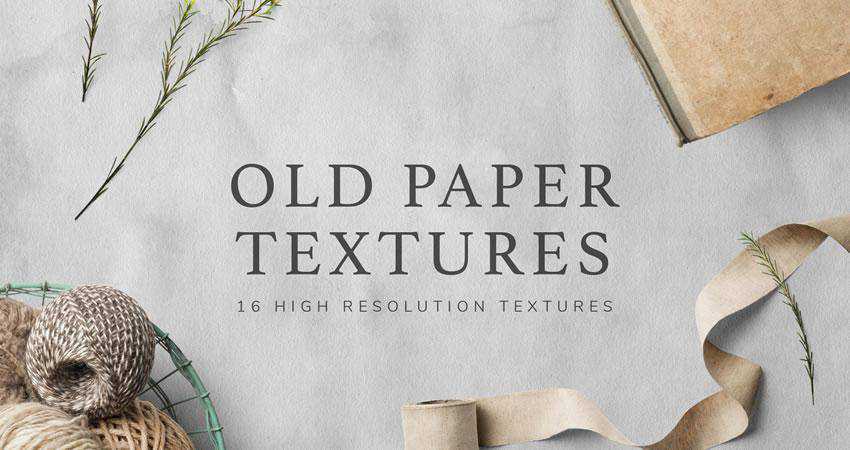
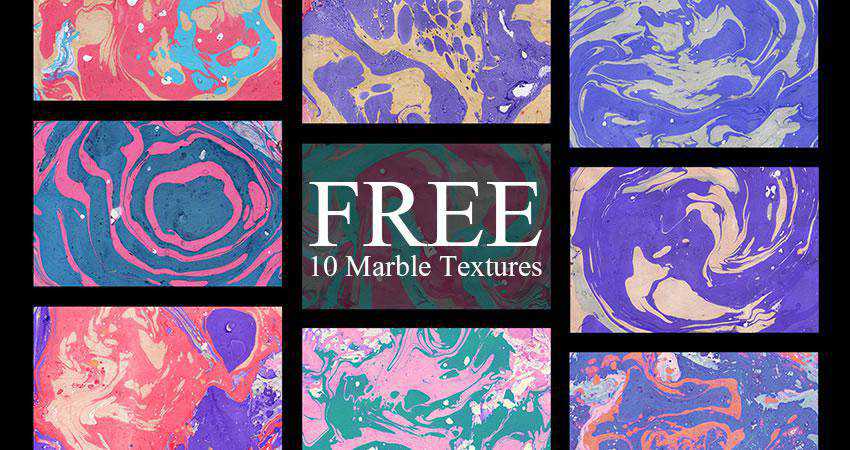
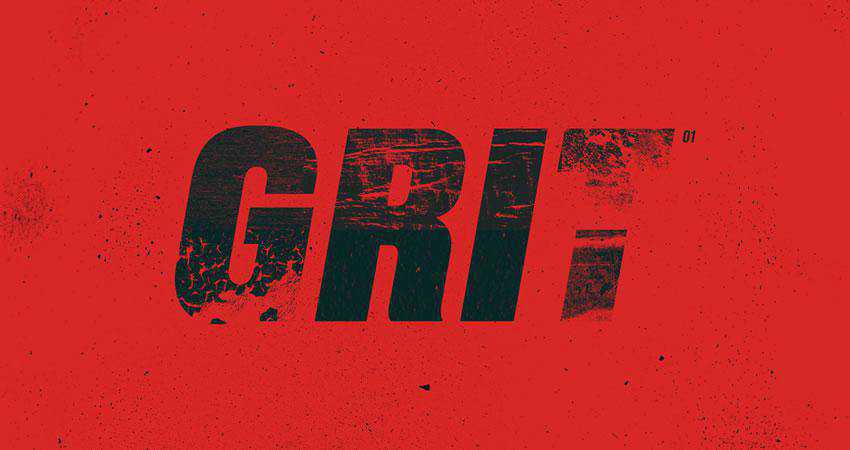
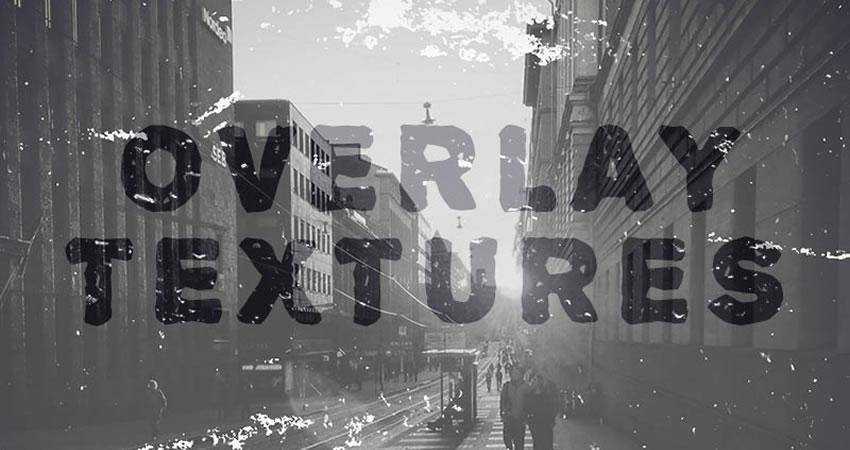
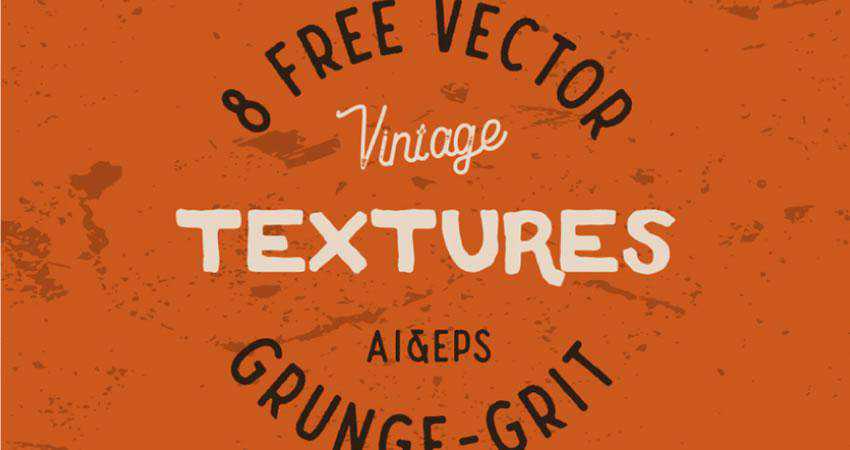
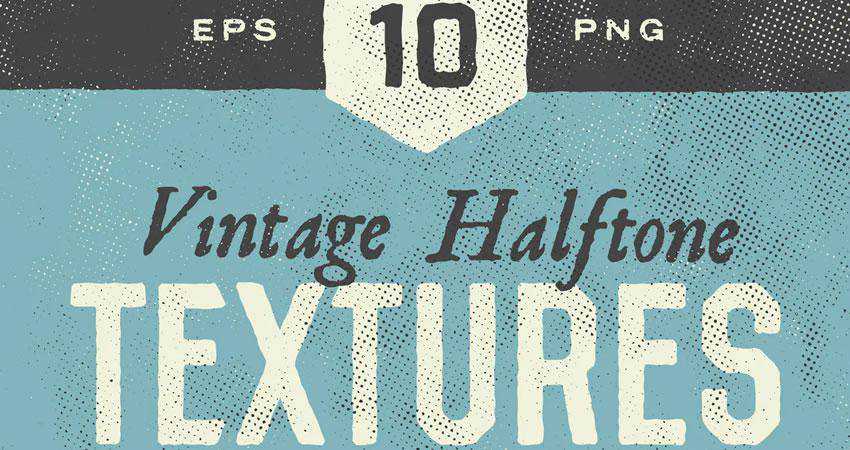
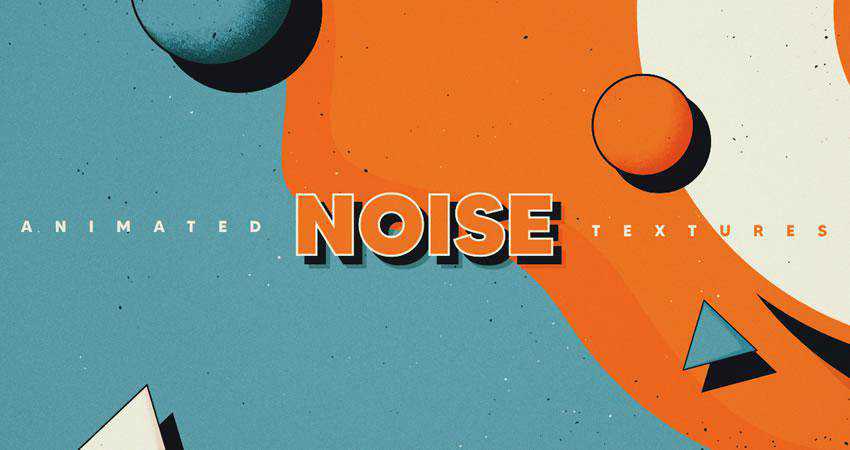
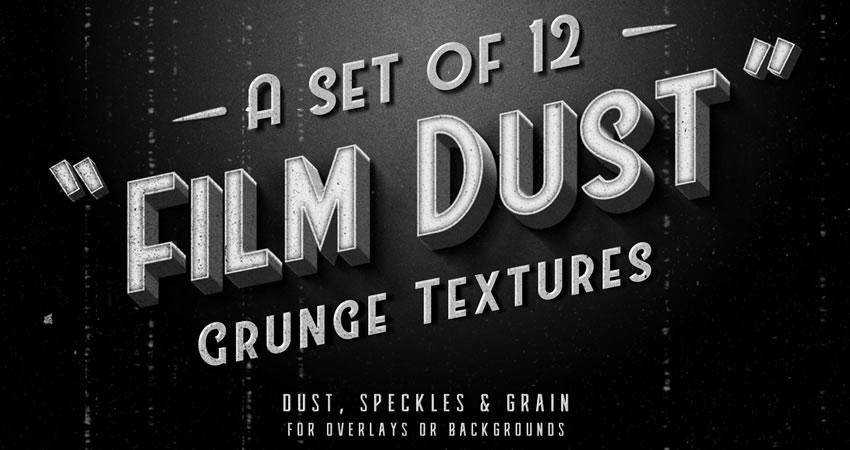
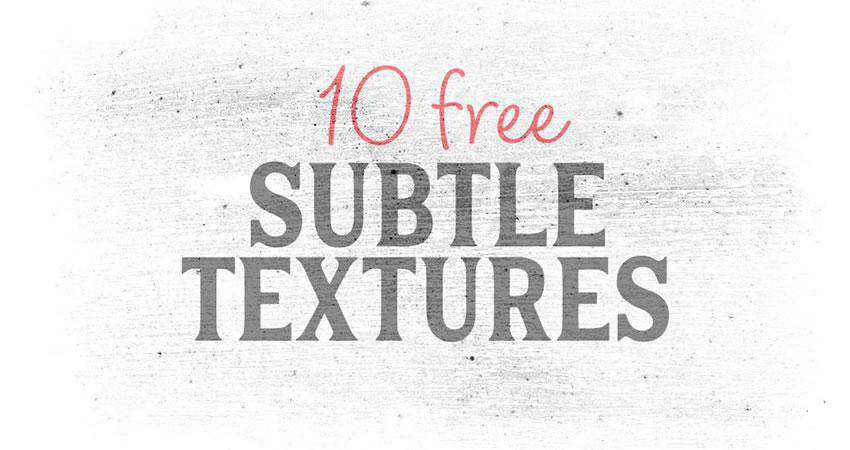
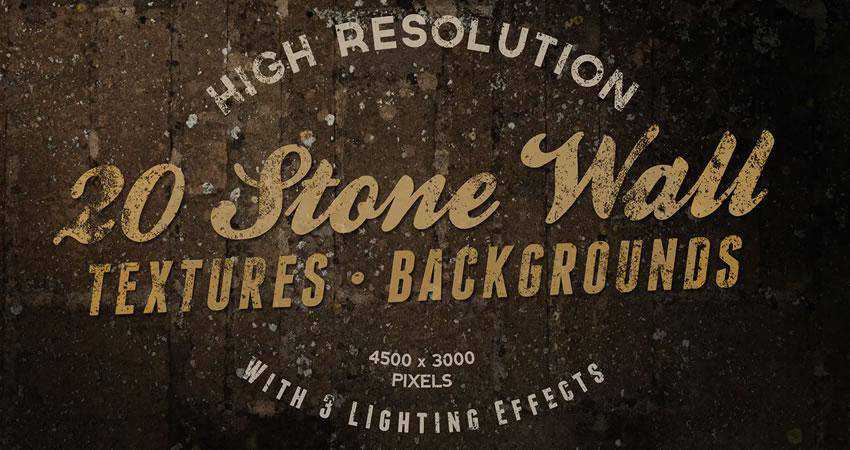
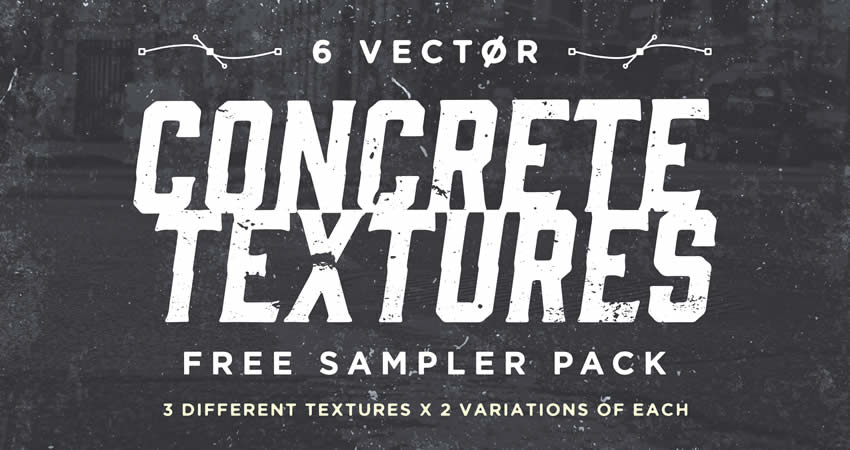
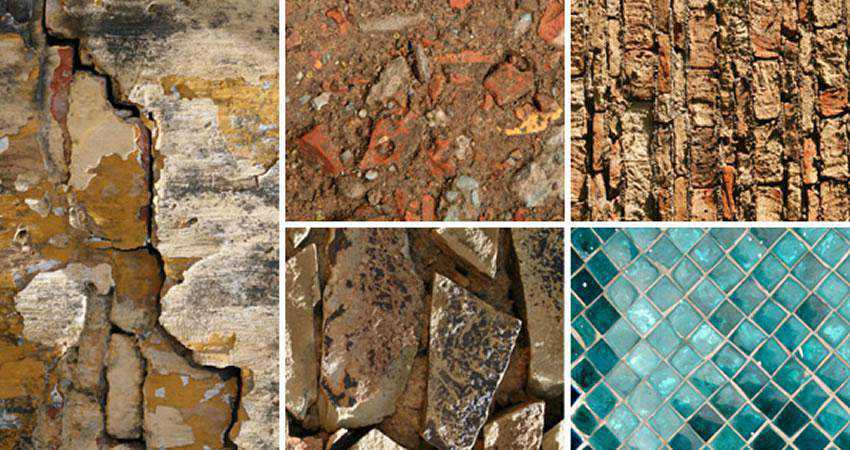
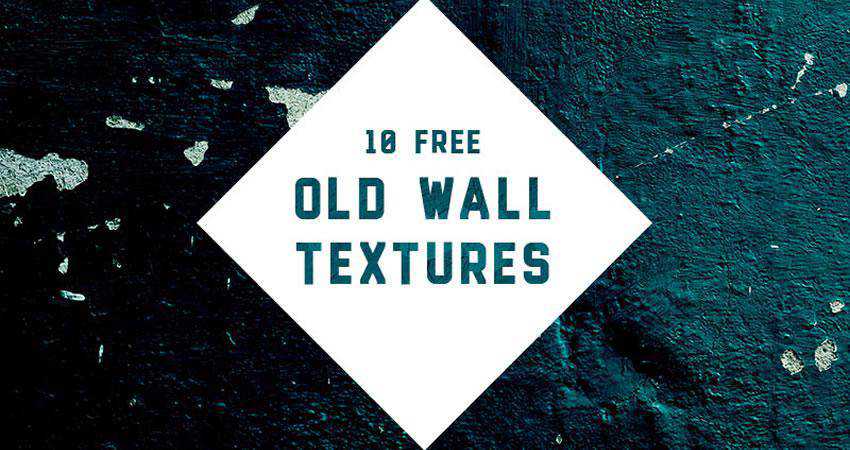
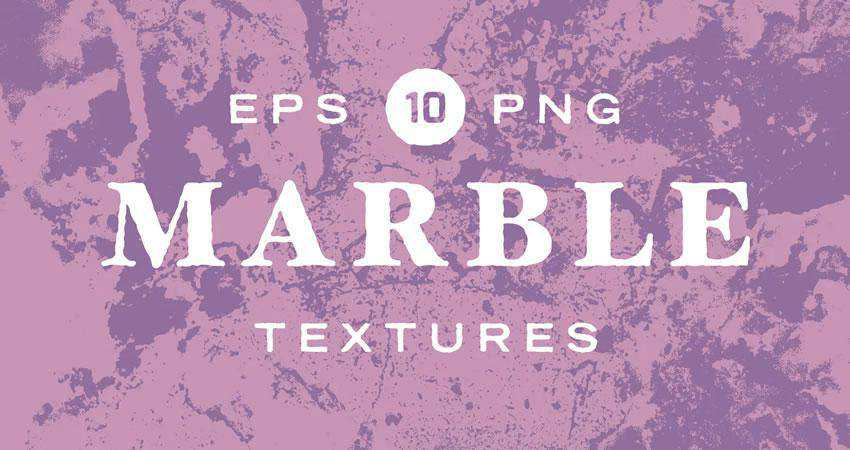
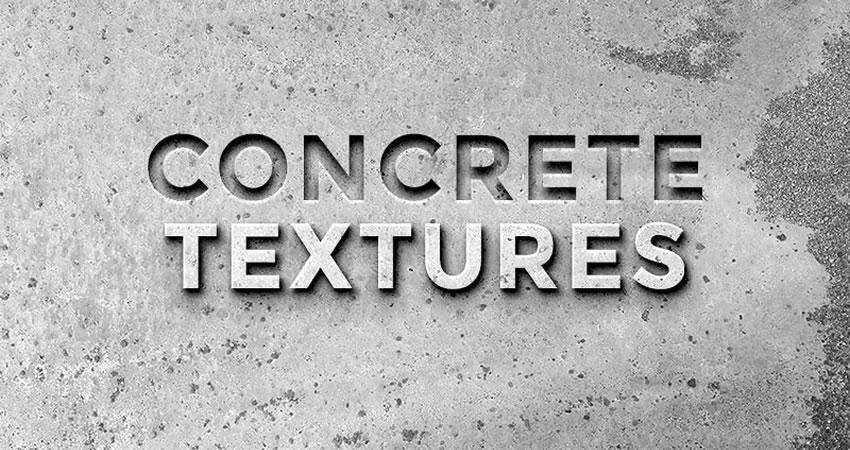
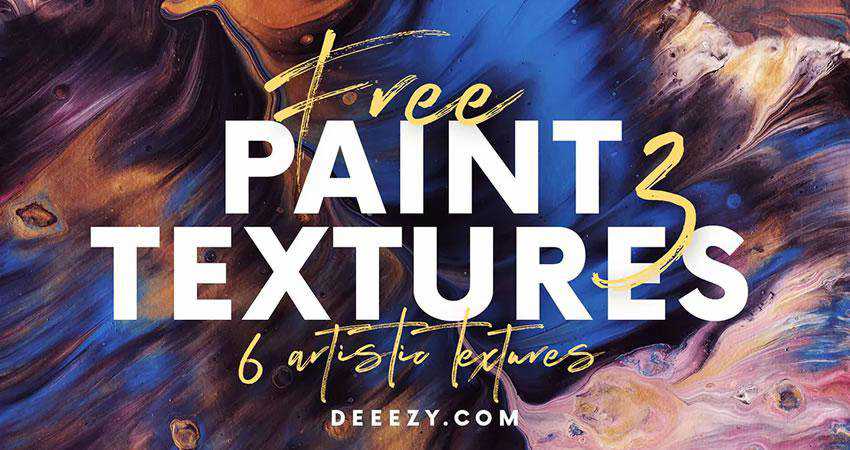
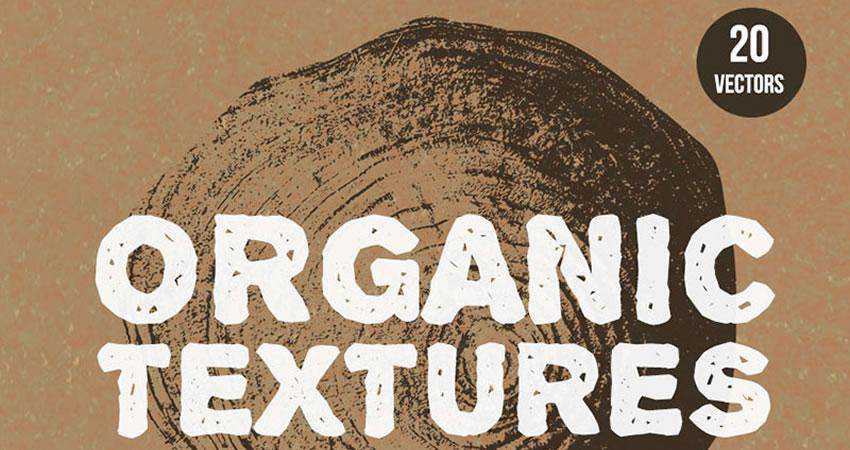
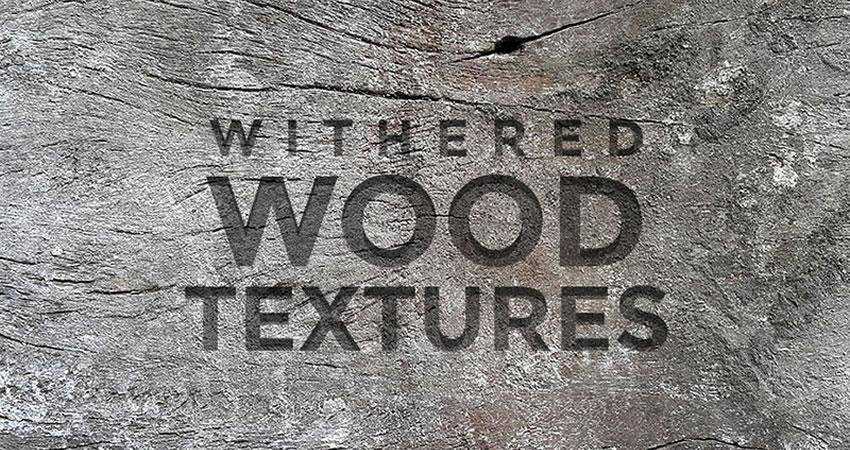
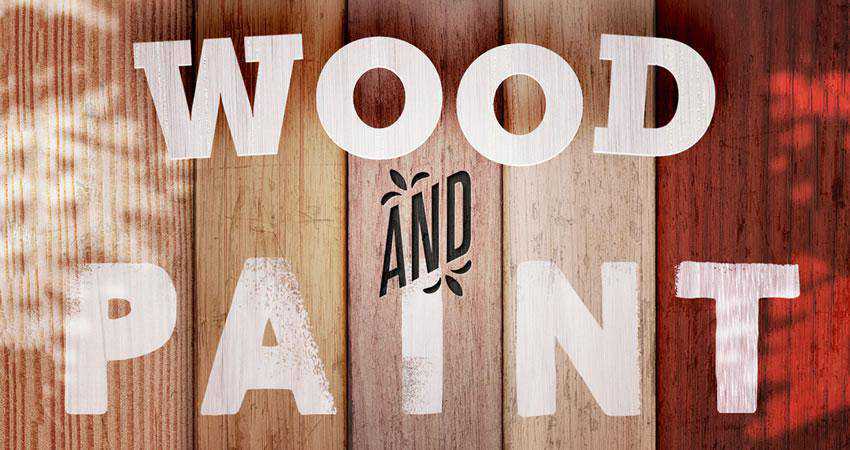
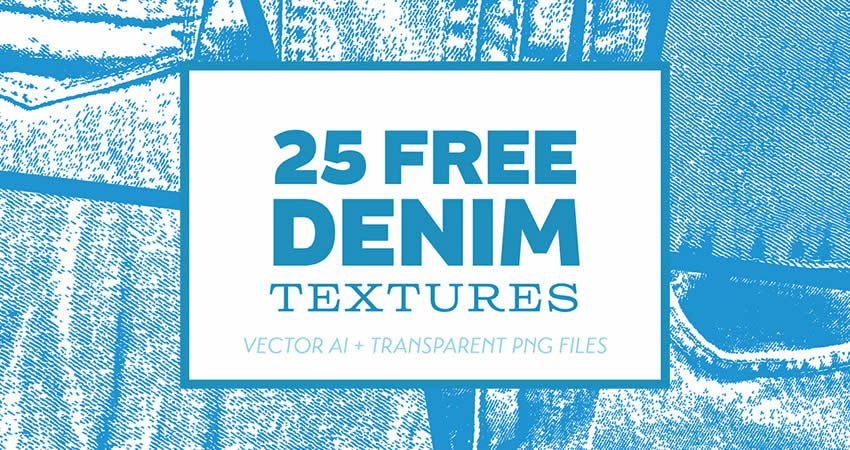
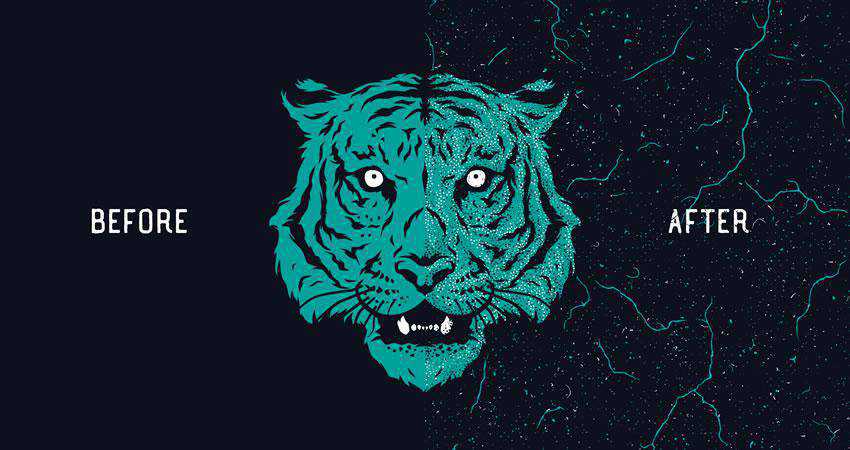
The number of options, directions, and aesthetic approaches you can take from simply adding a texture to your work is mind-boggling. Of course, not every design, photo, or video benefits from even the most subtle of textures, but you might be surprised at how a high-resolution texture can bring a design to life.
Knowing when to use a texture and which texture to use comes down to the flow of the design and the priority of information on the page. It is a good idea to keep certain textures in mind while working on a project, but don’t finalize them until you’ve seen the design as a whole.
Texture selection can be an involved and time-consuming process. Firstly, you have to search for that particular texture your design needs, and secondly, you have to test and tweak it to discover the one that actually works.
It is that search process we aim to help you with. We have a huge selection of free high-resolution textures for you today that are just shouting out for use in your next project.
Once you’ve found the perfect textures, integrating them is a straightforward process. Most photo and video applications allows you to overlay textures onto your artwork. You can then adjust their opacity and blending modes to achieve the desired effect.
Remember to consider the context of your project when choosing textures. Whether you’re creating a vintage poster, a modern website, or an artistic masterpiece, textures can be your trusty companions on the creative journey.
By understanding the role of textures and experimenting with their application, you can breathe life into your work and engage your audience on a whole new level.
While it is true that you can use very subtle, unobtrusive textures, you should also keep in mind that some textures can draw the eye more than just a solid color. This means that it’s best practice to use textures that create contrast and highlight areas of the page that are important.
We have the power to bend WordPress to our will. A little (or a lot) of custom code can make the content management system (CMS) do more. The sky’s the limit when it comes to functionality.
That’s quite a magic wand in our pockets. However, it does bring up a few key questions.
Do we go big when building plugins and themes for WordPress? Do we add all the bells and whistles and account for every potential use case? Or do we aim for the bare minimum – just enough to serve our needs?
I prefer the latter approach – start small and adapt as needed. That minimizes bloat and saves on future maintenance. It’s a hard-learned lesson.
The elephant in the room is that our needs tend to change. The plugin that once did the job may no longer do enough, while the theme that helped us achieve one look may not be flexible enough to adapt to a new one.
This is where a modular approach to development is valuable. It’s all about building to suit your current needs while planning for the future. Change is inevitable – so why not account for it now?
Let’s explore this different way to do WordPress development. We’ll cover the basics of what it is, how it looks, and how it benefits your workflow.
First, Consider Your Short-Term Goals
It’s easy to go down a rabbit hole during a development project. The finished plugin or theme might not resemble the idea you started with. We get sidetracked by shiny features and the quest to deliver more than advertised.
Our intent is noble. However, we also complicate our project by straying from the initial plan. Did we build something sustainable? How will we manage the code a year from now?
There’s a danger in going too big, too soon. For one, it can lead to sloppy code and structure. The impacts can be felt in performance and security. You could miss something important while attempting to squeeze more into your project’s timeline.
In addition, half-baked features could be a pain to work with down the road. Poor structure means bolting on additions or (gasp) ripping things apart and starting from scratch.
To avoid this fate, consider your short-term goals. Ask yourself:
What are the minimum requirements for the project?
What features do I need now?
How much time do I have to build this?
How much testing will I need to do?
The idea is to focus on what you need to achieve in the time you have. Anything beyond that can probably wait.
Get Organized to Prepare for the Future
The websites we build will evolve. Clients change their mind or have something new to offer. WordPress and the underlying technology of our sites also move forward.
That impacts our custom plugins and themes. There will likely be new features to add or changes to existing ones. It’s all part of the development lifecycle.
Using a modular approach helps when it’s time for a change. The first step is to get organized. Having a sound structure allows you to build logically and efficiently.
The WordPress developer documentation gives you a head start by outlining plugin and theme structure. Following these guidelines ensures a sustainable start to your project. That’s better than reorganizing a messy jumble of files and code.
For example, here’s the suggested plugin structure:
The ability to pick up where you left off is priceless. If you haven’t worked on that custom plugin for a few years, you might have difficulty remembering what you did and where things are. A well-organized plugin removes some of the guesswork.
Adding comments to your code also helps with organization. You’ll receive a high-five from your future self for documenting what each snippet does. It’s a small thing that makes a real difference.
The better your organizational skills, the easier it will be to maintain your work.
Add Plugin and Theme Features One at a Time
Sure, it would be cool if our plugin could do x, y, and z right out of the box. Perhaps that’s not realistic, given the budget and timeline. We don’t have to forget about those big ideas, though.
The priority is building something that works as intended. It should do what we outlined in our short-term goals. Once that is established, we can plan for those extra goodies.
Think of these features as items on a checklist where you can only do one at a time. Pick one, make it the best you can, and move on. That ensures your focus will be on the task at hand, rather than scrambling to fit puzzle pieces together.
Besides, trying to do all the things at once rarely works out. This is a difficult challenge for solo developers as there’s only so much time in the day. Not to mention those of us working on multiple projects.
Remember, good things take time. That’s why committing to a single task makes sense. Train your focus on one thing and do it well. The result will be improved quality and some mental clarity.
A Better Way to Build for WordPress
Every developer has a preferred workflow. We use our favorite tools and techniques to enhance our WordPress projects.
That individuality is both freeing and a bit troublesome. It’s great to write code how you want and when you want. However, a lack of foresight and organization can complicate things. It could lead to a buggy product that is a pain to maintain.
Starting with a modular approach is the cure for future chaos. Everyone benefits when every part of your plugin or theme has a place and purpose. You’ll love that you can find what you need with minimal effort. Clients and users will love that it works (even if they don’t realize it).
Writing code is challenging enough. The right approach can help you focus on getting it right.
Artificial intelligence (AI) can elevate your development workflow to the next level. The technology can perform complex and simple tasks – saving you time and increasing your earning power.
Nowhere is that more evident than in AI’s ability to write code. You tell your favorite tool what to do, and it generates the code. This is a boon to WordPress developers as you can create custom plugins with less effort. It’s like having an expert at your side.
That all sounds wonderful. But how does AI help developers in real-world scenarios? Is it capable of generating a decent solution without too much trouble? Let’s find out!
We’ll attempt to build a simple related posts plugin to give you a taste of what’s possible. We don’t expect it to compete with a commercial product. However, we hope to generate a functional piece of code; one that can be enhanced as needed.
What Do We Want Our Plugin to Do?
AI is powerful – but it can’t read our minds just yet. Thus, we should think about what we want to build beforehand. A well-defined prompt will produce better results.
Like any development project, it’s better to start with the basics. With that in mind, let’s consider the core functions of a related posts plugin. It should:
Scan the current post’s metadata, including categories and tags;
Search the site’s database for other posts with similar metadata;
Display links to a specified number of related posts at the bottom of the current post;
The idea is to build a plugin that performs these tasks – and nothing else. Once that is established, you can add more bells and whistles.
Let’s Get To Work
It’s time to see how much effort it takes for AI to produce our plugin. We’ll use ChatGPT for this exercise, but you can use the tool you like best.
We’ll test our plugin on a local site with a selection of Speckyboy posts we’ve imported. The content spans several WordPress taxonomies (categories and tags). It should show us how well the plugin connects the dots (or doesn’t).
Step 1: Write a Prompt
Here’s our prompt to ChatGPT that covers the basics outlined above:
Create a WordPress plugin that displays posts related to the current one. It should do the following:

- Check the categories and tags assigned to the current post;
- Search the site's database for other posts with similar metadata;
- Display links to 4 related posts at the bottom of the current one;
Within a couple of minutes, ChatGPT generates a related posts plugin. Here’s what it tells us about the code:
Here's a WordPress plugin that displays related posts based on shared categories and tags. It retrieves up to four related posts and displays them at the bottom of the current post. The plugin uses `WP_Query` to fetch related posts efficiently.

This plugin fetches and displays related posts by:

1. Checking the current post's categories and tags.
2. Querying the database for other posts with matching categories or tags.
3. Displaying up to four related posts at the bottom of the content.
Step 2: Review the Code
Now, let’s do a quick review of the plugin’s code. That allows us to see what it does and spot any potential issues.
Note that we made a few adjustments to the plugin header to match the desired name and author info. In retrospect, we could have asked ChatGPT to add this. Thankfully, the changes are minimal.
Regardless, here’s our code. We’ll highlight a few items of interest below.
A Bit of Security: The first thing we’ll highlight is a line dedicated to security:
if (!defined('ABSPATH')) exit; // Exit if accessed directly
This code prevents someone from directly accessing the plugin file. It’s a bit of obfuscation that helps protect your website.
Here are the arguments for our WordPress post query. This snippet tells our plugin to look in the 'post' post type and choose four related posts. It uses the post_not_in argument to ensure the current post isn’t included in the query. The orderby argument is set to 'rand' to select related posts randomly.
The plugin will output an unordered list of related posts. Each post’s link and title will be displayed. Notice the use of esc_html() to sanitize the title. That prevents any potentially dangerous code from executing.
Lastly, this snippet ensures the related post list displays at the bottom of the current post via the_content filter.
Step 3: Install and Activate the Plugin
Everything looks good so far. Next, we’ll copy the code generated by ChatGPT and place it in a file called speckyboy-related-posts.php. We’ll upload the file to the /wp-content/plugins/ folder on the test site. Finally, we’ll activate the plugin.
The plugin doesn’t produce any PHP errors, and our site didn’t break. We’ll consider that a victory!
Does Our Related Posts Plugin Work?
OK, we generated a plugin and installed it on our test site. It’s time to see if it works as intended.
To check, we’ll navigate to a blog post and hope a related posts list displays at the bottom:
Success! The plugin works well at first glance. There’s an unordered list of four related posts in the correct spot. Clicking each post reveals it shares a category and/or tag with the current post.
And the good news keeps on coming. Checking subsequent posts shows positive results. One or more taxonomies consistently match the current post. It may not be fancy, but it does the job!
We did notice an unintended side effect. Remember, our plugin chooses related posts randomly. Thus, refreshing the current post loads a fresh list at the bottom. That’s not necessarily a bad thing. It might benefit content-heavy sites, as it always gives readers something unique.
Finding the unexpected is part of the testing process. It’s an opportunity to refine and improve our plugin.
Taking Our Plugin to the Next Level
Our plugin works as expected and provides a solid foundation. But development doesn’t have to stop there. We can always add more features and advanced functionality.
We have a few ideas that could take this little related posts plugin to the next level:
Narrow the Scope of Related Posts
The current iteration looks for related posts that match a category and/or tag of the current one. That might be too broad for some use cases. Narrowing the scope of the search makes sense in this case.
We could limit matches to tags or even try to match keywords in the current post’s title. That could produce more relevant results. The downside? A more complicated search might mean a performance hit.
Improve Layout and Styling
The unordered list displayed by our base plugin is simple and accessible. There’s room for improvement, though.
For one, we could ask ChatGPT to create a card layout. That would look nice and neat on just about every site. In addition, we could add more post metadata such as featured images, publication dates, and excerpts.
A little CSS could also go a long way toward making the output look more professional. Hover effects would add some polish to the presentation.
Add a Settings Page
Our plugin has no settings. Adding a settings page could make it more flexible, though. A user might want to tweak several aspects of the plugin, including:
The number of related posts retrieved;
The post type(s) that should display related posts;
The criteria for related posts (taxonomies, keywords, etc.);
Posts or taxonomies to exclude;
It would be nice to have. However, plugin settings would also add a layer of complexity. Options must be saved to and retrieved from the site’s database. Plus, allowing user input comes with extra security responsibilities. That may not be desirable in every situation.
It’s a reminder to think about the consequences of each feature we add. Just because AI can do it, doesn’t mean we should ask!
AI Makes Building Plugins Easier Than Ever
It’s amazing to think about the speed at which AI produced our plugin. We went from a concept to a working prototype in about 10 minutes. It demonstrates the technology’s power and its level of improvement. Earlier versions of ChatGPT may not have been this efficient and accurate.
Granted, we weren’t trying to build the next WooCommerce. That’s still a bridge too far – especially when considering future maintenance and security needs.
Still, AI is adept at producing a simple plugin. Once you have that in hand, you can tweak it to your heart’s content. Adding features or making changes is a matter of writing a few prompts (or coding by hand, if you haven’t forgotten it yet).
Best of all, you can use these tools to your advantage. They’ll help you get projects done faster while expanding your development capabilities. It looks like the future is here!
Choosing a WordPress host is one of the biggest decisions a blogger can make. The right choice depends on what you, as a blogger, need. Publishing new content and pricing are very important, but so are speed, storage, support, and security, so they need to be considered.
Every host in this collection meets the needs of WordPress bloggers. They all offer managed WordPress hosting, built-in caching, daily backups, strong security, and easy-to-use dashboards.
Each provider answered a series of blogger-related questions (see the questions at the bottom of this page) that cover performance, pricing, migrations, uptime, user-friendliness, and many more features. So, this isn’t a review of personal experiences, as each host is ranked based on their answers and the needs of WordPress bloggers.
Pricing changes over time, so picking a host should start with features, not price. Some plans cost less but limit traffic or storage, while others charge more but include unlimited traffic or premium support. Bloggers should assess their needs first and then compare costs.
Whether running a small personal blog or a growing content site, the right host makes managing WordPress easier, keeps visitors coming back, and gives you the peace of mind to write your content without worrying about your WordPress installation.
A well-designed website isn’t just about words and visuals. It’s about efficiency, responsiveness, and seamless user experience. Without these elements, even the best content can fall flat.
Today’s designers must juggle creativity, functionality, and performance while keeping up with evolving tools and technologies. AI-powered and professional-grade tools can simplify this process, helping you work smarter and deliver high-quality results – without unnecessary friction.
The challenge? The sheer number of design tools available is overwhelming, making it difficult to pinpoint the ones that genuinely enhance your workflow. That’s why we’ve done the heavy lifting for you.
In this guide, we highlight 14 top-tier AI and professional tools that will streamline your design process, boost efficiency, and unlock new creative possibilities in 2025.
From Brizy AI and Mobirise AI for fast website generation to Slider Revolution for stunning animations and WoodMart for high-performance eCommerce, these tools cover a wide spectrum of web design essentials.
Explore the Tools That Match Your Workflow
If you’re curious about AI-powered design, try an AI website builder. Not as a replacement for your creativity, but as a way to speed up ideation and prototyping.
If you manage bookings or client scheduling, automation tools like Trafft and Amelia can eliminate repetitive tasks.
And if you want to take your visuals to the next level, LayerSlider and Essential Grid provide the advanced customization and interactivity you need.
What These Tools Bring to Your Design Workflow
AI-Driven Efficiency: Builders like Brizy AI and Mobirise AI generate site structures instantly, offering customizable templates at lightning speed.
Time-Saving Automation:Trafft and Amelia automate appointment bookings, while WhatFontis quickly identifies fonts, saving designers hours of searching.
Responsive & Scalable Design:Betheme, wpDataTables, and Blocksy ensure designs look flawless across all devices and screen sizes.
Customization Without Limits: Whether you need drag-and-drop flexibility (like in Slider Revolution) or advanced WooCommerce integrations (WoodMart), these tools let you tailor every detail to fit your vision.
Seamless Integration: These tools work smoothly alongside your existing stack, ensuring compatibility with WordPress, WooCommerce, and other major platforms.
Start Exploring
Browse through the descriptions of these AI and professional tools below. Or, jump straight to the ones that match your design and development needs.
However you work, these carefully selected tools will help boost your productivity, creativity, and efficiency in 2025 and beyond.
In Short: In seconds, Brizy AI can deliver a polished website that’s ready to be customized, drastically reducing design time in the process.
Click anywhere on the video to see this builder live.
You can get a website design off to a good start in 60 seconds or less when you have Brizy AI’s Powered website generation capability at your fingertips. Feed Brizy AI with basic information about your proposed design, and a few prompts later, you should have a website design that’s ready to customize.
Wondering what to do next? Demos such as Work Collaboration can give you some good ideas.
• Update Frequency: New demos are released monthly.
• Popular Brizy AI Features Include:
AI-Powered Regeneration: regenerate entire pages or individual elements – design and copy – with AI.
Google My Business Integration: Makes it easy for users to connect their Google profile to their website.
Seamless Integration: AI features are integrated into the website builder, a natural extension of the design process.
White Label AI Builder: A powerful service where developers can offer clients top-tier, fully branded technology.
• Rating: 4.1 out of 5 on Trustpilot, 4.5 out of 5 on G2, 4.6 out of 5 on Capterra.
• Client Feedback: “I love how simple Brizy is to use. I’ve used various platforms and web builders in the past, and Brizy gives a sense of ‘powerful customization with ease!’ It feels like a basic web builder with outstanding results.” – G2 review.
In Short: Trafft’s White Label option allows users to fully customize the platform with their own logo, brand colors, and domain name, ensuring a seamless and consistent brand experience for their clients.
Click anywhere on the video to see this booking software live.
Trafft provides both clients and customers with a smooth booking experience by automating an entire appointment booking process. Trafft’s booking software helps businesses save time and reduce administrative tasks. Trafft users can download the Barbershop demo for some great ideas on how to create attractive customer-friendly booking pages.
• Specific Trafft Features Include:
White Label Option: With white labeling, the Trafft brand remains completely invisible, making it appear as if the booking solution is an in-house, custom-built tool.
Multi-location/ Multi-service support: Users can manage appointments and schedules at multiple locations from a single platform.
Chatbox: Trafft’s AI Chatbot actively interacts with customers, automates booking requests, rescheduling, and cancellations, and provides instant answers to common inquiries – 24/7.
• Rating: 4.9 out of 5 on Capterra.
• Client Feedback: “Trafft has their trip together. The company regularly updates and expands their offer. Support answers questions via chat or email – quite a luxury these days. Four stars because it took me some time to understand the internal logic of the app: which options are where. It is mainly meant for companies who have employees, but as a solopreneur I have found my way.”
In Short: Mobirise AI is noted for its simplicity, multiple templates and website blocks to choose among, its ease of use, and its free use.
Click anywhere on the video to see this website builder live.
In addition to providing you with the ability to significantly speed up your web design workflows through the use of AI technology the selection of Mobirise AI demos, like the very interesting AI Marketing Assistant, offers some useful hints on how to build a better website.
The quickest way to learn more about Mobirise AI is to visit the website. You won’t encounter a list of features, not even an “About Us” page. Instead, you are invited to give a very brief description of a proposed website. Stand back and see the results!
• Mobirise AI can create entire pages or multi-page examples using prompts, for example:
Try “Choosing the Right Tools for Designing a Quality Website.”
Hit “Prompt”.
Enter your email when prompted to receive a password to open a free Mobirise AI account.
Receive several pages of content that provide an outline of possible subject matter.
Following the final page, you’ll receive more information on building an AI-generated website.
Multiple website blocks and templates to choose to make Mobirise AI exceptionally easy to work with.
In Short: Amelia offers customers a streamlined and convenient booking experience that enables businesses to bundle multiple services into cohesive packages while tailoring the software to their specific needs.
Click anywhere on the video to see this booking plugin live.
Automate your appointment booking and scheduling operation with Amelia and you will immediately notice a significant reduction in administrative tasks. Not long after that, the many benefits of providing all parties concerned with a smooth and friendly booking experience will become apparent. Amelia’s Scott Stevens Photography Portfolio demo shows what an engaging booking or signup page could look like.
Amelia is ideal for services-oriented businesses and agencies.
• Special Features Include:
A friendly UX: ensures quick system navigation for setting schedules and making and managing appointments.
Automated appointment and event booking that pleases clients and reduces the administrative burden on staff by managing appointments efficiently.
Customizing tools and options that allow businesses to tailor notifications to fit their brand.
• Rating: 4.9 out of 5 on Capterra.
• Client Feedback: “I am currently launching a new website which required an online booking system. After lots of research I decided to go with Amelia. I’m finding it really good and fairly easy to use. During the configuration stage, I have submitted lots of tickets to which all have been responded to. I have given it 4/5 as I think it has all the functionality I need.”
In Short: MapSVG has an advanced map editing feature with options that make it an ideal choice for any project requiring high-quality, informative maps.
Click anywhere on the video to see this map editing plugin live.
MapSVG’s customizable templates are flawlessly integrated with its embedded database and its variety of map types. These customizable templates, working in concert with the database and MapSVG’s advanced map editor with its many options, allow users to create information windows of whatever complexity they deem necessary to meet their requirements.
• Specific Features Include:
Enriched data visualization: MapSVG users can create multi-colored maps that use different colors to represent specific values in different areas in the map.
Store locator map: A business that has multiple stores throughout a given area or around the world can locate them on a map.
Land plot maps: Real estate agencies can gain an advantage when they have the ability to quickly and easily display land plots on a map.
AI Assisted Live Chat: Users can benefit from MapSVG’s Live Chat feature. The chat has an AI assistant that can answer all the basic questions. Live Chat is available 24/7.
In Short: Betheme is known for its more than 70 website-building tools, including BeBuilder, and its selection of 700+ responsive and customizable pre-built websites.
Click anywhere on the video to see this template live.
With Be Builder, WooBuilder, or one of Betheme’s pre-built websites, you can quickly build virtually any type of website for any niche. You can also create websites from scratch without coding since Betheme has the features you need to make that possible.
Most users like to get started with a customizable and responsive pre-built website. If you want color, animation, and counting in your website pages Betheme’s Be Lottie example with its Be’s Lottie Animation feature will help you get off to a great start.
Betheme is well known for its impressive selection of website building tools, aids, and options that include:
Be Builder: Be Builder has been completely rewritten and is faster and more efficient than ever.
Layouts configurator: For portfolio, blog, and shop pages. Build custom layouts and assign them easily for specific pages.
Parallax effect: Create stunning & modern pages with a smooth parallax effect that everyone will love.
WooBuilder: The WooBuilder, together with 40+ WooCommerce demos makes creating an online store fast and easy.
Elementor ready: Betheme is fully compatible with Elementor with over 30 unique elements and 120+ dedicated pre-built websites.
• Update Frequency: New demos are released monthly.
In Short: Upload any font image (including a Google font), wait >10 seconds, and the font will be identified with 90% accuracy.
Click anywhere on the video to see this font identifier live.
WhatFontis is used by designers who are paid for their work and creative types and others who work for fun. In addition to having a huge 50,000 daily users, WhatFontis is also the world’s largest free and commercial font identifier.
• Working with WhatFontis involves:
Font Identification: From its database containing roughly one million fonts, WhatFontis is capable of identifying free and commercial fonts and identifying fonts across all foundries, including Google fonts. Note that WhatFontis identifies fonts, it does not offer or provide them.
Extreme user-friendliness: With a Chrome extension, it is simply a matter of right-clicking on a text image and uploading it for font identification.
Fast response: A list identifying 60 of the closest matching fonts will be provided in 10 seconds or less. The system can even list 10 similar free fonts for every commercial font.
Accuracy: More than 90% of submitted fonts are accurately identified. The WhatFontis community can often help to identify some of the remaining 10%.
AI: AI ensures that the system is quickly able to identify a font.
• Update Frequency: New fonts are incorporated for identification regularly.
In Short: LayerSlider empowers its users to design anything and everything from sleek sliders and captivating slideshows to interactive popups and dynamic, animated web content.
Click anywhere on the video to see this plugin live.
Not all that long ago, LayerSlider became the best known premier slider plugin. LayerSlider has since transformed itself into a creative tool for WordPress, the ultimate creative tool according to many. With LayerSlider, you can turn a design idea into a stunning, visitor-engaging work of art.
LayerSlider’s extensive template library showcases the endless creative possibilities at your fingertips. The Sculptor demo, for example, features an impressive combination of smooth scrolling effects, dynamic layering, and visually captivating animations.
• Key LayerSlider Features Include:
Project Editor: With real-time live preview, intuitive drag-and-drop editing, advanced layer animations, and seamless access to online services, the Project Editor provides a complete toolkit for visual content creation.
Advanced Add-Ons: LayerSlider’s selection of advanced add-ons enhances its user’s ability to meet diverse project needs. Custom 404 pages & Maintenance Mode are particularly popular.
Marketing Popups & Banners: It is easy to create animated popups and banner content for marketing purposes in mere minutes.
• Update Frequency: Yes, typically every two weeks.
• Client Feedback: “I’m no coder, but LayerSlider made it so easy to create professional-looking animations. My website looks 10x better now!”
In Short: wpDataTables is perfect for those tasked with managing large amounts of complex data from diverse sources and presenting the findings in informative tables and/or charts.
Click anywhere on the video to see this data management plugin live.
The integration of WooCommerce into wpDataTables enables users to create easily customizable product tables. This top feature provides tools needed to manage product listings, display variable product options, filter and sort products, and apply frequently used customer-centric actions.
Demos reflecting these capabilities are a popular addition to the wpDataTables user toolkit. Cycle Shop is one example of the usefulness these demos can be to web designers.
A list of the most important wpDataTables features could take up an entire page. Those that become readily apparent to wpDataTables users for the first time include:
Robust Filtering, Sorting, & Search Options: These options make it easy for users to explore and analyze data.
Multiple Database Connections: This feature enables users to aggregate, manage, and display data from diverse sources.
Large Dataset Handling: wpDataTables easily manages thousands or millions of rows of data with ease.
• Rating: 4.6 out of 5 on WordPress
• Client Feedback: “wpDataTables is an amazing plugin. I am constantly using this plugin on my site. The features allow me to quickly create attractive tables, including from central data sources. I have hundreds of data tables, many of which are linked to Google Sheets.”
In Short: With Blocksy you’ll find an extensive number of features, a large number indeed, for a free version, making it easy to determine if it’s the right version for you.
Click anywhere on the video to see this template live.
With its speed, lightweight design, and extensive customization options, Blocksy could be exactly what you need to create your online store. Because of Blocksy’s deep integration with WooCommerce, you won’t be loaded down with plugins to achieve the functionality you are looking for, and demos like the e-Bike starter site available to Blocksy Pro subscribers, can get your site-building project off to a rapid start.
• Update Frequency: New demos are released monthly.
• Key features include:
The Content Blocks feature: a powerful feature that lets you insert content anywhere in your website at any time.
The Header and Footer Builder: Each header element in Blocksy is meticulously designed to offer a wide range of customization options.
Client Specific features: include hooks, actions, and filters for developers, popup builders for marketers, and custom templates for designers.
WooCommerce General Menu: helps users find options for customizing online store accounts, checkout and cart pages, and Shop Extra extensions.
• Rating: 5 out of 5 (based on 847 reviews).
• Client Feedback: “The plugin has everything I need for a publishing website. It is highly adaptable and offers a multitude of solutions beyond what initially appears. The support provided was prompt, concise, and extremely helpful.”
In Short: Slider Revolution’s fully customizable visual effects and animations allow beginners and professionals to create website designs that range from quite attractive to absolutely mind-blowing.
Click anywhere on the video to see this plugin live.
Slider Revolution will be a welcome addition to your design toolkit, whether you are creating new websites or upgrading existing ones. The plugin’s combination of full customizability of visual effects and animations enables professional designers to create mind-blowing visual effects. First-time users will also do just fine, perhaps with a little help from a demo like the Electronic Deals Extravaganza.
• Clients Love These Specific Features:
Developers: Developers are offered motivating approaches to content creation.
Marketers: Slider Revolution gives Marketers full control over their marketing content.
Web Designers: Designers can create new and innovative designs that stand out from the pack.
Developers: Developers are provided with exciting approaches to content creation.
• Update Frequency: Monthly.
• Client Feedback: “I remember Slider Revolution stood out straight away as being one of the coolest plugins visually. But obviously, there was a fee. So, I went down the route of looking at some cheaper or free ones. But putting our visuals together with them didn’t look great. I remember it looked good in the plugin, but when it went live, I was like, ‘Oh, that looks a bit cheap’. So, I went back to Slider Revolution at that point.”
In Short: Essential Grid saves you time while helping you create any responsive gallery layout you envision.
Click anywhere on the video to see this plugin live.
Essential Grid’s top feature is its collection of 50+ customizable templates. You are likely to find exactly what you need in this selection, but if not, you can put Essential Grid’s visual skin editor to good use to create the layout you have in mind.
Essential grid is a great destination for designers of blogs, portfolios, and galleries. A well-chosen layout with special effects can produce results like those shown in Essential Grids Grant Fuhr blog grid for WordPress demo, to results that can be absolutely mind blowing.
• Special features include:
A Drag and Drop Builder: when you are tasked with building a gallery in minutes.
Coding: For those (most of you) who are not in the business of building things from scratch, you can create any gallery design you have in mind without writing any code.
Grid Layouts: Impressive, even masonry and cobble layouts are available and typically suffice, but you can always design your own.
• Rating: 4.85 out of 5 on Trustpilot
• Client Feedback: “Rashid is the reason! He did an amazing job keeping me informed as to the progress of my ticket issue. He also was successful in fixing the problem quickly!”
In Short: Hongo is a Shopify AI-powered theme that is ideal for any type of business that features a product line or services.
Click anywhere on the video to see this template live.
Hongo’s most popular features are its customization options, although users will tell you that the theme’s overall design quality is quite impressive. Although Hongo lacks AI-specific features, its integration with Shopify gives it access to multiple Shopify AI features. This Hongo Shopify demo is an example of what Hongo can offer its users.
• Update Frequency: 2 or 3 times a year.
• Users Find the Following Features to be of Particular Value:
Product Listings: A multiplicity of creative and user-friendly product listings and product details are available to choose from and implement.
Mobile Bottom Navigation: This feature makes access to search, shop, and cart easily accessible.
• Client feedback: “I recently purchased this theme, and I am really happy with it. It is really a good investment for the price. There are a lot of customization options, features that are not found on other themes and allows you to have a really professional online store. The few problems I had were resolved quickly by the support who responds quickly. It is the best theme I have been able to use so far.”
In Short: WoodMart users love the selection of high-quality demo websites and well-structured design options to work with.
Click anywhere on the video to see this template live.
There’s a Woodmart demo that can help you with any website niche you plan to design. The WoodMart Landing Gadget demo’s appealing yet straightforward layout can be customized to display any product group. All that’s required of you is to have your own content ready, and away you go!
WoodMart excels in projects involving smaller stores, multi-vendor marketplaces, high-volume stores, and creating innovative storefronts. Since it is a WooCommerce theme, you won’t need to search for plugins to help you create your store.
Update Frequency: Monthly
• Key features include:
Custom Shop Layout Builder: This builder is loaded with client-specific and customer-centric shop features.
Performance optimization: settings are located in the easy-to-navigate Theme Settings feature.
Support: The Woodmart team is ready and willing to go to great lengths to give you whatever assistance you may need.
White Label: There is a White Label option for developers.
After exploring this curated list of top AI-driven and professional website-building tools, did you find one (or more) that could elevate your work in 2025?
Striking the perfect balance between creativity and functionality is no small feat – especially with an overwhelming number of tools available. That’s why we’ve narrowed it down to 14 standout options, each carefully selected to help you design and build with greater efficiency and impact.
Why These Tools Matter:
Innovation: AI-driven tools leverage smart prompts to streamline website creation and enhance workflows.
Responsive Design: Build layouts effortlessly optimized for mobile, tablet, and desktop experiences.
Efficiency Boosters: Automate tedious tasks, speed up production, and reduce costs.
Seamless Integrations: Enjoy smooth compatibility between themes, plugins, and design systems.
Limitless Customization: Tailor every detail to align with brand identity and project goals.
Take the next step – dive deeper into the tools that caught your eye, explore their capabilities, and see firsthand how they can refine your design process. Whether you’re looking for automation, flexibility, or cutting-edge AI assistance, these tools are here to push your creative potential further than ever.


 – Speckyboy")