
As AI becomes increasingly integral to business operations, new safety concerns and security threats emerge at an unprecedented pace—outstripping the capabilities of traditional cybersecurity solutions. The stakes are high with potentially significant repercussions. According to Cisco’s 2024 AI Readiness Index, only 29% of surveyed organisations feel…
How AI Changed My Web Development Workflow – Speckyboy
We’re still in the early days of artificial intelligence’s (AI) introduction into web development. The technology initially seemed like a gimmick (or a death sentence, depending on your point of view).
I have wrestled with what AI means for our industry during this time. There’s potential to make our jobs easier. However, there are also questions about where these large language models (LLM) get their data and how accurate they are. Not to mention the eerie feeling of replacing humans.
Is the glass half empty or half full? Perhaps we won’t know for a few more years. New tools and technical evolutions are sure to come.
One thing I can say is that AI has changed my workflow. And it’s about more than saving time. Tools like ChatGPT and GitHub’s Copilot have also changed how I approach development projects.
Here’s a look at how AI has impacted me so far. I hope you see a thing or two that resonates.
A Solution to Coding Challenges
I’ll admit it: I’m not the world’s best coder. My experience with PHP and JavaScript is riddled with fits and starts. I tend to make some progress – only to run into a debugging nightmare. It’s those little things that get in the way, you know?
AI tools have, for better or worse, saved me from scouring Google for solutions. I can paste the offending code snippet into ChatGPT, and it will explain where I went wrong. It will even provide a corrected version.
Issues such as syntax errors aren’t easy to spot with the naked eye. Code editors can point them out but don’t often provide easy-to-understand suggestions. AI acts like an extremely patient friend who holds your hand during these tough times.
I feel guilty for contributing to the decline of traffic to Stack Overflow and similar communities. On the other hand, finding quick answers has lowered my stress levels.
This feature is invaluable for freelancers who work solo. It’s like having a colleague on hand, 24/7. And even when the answers aren’t 100% accurate, they usually lead you in the right direction.

A More Holistic Approach to Development
Time is always of the essence when doing custom development work. Budgets are limited, and deadlines are short. Sometimes, this leads to a result that isn’t as good as it could be.
There’s also a tie-in with limited coding skills. It’s hard to build a top-notch feature when you spend most of your time debugging. I find myself rushing to get things done rather than polishing them.
AI has made a huge impact in this area. Its ability to quickly write code and solve problems allows me to approach projects differently. I can take a holistic view that encompasses how things should look and work.
The experience has been freeing. My focus has changed to implementing and then improving my code. There’s room to add details that make for a better user experience. I also have more time for quality control.
If anything, AI has brought some clarity to my usually-scattered mind. Working step-by-step through a project is easier than ever.

A Newfound Confidence in What’s Possible
Custom development has always scared me. I often doubted something was possible until I made it work. Funny as it sounds, having AI’s help at my disposal has improved my confidence. I no longer cringe as much when a client asks for something I haven’t done before.
That doesn’t mean the build process will be worry-free. There will still be bumps in the road and unexpected challenges. However, combining AI with my existing knowledge empowers me to determine the best way forward.
I think this is another side effect of working solo. Each task feels like climbing a mountain when doing it alone. Having access to the right resources helps to ease the burden.
To be clear, I don’t equate AI with a human developer. People are much better at things like planning and critical thinking.
Machines can’t yet compete in that realm. They provide an extra depth of knowledge and boost productivity, though. That makes a big difference when you’re used to doing it all yourself.
It makes me feel like I can take on projects I might have turned down before.

AI Provides a Helping Hand When I Need It
Believe it or not, I don’t use AI every day. Most of my web design and development work originates from my imperfect brain. As does 100% of my writing. I’m happy to keep it that way.
However, I have experienced numerous occasions where an extra bit of help is appreciated. That led to a lot of frustration in the past. Having neither the time nor money to hire an expert for small tasks caused a lot of headaches.
That’s where AI has been most useful. Writing a WordPress function or manipulating the DOM with JavaScript can be accomplished with minimal effort. They’re no longer sticking points that hold me back.
In the end, that’s what tools are supposed to do. We use them to do more in less time. The tools may change, but the concept remains the same. Maybe AI is just the latest in a long line of them.
Related Topics
Top
UK Government signs off sweeping AI action plan
AI is set to become a cornerstone of the UK’s vision for economic and societal renewal with a sweeping action plan unveiled today by Prime Minister Keir Starmer. The government has committed to all 50 recommendations outlined in the ambitious AI Opportunities Action Plan created by…
Meta accused of using pirated data for AI development
Plaintiffs in the case of Kadrey et al. vs. Meta have filed a motion alleging the firm knowingly used copyrighted works in the development of its AI models. The plaintiffs, which include author Richard Kadrey, filed their “Reply in Support of Plaintiffs’ Motion for Leave to…
Microsoft releases Phi-4 language model on Hugging Face
Microsoft has officially released its latest language model, Phi-4, on the AI repository Hugging Face. The model is available under the permissive MIT licence, allowing broad usage for developers, researchers, and businesses alike—a significant step for democratising AI innovations. Unveiled in December 2024, Phi-4 has been…
NVIDIA advances AI frontiers with CES 2025 announcements
NVIDIA CEO and founder Jensen Huang took the stage for a keynote at CES 2025 to outline the company’s vision for the future of AI in gaming, autonomous vehicles (AVs), robotics, and more. “AI has been advancing at an incredible pace,” Huang said. “It started with…
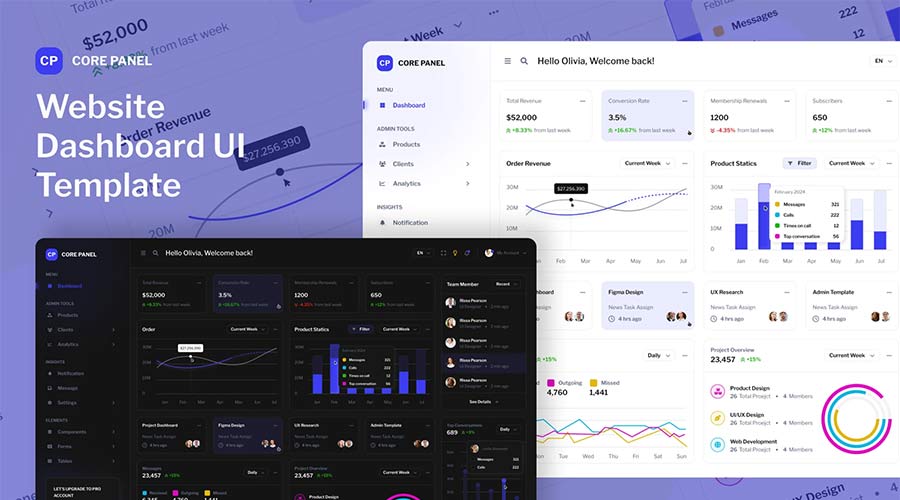
20+ Free Admin Dashboard Templates for Figma – Speckyboy
A great dashboard is both attractive and informative. Users should be able to get what they need effortlessly. The look should be clean and easy to understand. The result is something users want to visit time and again.
Designing a dashboard from scratch is a huge task, though. Things can get complicated in a hurry with so many widgets competing for attention. Who has the time to deal with all of this?
That’s what makes a Figma template so helpful. A beautiful and functional design is already in place. There are also components for you to use, duplicate, and customize. That means your project will be off to a running start.
Does it sound like something you could use? If so, check out our collection of free admin dashboard templates for Figma. There are options here for virtually every use case. Choose your favorite and get started!
You might also like our collection of web and mobile UI templates for Figma.
Give users an easy-to-navigate experience with this Figma UI template. It features a high-contrast color scheme, beautiful design components, and outstanding typography. Use it, and you’ll have a professional-grade dashboard in no time.

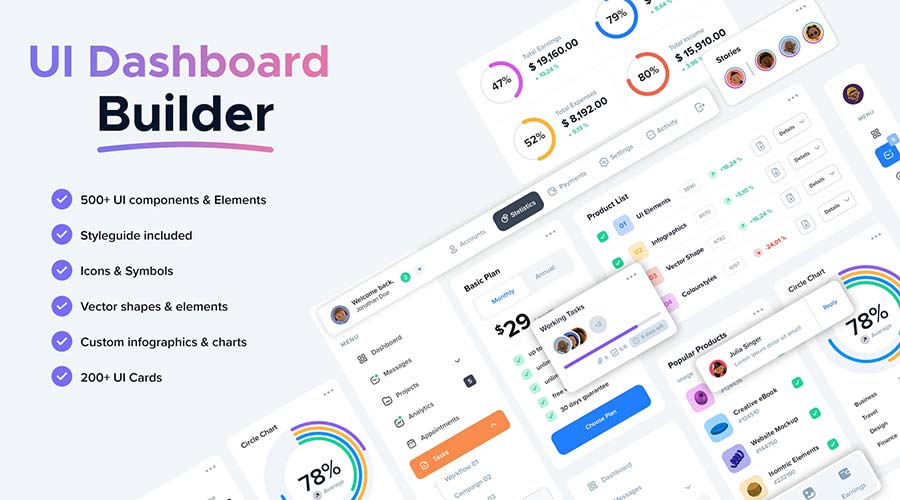
Download this Figma dashboard template and gain access to over 500 UI components. You’ll find charts, buttons, card layouts, navigation bars, and more. It provides the ultimate flexibility for your project.
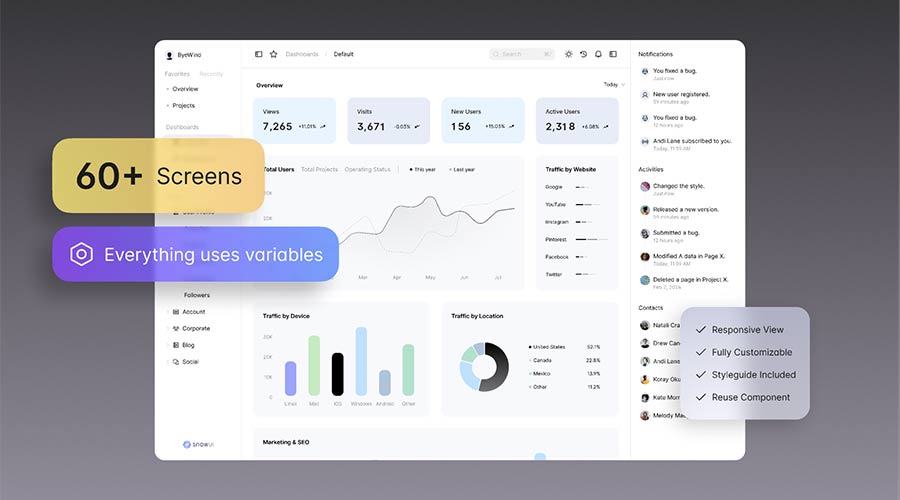
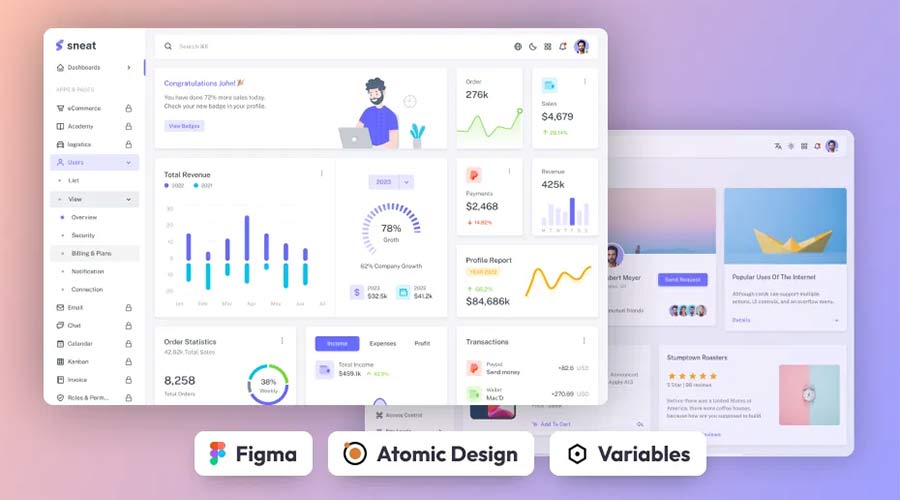
Here’s a UI kit that includes everything you need to build a dashboard layout. It includes multiple screens in both light and dark modes. It also uses Figma variables for easier customization.
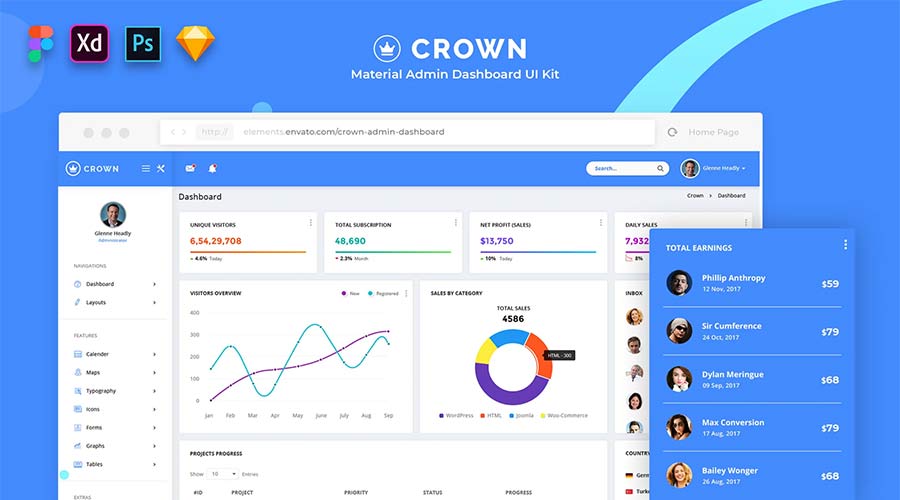
Crown is a dashboard template inspired by Material Design – Google’s open-source design system. This step makes everything seem intuitive and familiar. The components are colorful, and the layout is roomy.
This open-source dashboard template was designed to work with React. The package includes several templates and components with light and dark versions. It’s a versatile choice for building web applications.
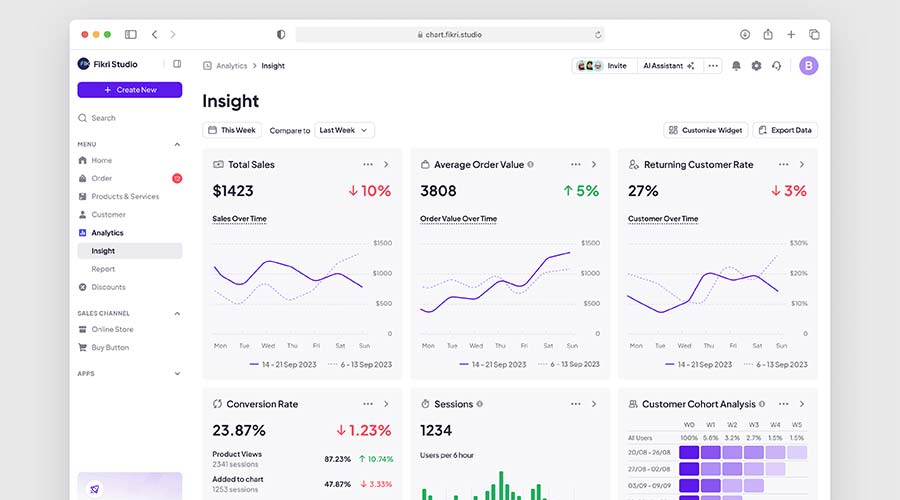
Create an analytics-focused dashboard using this Figma template. It features a modern aesthetic and support for multiple color schemes. The template uses layers, making it easy to customize to suit your needs.
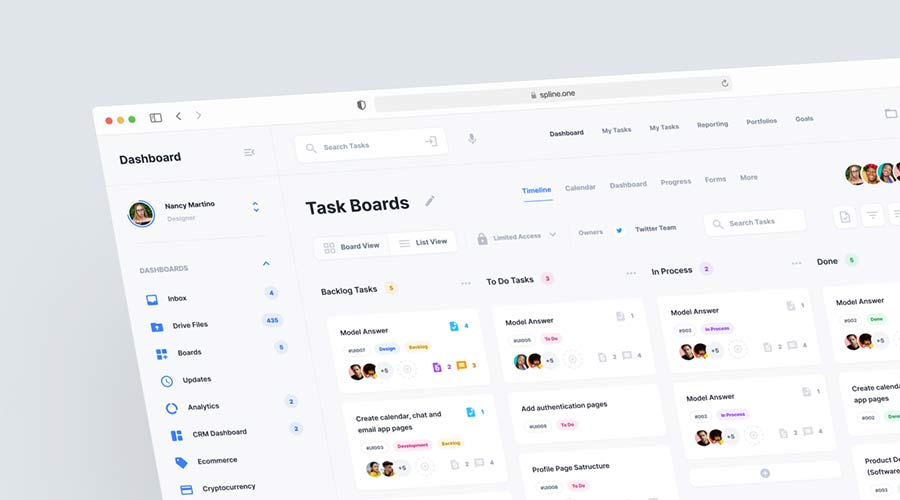
Kanban boards are great for organizing information for individuals and teams. This Figma template uses the concept to help you build a task management app. Use its clean design to improve communication and stay focused.
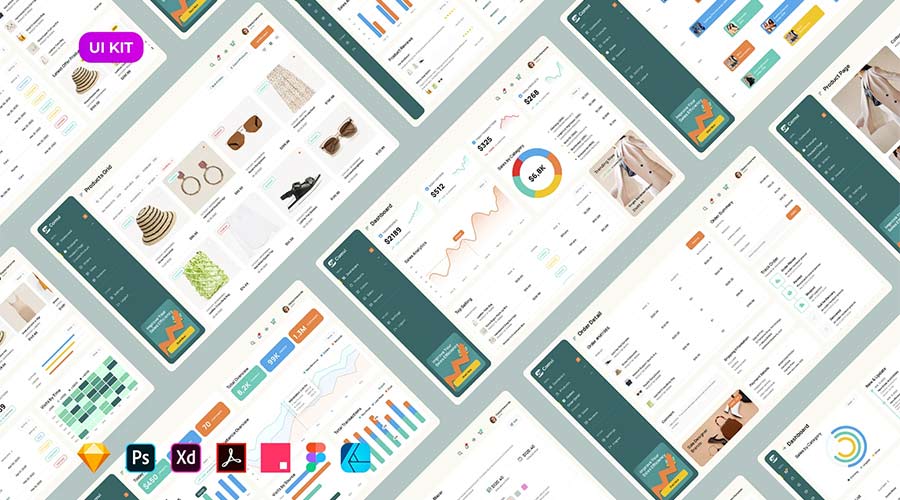
Sales Analytics Dashboard UI Kit has 16 predesigned screens for different use cases. You’ll also find plenty of widgets, well-organized layers, and an easy-to-customize setup. It’s also built for accessibility and meets WCAG 2 requirements.
The components included in this UI kit will make your dashboard project a breeze. It’s all here: dropdowns, modal windows, navigation, charts, form elements, and more. Use them to build a custom application that’s beautiful and functional.
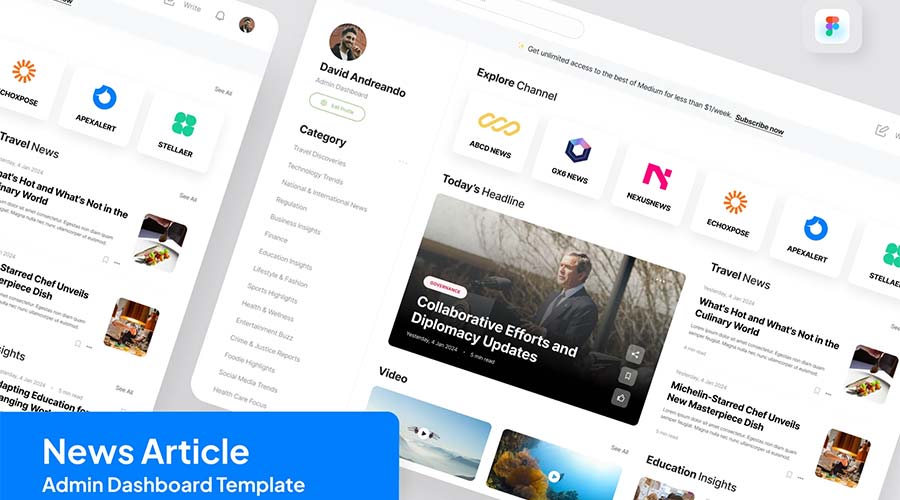
Here’s a different take on the traditional dashboard screen. NewsNet focuses on content more than statistics. That makes it a great choice for company intranets or personalized web portals. There are several creative possibilities here.
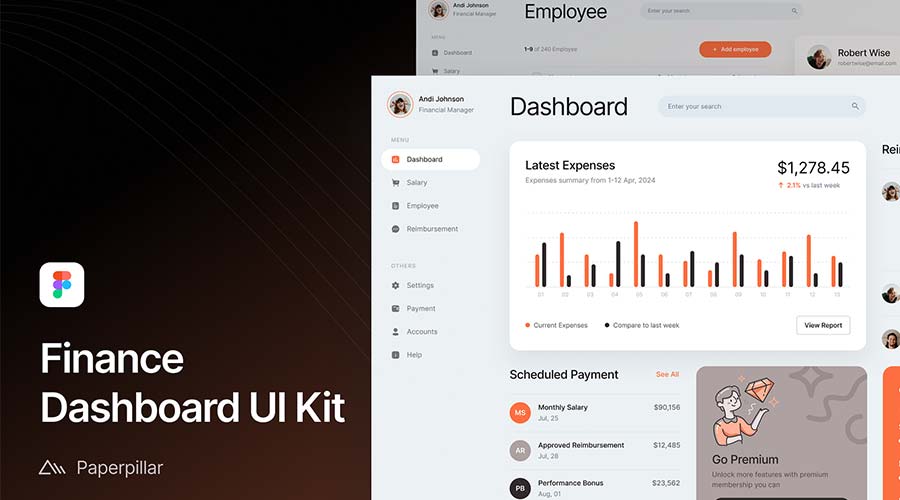
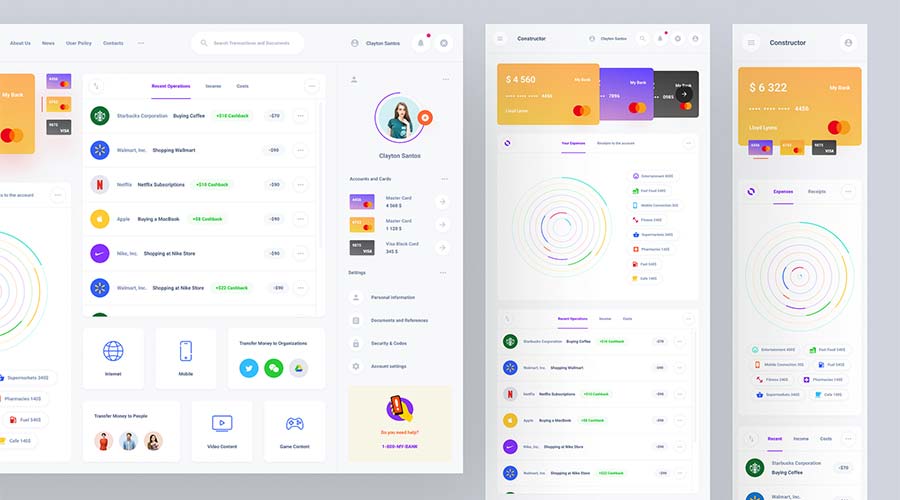
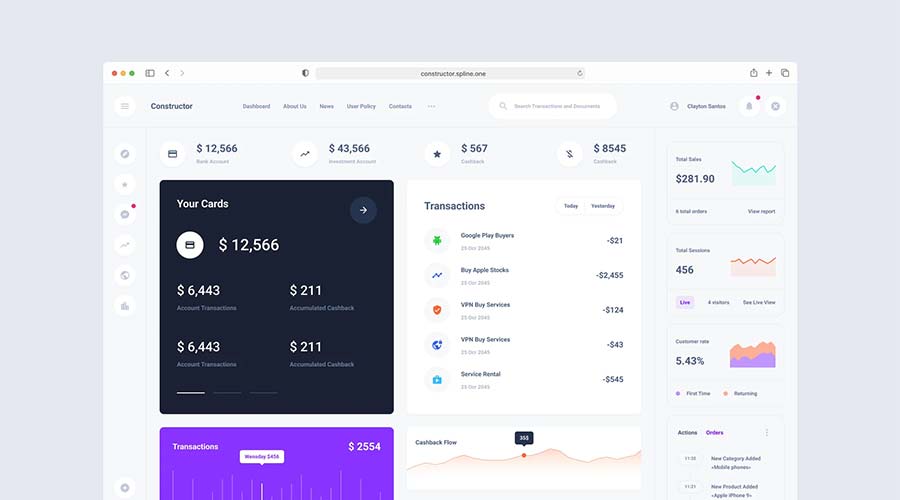
This free dashboard UI kit focuses on finance. You might use it for a company’s accounting department or as part of an employee portal. The design is clean and easy to read.
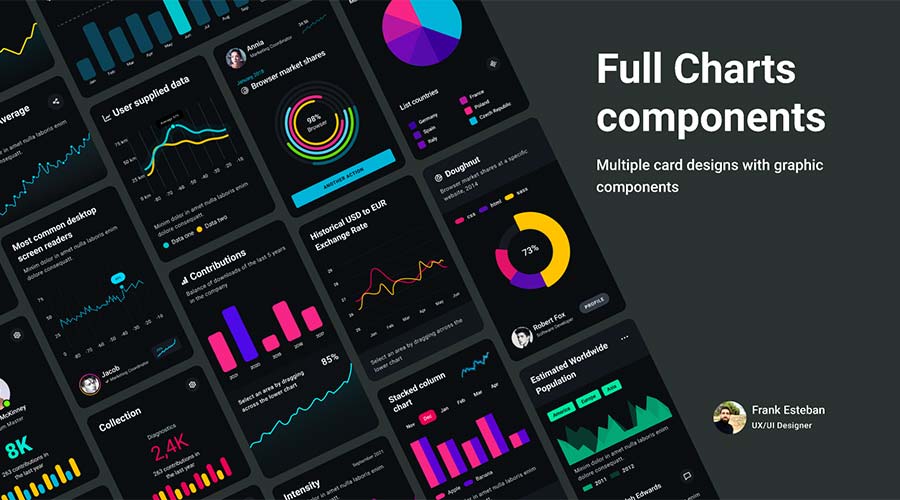
Create a custom dashboard layout in minutes using these beautifully designed component cards. Mix and match them to display an array of stats and info. These colorful cards are flexible, and many include crisp graphics.
This stylish template is perfect for use as an analytics dashboard. It includes all the basics in a simple and colorful layout. Customize it to your heart’s content. You’ll save time without sacrificing quality.
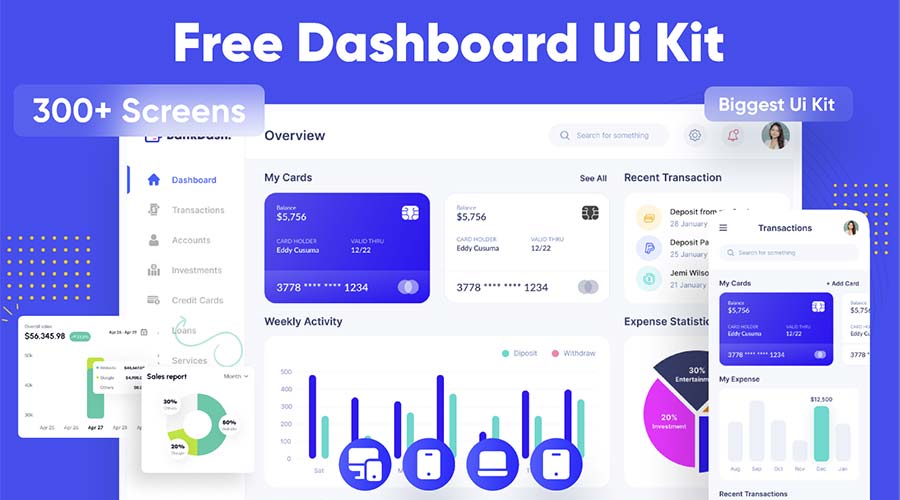
BankDash is a free dashboard UI kit that includes over 300 screen layouts. It uses the latest Figma features such as variables and auto layout. That makes it a fit for virtually any type of project.
There’s a lot to like about this free dashboard template. It’s clean, colorful, and includes mobile and desktop viewports templates. You’ll find plenty of resources to get your project off the ground.
This free Figma dashboard template includes plenty of ready-made components. Each can be customized to fit your content and color scheme. Pick your favorites and build a user-friendly interface!
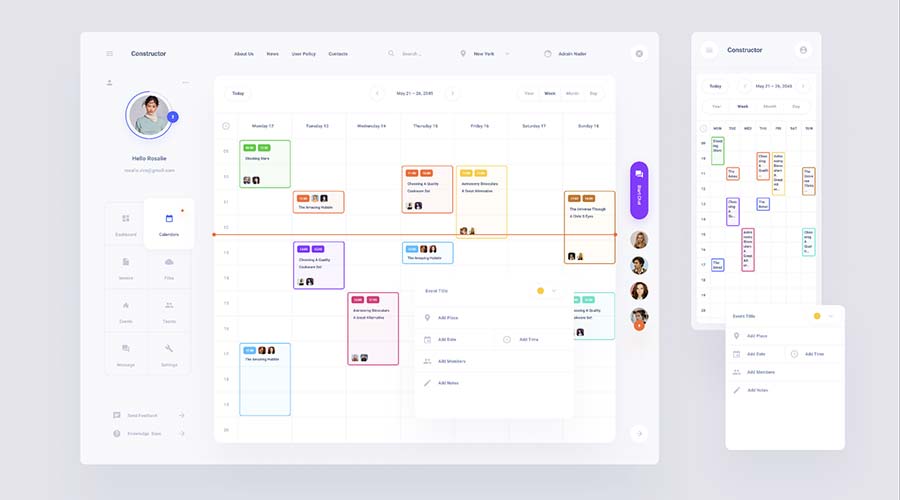
Do you want to build a collaborative dashboard? This calendar UI template will give you a terrific head start. It includes views for mobile and desktop. In addition, it outlines tasks in an easy-to-follow format.
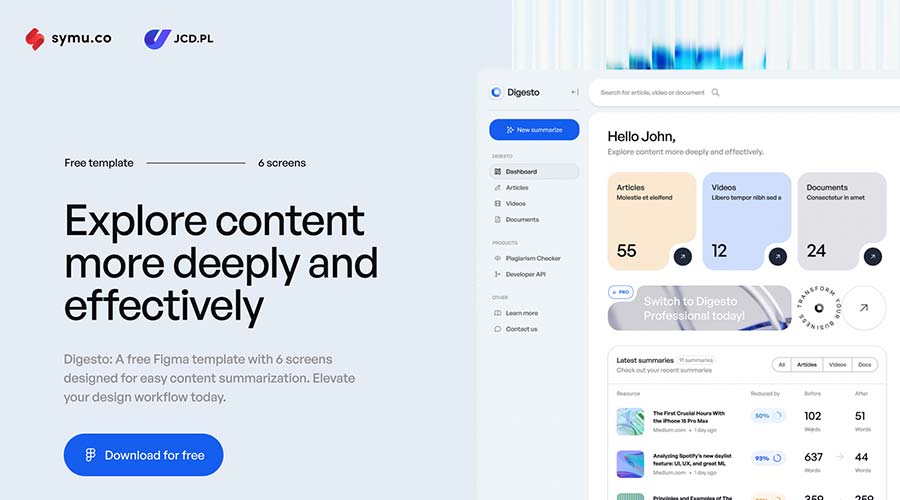
Digesto is a dashboard template that focuses on content organization. It’s perfect for user portals, client reputation tracking, or any project where media is front and center. The template includes six screens and several attractive components.
This free open-source admin dashboard kit includes an atomic design system. The template features UI elements like tables, charts, forms, etc. You’ll also have access to light and dark versions in an easy-to-edit package.
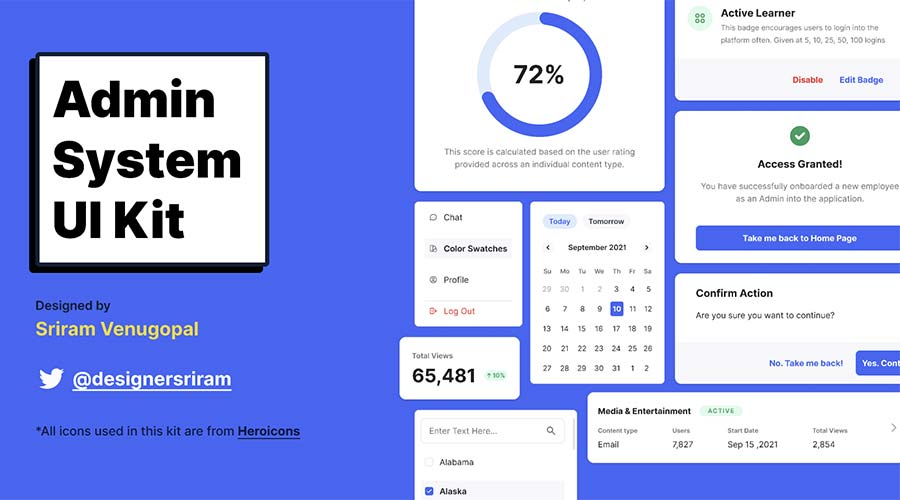
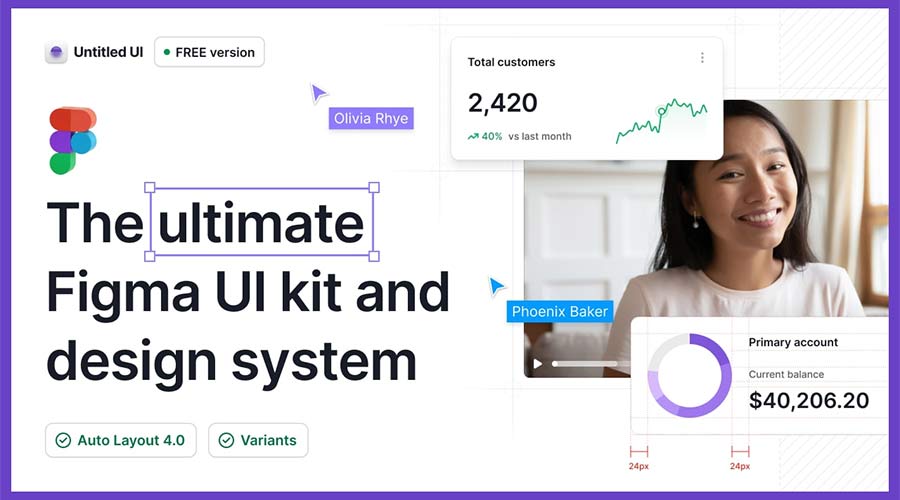
With more than 350 global styles and 10,000+ components, Untitled UI is a powerful package. That provides plenty of options for building a dashboard to match your needs. If you can dream it, you can do it.
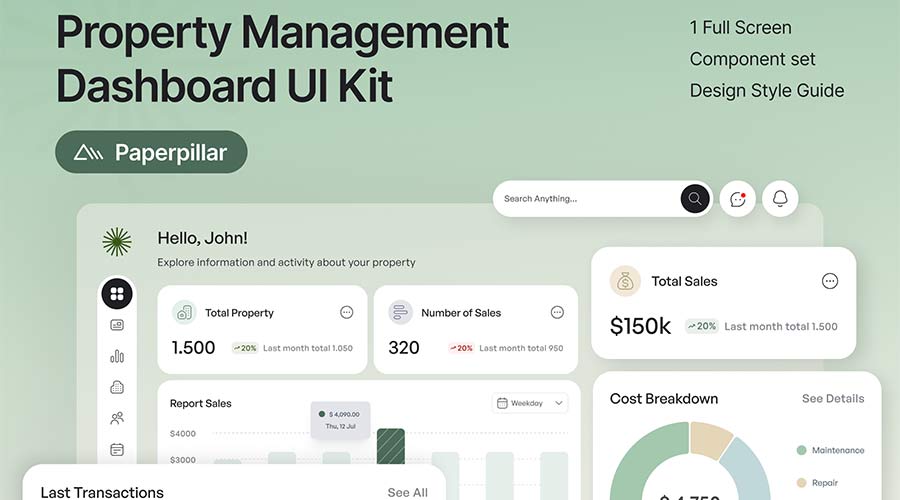
Use this dashboard UI kit for real estate and property management projects. Its well-organized layout will help users stay on top of their tasks in style. The kit includes one screen, a component set, and a style guide.
Form UI Kit uses a monochromatic color scheme to enhance legibility. It includes all the basics to build an attractive and functional dashboard. There’s enough here to cover a variety of needs.
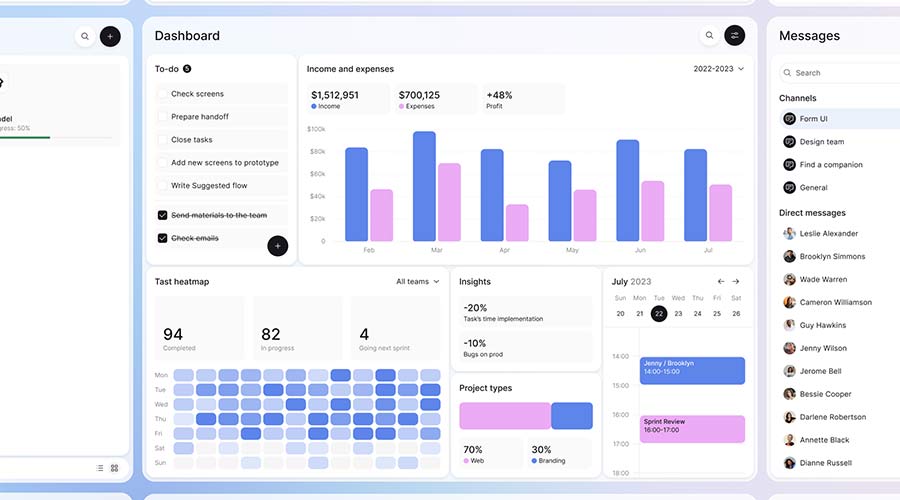
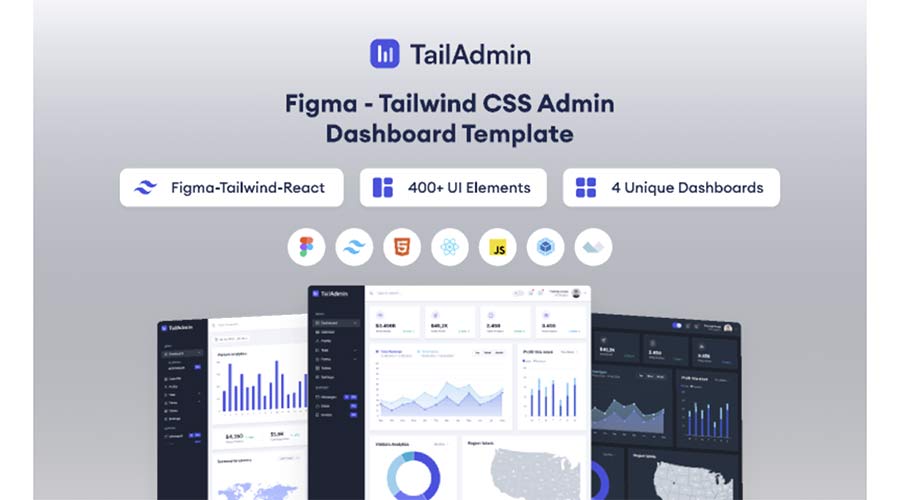
Users of Tailwind CSS will want to check out this admin dashboard template. The kit includes four distinctive dashboard layouts and over 400 UI elements. It’s a great way to combine the popular CSS framework with your dashboard project.
Build a Beautiful Dashboard in Less Time
Dashboards are among the most important and most difficult design projects. Users depend on them to perform tasks and gather information. However, building an effective one requires excellent attention to detail.
The templates in this collection are designed to make your job easier. They provide a solid foundation to build upon. The design and layout are taken care of. That allows you to focus on executing your plan.
Now that you have so many outstanding templates within reach – what will you build?
Related Topics
Top
10+ Explainer Toolkits & Templates for After Effects – Speckyboy
Working with clients and colleagues often includes explaining various concepts. Subjects like SEO, technology, and marketing are prime examples. After all, knowing how something works helps people make smart decisions.
Video is the perfect medium for breaking down these complex concepts. It allows you to narrow the focus to key talking points. You can also add illustrations and animations to provide visual reinforcement for viewers.
Creating such a video is a challenge in its own right. Starting from scratch means mapping out a storyline, adding effects, and polishing your presentation. That’s a lot of work. And what if you’re not an expert video editor?
The solution is using an After Effects template. They include everything you need to create a compelling explainer video. Take advantage of their professional layout and transitions. Then, customize it to fit your subject. It’s that easy!
We’ve put together a collection of 10+ explainer toolkits and templates for After Effects. Take a look and find one that matches your needs.
Add a touch of fun to your video with Stickmania. The template features a delightful stick figure to introduce segments and help with your explanations. It includes 38 scenes, along with a dozen transition effects.

Big and bold, this package includes six title sequences to enhance your tutorial. The grunge styling looks great on backgrounds and animations. A simple layout makes this one perfect for use in step-by-step videos.

This corporate explainer toolkit offers plenty of materials to create your presentation. You’ll find 18 scenes, 15 titles, plus lots of animations and transitions. It’s suitable for virtually any video project.

Explaining your ideas is as simple as waving your hand with this template. An animated hand introduces segments and brings a human touch to your video. Combined with bold text, it’s sure to get viewers’ attention.

Use this template package to share your contact information with viewers. Fun animations are there to reinforce your custom content. It might be a good fit for the end of your video presentation.

SEO (Search Engine Optimization) isn’t the easiest subject to explain. It’s intricate and full of ifs and buts. This video template for After Effects can help make your job easier. It’s built with SEO in mind and includes plenty of infographics to get you started.

There are over 30 “helping hands” included with this toolkit. Use them to introduce concepts and entice viewers to take action. The result will be a fun, easy-to-understand explainer video.

This template includes a variety of assets like banners, badges, icons, and backgrounds. However, the stars of the show are a group of cute birds. They’ll serve as guides through your tutorial or educational video. Viewers can’t help but fall in love.

The friendly characters in this package will brighten up your explainer video. They’re hard at work demonstrating analytics, multitasking, and teamwork. It’s a nice touch to help bring your ideas to life.

This toolkit offers plenty of flexibility for your project. It includes 40+ individual scenes to help you craft the perfect presentation. You’ll also find outstanding animation effects along with handy illustrations.

Here’s a template for realtors, mortgage brokers, and property managers. It’s a brisk 32 seconds and a good fit as an introduction to your video. Bright colors and lively animations make this a winner.

Email marketers will want to check out this After Effects toolkit. It has an international flavor and includes voiceovers in three languages (English, German, and Spanish). It’s also flexible with six color templates and plenty of customization options.

Explainer Toolkits & Templates for After Effects FAQs
Coming soon…
Create an Explainer Video That Converts
A great explainer video is an invaluable resource. It educates viewers by breaking down complex ideas into bite-sized pieces. That results in better communication and more conversions.
The templates above are there to help. Whether you’re looking for a long-form presentation or a few scenes to enhance your content, you’ll find plenty of options.
You don’t have to do it all yourself. Download an explainer template and create a top-notch video in less time!
Related Topics
Top
Ordnance Survey: Navigating the role of AI and ethical considerations in geospatial technology – AI News
As we approach a new year filled with potential, the landscape of technology, particularly artificial intelligence (AI) and machine learning (ML), is on the brink of significant transformation. Manish Jethwa, CTO at Ordnance Survey (OS), the national mapping agency for Great Britain, offers an insightful glimpse…