
An impressive week of AI releases….
YoloBox Extreme: 4K60 Sports Live Streaming Made Easy
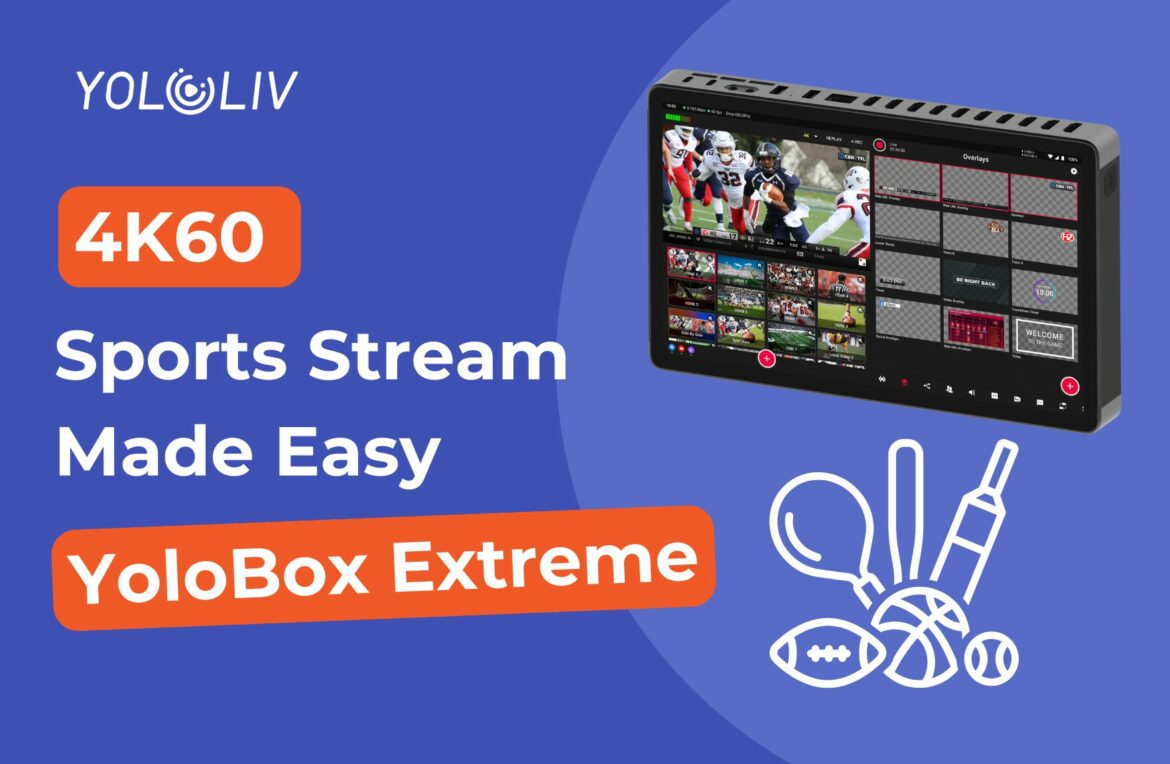
In this article for YoloLiv written by Meredith Jia, we look at how the YoloBox Extreme is transforming 4K60 sports live streaming for teams, schools, leagues, and creators with its all-in-one portable production power.
Sports live streaming is in higher demand than ever, as fans want the excitement of courtside or stadium action from anywhere in the world. The challenge? Producing professional, broadcast-quality streams without the high cost and complexity of traditional gear.
The YoloBox Extreme solves that problem. Compact, powerful, and feature-packed, it’s an all-in-one live streaming device built specifically for sports. Here’s why YoloBox Extreme is the ultimate tool for creating 4K60 sports broadcasts, backed by real customer streaming setups.
Setup for This Stream
Equipment used: Sony FX6 connected to YoloBox Extreme via HDMI, internal 4G SIM card (Simple Mobile), and CSG m519 5G Router (Verizon), with YoloLiv Network Bonding for stable, professional live streaming.
Crystal-Clear 4K60 Live Streaming & Recording
Sports move fast, and every detail matters. YoloBox Extreme delivers 4K60 live streaming and recording, capturing every play, reaction, and highlight with smooth motion and razor-sharp clarity.
Replay, Branding & Highlight Playlists
Replays elevate the fan experience, and YoloBox Extreme makes them seamless:
-
Add custom logos, intros, and outros for team branding
-
Create instant highlight playlists during breaks or halftime
-
Tag and thumbnail moments for quick replay access
Custom Scoreboards & Professional Overlays
Keep fans engaged with custom scoreboards styled in your team colors. Add image overlays for stats, sponsors, or logos — delivering a polished, broadcast-ready look without third-party software.
Web Graphics Overlay Integration
Bring in advanced web-based graphics and scoreboard systems directly into your stream. YoloBox Extreme makes it easy to integrate animated graphics for next-level sports production.
Real-Time Fan Interaction
Audience engagement drives modern sports streaming. YoloBox Extreme lets you view and pin live comments on-screen, making your broadcast more interactive and fan-focused.
Local Video Playback for Sponsors & Halftime
Insert pre-recorded videos anytime — from sponsor ads to hype reels to halftime montages. YoloBox Extreme keeps your stream flowing like a professional sports broadcast.
The Future of Sports Streaming with YoloBox Extreme
From youth leagues to professional tournaments, YoloBox Extreme empowers anyone to deliver broadcast-level sports live streaming. With 4K60 video, replay tools, custom graphics, and interactive fan features built in, it’s the ultimate portable live streaming solution for sports.
[embedded content]
YoloBox Extreme Review: Automated Podcast Studio Setup
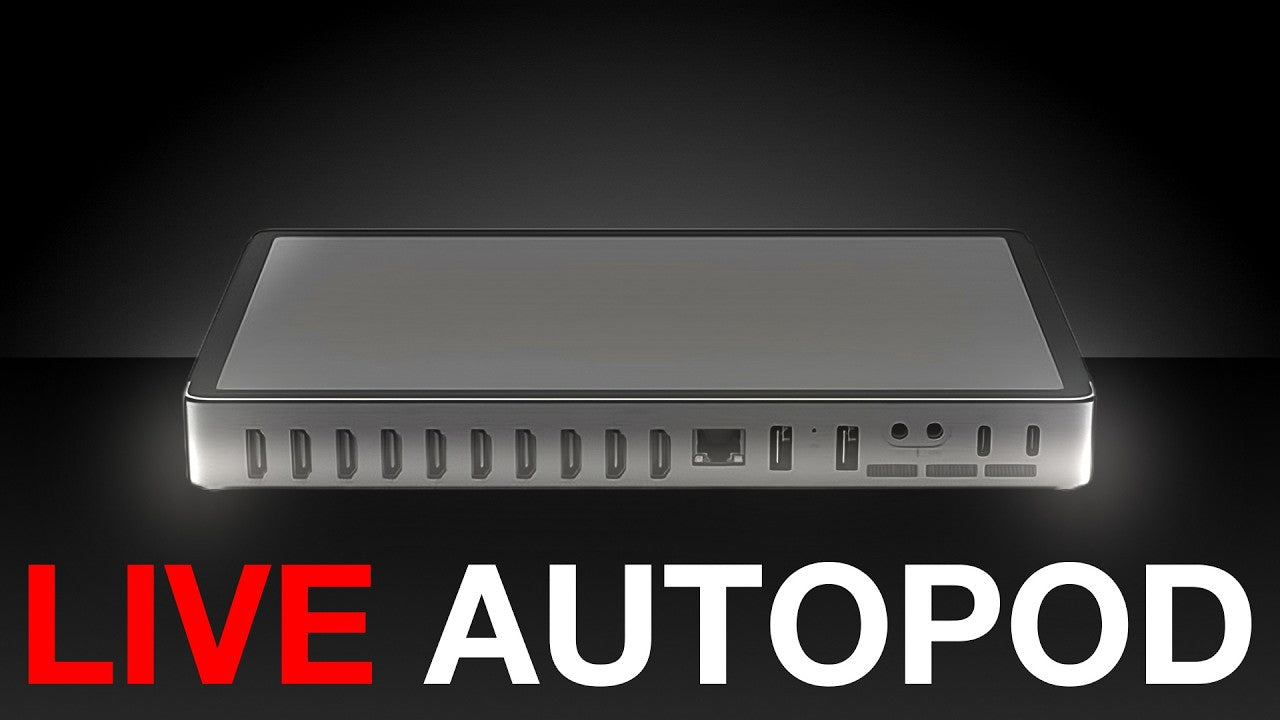
In a video from YouTube channel Tographer, the YoloBox Extreme is highlighted as the ultimate all-in-one switcher, streamer, and recorder for building a fully automated podcast or live streaming studio. This powerful device records both program and ISO feeds, supports NDI devices (including smartphones with the NDI app), and offers auto switching between cameras using timers or audio detection. With adjustable settings for switch sensitivity, thresholds, and audio triggers, creators can achieve smooth, hands-free camera switching based on who’s speaking. While full ISO recording works best at 1080p, the YoloBox Extreme also allows 4K program recording, making it flexible for podcasts, live events, and multi-cam productions. Because it operates as both the switcher and computer, no extra laptop is required—just balance your workflow to avoid maxing out the CPU. Easy setup, fast optimization, and wide input support make the YoloBox Extreme a game-changing live production tool for content creators.
Watch the full video from Tographer below:
[embedded content]
Learn more about YoloLiv below:
Read the full video transcript below:
I want to show you how to make a fully automated podcast studio. Damn, that looks super cool. This is the Yolo Box Extreme and it’s a switcher, streamer, and recorder allin-one. Is this system recording each camera independently? So, it’ll do the program and then it’ll do ISO version. So, right now it’s recording me as part of the program feed, but it’s also recording me as a backup, your cameras as a backup, and the computer as a backup. You can think of it as the brains of the entire operation. And it even has support for NDI capable devices. This is what blew my mind. Take over any phone that has the ability to download the NDI app. And pairing it was probably the easiest thing I’ve ever had to do from a technical standpoint. It just connected seamlessly. The Yolo Box Extreme has everything you would want, but the real magic happens here under the auto switch menu. You can auto switch based on timers. So like if you didn’t care what it cut to, you could just have it do this. And what it does is it cuts to each angle back to its master and then it’ll cut cycle through each camera. But what you really want to do is use video follows audio. But how loud do I have to be in order to Hey, Right. Basically, what’s going to happen is as the audio gets louder or quieter, that’s going to trigger the cameras to switch. There’s the microphone itself, the volume that it’s recording on the camera in the board. You tell it what level to detect. And there’s always this fine balance between a little too loud, a little too quiet, where that cut off is for it to actually hear and trigger. So depending on the condition, you can change your switching action. Meaning, if I’m talking, it’ll cut to my camera, but if audio is detected on this other input, it’ll switch to a different camera angle. As long as every microphone is run to its own camera, you can auto switch between them on the Yolo Box Extreme. That is pretty cool. Although I don’t get my own single. You have control over the switch sensitivity, the minimum switch duration, as well as the threshold or the decibel level needed to be reached in order to switch annunciate. I like that they give you all these different conditions. So whether it’s one camera input or if it’s combinations, you can change the switching action to go to any one of your other inputs. It’s very customizable and intuitive. Thankfully, this is just listening to volume, and that’s all it cares about, which is really nice if you get it dialed in. Right now, it’s limited to a maximum of three audio sources, and you can’t separate left from right, but I’m hoping that they add this in the future via firmware because I want more audio channels and more audio triggers. The problem is, even if I’m not talking, this microphone is still hearing you a little bit. So, if that sensitivity is too low or too high, one or the other, however you look at it, it’ll trigger this mic even if you’re talking way over there. So, you got to dial the sensitivity in. And then there are options in here to combo mic. So, you can do both of those as a third camera option. Wow. If all you want recorded is that auto switched version, you can just record the program at 4K resolution. You can even add some ISO tracks as backup for editing later in post-production if you want. But if you want to record all of your ISO tracks, you’re going to have to reduce the resolution. 4K is just too much for everything. Once you drop it down to 1080p, you should be good to go. Just so many features they’ve thought of and all in one thing. It’s important to know this is your switcher and computer allin one. So there’s no extra computer or laptop or phone required. Everything can be handled right by the Yolo Box Extreme. Except you should know you can overwhelm the system with too much. If you try and max it out, it will be too much for the CPU. So, you have to find that balance between what you need and what the board can handle. If you want a lot of different camera angles all recorded in ISO, 1080p is the way to go. But, if you just want that one auto switch sequence, you can get that plus a few others in 4K. There’s a wide of the room, the iPad if we had some kind of Zoom call or if we were watching a video. You would never call this Coco. We would never call it Coco. So then if I pause that and I manually switch back to me, back to you guys. Close up on David or you can use the video follows audio and then it does it automatically. How about that? I’ve got a computer hooked up to an external display also going into the board. This monitor is for external recording and monitoring. Cameras everywhere. 1 2 3 4 5 6 7 live. It’s a really cool piece of technology, and I’m just scratching the surface. There’s so much more this thing can do for any kind of live event, podcast, or multi-cam production. Just be aware of those CPU limits if you’re trying to max everything out at 4K. I will say, how long do you think it took me to get dialed in? 20 minutes, maybe. with more time, with more optimization, even this studio is kind of just hodge podgeed together. There’s cords everywhere. It’s not clean. It’s not tidy. It was just to prove a point. And now that it’s all set up, if I did refine it and dial in, I think it would be a lot better. The computer can just do it itself. That’s a game changer.
China Mobile Shanghai launches industry-first 5G-A network monetisation strategy with Huawei
The roar of 80,000 fans at Shanghai Stadium on September 21, 2025, wasn’t just about the football match between Shanghai Shenhua and Chengdu Rongcheng – it was also a live demonstration of how telecom carriers are tackling one of their most pressing challenges: converting advanced network…
The Friday Roundup – Video Editing Basics & A.I. Video Generators
Master the Basics: The Secret to Becoming a Better Video Editor Generally speaking Daniel Batal is one of my “go to” guys for video editing in DaVinci Resolve. However this week he put out something a little different and very much well worth taking the time…
Scoreboards, Instant Replays, and More with YoloBox Extreme

What sets the YoloBox Extreme apart for sports streaming is its built-in scoreboard overlays, customizable team logos, countdown timers, and instant replay features that rival professional broadcasts. From picture-in-picture commentary to smooth scene switching and replay playback, everything is managed through its intuitive touchscreen or optional YoloDeck controller. Whether you’re streaming youth games, high school competitions, or community sports, the YoloBox Extreme gives your productions the same polish and excitement as major league broadcasts.
[embedded content]
Learn more about YoloLiv below:
Read the full transcript:
So, if you’re a local sports fan and you want to like live stream the games, YOLO Live has created one of the best and most simplest solutions to do that and actually look really professional. You have scoreboards, you have instant replays, you have all kinds of scenes that you could do and I’ll explain a little bit how that works. But, get ready for your mind to be blown because it is really cool. Mr. Black. And by the way, if you like gadgets and gear, make sure you hit that subscribe button. Don’t be a stranger to the channel. Also, if you like this kind of content, make sure you also hit that thumbs up button. YouTube will give you more of it and I’ll put links to everything that we’re talking about down in the description. Now, I’ve made a few videos highlighting this magnificent device and I’ll link to those videos covering all the specs and features at the end of this video. But for this one, I wanted to focus more on the live stream sport aspect, especially because I get a lot of people asking me, you know, what’s some good devices they could use to broadcast their local sports team or their kids teams or something like that. This is a lot of fun and it’s insanely professional. And some might say that this would be overkill for your kids games, but maybe you’re looking for something to do. You’re looking for a new hobby and you would fall in love with something like this. So, this is the Yolo Box Extreme, the all-in-one 4K live streaming powerhouse that puts professional quality production right at your fingertips. Whether you’re covering that nailbiting soccer match or a fast-paced basketball game at your local court, this device has got you covered. So, let’s break down what makes this exceptional, especially for live streaming sports. So, you can connect multiple cameras to this thing. DSLR, mirrorless cameras, action cameras, also USB webcams, and I’m actually using the new YOLO Cam right now to film this part right here, and I’ll be making a video about that next, so stay tuned for that. But imagine capturing all the different angles from different cameras and broadcast those games in crystal clear 4K quality. So all the action, every triumphant moment, big or small, will look incredibly sharp and vibrant. And besides live streams, you can also record it directly to this as well. And you can even be recording multiple cameras at the same time. But for streaming purposes, it’s got built-in Wi-Fi, it’s got Ethernet, and even option for 4G LTE connectivity with a SIM card. So you can just pop that SIM card right in there and just stream through that. And you can stream to all of your favorite platforms like YouTube, Facebook Live, Twitch, and much more. And that’s like directly from the field. Like no other encoders needed. You could just stream direct from this box right here. You can add in your scoreboard. You can customize it. Put the names, put what game type it is. You can have a timer on there so people can see how much time is left. You can even add your own custom logos for the teams in colors. You can really go through that and set it up nice and easily. Now, you might be thinking, it’s going to be tough to have to go in and change the score every time. Well, you can actually use the YOLO deck and you can set that thing up and you can even add just plus one buttons to the home team or the OA team and just add those scores in when they do score. You can set it up as plus one, maybe plus two or plus three. Uh that way if it’s a basketball game or something, you can do it that way or just just one and just hit it a bunch of times. If it’s like the pregame or the intermission, you can have countdowns for it. It’s really easy to set up here in different scenes. You can have your picture and pictures. So, if you’re hosting it, you can uh pull up that picture and picture have me in one spot like, “All right, this is what’s happening now. They’re going for it. Yep. Okay, they’re going to kick the ball on the go.” I don’t know how you announce things, but you don’t necessarily need another monitor because you can monitor it all right here with this touchcreen display, which is really easy to see. It’s battery powered. It lasts a very long time. And yeah, you have the yellow deck over here if you want some quick access to some, you know, buttons if you’re just switching the the different sources right there or, you know, starting replays. And that’s right, you can add instant replays. So, you can set that all up in the replay button here. You can add how long you want the video duration, also the replay speed, if you want it to go faster or slower. You can put the audio on there if you want to capture the audio. You can mute any other audio during replay, or you can have that off in case you’re commentating on it. And uh you can also have the replay logo. You can even put in like custom like graphics for going into that replay or out of that replay, you know, just kind of like what you’d see like in professional sports games. But it works. So I have it set up on the YOLO deck. So I can just go start replay. And there you go. You got the replay right there. That’s what we just uh we wanted to see replayed. And then it goes back to the real-time shot, the shot that we had before. You can also set that replay to come back later so you don’t have to do it just like right then and there. So if there was something that happened you wanted to capture, you can save that and then play that back later on. And setting up sources, picture and picture, any graphics, it’s all easily done right through this YOLO box. It’s like got its own operating system and you can go through and again it might seem like overkill, but I think that if you’re using it for even like your bigger football games, the high school, the Yolo Box Extreme isn’t just for the big leagues. It’s perfect tool for any local sports organizations or a passionate individual who wants to share their excitement with that club uh with everyone online, maybe even for people back home that can’t come to the game. This is a lot of fun to learn and to show off those streaming skills. People will be very impressed. And if you are considering this, do check out the link in the description so you can see the most current and up-to-date price. And also check out some of the other Yolo Box videos that I’ve done. Yeah, they will explain a lot more. There’s a lot a lot that you can do with this thing. So do check that out. And thanks so much for watching and I’ll see you next time.
The Sequence Opinion #730: Reinforcement Learning: a Street-Smart Guide from Go Boards to GPT Alignment
The walkthrough the history of RL….
Why AI phishing detection will define cybersecurity in 2026
Reuters recently published a joint experiment with Harvard, where they asked popular AI chatbots like Grok, ChatGPT, DeepSeek, and others to craft the “perfect phishing email.” The generated emails were then sent to 108 volunteers, of whom 11% clicked on the malicious links. With one simple…
Same Idea, Different Paint Brush
Naturally, everything looks like code when I’m staring at a blank canvas. That’s whether the canvas is paper, a screen, some Figma artboard, or what have you.
Same Idea, Different Paint Brush originally published on CSS-Tricks, which is part of the DigitalOcean family. You should get the…
YoloBox Extreme: The Ultimate NDI Streaming Solution for Live Streaming
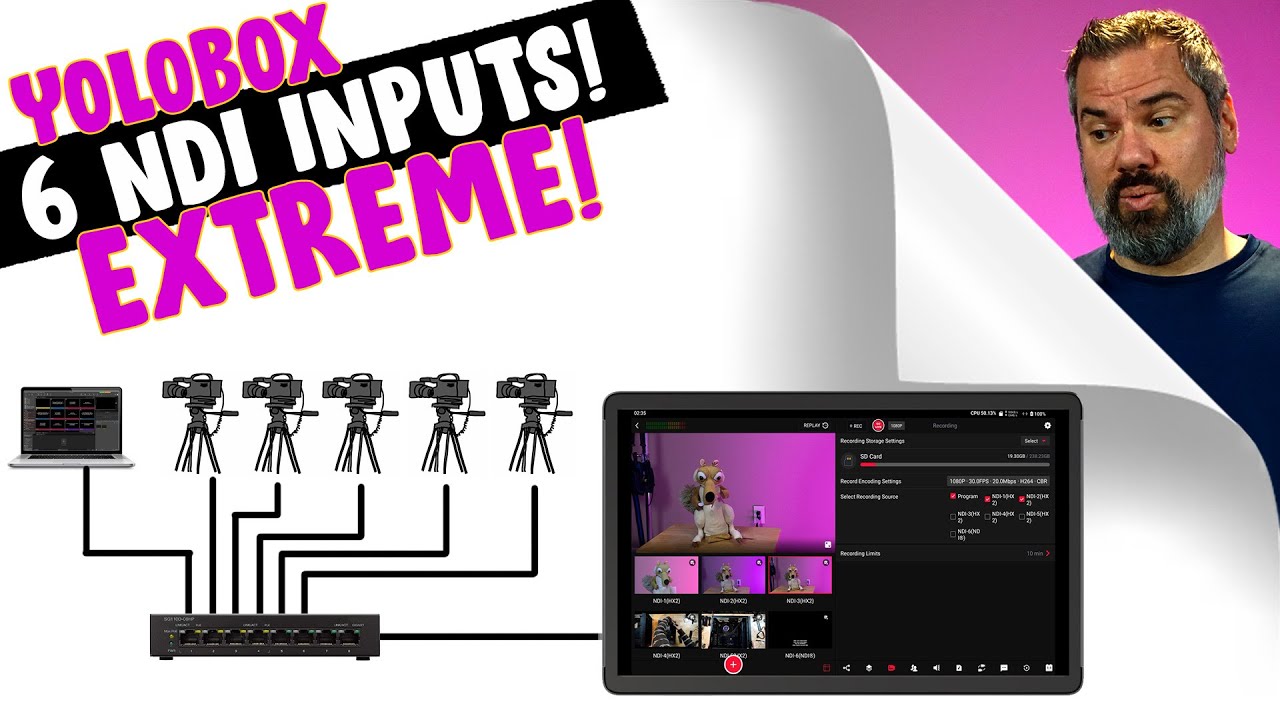
The YoloBox Extreme is a powerful all-in-one live streaming solution that makes fully NDI-based productions practical for churches, creators, and live event producers. Steven Ballast highlights how his team uses the YoloBox Extreme to stream an ASL service with five NDI cameras and a full-bandwidth NDI ProPresenter feed for lyric overlays—delivering reliability on par with top-tier streaming platforms. With advanced features like up to six NDI inputs, ISO recording, HDMI in/out, PTZ camera control, and alpha channel support for transparent overlays, this portable device simplifies complex workflows while maintaining broadcast-quality results. Designed for flexibility, the YoloBox Extreme gives ministries and content creators the tools to expand their productions without the need for extra computers or complicated setups.
Watch the full video from Ballast Media below:
[embedded content]
Learn more about YoloLiv below:
Read the full video transcript below:
So, now I’ve got five NDI cameras coming in and one full bandwidth NDI from Proresenter. Hello, I’m Steven Ballast. I’ve been a longtime fan of the Yolo Box line. I started out showing you on this channel the original Yolo Box and we’ve looked at the Pro and the Ultra, and today we’re looking at the Extreme. Now, we use a Yolo Box every week here at our church to live stream. It’s actually a secondary stream for us. We use it for an ASL or sign language alternate stream of our worship service. To do that, we take the video out from our video switcher and run it into the Yolo Box and overlay a camera of our ASL interpreter and we live stream that direct from the YOLO box to an RTMP destination streaming service. And I have to say, for our primary live stream, we use what many would say is the premier top tier live streaming service for churches. I’m sure you’ve probably heard of them. And for the two or more years that we’ve been streaming with the Yolo Box in parallel, the success or failure rate between these two methods of streaming has been the same. I’ll just leave that there. All that to say, I’ve been really happy with the Yolo Box as a live streaming solution. Each new Yolo Box model from Yolo Live, from the original to the Pro, Ultra, and now the Extreme, has incrementally given us more processing power, more inputs, and more features. One of the things to understand about the Yolo Box as a standalone live streaming tool is that they can do a wide variety of things from different overlays, bringing in different sources, 4K recording, ISO recording, sending out the stream to multiple destinations, just a whole list of things that these boxes can do. But what you need to understand to be successful with the YOLO box is that it’s also limited by the processing power of the box. What that means is yes, you can do all of these things, but it doesn’t always necessarily mean you can do all of them at the same time. Sometimes it’s taken people a little bit of experimentation to figure out if the combinations of features you need to use will all work together at the same time. And that’s where the extreme, as the next increment in the Yolo box line, brings us the most processing power we’ve seen in one of these boxes yet. And that enables more inputs. The Extreme has eight HDMI inputs, four of which can be used with 4K sources that can be ISO recorded while you are streaming. It has two HDMI outputs, which is a first in the Yolo Box line. You could use one to send your program out and the second as a multiv- view, or you could select a few different things that can be routed to that output. For instance, you could just send one of your inputs and pass it through to that output, kind of like an ox out on a regular video switcher. The Ethernet port for your internet connection. The Extreme can also connect through Wi-Fi and it comes with external antennas you can use to boost that signal. There are two USBA ports and a USB C port. This last USBC is for charging and an 8 inch mic input. On the bottom, it has a headphone output for monitoring your audio, an SD card slot, your SIM card slot for connecting through a cell tower and using cellular data for your live stream, a/420 mount, and finally the power button. Another feature of the Extreme that I think a lot of people have kind of missed the implications of, and that is the ability to bring in six NDI input sources. So far, most standalone switchers that I’ve seen might have the ability to bring in one NDI input, and it’s kind of added on as an afterthought to the switcher. So, to really switch a fully NDI based video system, you’d have to use a computer, maybe with OBS or V-Mix. And that’s what I want to focus on in this video. I want to look at using this extreme, this standalone portable device to set up an all NDI based video system. One of the things that makes an all-in-one streaming, recording, video switcher device like this appealing is its portability and simplicity. And how quick and easy of a setup would it be to just have to run one Ethernet cable to each of your cameras using a PoE switch? Beyond that, Yolo Live has also added a new NDI capability to the extreme that previous models haven’t had that make this work even better for churches that want to overlay lyrics. So, I’m excited to show you that in a minute. Let’s take a look at setting this up. I’ve gathered every NDI capable camera I could find. I’ve got the Honey Optics PTZ camera, an Obsot Tail 2, and just to throw another camera in the mix, I’m also using the Tail Air that has NDI out over Wi-Fi. These two cameras are connected to a PoE switch through their Ethernet cable. That’s what I’d recommend doing for reliability and latency instead of using the Wi-Fi. That Ethernet cable provides power to the camera as well as sends out the NDI video signal and it’s also going to let us control the camera. And yes, we can do that right from the extreme as well. I’ve already set up these cameras on the network and to output NDI. That process will be unique to the configuration settings of whatever camera you end up using. I’ve also set up the extreme on my wired Ethernet network as well in its configuration. So let’s first create an event and go into that event. And now to add these cameras to the extreme, tap the add video source button here and select NDI. And it will find the NDI cameras on your network. Select one and tap done. And that’s now coming into the stream as one of our inputs that we can select to go live in our video. I’ll just repeat that for my other cameras. But I want to max this out. I want to have five NDI HX camera sources and then our full bandwidth lyrics overlay NDI source to make six NDI sources coming into the extreme. I’ve set up computers here on my network using NDI tools to output their display over NDIHX as well. So those cameras are going to be my last two camera sources. So let me add those. Now I have five NDI HX camera sources coming into the extreme and I can select which one I want live on my video by tapping them. Now, to set up PTZ control for our cameras, tap the little gear icon in the top right corner of your input and select PTZ control. Now, here you’ll need to know the IP addresses of your camera on your network. You should know that already from when you set up your cameras on your network. And now I can control my camera right here on the Xreme. Before we add in our lower thirds from Proresenter, and that’s one of my favorite new features of the extreme, is that it can now use the alpha channel of an NDI feed. But before we get to that, let me say a couple things about bandwidth and data rates and all of that. NDI video is running over your network, so it has to follow the rules of the road for networking. What I mean by that is the NDI feeds coming into the extreme for my setup that’s using this wired Ethernet connection. All of that data has to fit through that one pipe. Now the extreme supports up to six NDI HX feeds and up to two full bandwidth NDI connections. And this limitation somewhat is probably related to the network bandwidth, but it’s also probably a limitation of the CPU of the extreme as well. Each of those NDI sources has to be decoded by the CPU. I found this setup to be most stable and to get the least amount of latency on my camera feeds when I set each camera to the lowest bandwidth setting that I could tolerate for quality. For my tail two, six megabits per second for the 1080p 30 video was buttery smooth and had decently low latency. Over a network, you’re always going to have some amount of latency to deal with. You know, this is never a setup you’d want to use for iMac. But by keeping the bit rates lower, we can reduce the processing time for both the camera and the extreme and keep the latency as low as possible. When I turned the bit rate up to 8 megabits per second, I started to notice some stuttering or drop frames, but I’m actually pretty sure it was on the tail 2 side because I’m able to get the Honey Optics camera up to 12 megabits per second and it’s still really smooth. All of this to say, depending on what cameras you have, you’ll probably have to do some experimenting with what bit rates get the best results. You’ll probably not be able to just turn it on and have everything work well. Okay, now let’s finally bring in our lyrics from Proresenter to be overlaid over our video. In Proresenter, go to screens, configure screens, and now we are going to add a new audience screen. Select new NDI. I’ll select 1080p 30. And let’s rename this to something more informative. I’ll call it video overlay. And down here in the NDI settings, let’s name this Prop P NDI. Now, here’s the important part. On the alpha key tab, we’re going to select premultiplied. Then under screens, edit looks, we’re going to choose a theme for our video overlay output that has our lyrics formatted to be at the bottom. And the theme doesn’t have any background, so it’s transparent. This is the really cool part. Because the extreme now recognizes the alpha channel that’s embedded in the NDI video, we won’t have to use a chroma or green screen key anymore. The transparency from Proresenter will be used in the extreme. So, back on the extreme, add a new video source and select NDI. And we should find our proresenter source. And now we have our lyrics coming in as a full screen input. If we tap that, it could be used just like any other input. But now let’s go to the overlay settings page and tap add overlay. And then on the video source tab, select our prop input. Scale it all the way up and tap done. Now we can turn this overlay on by selecting it in the overlays page and it gets overlaid over our video. And as we change cameras, it stays overlaid and it’s going to be updating as our lyrics operator advances our lyrics. So now I’ve got five NDI cameras coming in and one full bandwidth NDI from Proresenter. I just find this setup really cool because I don’t know of any other standalone portable device that can switch that many NDI sources, which really makes a fully NDI video production practical. Next, if you’re new to the Yolo Box and haven’t seen any of the previous models, let me give you a quick overview of how the Yolo box works and also a couple specific workflow things that I would do if I were setting this up for a live production. The way the Yolo Box interface is laid out, obviously this large display here is what’s live on your video with your camera input thumbnails below that. And tapping on these takes them live in your video. You can change the size of the thumbnails by tapping this little icon here. The right side of the screen are all your settings and where you operate some additional features. You select which menu you are in with these icons at the bottom. And you can change the order of these tabs by scrolling to the end here and tapping these three dots. Now you can just drag these to rearrange them. So if your icons are in a different order than mine, that’s why. This first menu is our destinations for live streaming. Just tap to add a destination and select where you want to go. And you’ll be asked to log in to your account. It also shows your encoder settings here at the top. You can tap it to modify it, but realize when you do that, you’re actually just being taken to a different tab on the bottom here. So, you could access it that way as well. Here you can set the encoder setting for your live stream, which also will be used for an NDI output or SRT output if you have that turned on. And this second set of encoder settings are for your recording. I love that we can record a different bit rate than what we are streaming because we’re always going to want a higher quality recording for later editing compared to what we send out for our stream. Then we have the overlays tab. We’ve already seen the video overlay that we added from Proresenter, but you can also add lower thirds with names or different titles, timers. The YoloCast overlays is a free online tool that you can use from Yolo Live where if you set up a free a Yolo Live account, you can make overlays in their browserbased tool and add them to your video here. Next is the recording tab. Here you can select where you want to record to. There is internal storage on the Xreme itself. You can insert an SD card for recording and you can also connect an external USB hard drive and record to that. Again, it shows you the recording encoder settings that came from the other page. And here we can select what to record. Obviously, the program output is the default, but you can also record an ISO recording of each of your inputs and then record limits. This will chunk your recordings into multiple files. So, in this case, every 10 minutes, the recording will start a new file. This is just a safety mechanism. So, if for some reason something happens and the current recording has a problem, you won’t lose hours worth of recording. You can bring in guests if you’re doing a podcast, maybe. I’ll be honest, I’ve never had a need to use this feature. The audio mixer. This lets us turn on and off audio from our input sources. You can select if the sourc’s audio is just always on or uses AFV or audio follows video. That means that the audio from a camera will switch on when that camera is live but then turns off when you go to a different camera. And finally, there’s a headphone and master volume slider for your program. And if you connect an external USB audio device, which is what I would recommend as the best way to get audio in from, say, an audio mixer, that will show up here in the audio page as well. The music tab, a new feature here on the Extreme is you can load in audio files from the SD card or a USB device that can be played from this interface. This is great for pre-show music. Auto switching. This lets you automatically switch between your inputs at a determined interval. Comments lets you see any comments that are coming in on your live stream from your social accounts. Then instant replay and the scoreboard. These are obviously useful if you are live streaming sports. Network bonding is a paid feature from Yolo Live that lets you use the shared bandwidth from multiple network connections. So, your Ethernet, your Wi-Fi, you could connect a USB dongle access point or the internal SIM card through a cell tower. And this will give you more reliable bandwidth for your stream. Especially if you’re streaming out somewhere where you don’t have one solid connection, you can divide your bandwidth up amongst multiple connections. And then transitions. The default is to cut between your inputs, but you could also set that to something else and then it will use a different transition when you switch. In the settings, this gear icon in the top right, there are a lot of different things that we can configure. This is where you would change your HDMI output settings. So, if you want HDMI 1 to be something different than program, and in this case, I have HDMI 2 set to be this entire interface that you’re seeing. Another nice new feature of the Extreme. This is a simple thing, but I really appreciate it. If you swipe down from the top, it gives you a little readout of some useful information. How much CPU you’re using, battery life remaining. You can control your headphone output volume, adjust the screen brightness, and then also down here you can see some information about your stream when you’re streaming. This is really useful because one of my I’ll say hesitations about using standalone encoders for live streaming versus a computer is that when you have an issue with your live stream, and I’ve been streaming long enough to know that it’s not if you have a problem with your live stream, but when you have a problem with your live stream, usually it’s a lot harder to troubleshoot what’s going on with a standalone encoder. So, having this information can quickly tell us the health of our stream. Once I have things set up and recording and streaming, I kind of prefer to operate the actual show in this view here where my inputs are on the side and I get a bigger view of what camera is live. It kind of depends on how many camera inputs you have, I guess, but you can still access the menus in a pop out from the side when you tap on them. You can also just tap and drag an input to change where it’s located. And if you tap the little settings icon in the top right, you can also rename your camera. I’ve been really impressed with all that’s packed into the Xreme. It’s also got a big screen that’s nice and bright and easy to see all your cameras on. Yet, this thing is still very portable. It could easily fit in, say, the pocket of a laptop bag. I’ve really enjoyed checking out The Extreme and I think you will too. Until next time. Bye.