15+ Best Free Brush Fonts for Designers in 2025 — Speckyboy

Brush fonts are a type of typeface that replicates the look of calligraphy created with a paintbrush or marker. They are typically characterized by their imperfections, irregular shapes, and varying stroke widths, which give them a more organic appearance than traditional fonts.

Brush fonts are often used in design to express creativity, authenticity, and informality. They are usually aimed at a youth-oriented audience, making them popular in the music, gaming, fashion, and food industries.

From bold and chunky to gentle and graceful, brush fonts come in various styles and weights depending on the actual brush used to create the font. They can add an authentic feel to a design but are generally used to create urban or graffiti-style typography.

To help with your selection, we have curated a collection of our favorite free brush fonts, which you can download and use in your creative projects.


This brush font combines heavy black ink with a well-used artist’s sable brush to create a stunning hand-made and textured typeface. Its distinctive appearance makes it readable in both large and small sizes, making it ideal for many projects.

15+ Best Free Brush Fonts for Designers in 2025 — Speckyboy

Free to Download

Designed by Artimasa Studio, Debby is a free hand-drawn font with a personal and imperfect feel. Use it to add character and uniqueness to your designs.

debby free font brush hand-written hand-painted

Free to Download

Zallord, designed by Alice Whales, is a versatile brush font featuring both uppercase and lowercase characters, numbers, punctuation, and a few extra marks. Its aggressive style is perfect for creating striking displays, labels, clothing designs, posters, movie titles, album covers, logos, and other exciting projects.

Zallord free font brush hand-written hand-painted

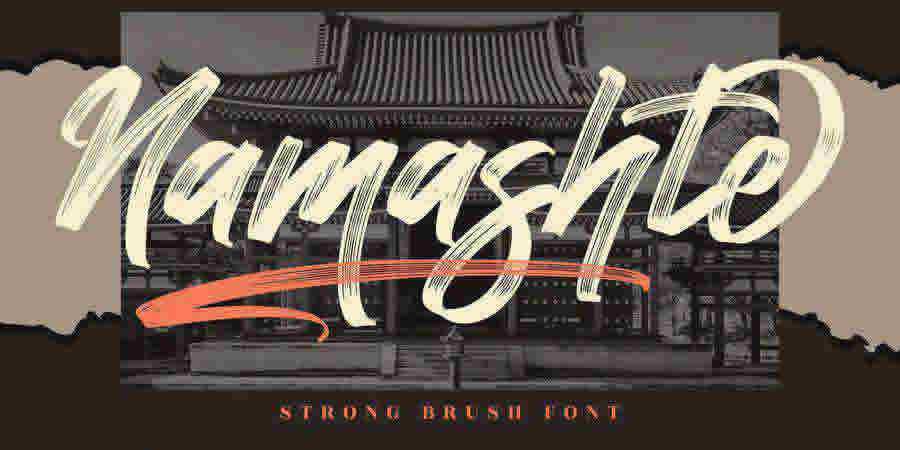
Namashte Brush Font is a stunning typeface with a strong paintbrush texture. It is an excellent choice for creating posters, branding materials, and more. With its bold and expressive style, this font will help you make a strong impression.

Namashte free font brush hand-written hand-painted

Free to Download

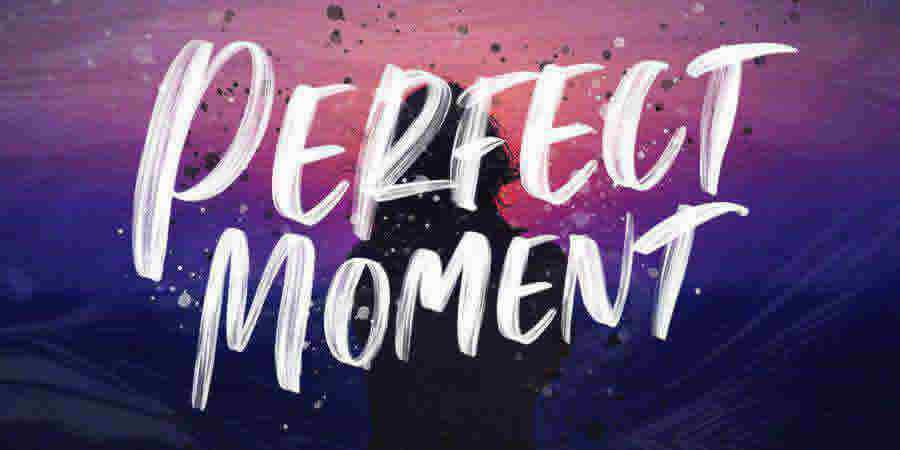
Perfect Moment is a dynamic and adventurous SVG typeface that perfectly captures the energy of hand-written brush strokes. This Open Type font can be used for creating striking headlines and titles,, banners, posters, and more!

Perfect Moment SVG free font brush hand-written hand-painted

Free to Download

This hand-drawn brush font has been created using a thick brush that resembles a traditional besom brush, from which the name is derived. The font only has uppercase letters, giving it a bold and impactful look, perfect for creating distinctive designs.

Besom free font brush hand-written hand-painted

Free to Download

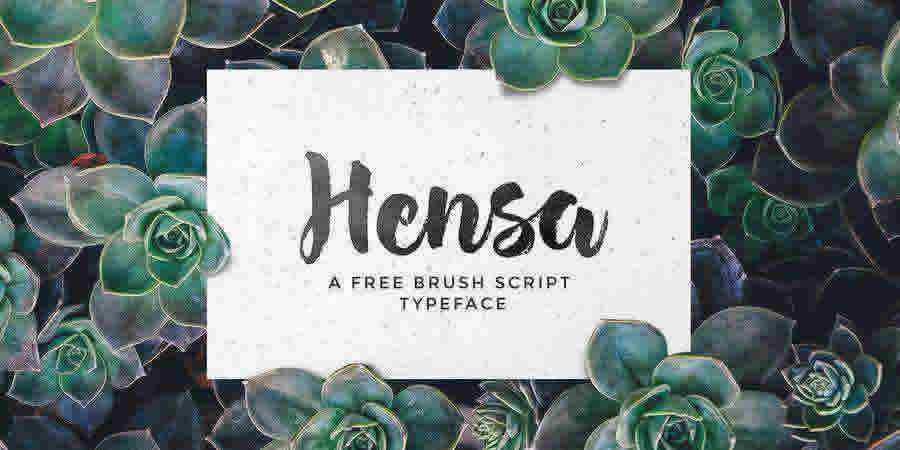
Hensa is a hand-painted brush script font with a stylish design. It includes uppercase and lowercase letters, punctuation, numerals, ligatures, and swashes. Use it for logos, quotes, packaging, and more!

Hensa Hand-Painter Brush Script free font brush hand-written hand-painted

Free to Download

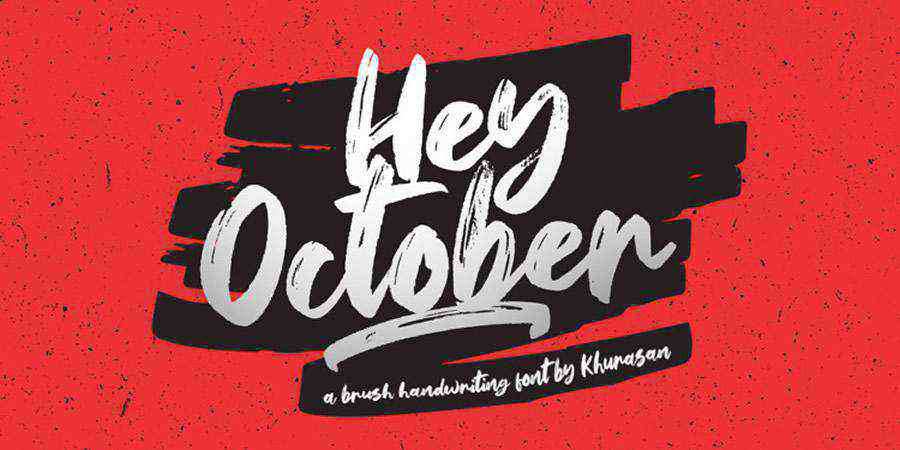
The Hey October free font boasts a playful and whimsical style with irregular letter shapes that give it a fun and quirky feel. It’s the perfect choice for greeting cards, posters, and other design projects where you want to add a touch of whimsy.

Hey October free font brush hand-written hand-painted

Free to Download

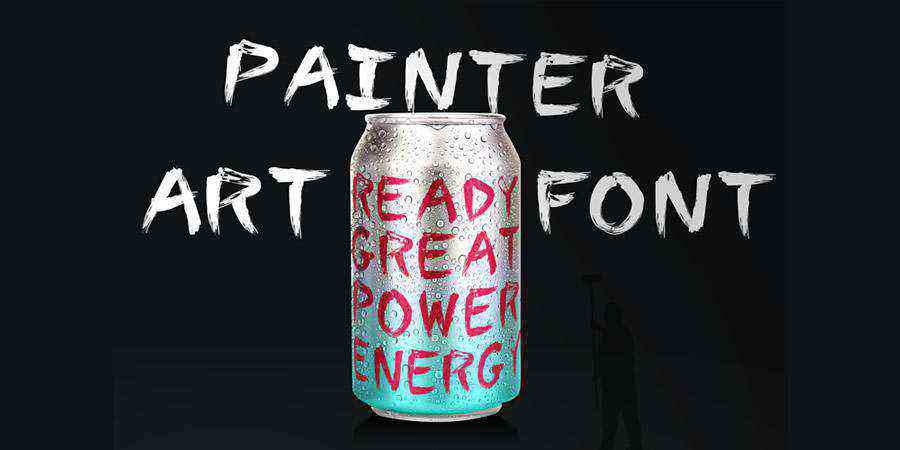
Painter Font is a free typeface with thick brush strokes and a playful, hand-written style. With its unique look, this brush font will add a touch of character to any design.

Painter free font brush hand-written hand-painted

Free to Download

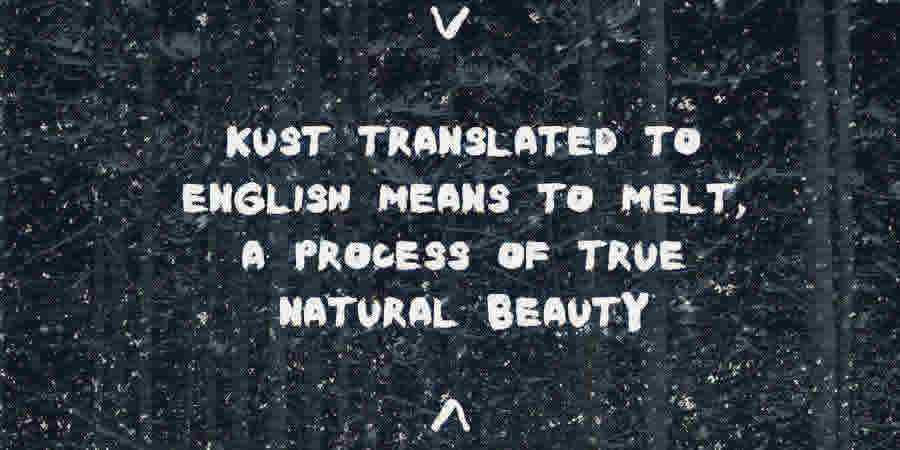
Kūst is a brush typeface with distorted letters. It was created by fashion designer and painter Ieva Mezule using a thick brush and pure black ink on hard paper. Use it to add a bold touch to your design projects.

kust free font brush hand-written hand-painted

Free to Download

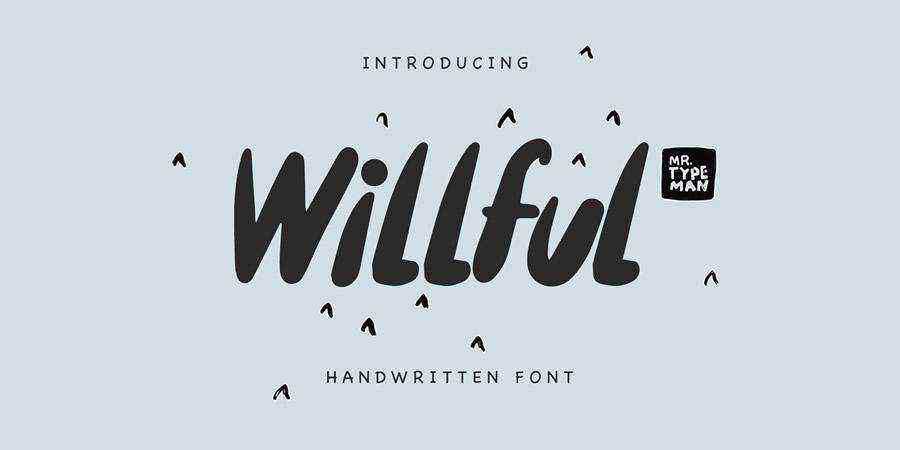
Willful is a playful hand-written brush font perfect for adding character to your designs. Use it by itself or with thin typefaces to create stunning typography.

Willful Sans free font brush hand-written hand-painted

Free to Download

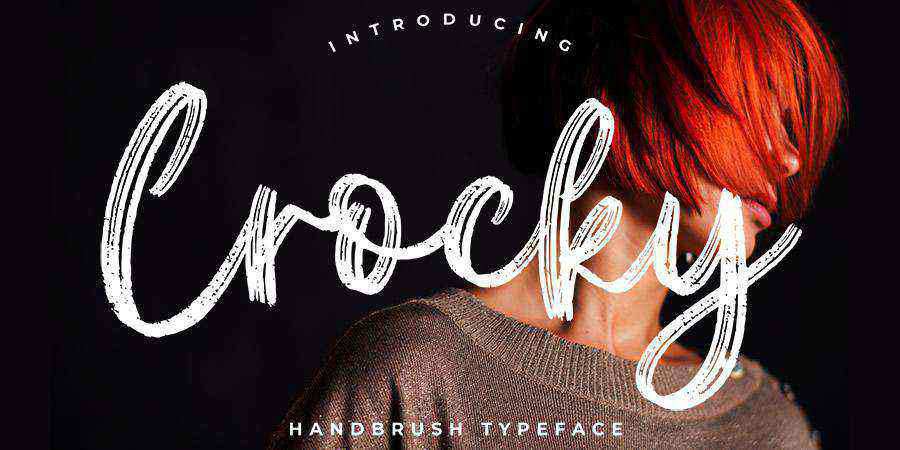
Crocky is a hand-brush typeface with a scratchy brush script style. It’s perfect for branding projects, product packaging, and any project that needs a classy hand-written touch. The font is available for free download and personal use.

Crocky free font brush hand-written hand-painted

Free to Download

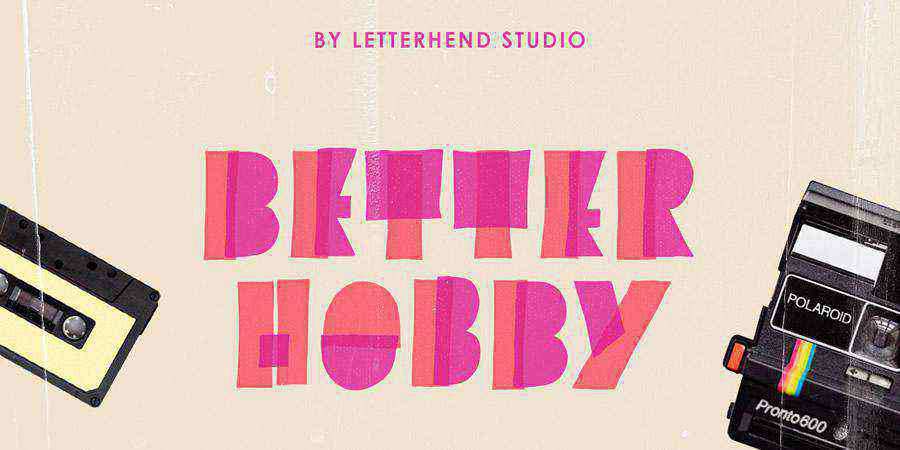
Better Hobby is a free display font with a playful design that is perfect for projects that need a touch of fun. With its colorful highlighter markers and overlaying strokes, this font will bring a lively touch to any design.

Better Hobby Highlighter free font brush hand-written hand-painted

Free to Download

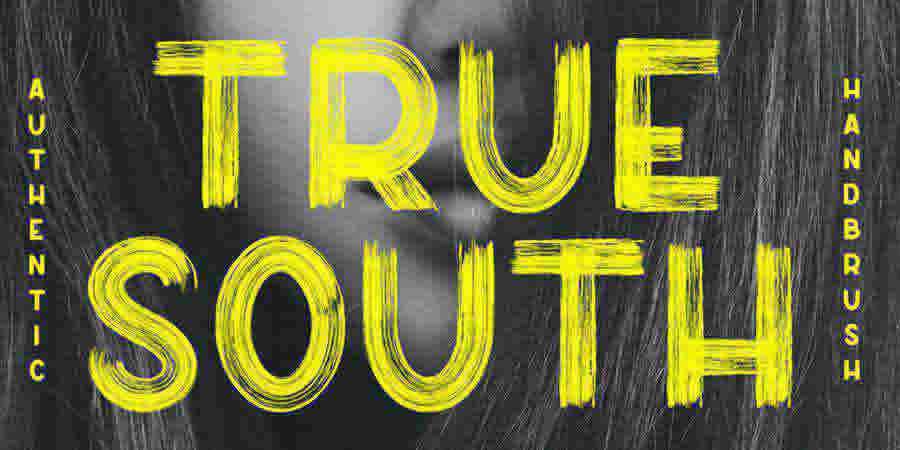
True South free font brush hand-written hand-painted

Free to Download

Mazak is a hand-drawn brush font that’s available for download in both Illustrator AI and TTF formats. With its distinctive uppercase design, this free font will add a unique touch to any design project.

Mazak free font brush hand-written hand-painted

Free to Download

Lemon Tuesday free font brush hand-written hand-painted

Free to Download

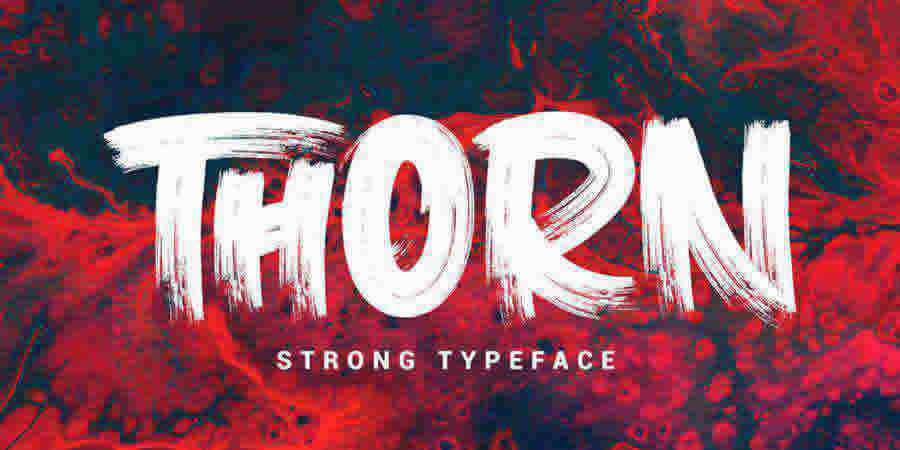
thorn free font brush hand-written hand-painted

Free to Download

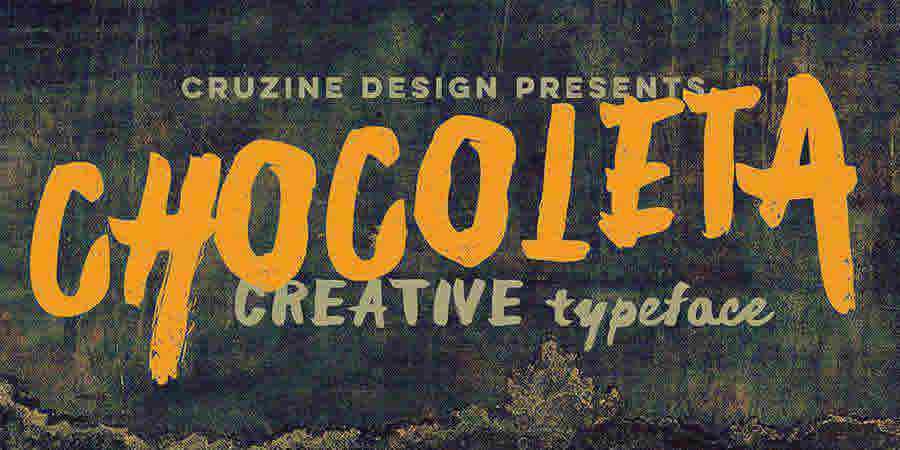
Chocoleta free font brush hand-written hand-painted

Free Brush Font FAQs

  • What are Brush Fonts?
    They are a category of typefaces that replicate the look of hand-written text created with a brush or marker.
  • Why Use Free Brush Fonts?
    They’re great for adding a creative touch to your work. Perfect for artistic projects, logo design, or promotional materials, they can give your design a personal and crafted feel.
  • Can I Use Brush Fonts for Business Branding?
    Yes, brush fonts can be used in business branding, especially for brands looking for a casual, approachable, or artistic image. They work well in logos, taglines, and marketing materials.
  • Are Brush Fonts Easy to Read?
    Some brush fonts might be harder to read, especially at smaller sizes. They’re best used for larger headings or focal points where readability is less important.
  • Can I Use Brush Fonts in Print Materials?
    Brush fonts are great for print materials like posters, business cards, and brochures, especially when you want to add a personal or artistic touch.
  • Do Brush Fonts Have Different Styles?
    Yes, they come in various styles, from rough and rugged to smooth and elegant. Each style can bring a different character to your design.
  • Are Brush Fonts Good for Logo Design?
    Brush fonts can be great for logo design, offering a unique and custom-made feel. They are well-suited for brands in creative industries.

Brush Fonts in Your Design projects

Brush fonts are a beautiful representation of imperfect handwriting. Each character is unique and carefully crafted by hand, resulting in a distorted and irregular appearance that can add character and personality to any design.

They bring an authentic and artistic element to design projects. Their textured strokes, expressiveness, and versatility make them popular for designers looking for a touch of handmade charm in their work.


Related Topics


20+ Best Project Proposal Templates for InDesign in 2025 — Speckyboy

Bringing a new business idea to life requires a great deal of planning and preparation. One of the first and most crucial steps is to create a persuasive business or project proposal. However, creating a proposal from scratch can be time-consuming, especially for those new to entrepreneurship. That’s where proposal templates come in.

These business proposal templates for InDesign (both free and premium) have been designed to simplify the proposal creation process. With a wide range of options, you will find the perfect template to suit your specific needs. Whether starting a new venture, looking for investors, or pitching a project to potential clients, these templates offer a professional foundation for your proposal.

With their user-friendly layouts and customizable designs, these INDD templates offer the perfect balance of structure and flexibility. Using a template can save you significant time and energy, allowing you to focus on refining and perfecting your proposal’s content.

Don’t let the prospect of proposal creation hold you back – use these InDesign templates to bring your business idea to life.


If you’re new to the application, you might like to take a look at our collections of InDesign tutorials.


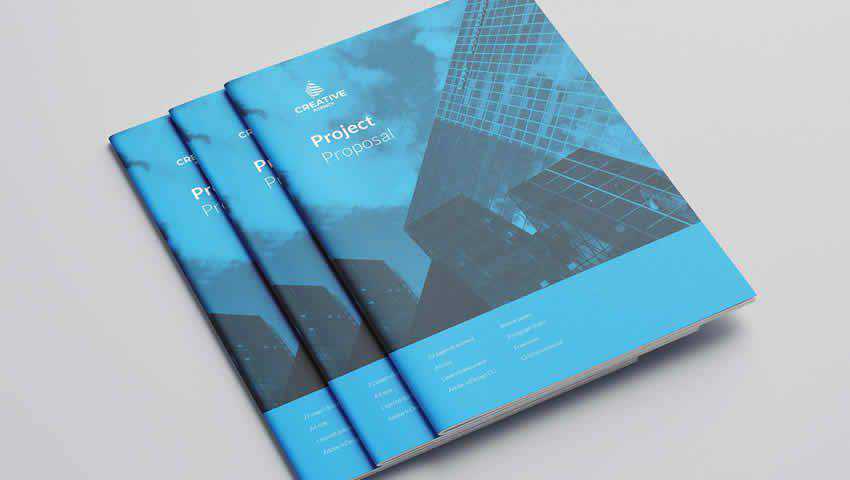
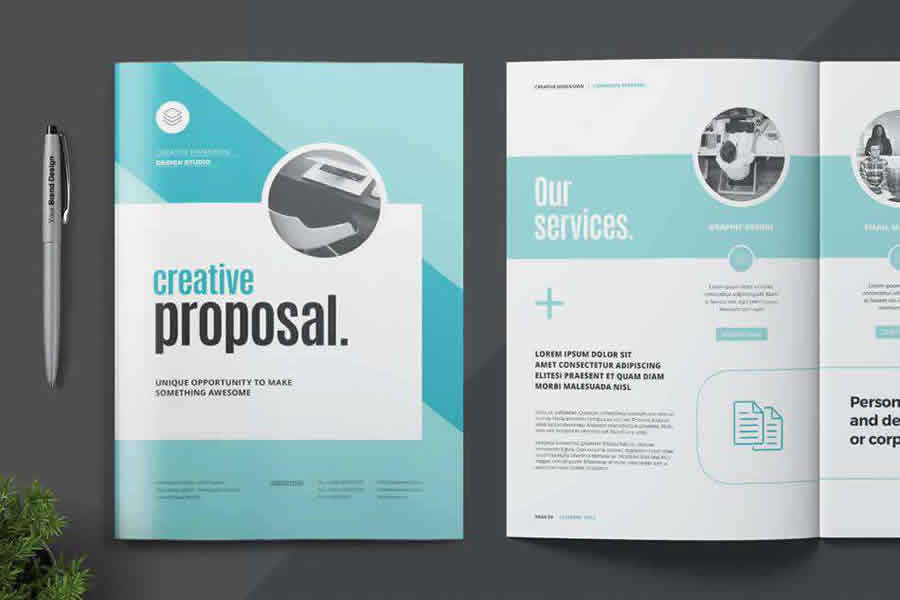
The first proposal template in this collection features a modern and fresh design. The template includes 14 Indesign templates, including a cover letter and resume, proposals, estimates, and invoice templates.

20+ Best Project Proposal Templates for InDesign in 2025 — Speckyboy

Free to Download

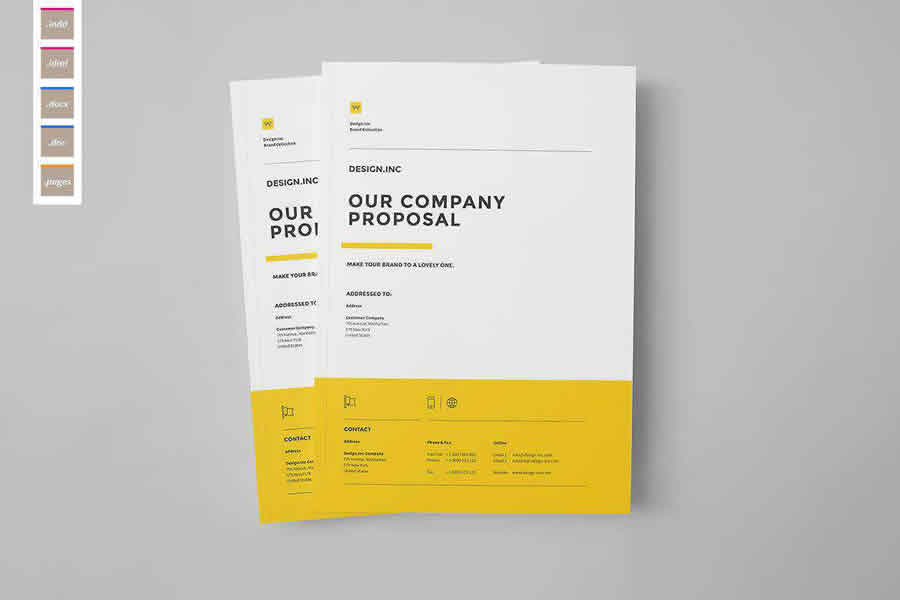
This business proposal template is fairly simple, but don’t let that put you off. Its simplicity is its strength. This 20 page template makes it easy to present your proposal logically without too much clutter and overwhelming the reader.

Business Proposal InDesign Template

This proposal template features a minimalist design and includes 20 different layout files. The files have been designed in A4 and US letter sizes, and they are easy to tweak and customize to reflect your brand.

 proposal print business template format

Free to Download

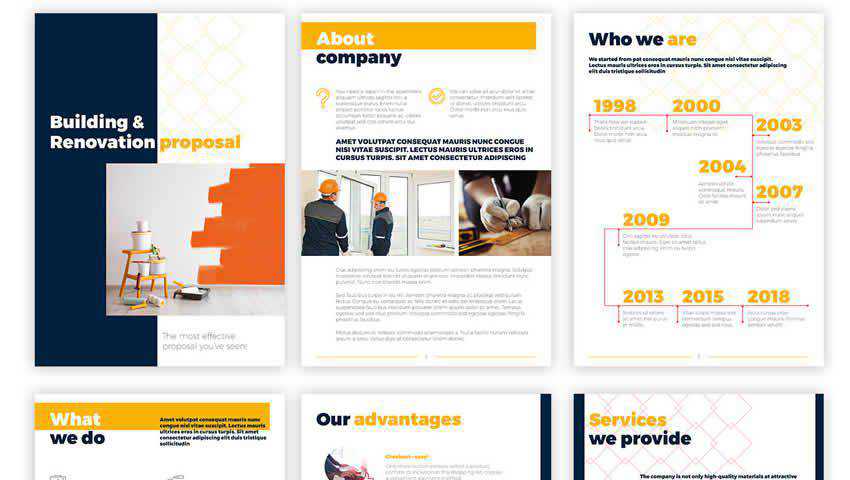
This free business presentation template is ideal for construction and renovation businesses. It has a 20-page layout that offers ample space for detailing your business plan. It includes free fonts and is print-ready in U.S. Letter and A4 sizes.

Business Proposal Presentation Template

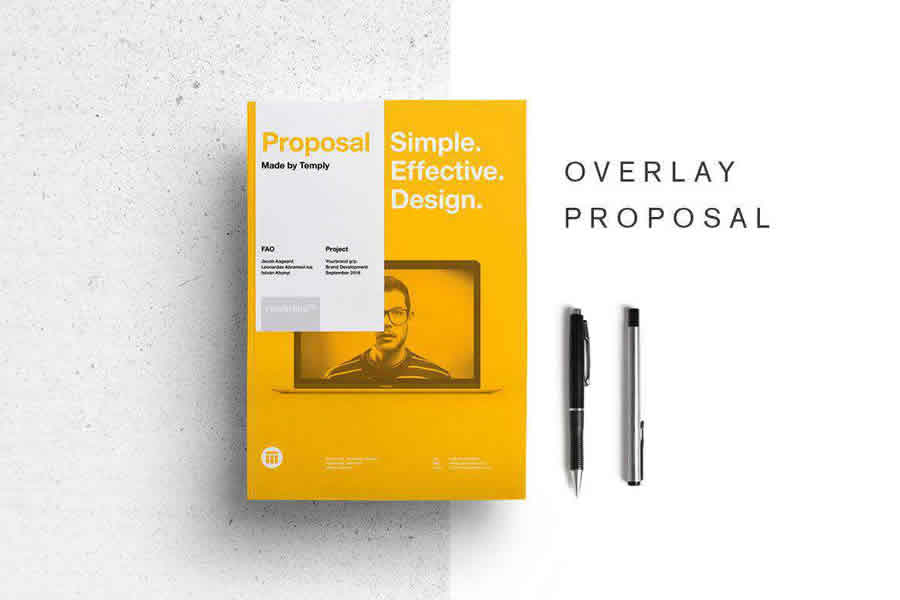
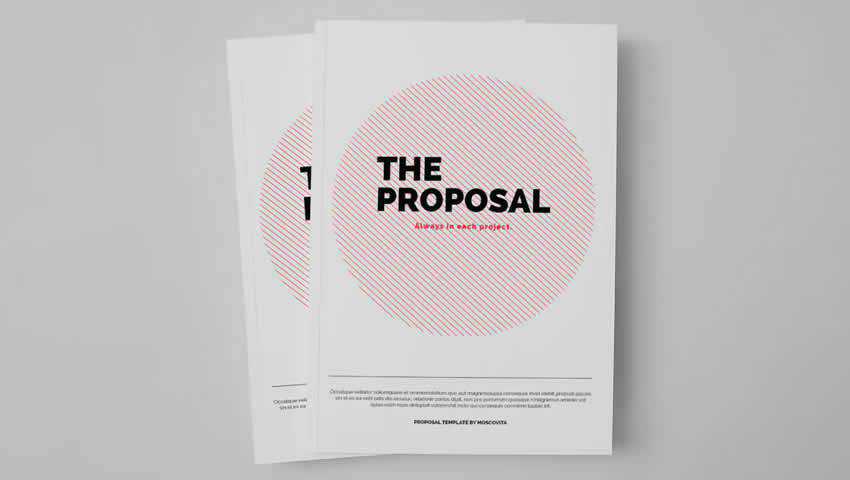
This minimal proposal template includes over 40 layered pages, perfect for designing any type of proposal. The template comes with defined character and paragraph styles, and you can easily change the colors and other styles by editing master files.

 proposal print business template format

Free to Download

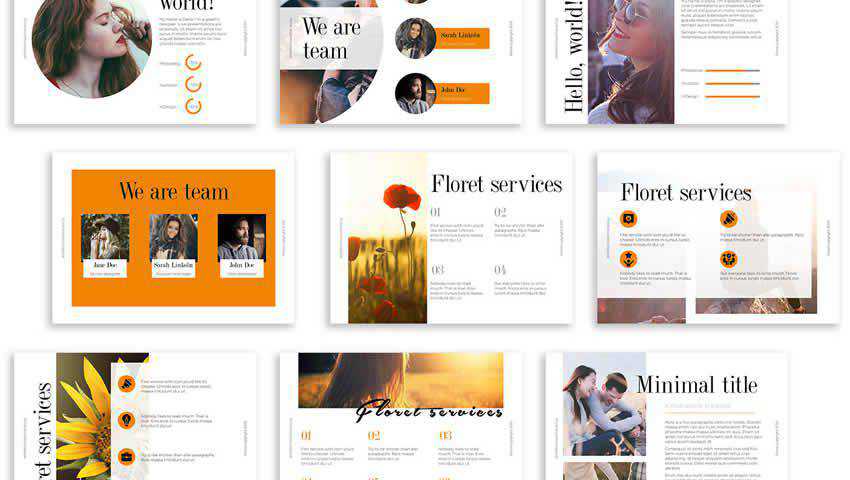
This template lives up to its name. ‘Floret’ features beautiful floral elements and offers a robust 44-page layout worthy of the most complex company proposals.

Floret Business Proposal Template

This colorful proposal template has everything you need to design a beautiful proposal for your next project. The template includes 28 pages, as well as unique character and paragraph styles.

 proposal print business template format

Free to Download

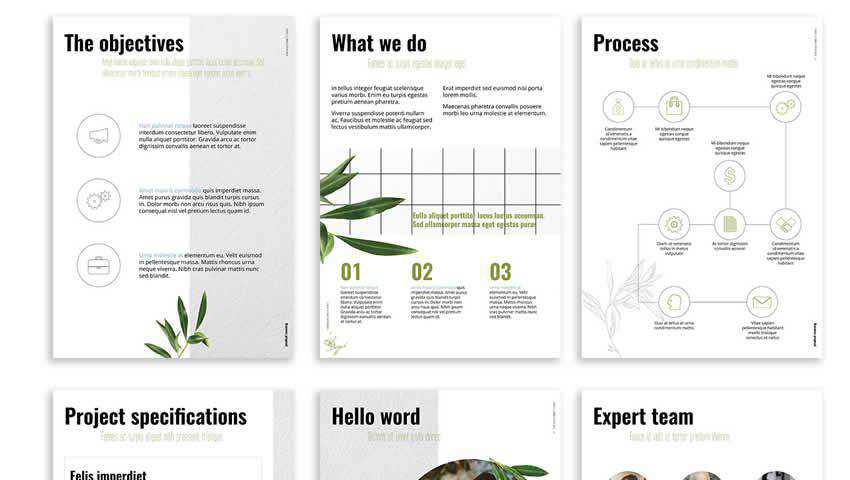
What a breath of fresh air this template is! ‘Olive offers a stunning layout with plenty of whitespace to ensure your proposal content stands out. Thanks to well-organized layers, this InDesign template is super easy to customize.

Olive Free Presentation IndDesign Template

Free to Download

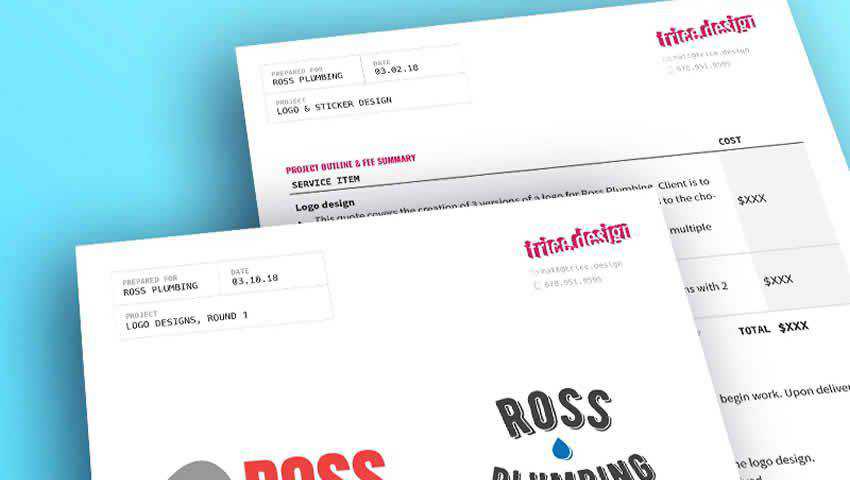
Sometimes, all you need is something super simple to get the point across. The Quote and Presentation Template is perfect for giving an estimate on a project or presenting a new business idea in a streamlined, no-fuss way.

Quote Presentation Templates for InDesign

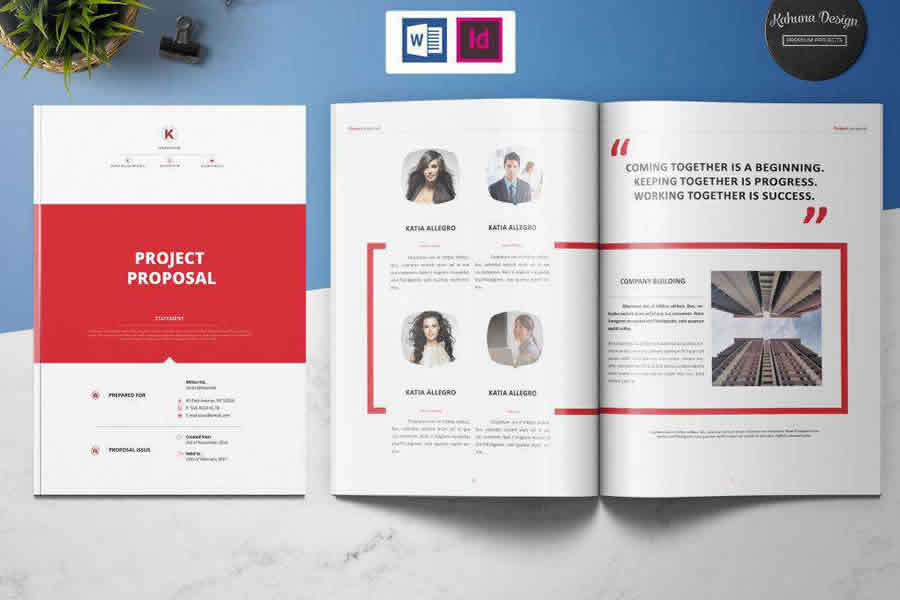
Consider this project proposal if you need a template that you can reuse for multiple projects. With a multipurpose design and style, this template is a perfect choice. It also includes various infographics, editable shapes, two project timeline options, and is compatible with MS Word.

 proposal print business template format

Free to Download

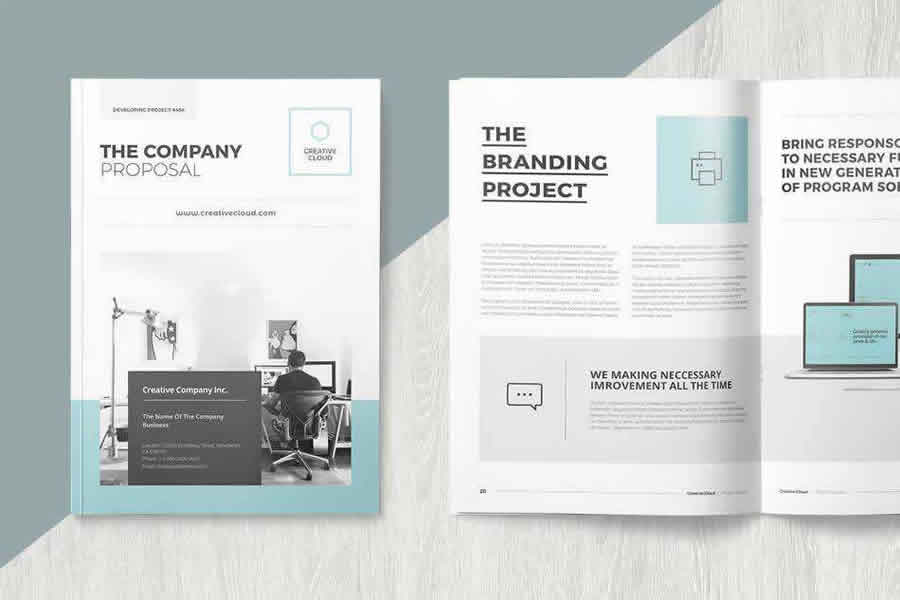
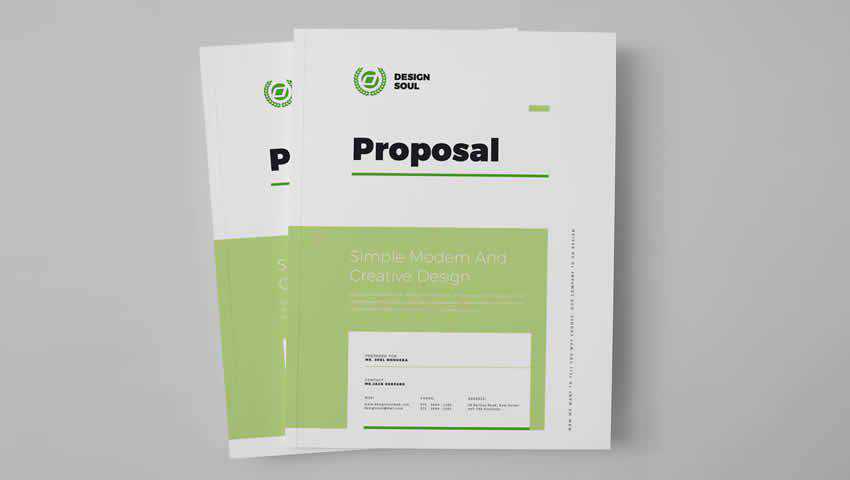
This proposal template is super clean and stylish, reminiscent of numerous minimal designs while still maintaining a sense of originality. This template comes with a 24-page print-ready layout in both A4 and U.S. Letter sizes.

Professional InDesign Proposal Template

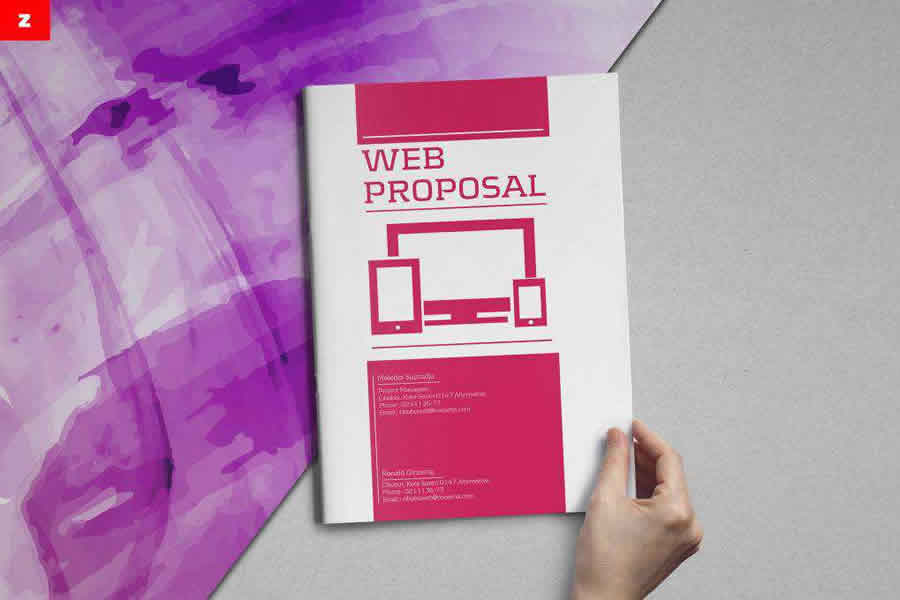
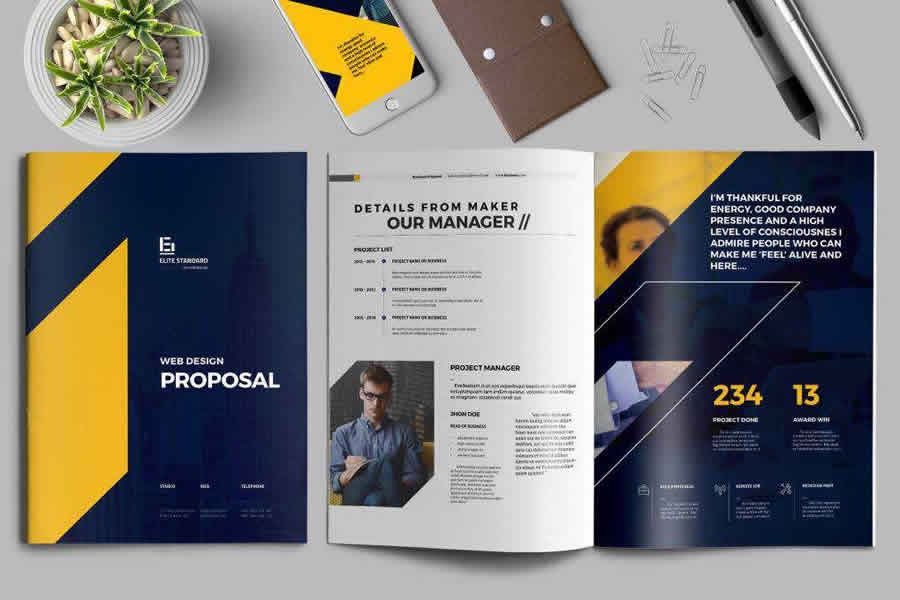
Try this clean web proposal project template if you’re looking for one to help you create a professional proposal for a web design project. This templating features a minimal style and comes with 28 pre-designed pages that include everything from proposals to estimates and invoicing.

 proposal print business template format

Free to Download

This stylish business proposal template has been designed with creatives in mind. It offers a bold geometric design, large color blocks, and bold typography. Due to its modern design aesthetic, this template is perfect for use by colleges and universities.

Stylish Business Proposal InDesign Template

This stylish InDesign proposal template includes 34 pages and comes in A4 and us letter sizes, and you can easily customize the colors and the fonts to match your brand.

 proposal print business template format

Free to Download

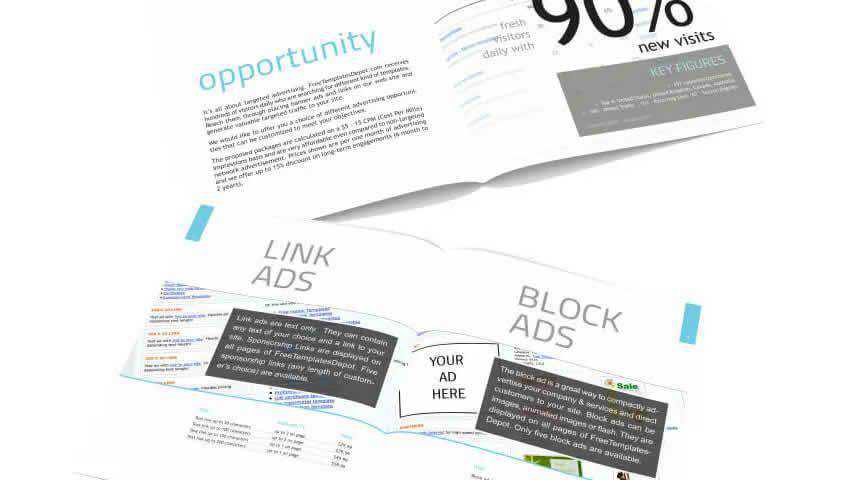
Use it for a business proposal or as a website media kit. Either way, the InDesign Proposal Template includes eight eye-catching layouts, perfect for filling in with company info, custom graphics, graphics, statistics, and more.

Advertising Proposal InDesign Template

The proposal template has a fresh and modern design with 24 pages. The template was designed in A4 and US letter sizes. It features a grid-based layout to help you align your elements and create a stunning proposal.

 proposal print business template format

This colorful and modern web design proposal template is perfect for any web design project. The template comes with 28 easy-to-edit pages and master pages.

 proposal print business template format

Try this one if you need an InDesign proposal and portfolio template to present your project. This template’s standout feature is that it also comes in Photoshop, Illustrator, and Word formats, so you can easily edit it in whatever program you’re most comfortable with.

 proposal print business template format

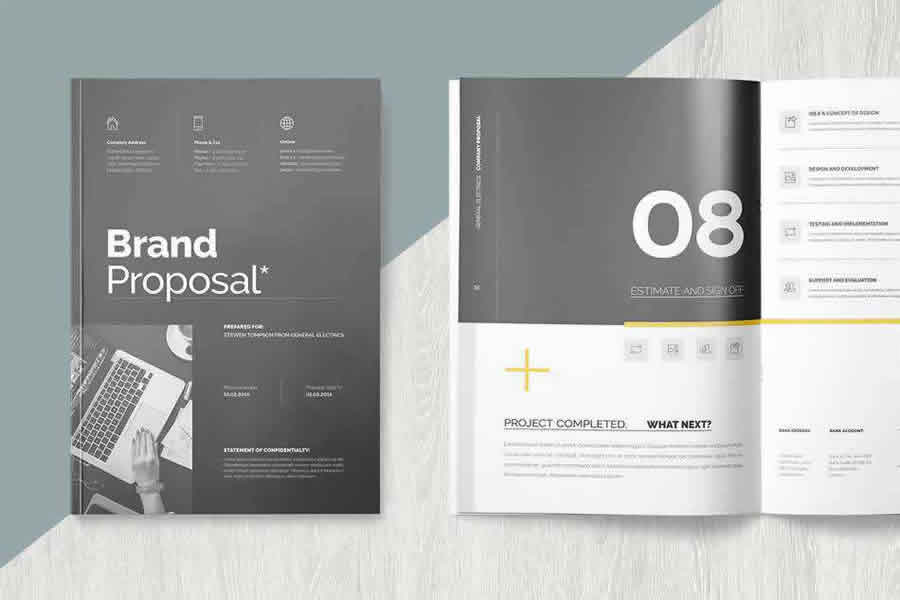
The Proposal Template lives up to its name – it’s the only template you’d ever need, thanks to its understated design and compelling, full-page layout. Customize the color scheme, add personalized text and images, and change character styles, all within 28 pages of full-color, print-ready convenience.

The Proposal Template

InDesign Proposal Template FAQs

  • Are These Templates Customizable to Fit My Business’s Brand?
    You can customize colors, fonts, and layouts to align with your business’s branding and the specific needs of your proposal.
  • Do I Need a Special Version of InDesign to Use These Proposal Templates?
    Generally, the latest versions of Adobe InDesign should be compatible with these templates, but always check the template’s requirements.
  • What Elements Should a Good Business Proposal Include?
    A comprehensive business proposal should include an executive summary, problem statement, solution, budget, timeline, and company overview.
  • Can I Export These Proposals for Digital or Print Use?
    InDesign allows you to export your finished proposal in various formats suitable for both digital sharing and high-quality printing.
  • How Can Using a Template Benefit My Business Proposal?
    A template ensures a polished and cohesive design, allowing you to focus more on the content and less on layout concerns, adding to the professionalism of your proposal.
  • Are InDesign Templates for Business Proposals Suitable for All Industries?
    These versatile templates can be adapted for various industries by customizing the content and design elements.
  • How Do I Choose the Right Template for My Proposal?
    Select a template that meets the tone and complexity of your proposal, considering factors like industry, audience, and the type of information you need to convey.

Proposals That Stand Out

Hopefully, this collection of InDesign business proposal templates will make it easier for you to push forward a new business idea and present all the information you need to captivate your target demographic.

These templates are easy to customize and designed to help your proposals stand out. With various styles to choose from, you will find the perfect template for your business needs.


Related Topics


15+ Best Free Personal Portfolio WordPress Themes in 2025 — Speckyboy

As a designer, illustrator, or other creative professionals, a portfolio website is an essential tool to showcase your skills and attract new clients or job opportunities. With WordPress, it’s never been easier to create a stunning portfolio site, even if you have no coding knowledge. However, choosing the right portfolio theme can make all the difference.

Fortunately, there are many free portfolio WordPress themes available that offer customizable templates, elegant typography, and beautiful galleries, all designed to showcase your work in the best possible light. These themes also offer features like mobile responsiveness and search engine optimization, ensuring your website looks great and is easy to find on any device.

In this roundup, we’ve compiled the best free portfolio WordPress themes for creatives. Whether you’re looking for a minimalistic design or a bold and colorful aesthetic, there’s a theme out there that can suit your needs. These themes are perfect for showcasing your unique style and vision. Check out our selection and start building your professional portfolio website today!

You might also like our collections of personal portfolio PSD templates, or these personal portfolio HTML templates.

Free to Download | Demo | WordPress Hosting

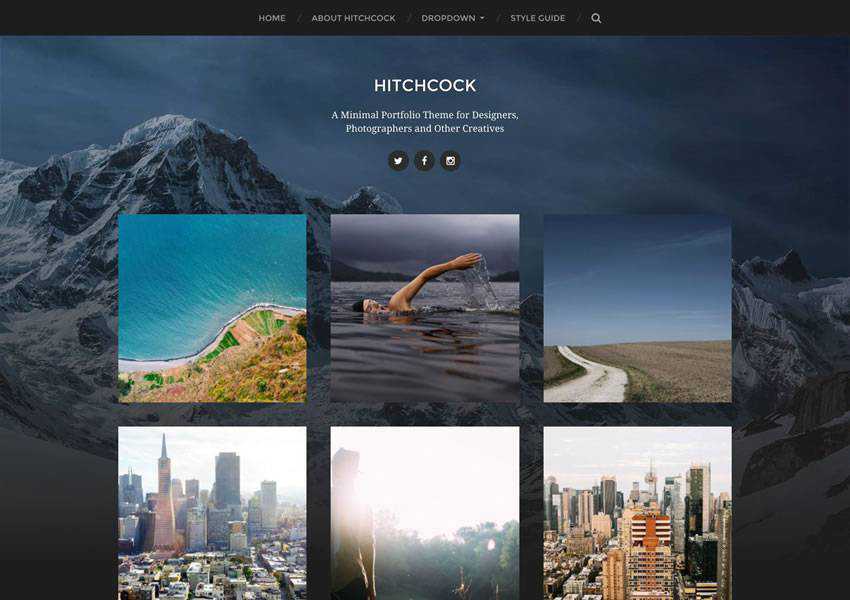
The Hitchcock theme has a unique design with a full-screen featured image. The theme is fully responsive and retina-ready and includes infinite scroll as well as support for the new post editor, Gutenberg.

15+ Best Free Personal Portfolio WordPress Themes in 2025 — Speckyboy

Free to Download | Demo | WordPress Hosting

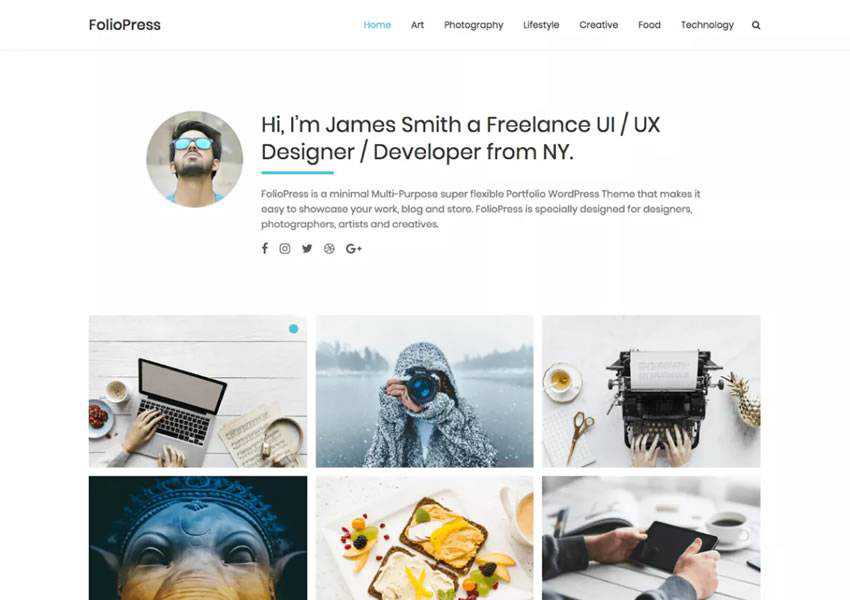
FolioPress is a minimal and flexible portfolio theme that displays your creative work in a grid layout on the homepage. You will also find plenty of customization options, custom social profiles, and it is fully responsive.

FolioPress free wordpress theme wp responsive creative designer agency portfolio camera

Free to Download | Demo | WordPress Hosting

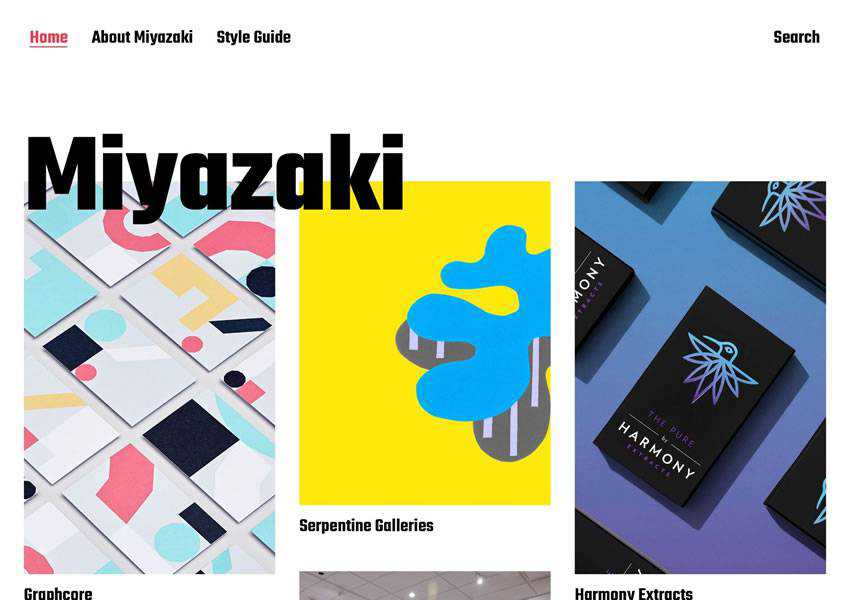
Consider the Miyazaki theme if you’re looking for an elegant and stylish portfolio theme. It uses contrast-heavy design, bold typography, and masonry layout to ensure your creative works draws the attention they deserve.

Miyazaki Stylish free wordpress theme wp responsive creative designer agency portfolio camera

Free to Download | WordPress Hosting

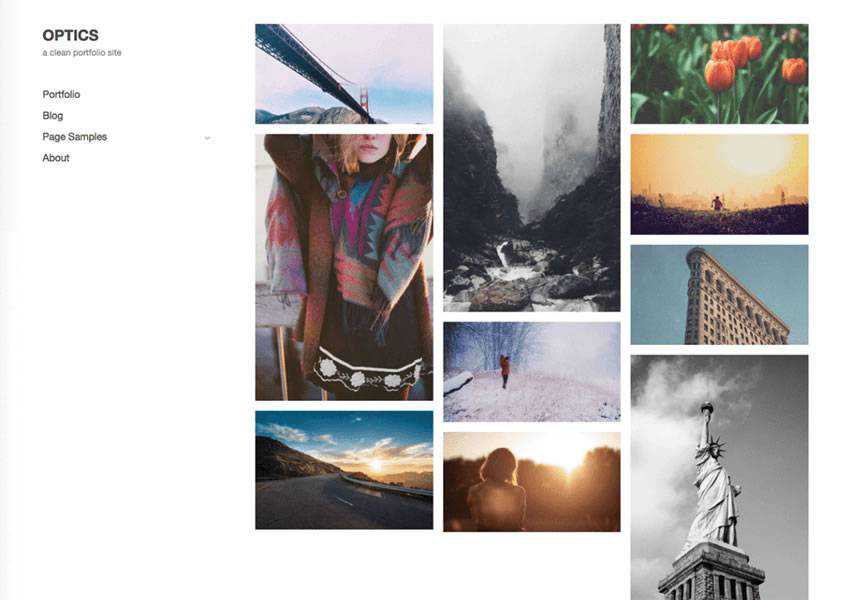
The Optics is a clean theme suitable for anyone looking for a minimal portfolio. The theme is easy to customize and is also translation and accessibility-ready. A standout feature is the integration with WooCommerce, so you can quickly sell your work.

Optics Clean free wordpress theme wp responsive creative designer agency portfolio camera

Free to Download | Demo | WordPress Hosting

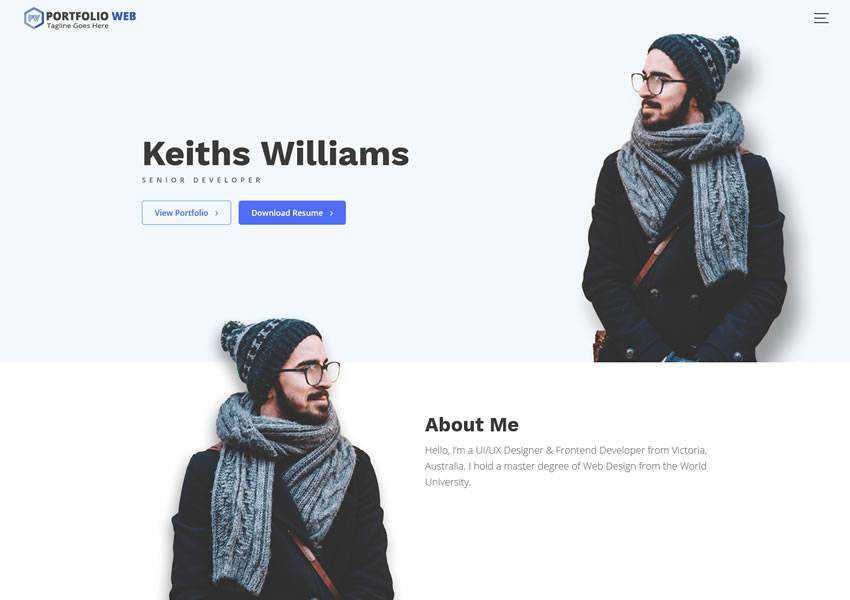
The Portfolio Web is a simple, modern, and responsive WordPress theme built with designers and creatives in mind. It comes with a built-in Live customizer and a huge range of widgets that make this theme easy to use.

Portfolio Web Multipurpose Biography free wordpress theme wp responsive creative designer agency portfolio camera

Free to Download | Demo | WordPress Hosting

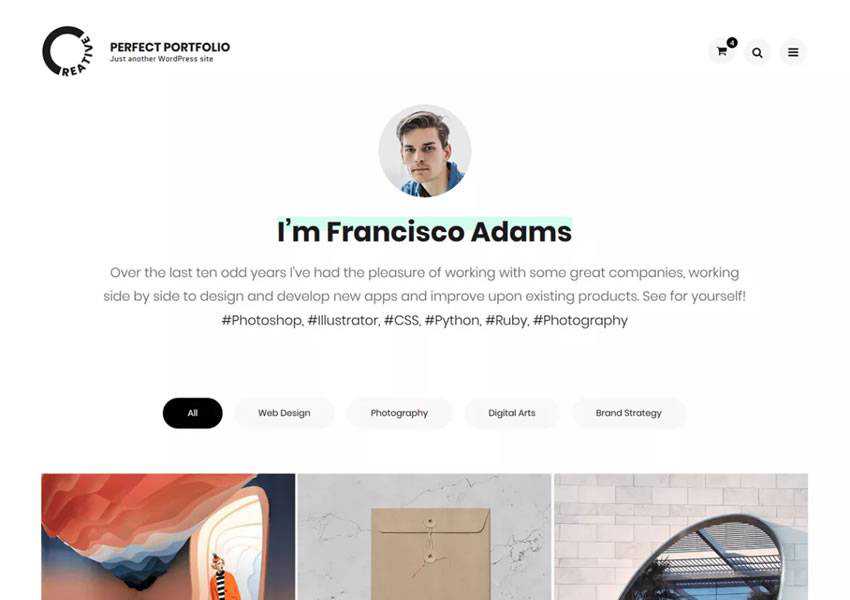
The Perfect Portfolio theme focuses on typography paired with stunning featured images. The theme has a wide range of customizable features, including sections on the front page, cross-browser compatibility, mobile-friendly design, and responsive features.

Perfect Clean Elegant free wordpress theme wp responsive creative designer agency portfolio camera

Free to Download | Demo | WordPress Hosting

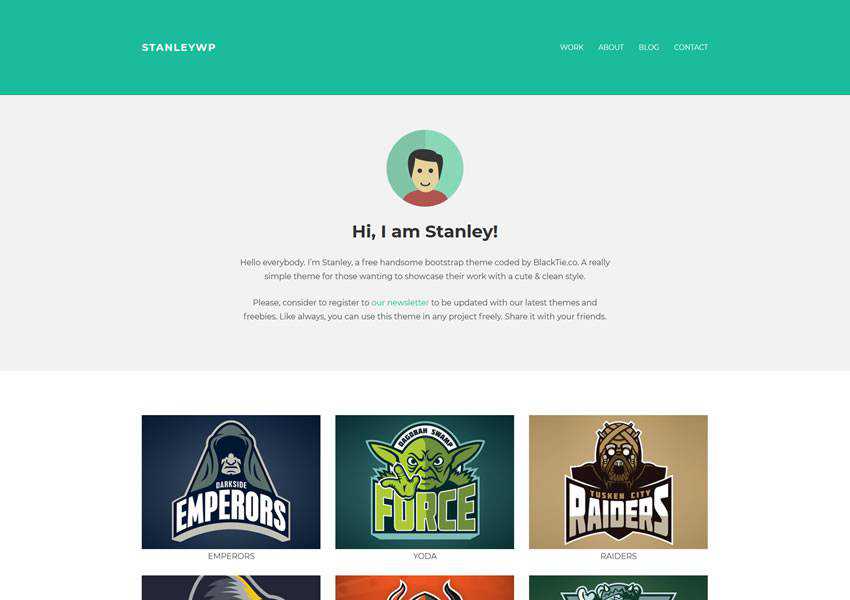
StanleyWP is based on the Bootstrap framework, which means it’s responsive out of the box. It’s also minimal and easy to customize and features several different page templates that will make it easy to get your site up and running as fast as possible.

StanleyWP Bootstrap free wordpress theme wp responsive creative designer agency portfolio camera

Free to Download | Demo | WordPress Hosting

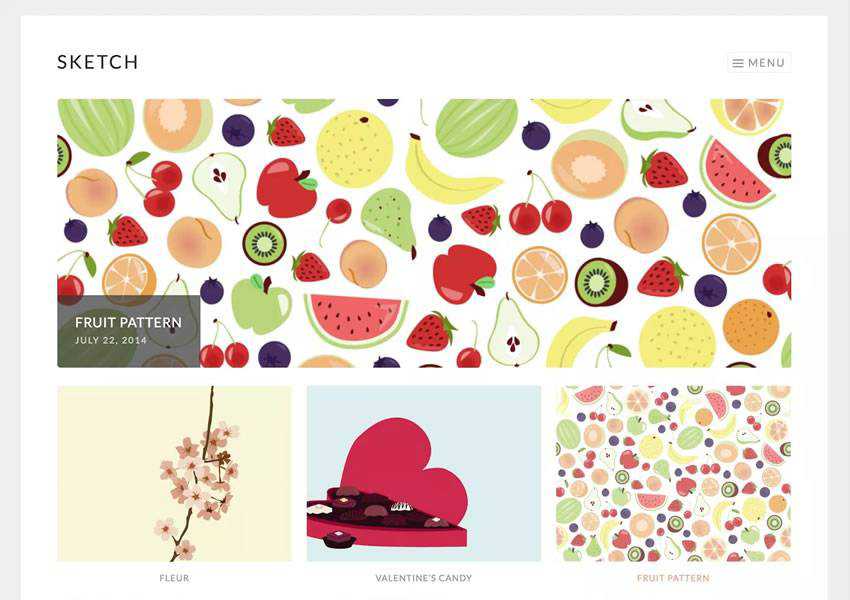
Sketch is a responsive portfolio theme, perfect for showcasing your creative talent. The theme features a clean, lightweight design that puts focus on your projects. It’s also easy to customize and supports a custom social links menu.

Sketch free wordpress theme wp responsive creative designer agency portfolio camera

Free to Download | Demo | WordPress Hosting

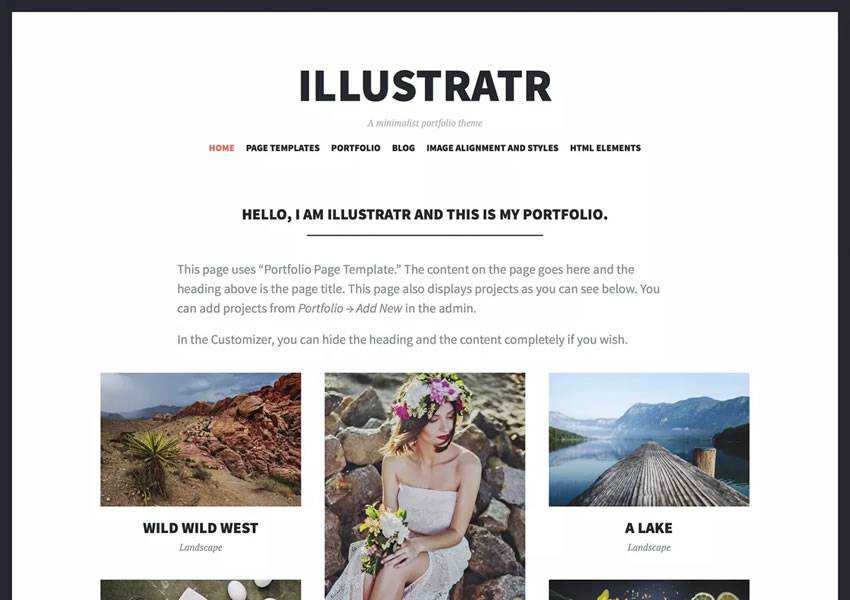
The Illustratr theme features elegant typography and displays your creative works in an elegant grid fashion. It makes use of the WordPress portfolio feature, and it also includes support for a custom social links menu.

Illustratr free wordpress theme wp responsive creative designer agency portfolio camera

Free to Download | Demo | WordPress Hosting

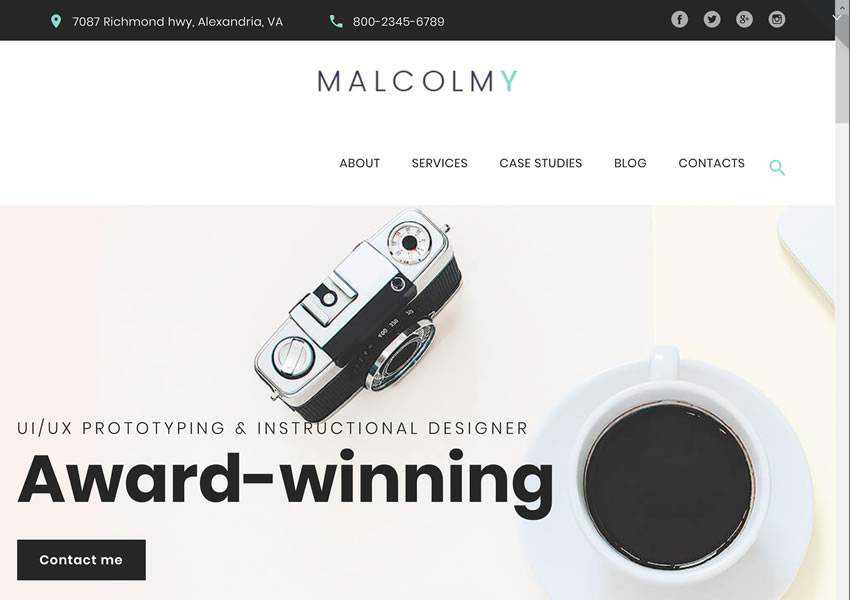
The MalcolmY theme is easy to customize because it uses a drag-and-drop page builder and has an extensive theme options panel, so you can make this theme your own without any coding knowledge. The theme has multiple portfolio layout possibilities and is fully responsive.

MalcomY Freelance Designer free wordpress theme wp responsive creative designer agency portfolio camera

Free to Download | Demo | WordPress Hosting

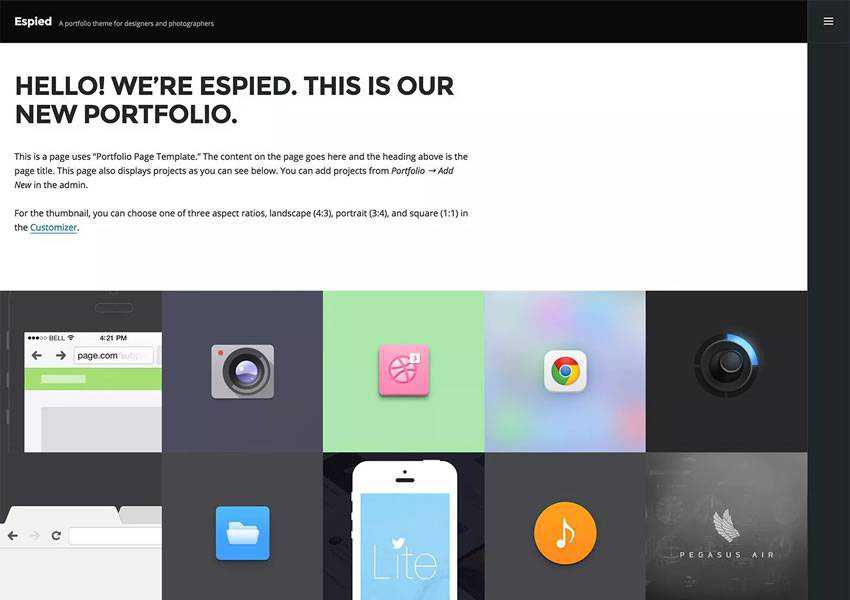
The Espied theme has a minimal design which puts your creative projects in the spotlight. With support for Gutenberg and classic layout, custom social links menu, and a responsive design, this theme is easy to use and makes it easy to share your creativity with the world.

Espied free wordpress theme wp responsive creative designer agency portfolio camera

Free to Download | Demo | WordPress Hosting

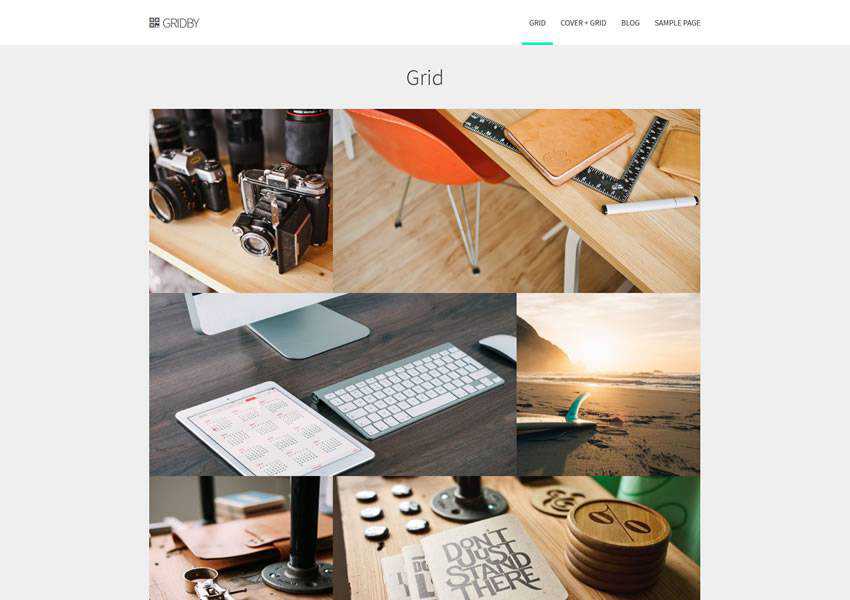
Try the Gridby theme if you love parallax design. In addition to beautiful parallax animation, this theme uses a grid layout and is easy to customize thanks to the extensive theme options panel.

Gridby Parallax Grid free wordpress theme wp responsive creative designer agency portfolio camera

Free to Download | Demo | WordPress Hosting

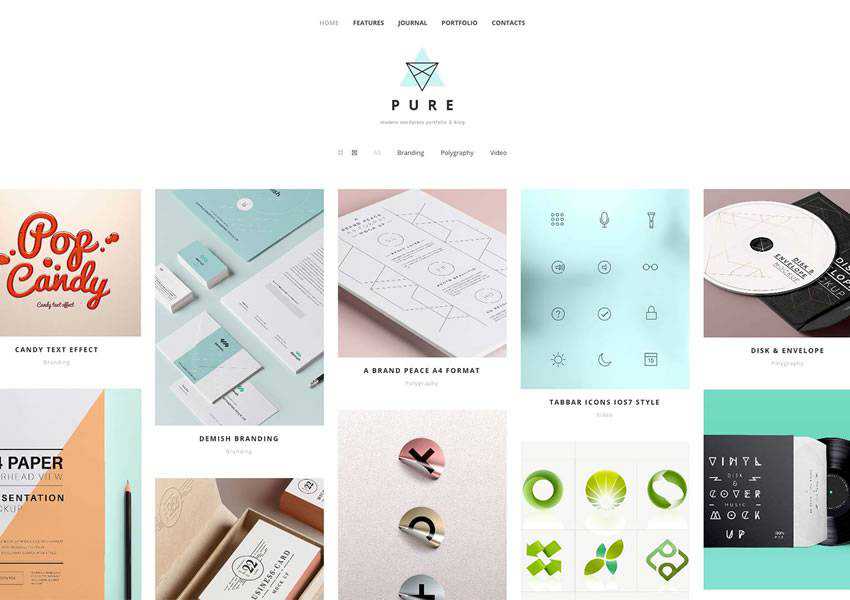
The Pure theme has a dedicated portfolio option and a well-designed blog section so you can easily share plenty of details about your creative process. The theme is easy to customize with a drag-and-drop page builder.

Pure free wordpress theme wp responsive creative designer agency portfolio camera

Free to Download | Demo | WordPress Hosting

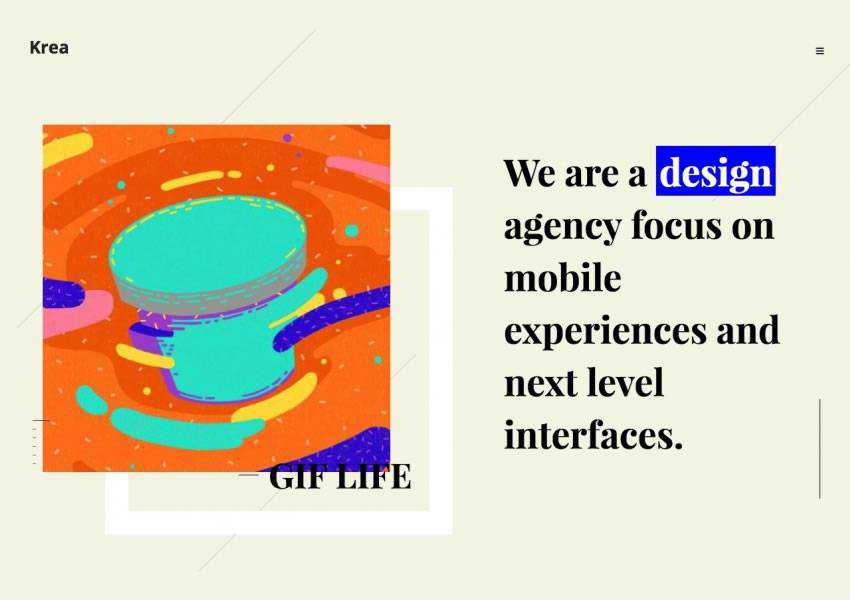
The Krea theme uses bold typography paired with a well-organized grid layout to make your creative works stand out. It comes with detailed documentation and is translation-ready.

Krea free wordpress theme wp responsive creative designer agency portfolio camera

Free to Download | WordPress Hosting

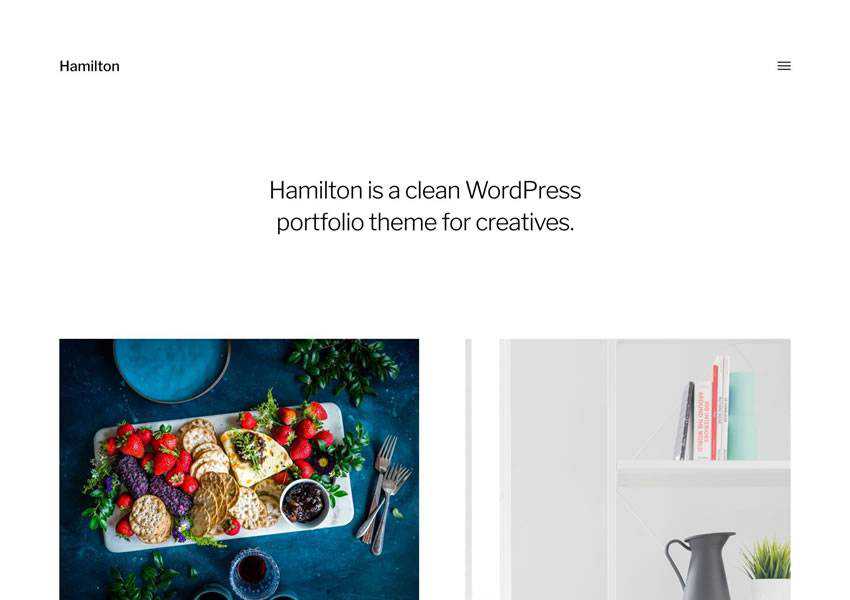
The Hamilton theme is an excellent choice if you’re looking for a simple and clean theme. It has a built-in dark and light mode, infinite scroll, and Gutenberg and classic editor support.

Hamilton free wordpress theme wp responsive creative designer agency portfolio camera

WordPress Portfolio Theme Comparison Table

Theme Best For Features Responsive SEO Friendly
Hitchcock Photographers & Designers Fullscreen image grid, social icons, retina-ready
FolioPress Creative Agencies Homepage slider, portfolio showcase, customizable layout
Miyazaki Writers & Visual Creatives Bold typography, masonry grid, infinite scroll
Optics Photography Portfolios Clean galleries, bold image display, Gutenberg support
Portfolio Web Personal Portfolios One-page design, easy customization, smooth scrolling
Perfect Portfolio Freelancers Multiple homepage layouts, SEO optimized, fast loading
StanleyWP Designers & Developers Bootstrap framework, portfolio showcase, minimal style
Sketch Illustrators & Artists Minimal design, project-focused layout, easy setup
Illustratr Graphic Designers Simple grid layout, portfolio projects, lightweight design
MalcolmY Creative Portfolios Grid-based layout, bold typography, lightweight code
Espied Photography Portfolios Clean image grid, portfolio template, modern layout
Gridby Visual Artists Grid-first design, easy portfolio management, responsive
Pure Minimalist Minimal Portfolios Simple layout, clean typography, distraction-free design
Krea Agencies & Studios Creative layouts, bold design, portfolio showcase
Hamilton Modern Minimal Portfolios Grid design, dark/light mode, Jetpack infinite scroll

Frequently Asked Questions

  • What is the best free WordPress portfolio theme in this collection?
    Hamilton is a favorite for its clean grid design, while Miyazaki and Hitchcock stand out for their bold layouts and strong typography.
  • Which themes work best for photographers?
    Optics, Espied, and Illustratr are built with image-heavy portfolios in mind, making them strong choices for showcasing photography.
  • Are these free portfolio themes responsive?
    Yes. Themes like Perfect Portfolio, Portfolio Web, and Gridby are fully responsive, so your work looks sharp on any screen size.
  • Which themes are best suited for minimal portfolios?
    Sketch, Pure, and Hamilton offer simple layouts with a focus on your work, making them ideal for minimal-style portfolios.
  • Can these free themes be easily customized?
    Many of them, such as FolioPress, StanleyWP, and Krea, offer flexible options through the WordPress Customizer for colors, layouts, and typography.

Getting your portfolio site up and running is not difficult when you have tools like WordPress at your disposal. However, you will still need a portfolio theme, so use our roundup as a starting point to find the best WordPress theme for your site.


More Free WordPress Themes

<!–


–>

Related Topics


10 Best Free Niche WordPress SEO Plugins in 2025 — Speckyboy

WordPress is an effective platform for getting your website indexed by search engines. And, while there are several well-known plugins to help optimize your site, there are many more under-the-radar options to choose from.

These plugins range in their focus. Some provide comprehensive SEO improvements, covering everything from keywords to helping boost site speed. Others focus on specific aspects, like making your site easier for artificial intelligence (AI) models to index. This diversity means you can find a plugin tailored to exactly what your site needs.

The beauty of these plugins is their ability to fine-tune your website’s SEO strategy. Whether you’re looking to enhance your site’s visibility, increase traffic, or improve search rankings, these tools can be helpful. They’re also designed to be user-friendly, making SEO more accessible to everyone, regardless of technical expertise.

To give your WordPress site an SEO boost, here are ten underrated plugins. Each plugin brings something unique and could be the key to improving your site’s search engine ranking. These plugins are worth exploring if you’re aiming for a more effective and efficient SEO approach.

Enter your desired keyword or phrase, and BoldGrid Easy SEO will analyze your site’s content and provide helpful suggestions.

That may sound pretty standard. However, the plugin also scans image ALT attributes and your use of heading tags to improve page structure. Search visibility settings enable you to hide content from search engines, if that’s your thing.

10 Best Free Niche WordPress SEO Plugins in 2025 — Speckyboy

The SEO Framework aims to blend seamlessly into your WordPress website. The plugin eschews loud ads and upsells, while focusing on helpful features. It comes preconfigured with settings that should benefit most websites, but you can adjust them as needed.

You’ll find settings for each page’s meta details, along with social sharing optimizations. There is also a wide array of paid extensions that add structured data, Google Analytics integration, and local business info.

The SEO Framework WordPress plugin

Structured data is an important factor for many types of websites. Local businesses, publishers, and events benefit from adding rich snippets to their content.

& Structured Data supports 35+ schema types and includes WordPress blocks that make it easy to add structured content to any page. Plus, you can conditionally display markup fields on any page or post type.

Schema & Structured Data for WP & AMP

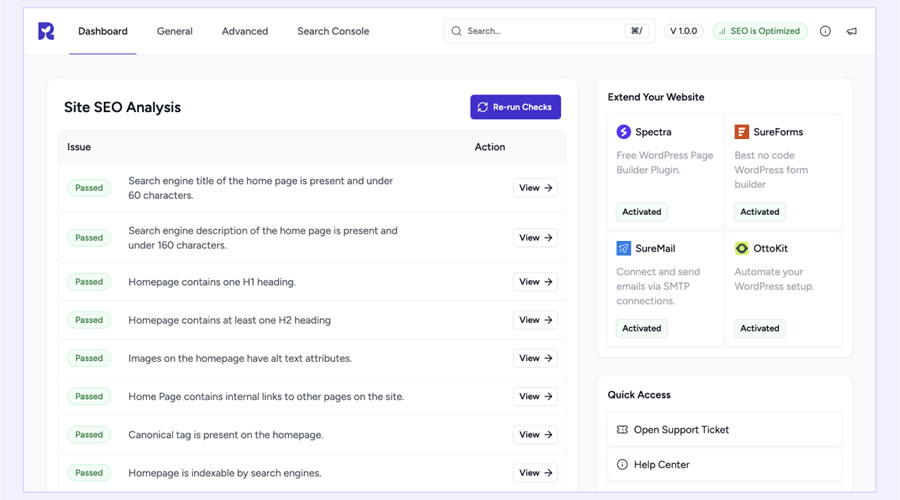
Touted as “beginner-friendly,” SureRank SEO offers a suite of features to get your site indexed. It covers all the basics for optimizing content and social media sharing.

There’s also an image SEO feature that automatically generates ALT text and redirects WordPress attachment pages. You’ll also find Google Search Console integration and the ability to track SERP (search engine results pages) stats on the dashboard.

SureRank SEO WordPress plugin

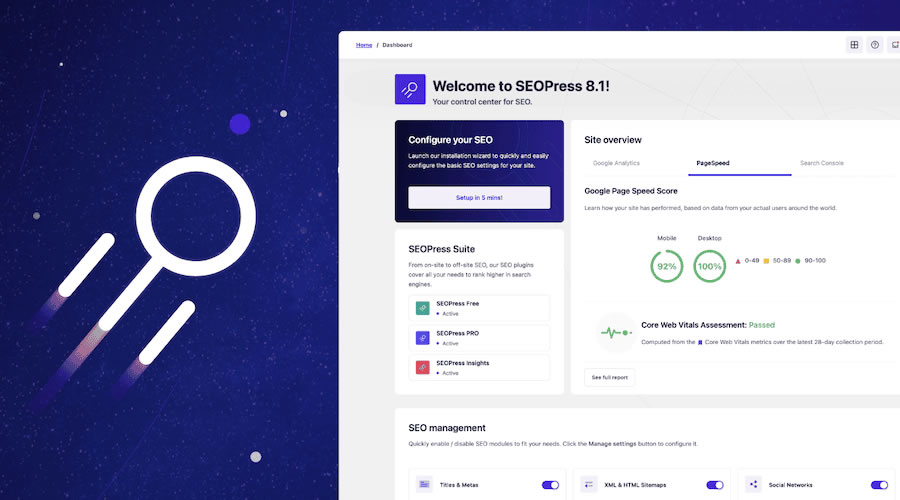
SEOPress includes everything you’d expect from an SEO plugin, plus a few extras. The image sitemap feature is a prime example.

It automatically adds images, galleries, and WooCommerce product images to your sitemap for improved visibility in Google Images. You can also build a custom HTML sitemap to help users navigate your content. The little details are what make this a compelling option.

SEOPress WordPress plugin

Sometimes, the standard meta tags added by SEO plugins aren’t enough. That’s where Meta Tag Manager comes in.

The plugin enables you to add predefined or custom meta tags to pages and posts. You can include tags globally for different content types, or on specific posts. It will also add structured and Open Graph data to your site’s home page.

Provide social networks like Facebook, Pinterest, and X with all the appropriate Open Graph data with OG. Activate the plugin, and it will automatically output the relevant data, including images and WooCommerce product meta.

Oh, and there’s no settings page to worry about. It’s an easy way to improve your site’s social sharing capabilities.

Search engines are no longer the only tools indexing your website. AI large language models (LLMs) are also frequent visitors (some might say too frequent).

he Website LLMs.txt plugin automatically generates an llms.txt file that formats site data in an AI-friendly manner. Think of it as an XML sitemap geared toward the needs of LLMs. You can customize which content is added and how often the file is updated. The future is now, friends.

Website LLMs.txt WordPress plugin

Internal linking is often an underutilized aspect of SEO. We spend so much time tweaking titles and descriptions, ignoring the great content already on our websites.

Internal Link Juicer aims to fix that by automatically adding relevant links to your posts. Enter keywords for a post, and the plugin will identify appropriate links. You can tweak settings, including the link format and excluding specific posts from linking.

Internal Link Juicer WordPress plugin

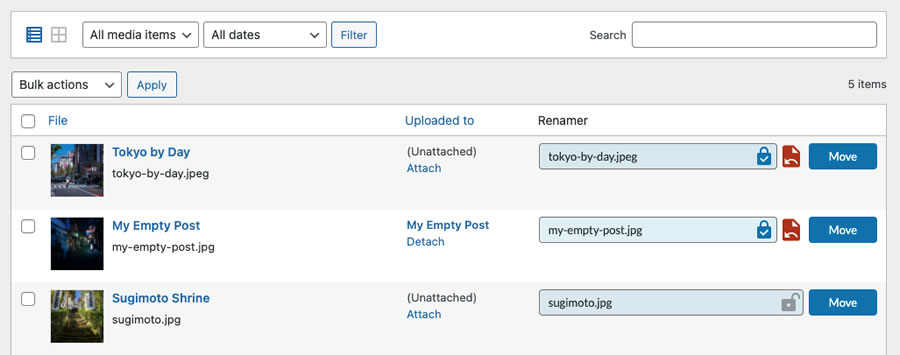
Do you pay attention to the names of your media files? If not, you’re missing an opportunity to improve SEO. Media File Renamer scans your file’s data using AI and generates an SEO-friendly name, title, ALT attribute, and description.

The plugin works for new uploads, but you can also use it with the existing files in your Media Library.

Media File Renamer WordPress plugin

Alternative Options for Improving SEO

SEO isn’t a one-size-fits-all proposition. Your site’s needs will vary, based on the type of content you publish and your goals. Certain niches require specialized tools.

The plugins in this collection can help with a variety of use cases. And some can be used in conjunction with the more generic tools on the market. That enables you to build a custom SEO strategy.

It’s also no secret that, in the age of AI, SEO is shifting. Thankfully, the WordPress plugin ecosystem is beginning to address this evolution. You can simultaneously cover the traditional and cutting-edge techniques.

We hope this collection helps you build a winning formula for now and the future!

Niche SEO WordPress Plugin FAQs

  • What Are Niche WordPress SEO Plugins?
    They are specialized WordPress plugins designed to improve search engine optimization for specific types of websites.
  • Who Should Use Niche SEO Plugins for WordPress?
    They are ideal for website owners who have specific SEO needs that aren’t fully addressed by general SEO plugins.
  • Why Choose a Niche SEO Plugin Over a General SEO Plugin?
    They offer customized features and settings that cater specifically to the unique SEO challenges of certain types of websites or businesses.
  • Can These Plugins Help with Content Optimization?
    Yes, many niche SEO plugins offer content analysis and recommendations tailored to your specific website type, helping you optimize your content more effectively.
  • Do Niche SEO Plugins Work Alongside General SEO Plugins?
    In many cases, yes. They can often complement the features of general SEO plugins for a more comprehensive SEO strategy.

More Essential Free WordPress Plugins


Related Topics


Why The Grumpy Designer Is Wary of AI’s Confidence — Speckyboy

Confidence is a funny thing. I struggled with it as a child. I didn’t believe I was good enough to excel in school or athletics. Even so, I was a terrific partner in pop-culture trivia.

Growing up to be a Grumpy Designer came with a boost to my self-worth. I discovered a talent for design, development, and writing. That other people enjoyed my work made me feel capable. I also started caring less about what other people think.

However, I still feel self-conscious when in the presence of a confident person. You know, the type who could sell anything to anyone. I tend to doubt myself in those situations. Perhaps that intimidation factor is why these people often rise to high-powered positions, but I digress.

These days, I don’t have to leave my house to feel that same sense of insufficiency. All I have to do is fire up an artificial intelligence (AI) app. It will respond with a level of confidence we mortals can only dream of.

Here’s why I find AI’s self-assured attitude to be troubling. Scary, even.

Confident Answers Don’t Always Mean Accurate Results

A well-tuned AI model can say anything while keeping a straight face. OK, it has no face (yet). But hear me out. This thing could tell you that the moon is made of cream cheese and really mean it. The worrisome part is that some people will trust the answer without question.

I see this brazenness when asking AI for coding advice. I’ll share a buggy code snippet or request a new one from scratch. The tool generates code and an explanation of how it works. How thoughtful!

Surprisingly, it turns out that code generated in less than a minute isn’t always reliable. Testing AI’s output doesn’t necessarily work the first time. It either produces the same issue or introduces new ones.

Pointing out these issues humbles the robot, to a degree. The go-to response seems to be, “Oh, that’s right! I forgot to account for x, y, and z. Here’s how to fix it.”

That magnetic personality springs back to life, with an answer just as confident as the first one. The cycle continues until AI gets it right or I give up.

None of this means AI isn’t helpful. However, the tone of its responses gives humans a false sense of security. Large language models (LLMs) can convince us in ways most people can’t. Thus, it discourages us from critical thinking.

The impact is already being felt. Future generations that grow up with this omnipresent technology will lose even more. For them, AI’s answer may be the only one they see.

Why The Grumpy Designer Is Wary of AI’s Confidence — Speckyboy

Can AI Take It Down a Notch?

I understand the predicament AI companies are in. From a marketing perspective, an app that provides answers to difficult questions must demonstrate competence. A confident tone is one way to establish trust with users.

There doesn’t seem to be an easy alternative. For instance, I can’t imagine a sheepish response will give the same positive vibes. Can you imagine Google’s Gemini responding with, “This probably won’t work, but try it anyway”?

I don’t believe enlarging those tiny disclaimers will help, either. So, what’s the solution? There are a few things that might help (notice my semi-confident tone).

Do a Better Job of Citing References

AI is not magic. It does not conjure knowledge from the cosmos. It crawls websites (sometimes, a little too much). However, it does a poor job of citing its sources of information.

Some apps add clickable footnotes, while others seem to offer no visible references. That’s not good enough.

Sources could be better integrated into AI’s responses. For example, instead of saying:

“Be sure to escape the output of your WordPress plugin.”

It could be tweaked to:

“According to official WordPress documentation, plugin authors should escape everything from untrusted sources.”

This step accomplishes two things. First, it credits the source of information (the polite thing to do). Second, it invites users to dig deeper into the subject matter.

Tell Us What Could Go Wrong

Since LLMs have gobs of data, I’m willing to bet they can account for the worst-case scenario. They could use this information to keep users safe when experimenting with code, cooking, or other potentially dangerous activities.

Like the coffee cup that warns you of the hot liquid inside, AI apps could provide a safety checklist with their responses. Reminders to back up your website, for instance, might save someone from a disaster.

It’s a common technique for writers and other content creators. We’re not supposed to assume the reader knows everything. Thus, informing them of potential dangers is part of being a responsible resource.

AI should be held to the same standards as its human counterparts.

Ask Follow-up Questions to Provide the Best Answer

There’s more than one way to accomplish something. And some subjects are controversial or have gray areas. That’s the reality of our world. AI should strive to notify us of those instances without taking sides.

When using AI to write code, I have noticed occasions where it provides multiple approaches. It’s helpful, as I can use the one that works best for me. This should become the rule, not the exception.

I realize it might be difficult for an app to do this without proper context. We humans aren’t always clear about what we want. So, why not ask us a few follow-up questions? Or make responses with multiple options a choose-your-own adventure experience?

This promotes a more conversational approach to tasks and encourages critical thinking. It may even lead to better results.

There are steps AI companies can take improve user confidence.

AI Doesn’t Have to Be So Smug

AI answers our queries with robust confidence, regardless of its accuracy. It’s a concerning trend, given how quickly these tools are being adopted. Humans who blindly follow AI’s advice will inevitably be in for a rude awakening.

I can’t see this as a positive for either AI companies or users. Trust is a key component for growth. Users will flock to an app they trust and shun ones that provide bad information. Just like other consumer products, reliability matters for AI’s ultimate success.

Perhaps the answer is for these models to trade a bit of convenience for a more trustworthy process. We humans do it all the time. Maybe these machines could learn a thing or two from us.

Related Topics


Wirecast Empowers Single Operators to Run Multi-Camera Live Streams with Ease

Wirecast Empowers Single Operators to Run Multi-Camera Live Streams with Ease

Running a professional multi-camera live stream as a one-person crew may sound impossible, but with Wirecast by Telestream, it’s not only achievable—it’s efficient. By combining capture cards, PTZ cameras, and a joystick controller, a solo operator can switch between multiple camera angles in real time while maintaining broadcast-quality production. Wirecast acts as the central hub, managing HDMI and SDI sources, PTZ over NDI, and audio from a USB interface. Its intuitive layer-based workflow allows operators to easily organize audio, camera feeds, and pre-recorded media, while Stream Deck integration ensures fast switching at the push of a button. The result: smooth, professional multi-camera productions without the need for a full crew. Check out the video:

[embedded content]

Learn more about Wirecast below:

Read the full transcript:

I am moving on my gear in for yet another multi-camera live stream setup now if you have the budget and the crew to have multiple camera operators each run in the camera for you these aren’t too hard but when you’re trying to do one by yourself it’s a little bit different we believe now in an earlier video I took a quick look at how I do these live streams but in this video I’m going to go in depth and show you step by step how to do a one-man band live stream complete with multiple cameras and animated graphics so let’s take a look at how I pull off these live streams by myself so you will need a piece of software to take the video from your cameras encode it and broadcast it live to the web there are several options you can use including vmix OBS or the software I use which is made by telestream and is called wirecast this software can do all sorts of things and we will be taking a look at some of its abilities in this video so there’s a variety of ways to get video into wirecast the first way I’m going to talk about is using a capture card capture cards bringing video into your computer via HDMI or SDI you can use an external capture card or an internal capture card if you have a desktop but as I have a laptop I’m using an external capture card there’s a variety of these capture cards from magewell Blackmagic and Elgato these capture cards will let you bring in professional video cameras or dslrs anything that has an HDMI or SDI output can be brought into your computer moreover you don’t have to just hook one of these up you can hook two or more cameras up and switch back and forth between the two cameras using wirecast as a video Switcher foreign is to hook up several cameras to an atem mini and pre-switch the cameras and bring them into wirecast wirecast will see the atem mini as one source and you will switch on the switcher itself instead of in-wire cast now from a solo operator’s point of view there’s one thing wrong with either one of these options and that is that you need camera operators if you ever want to change any of the shots on any of your cameras well when you’re one-man crew and you don’t have camera operators what is another option the best option is probably using ndi to hook up multiple PTZ cameras which you can then control with a joystick and here I’m going to show you how to do that so I’ll post links to the Gear I used in the description field of this video first of all we’ll need a Poe switch Poe means that one ethernet cord delivers video signal from your camera to the computer power from the switch to the camera and control of the camera to the joystick controller we’ll also need a thunderbolt 4 dock from OWC to give us a bunch of extra ports to hook up everything that we need for this live stream we will need some way to bring audio into the computer this is a Behringer USB audio interface which allows us to bring audio in from a dedicated audio mixer a stream deck while it’s not essential is really nice because you can use it as both a switcher to switch between your different cameras and you can bring in animated graphics and titles with it and I’ll show you how to do that later you’ll also need a couple PTZ cameras and the joystick controller to control these PTZ cameras for purposes of this demonstration I’m also going to use an external capture card to hook my Sony fx6 up so that I’ll have three different camera sources so here’s a look at the OWC Thunderbolt Dock and what I plugged into each port and here’s what goes into each port on the poe switch thank you and here’s how I set up the audio interface foreign TZ cameras and the joystick controller a stream deck and an external keyboard and mouse are connected to the OWC Thunderbolt dock a thunderbolt ethernet adapter is connected to a second Thunderbolt port on the laptop I want to keep all broadcast traffic separate from my internet connection so my Poe switch is only for the cameras and the joystick controller the high-speed internet line to stream the video out on connects to this external adapter next let’s get the joystick controller and the PTZ cameras communicating with each other first you’ll have to open a free app from PTZ Optics go to the settings menu and choose multi-camera settings in the box that pops up you will enter IP addresses for both cameras 1 and 2 which correspond to the two PTZ cameras I’m not an I.T expert but basically the cameras and joystick controller need to all be in the same range the first three sets of digits should be the same I didn’t want these to be anywhere close to my actual network settings for connecting to the internet so I changed the default IP addresses I entered the following IP addresses camera 1 169.254.150.10 and camera2169.254.150.11. now we need to go into the joystick controller and add those IP addresses for each of the PTZ cameras we will add a device here and then we will enter the IP address for Camera one [Music] and Camera 2. Then we will go into setup and we will set up the IP address on the joystick controller let’s take a look at this whole setup I’ve got a capture card running to my fx6 an Ethernet Line running to PTZ camera one looking out my front window and another ethernet Line running to PTZ camera number two looking out my son’s bedroom window now let’s go into wirecast we’re going to start things off by adding the audio interface now wirecast works with layers much like Photoshop or most mles I’m going to put the audio on the bottom layer because we want the audio to be present at all times now on layer 2 I’m going to start adding my visual sources wirecast allows you to add pre-recorded media files in this case we’re going to add a still because every live stream needs bars now this still doesn’t have the correct aspect ratio for my project so I’m going to just scale it up and send it live now let’s bring in a pre-recorded video we’ll add another source choose the video and it will be imported on layer 2. This allows you to cut away from live cameras to pre-recorded videos that your viewers can watch live cameras now let’s start to go add in our live sources any video that you want to bring in Via capture card will be found under the video sources Tab and there is the capture card that has the fx6 on it next let’s bring in the PTZ cameras now these are not connected via HDMI or SDI to a capture card instead they’re connected on the network so we’re going to have to go into the network tab to find the PTZ cameras so there’s PTZ camera one and PTZ camera 2. I’m going to take quick screenshots of the view that each camera sees for use with the stream deck next we’re going to start up the stream deck software and drag the screenshots I just took with a view of each camera on them to a button on the stream deck I will then map each button to the corresponding camera this one is the fx6 shot I will then repeat the process for PTZ cameras one and two these pictures are mapped to the physical LED buttons on the stream deck and when you press a button the corresponding camera is selected into preview and wirecast and ready to be taken live foreign ly let’s add some animated graphics and titles to do that we’re going to use a piece of software called new blue title live I’m going to select four pre-made animated graphic templates to bring into our broadcast. Now let’s go back over into wirecast to bring these animated graphics in now we want these animated graphics to show up over the top of the video so we’ll add them on the layer above the video layer we’ll add a source these sources will be found under the network tab these are ndi sources because they are on the network even though they’re on the same computer however we have a little bit of a problem here we want to bring in four separate animated graphics we are already using level 1 in wirecast for audio and level 2 for camera sources there are five levels in wirecast which leaves us with only three available levels luckily wirecast allows you to Nest levels and side levels which basically gives you an unlimited number of levels that you can use in wirecast here we’ll Nest all four animated graphics inside One graphics level and then map each of these four animated titles to a button on the stream deck so now we have the stream deck set up with four animated graphics and three cameras that you can call up all with just the touch of a button here you can see me switching between the three different camera shots I have and with just the touch of a button I can bring in animated graphics as well thank you and I can change the shot with the joystick controllerforeign  so that’s a look at how I pull off multicam live streams as a single operator thanks for watching and I’ll see you on the next one.

The Friday Roundup – HSL Color Control in PowerDirector

The Color Grading Tool You’ve Been Waiting For – PowerDirector A few years back now the folks at CyberLink were receiving more and more demands from users to extend the capabilities of PowerDirector in certain ways. The problem for them at the time was that introducing…

YoloBox Extreme Review – Pros, Cons, and Who It’s For

YoloBox Extreme Review – Pros, Cons, and Who It’s For

At $2,000, the YoloBox Extreme offers incredible versatility with 8 HDMI inputs, 4K 60fps streaming, multi-platform outputs, and built-in media playback, but it also raises questions about who truly needs it. Its touchscreen interface is responsive and flexible, but lacks the speed and tactile control of hardware buttons, making it better suited for slower-paced productions like podcasts, live events, and mobile field setups. While the lack of SDI and professional broadcast features may limit adoption in permanent installs, creators who need portability, multi-source flexibility, and integrated graphics without a full studio setup will find the YoloBox Extreme a powerful all-in-one live streaming solution. Check it out:

[embedded content]

Learn more about YoloLiv below:


Read the full transcript:

This is not a tablet. It’s actually an 8 input 4K video switcher, recorder, and encoder. It’s the YoloBox Extreme from Yolo Live. And they sent it over to me to try out and make a video about to kind of show you guys how cool it is and all the things it can do. Don’t worry though, they’re not getting any input into this video. All the opinions are my own. And I’m going to talk about the things I like, the things I don’t like, and things that I hope they improve for the future versions. So anyway, let’s actually take a look at it. First of all, even though it looks like a tablet, I mean, it kind of is, you control the whole thing via this giant touchcreen. Let’s take a look at the rest of the hardware, though, before we actually dig into the rest of what’s going on here. So, up on the top here, we actually have eight HDMI inputs. So, the first three of them are just 1080p, but then the last five are 4K inputs. So, that’s awesome. It means you can feed in a ton of 4K sources into this bad boy. Right after that, we have two HDMI outputs. So these can be, you know, multiv- view out, a program out, whatever it is you need out to an extra monitor. Though again, this whole thing is your giant display. So for your main multiv- view, you don’t really need that. You can kind of just put it right here. Then you have a network port, so you can actually hardwire this thing into your network. Two USB ports, two mic line jacks, a type-C port, and a type-C charging port. On the sides, they have these little proprietary antenna connections for their little antennas because this thing also has Wi-Fi as well as 4G cellular. So, you can connect it to whatever you need to if you’re out in the field. On the bottom, you have an audio out, headphone jack. Love to see it. An SD card slot as well as a SIM card slot for that 4G connectivity we were talking about. There’s a quarter20 mount and a power button. And that’s it for IO on this guy. Oh, just kidding. And there is a big speaker on the back as well if you count that for I/IO, you know, whatever. So anyway, this thing is pretty hefty. It’s definitely not something you really want to sit here and hold for a long time, which is why it’s nice that they have that quarter20 mount on the bottom. I will say though, if you’re putting it on any kind of tripod or anything, you better hope that it’s a pretty steady one, especially once you start plugging things in because it’ll get kind of heavy and topheavy. Let’s go ahead and power this guy on. I’m going to do my best to actually record what’s going on on the screen with this camera. So you guys bear with me because unfortunately everything happens directly on this screen. So it’s a little bit hard to show in video when I’m actually interacting with it. So when it boots up, you have two options. We can go into live streaming or we can go into monitor mode. Now both of these actually have similar functionality except that if you actually want to stream, you do this one. If you want to just switch and do a local recording, you’ll do monitor mode. Before we jump into any of those things, though, let’s actually take a look at the settings that we can find over here. First of all, you have the option to log in with a Yellowcast account. I have one, so I logged in, but you don’t have to have one in order to use this. Next up, you can actually add different streaming platforms. So, whether you want to stream to Facebook, YouTube, Twitch, or just custom RTMP or SRT or HLS locations. You can set up connections. So, this is where you can connect to Wi-Fi, as I’ve already done. Set up your Ethernet or cellular or USB dongle, hotspot, you know, you name it. This thing has a lot of different connections that it can have, which makes it great to use out in the field. You’re going to have a lot of options to actually get connected to the internet. Got some settings here for showing the CPU usage, settings about the versions you’re running, language, date and time, the keyboard you’re using, uh, display, brightness, storage management, FAQs, conus, you know, normal stuff here. So, now that we’ve looked at that, let’s go ahead and enter monitor mode here. So, right now, we are looking at a little bit of a multiv- view. There’s not a lot to see because we don’t actually have any sources connected. So, let’s go ahead and connect some sources, shall we? All right. So, here we are. We got some things plugged into the top here. I don’t know if you could tell, but it uh looks a little silly with all these things coming out the top. And at this point, I only have two HDMI cables and two hard drives coming out. You can only imagine if I was actually trying to use all eight inputs, as well as another hard drive, a power, an Ethernet, an audio cable. like this thing can get a little ridiculous looking as you start adding things to it and get a little unwieldy. So, you kind of need some sort of base like this to mount the quarter 22 if you’re going to use it in any kind of realistic scenario. I kind of wish that they had a way to just kind of lay it flat on the table. I mean, the only way you can is if it’s sitting flush, but then it’s hard to kind of see what’s actually going on with it. So, I wish there was yeah, some sort of a stand. I mean, obviously you could prop it up on something, anything really, but it’d be nice if there was something built in, some sort of kickstand, especially since this thing is a little hefty. But anyway, this works. We’ll use it like this for now and kind of show off the rest of the software here. All right, so first off, you can see we have two different video inputs showing up here. We have uh this camera that I’m looking at here showing up as HDMI 5, and then we have HDMI 4, which is actually a camera right right here, right here. Um, and it’s just showing what’s on this screen. Now, I don’t know if you guys can see that in the recording, but uh, even though the preview monitor is pretty nice and uh, smooth, those multiv- views are really delayed there, the little preview inputs. So, just something to know. They’re a little laggy, a little delayed. So, definitely don’t use those as something you’re really paying attention to. But, as we look at this page here, we are in what they call director view. So, we have our preview up here. We have our program over here. We have all of our inputs on the side here. And then over in this corner, we have different settings, and we’ll kind of dig in those in a minute. So, at this point, it kind of just works like a normal video switcher like you’d expect. Um, if I hit preview to program, great. That’s just a little cut there. You also have fade to black. You can change the transition type, whatever. But I can cycle between my inputs. One thing that’s really cool about this is the type of inputs it supports. So, obviously, I have two cameras plugged in right here, but I also have two hard drives plugged in. So, let’s add some sources. It grays out all the HDMI and the USB ports because those are just going to get pulled in automatically if they’re video sources, whether they’re cameras or if you plug like a webcam into one of the USB ports. But let’s say I want to add a video. Well, there’s an SD card on the slot and it checks there first, or you have internal storage, which you can load things to, but you also have USB storage. So now it’s grabbing things directly from the flash drives that I have plugged in here. So I can grab any video I want from here. So, say this drone shot and uh this B-roll here. And then I can hit done. And now they’re dropped right in there. And I can use that just like I could any other source. And that’s awesome. Let’s cut up those over there and pause that. But we also have other types of sources, not just video. You can also do images. So, same thing. Grab that. Go to the USB storage and let’s grab a picture here if we wanted that as a source. Finally, you can also grab. I mean, look at all these things. You’ve got PDF, live stream, NDI sources, SRT, SRT listener, RTMP, RTSP, web. So, you can be pulling in all sorts of things. Look at this. We could put in a website as a source directly on here. Now, Google.com probably is not an amazing source because it’s not exactly super dynamic. There we go. I can have google.com as a source. Obviously, you can’t interact with it. So, not a good source. But if you had a site where you had some sort of a dashboard or some other video feed showing up on it, that’s something that you could do. You can also use multiv- views as your sources. So let’s say I wanted a side by side here. Then I can select two different inputs that I want side by side. Put a little background in there. Or I could add an image to use as a background. So let’s get crazy with this, right? We’ll grab this image. Done. Use that. Add some border thickness. change the color and give it a little spacing. There we go. So now I have this awesome side by side that looks super cool. Everybody likes to see this one, right? And let’s cut it over. So you can see it’s super powerful and super quick to add and remove sources like that. You can then zoom in so you can see them a little bit better or zoom out so you get a little bit more space. If you want to remove a source, you just hold down on it and hit the trash. You can also rearrange sources if you want them to be in different places. So, you can see I think this would be a little bit slower in a fast-paced environment to cut because you’re kind of jumping around with your finger like that. But the flexibility you get from it is kind of amazing. You know, the ability to add and remove sources that quickly and set things up so fast and make these multiv- views really quickly. I mean, this device is really responsive and that’s pretty sweet. All right, let’s go ahead and look at the settings we have over here in the bottom right. So, first off, we have overlays. So, let’s just uh cut over to a normal shot here. Um, if I want to add an overlay, it’s as easy as just hitting that and then it pulls it up and I can hit it to turn it off. We can also create new overlays through this menu. They have a lot of um templates here and different types, you know, but they’re really easy to customize as well. So, like if I want to just change that text, great. If I want to change the size or the color, you know, like I said, this thing is super fast and responsive, which I actually think is really cool. You can set a duration so that it autohides after you’re done. But anyway, we can throw that on and boom, there you go. We’ll take it off. So, overlays are really easy to make here. And yeah, they just live here and they’re super quick to use. Next up, you have your audio panel. And so, you can see audio coming in on my different sources here as I scroll through them. Um, you can set them on or audio follow video or adjust some settings just like you could on any other switcher. Here you have your recording settings. Um, you can choose where you want to record to if you’ve got media plugged in and also the quality settings here. You can go in and dial those in to exactly what you need them to be. You also have your streaming settings here. Same thing, setting those settings exactly how you need them to be for your stream. Uh, you have a scoreboard feature. So, if we turn that on, great. we can take that and we can add some points. And in a similar manner, you can customize your scoreboard. So, if you’re using this in a sports scenario, this is something that’s really easy to do as well. Let’s go ahead and turn that off. You have a replay function um to be able to actually replay the last few seconds of something that’s happened. So, that’s really cool to see something like that built in. You can add background music, so if that’s something that you need to do. And here we have transition settings that I actually played with earlier. And then finally, you can choose what does or doesn’t show up on this menu bar and also rearrange them as you need to. So there’s a lot of flexibility there. Finally, we have this little gear icon right here. And this gives you a few different settings. So we can choose whether or not we want to see that CPU usage up in the corner. If we want to see kind of some zones there to make sure we’re not going over things we shouldn’t. We can change the way that we switch. So we can actually just set up a double click to switch. Um oh, we have to turn that in on in director mode specifically. Okay, there you go. And I can just do that. So, that’s a little bit faster way to actually switch our videos. You have local video settings, your input settings, how they respond, what the frame rate is, etc. And then what you want to come out on your outputs and whatnot. So, again, all of this stuff is really just right here. Your recording file management and other configuration. And then finally, we can change out of director mode to just into classic mode if we want, which is just a little bit different where um instead of having that preview program, you just have this one view on the side here. And then your settings over here on the right. Personally, I prefer director mode. I think you see a little bit more information and that preview program is nice to have. But you can see there’s a lot of settings here, a lot of customizability, and it’s all kind of right there. You know, one of the benefits of your switcher having a touchcreen like this is you don’t need companion software in order to control it like you would on like an ATM or something, you know, to get into those nitty-gritty settings. Instead, it’s right here on your switcher. I think they can be good and bad because if you need to change things live during a show with one person while another person is directing and switching, that’s going to be hard to do because it’s all on the same device. But if you’re setting things up ahead of time or on the fly and it’s a pretty slow event, you’re able to do that really easily right here without having to have a separate companion computer in order to do that. Finally, I didn’t show this before, but the button right up here that says wreck, you can use this to actually start a recording of whatever it is you’re doing. So that is the monitor view. So let’s go ahead and go back to get out of this and let’s go into the live streaming view instead. So this is going to be very similar except you’re actually going to live stream what’s on the output instead of just being able to record or monitor it. Now you can live stream to all sorts of different platforms with this thing. But I think the big thing that Yolo Live really wants you to do is use their Yolocast software and platform. you can stream to their platform directly. And it has some sort of extra settings to make sure that it’s buffered really well and that you hopefully don’t experience any lag with any of that. But if we go in here to our live stream, let’s go ahead and create one. Um, you know, we’ll call it test. We’re not going to give it a description or anything like that, but you can go ahead and open that. And you can see once we’re here, it’s honestly a very similar view to what we were already in before. Um, but we can change all of our streaming settings and whatever. Um, and then just start our stream. We can connect this to multiple different streaming platforms all at once. So, you know, YouTube, Facebook, Twitch, whatever, and do a multistreaming directly from this device. Then, when we’re ready to go, we just hit go live right here at the top. Now, one of the selling points of this device is the ability to stream actually in 4K natively, which is really cool. You don’t often see that directly on the Switcher for one, and there’s not a ton of devices out there that do stream in 4K. So, that’s a big selling point of this device for sure. Now, as you’re streaming and you’re pulling in sources and whatnot, you do have to keep an eye on that CPU usage up here because that is going to make a difference in how well it’s performing because you have one device that’s doing everything. Every single thing that you add to it, every overlay, every video, every input, whatever it is you’re doing is going to add to that CPU load. So, you do need to be careful that you’re not overloading this device. The keen eyed among you might also have noticed that this is basically just running a custom version of Android. So, you do get some interesting things here. If you swipe down, you can see some network settings. You can see more stats right here for whatever it is you’re doing. You can change the brightness of the device as you need to change the volume on your headset, whatever, whatever. So, that’s kind of interesting. One more feature that this has that I think is actually really cool built in is the ability to bring in guests into your uh live stream. So, you can go here to invite guests and send them an email. And then essentially it gives them a web portal that they can log into and set up their webcam and mic and they can actually come and be a video source into your stream. And on their side they see the program feed. So if you wanted to have a conversation with remote guests, you can actually do that directly from this box, which again is not something that we do in our church, but if that’s part of your workflow, it’s really cool that you can do it directly through here. I did notice it was a little bit choppy on the video when I tested that, but really not bad at all. Finally, it does also have an auto switching feature. I haven’t specifically tried this out because again, it’s not something that I need to use for my church, but if you were to use this in a podcast setting and you wanted to set up a couple different cameras and have it automatically switch based on where the audio was coming from, it can do that. So, if you’re looking to use this in a podcast studio, that might be something that’s really helpful for you. Anyway, you may have noticed that I don’t actually have power plugged into this, and that’s because it does have a battery. I really wouldn’t rely on it for anything super missionritical, but it’s cool to know that you can unplug it and take it on the go if you need to, especially if it’s for something fairly quick, you know, or it’s just moving from one place to the other while you’re still streaming, you know. It’s more of a nice to have than a I’m going to rely on this having a battery and run my entire production off of it. So, that is the Yellowbox Extreme. It’s a very unique switcher, as you guys can see, but honestly, it does a lot of things really, really well. Right now, you can pick it up for $2,000. And that price point is really interesting to me because when I’m thinking about other switchers that are like not pro switchers, um $2,000 feels like a lot. But also, this has 4K inputs, can do 4K recording and streaming. It can do multistreaming. It can combine different networking solutions to stream kind of from anywhere. You know, it’s a really cool device that feels portable and can set up a really great stream kind of from anywhere. And at $2,000 when you’re thinking about all of the things that it does, I think that price point actually does make sense. But if I’m thinking about churches, you know, which is kind of my frame of reference for these things, most of the time we’re in a more permanent setup. And so a device like this, you know, that has like the weird touchcreen instead of physical buttons that probably shouldn’t be powered on constantly, um, is a weird form factor. Like I mean, good luck making this look nice on your desk. I don’t know that I can really recommend it to churches unless it’s like, hey, you’re having services out in the the lawn every week or something like that, you know, and you just need something really easy to set up. It’s also not completely professional, you know, all of your connections are HDMI. There’s no SDI to be found anywhere on this thing. So, like, it’s clearly targeted more towards like the consumer proumer market. And at that point, I’m like, do we really need to be streaming in 4K? Could we have brought the price down a little bit if we kept this as an HD device? Which I do think some of their other devices are like that. So maybe that’s a moot point, right? Maybe I’m comparing the wrong item. I’m just wondering if a 4K version of this really needs to exist at all. But like I mean I could see some use cases for it. Again, if you’re someone who needs to stream from kind of random locations and you don’t want to pack a ton of gear, it’s not a super fast-paced environment. So you are able to rely on just a touchcreen to be able to cut cameras. Um, if you like the flexibility to be able to call up videos on the fly and not have to have like a separate media machine to do all of that because I mean that’s the thing is now we’re talking about it’s replacing Proresenter a little bit, right? Because we’re bringing in lower thirds and graphics and videos more on the fly there. So it has a lot of flexibility packaged into this $2,000. Um, so honestly it’s a cool device. It’s not for me, but if it’s for you, like let me know down in the comments and if you’re looking to buy one, use the link in the description cuz I get a small kickback from that. But let me know what it is you’re going to use this for because I think it’s really cool, but I just wish I had something I needed it for. You know, like it’s this really cool tool. It works really well. It’s really snappy. I’m honestly surprised at how well it works. But I mean, there you go. I’ve been really happy with it. And I just like I’m just struggling to know who it’s for. And you know, maybe that’s just on me. Maybe I’m not being imaginative enough. But I feel like this is a product without, you know, it’s solving a problem that doesn’t necessarily exist. But if you have that problem, let me know. Anyway, I’m going to go play with this some more because maybe maybe I’ll think of it. But anyway, until next time. I feel like I’m being overly negative right now and I don’t mean to be cuz again, I really do like this. I really I really want to use it. I’m just struggling to think of what that would be. You know, you ever you guys ever have that? You’re like, man, I really want this. I really wish I needed this because that’s where I’m at. But anyway, buy it or don’t. You know, you do you, I guess. Like, if you need it, you know it. And if you don’t need it, you you know it. I don’t know. But also, really, this thing really is a It is a chunker. I mean, this whole thing wobbles with this thing on it. Like, I don’t know. I don’t know if that’s good. Yeah. It’s a uh it’s a solution without a problem, you know? It’s like this is cool, but like who really needs it? I don’t know. That’s that I guess. Oh well.