
Apple is planning to use a custom version of Google’s Gemini model to support a major upgrade to Siri, according to Bloomberg’s Mark Gurman. The company may pay Google about $1 billion each year for access to technology that can create summaries and handle planning tasks….
Should Your Agency Focus on WooCommerce Projects? — Speckyboy
Choosing a niche is one of the perks of running a WordPress agency. You get to decide what type of projects to work on. You also have an opportunity to adapt as the landscape shifts.
Sometimes, you end up where the opportunities are. For example, WooCommerce is a longtime staple of the WordPress ecosystem. The e-commerce plugin dominates its segment and continues to evolve. Recent developments include better database performance and the first steps toward AI integration.
Those factors make WooCommerce an interesting option for agencies and freelancers. It’s both familiar and future-focused. Plus, Woo’s large subsystem of extensions is still growing.
It all adds up to a niche that’s full of potential, enough to fill your schedule and bank account. That may convince you to jump in with both feet. However, there are also some challenges in running a WooCommerce-focused agency.
The following are considerations when making your decision. We’ll cover the pros and cons, along with a few items that aren’t readily apparent. Is Woo right for you? Keep reading to find out!
WooCommerce Is Powerful and Flexible
WooCommerce mirrors WordPress in terms of flexibility. Just as you can use WordPress to build every type of website, Woo spans the spectrum of e-commerce genres.
The possibilities go well beyond standard retail sites. You can also focus on membership sites, selling digital goods, subscription content, auctions, and business-to-business (B2B) shops. You can also tie in with various third-party marketplaces. If you can dream it, you can sell it with WooCommerce.
That alone is an advantage over many proprietary platforms. You aren’t limited to a small set of functions. Instead, you have an entire ecosystem of prebuilt extensions to choose from. If something doesn’t exist or doesn’t match your project needs, you can build it yourself.
It’s a good fit if your agency offers custom development services. Woo’s core functionality and extensions can be endlessly tweaked. If you like to tinker and create detail-oriented workflows, you’ll feel right at home.
So, what’s the downside? WooCommerce can be overwhelming for some developers. There is no singular way to do things. Sometimes, there are simply too many ways to accomplish a goal.
A highly customized online store is also difficult to maintain. Refactoring custom code may be necessary as WooCommerce and WordPress evolve.

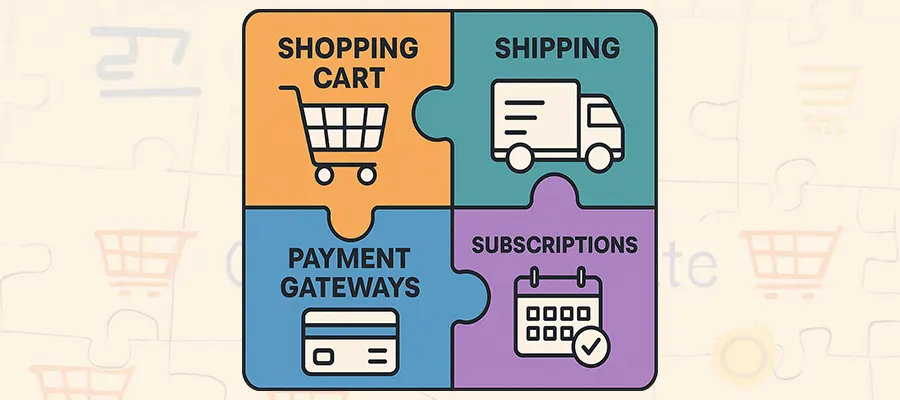
Building a Shop Is Like Putting a Puzzle Together
Like WordPress, a default WooCommerce installation only gets you so far. You’ll get basic shopping cart functions, a handful of product types, and the opportunity to connect to a payment gateway.
Extensions are required for advanced functions such as subscriptions, user-defined pricing, and shipping integrations. Those examples only scratch the surface of what’s possible. It doesn’t make for simplicity. And some of these items are already included in Woo’s proprietary competitor platforms.
Once again, it’s a double-edged sword. On one hand, you can pick and choose the items your clients need. That means you’re not stuck with features you’ll never use.
However, this piecemeal approach makes it harder to provide an accurate project estimate. Clients may be unaware of everything they need from the start. As such, there could be surprise costs in the development phase.
Experience is the only way to get around this issue. The more you work with WooCommerce, the better questions you’ll ask in the discovery phase of your projects. This takes time, though, and there’s still no guarantee you’ll get it right each time.
That level of expertise is valuable to clients. It’s something you can charge extra for. The pain is in getting to that point.
Success With WooCommerce Requires Investment
A focus on WooCommerce projects can be worthwhile, but it takes commitment. You’ll need to invest in learning the platform and how to extend it.
The decision may depend on your ability and willingness to do the hard work. If you’re overloaded with projects, shifting gears may not be feasible. The same applies if you’re already focused on another e-commerce solution.
The good news is that you don’t have to go all in right away. You can take time to experiment with WooCommerce on the side (a local WordPress installation is great for this purpose). Starting with a small project or two also makes sense. That will help you gauge your comfort level and provide a taste of the processes involved.
From there, it’s about building a portfolio and increasing your knowledge. You’ll be able to market your services and identify your audience. The opportunities are there if you’re up for a challenge.
Related Topics
Use AI to Enhance – Not Replace – Your WordPress Expertise — Speckyboy
It’s amazing to see how quickly web developers have adopted artificial intelligence (AI) apps. Many have added this technology to their workflow and haven’t looked back.
There are pros and cons to this seismic industry shift. On the bright side, AI speeds up the development process. We don’t have to spend hours poring over WordPress documentation. Instead, we explain our coding needs in plain language. AI helps us build new things from scratch and troubleshoot existing code.
What’s the downside? Well, it’s easy to cede too much power to AI. There’s a danger in becoming too reliant on these tools to do everything for us. That could lead to trusting AI’s “judgment” more than our own.
Forgetting our common sense means solutions that are difficult to maintain and potentially insecure. Nobody wants that. As such, it’s essential to strike a balance between the convenience of AI and our personal experiences. Here are a few thoughts on using AI to enhance, not replace, your WordPress expertise.
A New Way to Fall Into the Same Productivity Trap
Even experienced developers need a helping hand. In the old days (OK, a few years ago), that meant searching sites like Stack Overflow for answers. We could spend hours trying to find a suitable solution.
This practice also led to a scattered approach to coding, such as copying and pasting code snippets in hopes that one would work. The quest to find a shortcut ultimately cost us precious time. We chased easy answers instead of using our brains. At least, that’s how this author did things.
AI models certainly make this process faster. They generate code within seconds. However, we can still fall into the same trap of cut, paste, and repeat. The only difference is that we’re locked into a single chat instead of a massive forum.
Much like Stack Overflow, AI’s accuracy can vary. Not every code snippet is functional or appropriate for use on a production website. Even so, it provides the illusion of increased productivity. Faster answers don’t mean much if they’re not the right ones.
For instance, I recently used an AI app to tackle a WordPress plugin project. The app confidently created a file structure, complete with code. The plugin didn’t work, regardless of the issues I reported. After a few hours of frustration, I didn’t feel very accomplished. Taking the project one step at a time would have been more productive.

Remember Who’s in Charge of Your WordPress Project
We still need to use our critical thinking skills, even when working with AI. The technology works best when it’s our sidekick, not our boss.
The key is to remember your own power. You’re the developer and get to make the final decisions on how things are built. You’re also responsible for the project’s performance and security. It’s not like you can blame AI if something goes wrong. Well, you could go that route. However, it’s unlikely that anyone will consider it an acceptable answer.
With that in mind, the better approach may be to use AI to give us a head start on a project. For example, generating a plugin wireframe instead of everything at once. That allows us to build iteratively and consider each piece more carefully.
Odds are, you’ll get better results than asking AI for a plugin that does x, y, and z right from the start. This way, you can focus on the task at hand and improve efficiency.
The same goes for troubleshooting existing code. Identify a problem and use AI to help you resolve it. Then, move on to the next one.
Remember, these tools need your input to produce the best outcome. They aren’t smart enough to make important decisions for you.

AI Can Help You Do More With WordPress – Within Reason
Perhaps we’ve gone a little too far, too fast, when adding AI to our workflows. Suddenly, we’re assigning important tasks to bots and just going with it. It’s easy to feel like a bystander in our own projects.
It’s the “ah-hah” moment for any of us afraid that AI will replace humans, except that we’re the ones who control the narrative. We can choose how to use AI and the role it plays in our careers.
The first step is to have realistic expectations for what these tools can do. Keep them in mind as you generate code and other project assets. Remind yourself that ChatGPT, et. al., are just tools. It’s not the same as having an experienced developer on your side.
Most of all, trust your judgment. AI provides another way to bring your ideas to life. Use it wisely!
Related Topics
Tips for Building a Performant WordPress Website — Speckyboy
Website performance is critical to your online success. Faster page loads result in better conversion rates, happier users, and peace of mind. Hint: You must achieve the first two to attain that last one.
WordPress is fairly performant out of the box. However, that changes when we add a theme, plugins, content, and media files to the mix. Web hosting is also a factor. Your site can slow down before you know it. Even worse, diagnosing these issues isn’t always easy.
That’s why building your website with performance in mind is the best option. Picking the right tools and techniques brings better results.
With that in mind, let’s review the ingredients of a performant WordPress website. We’ll share some tips for pleasing users and Google’s Core Vitals.
Choose the Right Web Host for Your Project
Great website performance starts with a great web host. After all, no amount of optimization can make up for a slow web server. It will inevitably weigh down your page loads.
Every website has different needs, so we can’t tell you the perfect option. However, there are a few factors to consider, including:
- Available server resources: Choose a hosting plan that includes enough memory, storage, and CPU cores to run your website efficiently. The more complicated your site is (e-commerce, membership, etc.), the more resources you’ll need.
- Server-level caching: There are plenty of effective plugins available to cache your website. However, caching works best at the server level. A host that offers page and/or object caching will provide a performance boost.
- Content Delivery Network (CDN): You can use a CDN to achieve blazing-fast performance for users around the world. It sits between your site’s server and visitors, serving files from various geographic locations. Users are connected to the closest server, reducing latency. Some hosts provide a CDN as a standard or optional feature. Bonus: CDNs also improve your site’s security and can reduce bot traffic.
At a minimum, you’ll want to choose a hosting plan that has more than enough server resources. Features like caching and a CDN are optional, but helpful for powering busy websites.

Take a Minimal Approach to Themes and Plugins
There is no shortage of WordPress themes and plugins on the market. But quality matters, and not every product adheres to best practices. The wrong ones could lead to an instant performance hit.
Despite the myth, the number of plugins you use isn’t always the culprit. You might see better performance by running 20 well-made plugins in place of 10 bloated ones. The key is to install only what you need.
It’s also worth experimenting to see how different plugins impact your site’s performance. You could install a plugin like Query Monitor to see the number of scripts, styles, and API calls a plugin adds. Your web browser’s console is another good option for reviewing what’s happening behind the scenes. Check for errors and network bottlenecks.
Themes can be just as impactful. We recommend choosing a starter theme or framework that lets you start small and add on as needed. Themes that trade old-school JavaScript libraries (like jQuery) for more modern options will also load faster.
Block themes are also worth trying. They rely on core WordPress features, rather than heavy PHP templates.
Not sure about a plugin or theme’s impact on performance? Test them on a staging environment or local WordPress installation.
Limit Calls To Third-Party Scripts and APIs
Connecting WordPress to third-party services adds all sorts of useful features. Common examples include Google Analytics, remotely hosted fonts and scripts, and embedded media. That’s only scratching the surface of what’s possible.
Such convenience comes with a price, however. Each call to a third-party service impacts your website’s performance. The more calls you make, the more potential for bottlenecks.
The volume of calls to outside resources is only one part of the equation. All it takes is a singular issue with a service to delay a page load. It could be a slow analytics server that gets in the way. Even worse, a remote script that fails to load could break your site’s functionality or prevent it from rendering.
Once again, it pays to use only what you need. Features like social media feeds and other outside widgets may do more harm than good. Think about what matters most to your site and act accordingly.
Sometimes, a remotely-hosted resource is a necessity. But there are often alternatives you can host locally. For instance, Google Fonts can be stored on your web server, as can various analytics suites.
There are benefits to using third-party services, but choose wisely.
Use the Latest Image Compression Techniques
Design features such as sliders, photo galleries, and hero areas often include large images sized for HD or even 4K screens. They can easily slow down your site if they’re not efficiently optimized.
Legacy image formats like JPEG are often to blame. Their compression techniques make it tough to achieve a balance between image quality and file size. They also struggle with complex image compositions.
Thankfully, we don’t have to settle for old-school image formats. Newer formats, such as WebP and AVIF, are widely supported by browsers and offer better compression. They’re also great at maintaining image quality.
Oh, and we can’t forget about SVG. These vector images are often tiny in file size but can be scaled without losing detail. They’re great for use with icons and logos.
How much space can you save? Test your site with Google PageSpeed Insights, and it will provide a savings estimate for detected images. You might be surprised at the difference these modern formats can make.

Create a WordPress Performance Strategy
Building a performant WordPress website doesn’t happen by sheer luck. It requires a mix of planning and testing.
The planning stage is all about identifying the best tools for the job. It starts with your web host, as a fast server is a must-have. From there, choose a lightweight theme and plugins that avoid bloat.
Testing provides an opportunity to improve on your work. Use your favorite tool to analyze page speed and take note of any suggestions. Make the necessary changes and retest until you’re satisfied with the results.
You’ll also want to make sure your site’s assets load efficiently. Defer items that aren’t needed right away, and preload above-the-fold fonts and scripts.
With a little work, it’s more than possible to achieve top-notch performance with WordPress. We hope the tips above will help you create the perfect strategy!
Related Topics
The Sequence Knowledge #747: A New Series About Synthetic Data Generation
Cannot miss this one!…
The Sequence AI of the Week #749: Inside MiniMax-M2: Where Minimalism Meets Maximum Power
A new model that you should know about….
Keep CALM: New model design could fix high enterprise AI costs
Enterprise leaders grappling with the steep costs of deploying AI models could find a reprieve thanks to a new architecture design. While the capabilities of generative AI are attractive, their immense computational demands for both training and inference result in prohibitive expenses and mounting environmental concerns….
How to Use YoloBox Ultra to Level Up Your Zoom Meetings

What if your Zoom meetings could look like a live broadcast instead of just another video call?
In this Streaming Alchemy workflow, you’ll learn how to transform your Zoom sessions using the YoloBox Ultra for professional, directed layouts — from clean host shots to interview-style side-by-sides.
This guide walks you through how to:
Manage and route audio with Voicemeeter Banana
Configure Zoom’s dual-monitor mode for production-style control
Use the YoloBox Ultra to switch layouts, record, and stream a polished program feed
Perfect for teams, educators, and event producers, this setup brings structure and broadcast quality to every online session — all without leaving Zoom.
[embedded content]
Learn more about YoloLiv below:
Read the full transcript:
Most Zoom calls look like Zoom calls, a grid of faces or a single speaker view. But what if you want something better? Something streamlined with professional layouts and the ability to feature a participant right beside you interview style? That’s exactly what I’ll walk through here. Built around the Yolo Box Ultra, a laptop, and a few supporting accessories. And with that, we can take our Zoom meeting from a default look to something deliberate and designed. To start, I’ll quickly show the gear and connections we used to make this work. I built this setup around four core pieces. A laptop to run Zoom, a Yolo Box Ultra to build and switch layouts, a USB headset with mic for the host, and a USB webcam for the host camera. On the laptop, I also installed software called Voice Meter Banana. It’s a free audio routing tool that lets us send a single audio source to multiple destinations at the same time, like Zoom, headphones, and the Yellow Box. And that’s something we need for this setup, and it’s not something Windows can do on its own. The USB headset plugs into the laptop, giving the host both a microphone for Zoom and a way to hear the meeting. From there, a 3.5 millimeter cable runs from the laptop’s headphone jack into the Yolo Box line. And this ensures the host voice doesn’t just go into Zoom. It also becomes part of the program feed for recording and streaming. To link the two systems, I connected the Yolo box back to the laptop over USBC. And this allows every Yolo box layout to appear in Zoom as if it were just another webcam. For the meeting content, an HDMI cable carries Zoom’s second monitor output from the laptop into HDMI input one on the YOLO box. That will be the feed we use to send a participant’s video over to the YOLO box, ready to be framed into different layouts. And since the host needs to appear in those layouts, I connected a USB webcam directly to the YOLO box. That camera becomes the anchor shot for the host throughout the production. With all the wiring and software in place, the next step was setting up the layouts inside the YOLO box. Now, inside the Yolo Box Ultra, I set up five layouts that we could switch between during the meeting. The first is a full screen of HDMI 1. Whenever I pin somebody in Zoom to that second monitor, that participant will fill this layout. Next is a full screen of the host webcam. That one came in automatically when the webcam was connected. The webcam layout didn’t need any changes, but HDMI 1 needed a quick tweak. I cropped it to remove the extra Windows elements, keeping it clean at 16×9, so the pin participant fills the frame. To build interaction, I created a sidebyside layout with the host webcam on one side and HDMI one on the other. This gives us that interview look where the host and participant appear together in equal balance. For presenting content, I added a layout that shows the slide deck full screen and I imported the slides as a PDF, copied that file to an SD card, dropped it into the YOLO box and selected it as an input. And finally, I built a news style layout that combines slides with the host. This way, the host stays present on screen while walking through material. The classic presenter with graphics frame. With these layouts ready, we had everything needed to move from a basic zoom view to something that feels like a polished production. Earlier, I mentioned Voice Meter Banana. This is the free audio routing software that makes this setup possible. You can download it from VB Audio’s website. And once it’s running, it works like a virtual mixing board inside your computer. When you open Voice Meter, the layout is always the same. Inputs are on the left, outputs are on the right, and what comes in on the left can be sent to whichever outputs you choose on the right. On the input side, there are two kinds. Physical inputs are real devices, the things you plug in. In this setup, hardware input one is the USB headset microphone. Virtual inputs are audio feeds from software. Here, voice meter’s VAIO carries the meeting audio coming from Zoom. On the output side, it’s the same story. Physical output sends sound to hardware. In this setup, A1 goes to the USB headset so the host can monitor the meeting. A2 goes to the laptop’s line out jack feeding the YOLO box and A3 goes to the laptop’s HDMI port which also feeds the YOLO box. Virtual outputs on the other hand send sound back into software. For this setup, B2 is the virtual audio out that Zoom can use as a microphone input. With that picture in mind, here’s how the routing works. The headset microphone comes in on hardware input one. I send it to B2 so Zoom gets the host mic as its input. I also send it to A2, the line out. So the Yolo box hears the host microphone as part of the program feed. The Zoom meeting audio comes in on the virtual input voice meter viio. I send it to A1 which drives the USB headset so the host hears the meeting and I send it to A3 which routes through the HDMI into the YOLO box. So the meeting audio is also part of the program as well. The result is clean and balanced. Zoom only hears the host. The host only hears Zoom and the Yolo Box hears both sides together as one program feed. In other words, everybody hears what they should and nobody hears what they shouldn’t. By letting voice meter handle the routing, a Windows limitation becomes a flexible, reliable audio workflow. And with the routing in place, the next step was dialing in the mix on the Yolo Box Ultra. Now on the YOLO box, I opened the audio mixer and enabled HDMI 1 and line in the two sources carrying meeting audio and the host mic. I balanced the levels so the host and participants sat naturally together. And with that done, the YOLO box was ready to capture the program feed. And here’s the real payoff. When you press record, the YOLO box is recording the layout you built, not Zoom’s tiles and menus. And if you go live, that same polish feed can stream directly to YouTube or any other platform. You’re not just screen grabbing a meeting. You’re producing something that feels put together. So with recording and streaming in place, I turn back to Zoom to make sure its settings match this workflow. With the YOLO box and voice meter configured, the last step is setting up Zoom so everything connects the right way. In Zoom’s video settings, I select the Yolo Box Ultra as the camera. Because the Yolo Box is connected over USBC in a UVC mode, whatever layout I switch to on the Yolo Box shows up in Zoom as the camera feed. That means that the directed program coming from the Yolo box, not just the ROAR webcam, becomes the view for everyone in the meeting. In Zoom’s audio settings, I set the microphone to voice meter output B2. That’s the virtual output carrying only the host mic. This way, participants hear the host clearly without any doubled audio. For the speaker, I set it to voice meter viio. That’s the virtual input device that takes Zoom’s meeting audio and brings it into voice meter. From there, voice meter splits it to the host headset and into the YOLO box so both get the same clean feed. The last step is enabling dual monitor mode in Zoom. This gives us two windows to work with. Monitor one will be where we manage the meeting. Monitor 2 is actually the HDMI input on the YOLO box. We can pin individual participants here to drive layouts like the sidebyside interview frame. So the division of labor is clear. Monitor one is for running the meeting itself, while monitor 2 feeds the YOLO box the participant video it needs for production. Working together, these two screens give you that director level control inside a Zoom call. With Zoom configured, the workflow is complete. And now we can see how it plays out in practice. Now imagine hosting a Zoom meeting with this setup. The Yolo Box feed is spotlighted so participants always see the clean layouts, whether that’s full screen, slides, or a side by side. If somebody raises their hand, you can pin their video to the second monitor and tap the side by side on the YOLO box. And in one move, you’ve placed them next to you in a professional interview frame. That simple combination, pin and zoom switch on the Yolo box turns a standard meeting into something that feels produced. It not only looks better, it also encourages people to take part. They’ll know that they can be featured cleanly and that their perspectives matter. And with both Spotlight and Pinning working together, you stay in control of exactly how the meeting looks to your audience. Hopefully, this has sparked a few ideas on how to elevate your own Zoom meetings, keeping what’s familiar, but giving it a more structured and polished look than your typical video call. We built this using the Yolo Box Ultra, which makes it easy to create professional layouts and manage a meeting like a production. But the concepts we’ve covered here, routing audio cleanly, framing layouts, and managing participants across two screens, those can be applied to almost any setup. And if you ever need to scale beyond meetings into something more eventlike, where you’re coordinating multiple guests, mixing content sources, or streaming to a wider audience, a tool like our live to air Z can extend the same ideas to that level of production. But whatever tools you use, the goal is the same. To create online sessions that look polished, sound clear, and keep people engaged. Thanks for taking the time to watch, and I hope you take what we covered here and make something amazing with it for your next Zoom meeting.
The enemy within: AI as the attack surface
Boards of directors are pressing for productivity gains from large-language models and AI assistants. Yet the same features that makes AI useful – browsing live websites, remembering user context, and connecting to business apps – also expand the cyber attack surface. Tenable researchers have published a…
Flawed AI benchmarks put enterprise budgets at risk
A new academic review suggests AI benchmarks are flawed, potentially leading an enterprise to make high-stakes decisions on “misleading” data. Enterprise leaders are committing budgets of eight or nine figures to generative AI programmes. These procurement and development decisions often rely on public leaderboards and benchmarks…