What Is Managed WordPress Hosting? — Speckyboy

What Is Managed WordPress Hosting? — Speckyboy

If you’re building or running a WordPress site, you’re going to need web hosting. And not all hosting is the same. Some plans are cheap and bare-bones. Others are packed with features you might not understand or use.

Somewhere in the middle sits managed WordPress hosting, a setup made to simplify things for site owners.

This guide explains what managed WordPress hosting is, what it does, and when it’s worth the extra cost. It covers the features, the differences from other types of hosting, and what kind of sites benefit most.

What Does “Managed” Actually Mean?

In hosting, “managed” means the host handles technical tasks, so you don’t have to.

With managed WordPress hosting, those tasks are specific to WordPress. You get a server that’s optimized for the platform and a support team that understands how it works.

Here’s what’s usually included:

  • WordPress Installed and Ready to Go: There’s no need to download WordPress, create a database, or run an installer. When you sign up, WordPress is already installed and ready to use. This saves time and removes the setup errors that sometimes happen with manual installs.
  • Automatic Core Updates: Keeping WordPress up to date is a key part of staying secure. Managed hosting takes care of core updates for you. Some plans also update plugins and themes automatically, or let you enable it selectively. This reduces the risk of security holes caused by outdated software.
  • Daily Backups With Easy Restore: You don’t need a plugin or a separate service to back up your site. Managed hosts back it up every day. If something breaks, you can restore an earlier version with a single click. Many plans keep backups for 14-30 days.
  • Server-Level Performance Tuning: Managed hosts optimize their servers specifically for WordPress. You’ll get built-in object caching, image optimization, and CDN integration. This gives you faster load times without any extra plugins or work.
  • Security Scanning and Protection: Managed hosts actively monitor your site for malware and suspicious activity. They usually block brute-force login attempts, filter bad traffic, and scan files for known threats. Some will clean up malware for free if your site ever gets infected.
  • Support That Understands WordPress: Instead of general tech support, you get help from people who work with WordPress every day. If a plugin causes errors, they’ll understand the problem. If your site is slow, they can trace it to theme bloat, a slow query, or a caching conflict.

How It’s Different From Shared or VPS Hosting

Choosing the right hosting type depends on how much control you need, how much traffic you expect, and how comfortable you are managing server tasks.

Here’s how managed WordPress hosting compares:

Shared Hosting

The most basic and budget-friendly option. Your site shares a server with many other websites.

  • Pros: Cheap, simple to get started, often includes one-click WordPress installs.
  • Cons: Performance is inconsistent. You handle updates, backups, and security yourself. Limited support if something breaks.
  • Best for: Small personal blogs, test sites, or people learning WordPress.

VPS Hosting

You get a virtual server with your own resources, separate from other users.

  • Pros: More power and flexibility. You can configure your own environment and install extra tools.
  • Cons: You’re responsible for everything — server setup, security, backups, and performance tuning.
  • Best for: Developers, advanced users, and people who need to run other apps or services alongside WordPress.

Managed WordPress Hosting

Designed specifically for WordPress. The host handles most of the technical work.

  • Pros: Fast, stable, secure. WordPress-specific features and expert support. Less to manage on your own.
  • Cons: Higher cost. Some plugin restrictions. Not suitable for hosting anything other than WordPress.
  • Best for: Business sites, growing blogs, WooCommerce stores, and anyone who wants reliability without server management.

Pros of Managed WordPress Hosting

If you’ve ever dealt with a broken plugin, a slow site, or a crash during an update, you’ll understand the appeal of managed hosting. It removes most of the manual work involved in maintaining a WordPress site.

If your site is part of your business, or even something you rely on regularly, these benefits can make your life easier.

  • Saves Time: No need to handle updates, schedule backups, or troubleshoot issues manually. You can focus on the site itself instead of server maintenance.
  • Better Performance: Servers are tuned specifically for WordPress. Built-in caching and CDN support help your site load faster without extra configuration.
  • Security is Handled: Brute-force attacks, malware, and outdated plugins are common issues. Managed hosts block threats automatically and fix problems before they cause damage.
  • Built-In Backups: You can restore a version of your website from yesterday or last week with a few clicks. No need to rely on plugins or cloud storage.
  • Helpful Support: Most managed hosts hire support teams that specialize in WordPress. They’re more likely to know what’s wrong and how to fix it quickly.

Cons of Managed WordPress Hosting

While managed hosting solves a lot of problems, it’s not a perfect fit for everyone. It costs more than traditional shared hosting, and the added convenience sometimes comes with trade-offs.

Before switching to managed hosting, it helps to know what you’re giving up as well as what you’re gaining.

  • More Expensive: Most plans start around $15 to $30 per month for one site. That’s several times more than shared hosting, which can start as low as $3.
  • Plugin Restrictions: To keep servers stable, some hosts block specific plugins. These are often backup, caching, or security plugins that overlap with built-in tools. Example: WP Engine’s disallowed plugin list.
  • WordPress Only: You won’t be able to install other platforms or apps on the same plan. It’s WordPress or nothing.
  • Less Flexibility: You don’t get full server access. Advanced customizations like editing PHP settings or installing server-side software usually aren’t allowed.

Who Should Use Managed WordPress Hosting?

Managed WordPress hosting isn’t just for developers or large companies. It’s designed for anyone who wants to run a WordPress site without constantly worrying about updates, speed, or security.

Managed hosting is especially useful for site owners who don’t want to spend time tweaking plugins, adjusting caching settings, or restoring backups when something breaks.

  • Small Business Owners: You have a business to run. Managed hosting means your site stays fast and secure without needing a full-time web person.
  • eCommerce Stores: Speed and uptime are critical for online sales. Managed WooCommerce hosting helps you avoid downtime and keep checkout running smoothly.
  • Agencies and Freelancers: Managing multiple client sites is easier when updates, backups, and security are handled. Many hosts offer tools made for multi-site workflows.
  • Blogs With Growing Traffic: When your blog grows, cheap hosting often becomes a problem. Managed plans can handle more visitors and reduce the chance of your site slowing down.

Who Might Not Need It

While managed WordPress hosting solves a lot of problems, it’s not necessary for every site. If you’re experimenting, learning, or building something with no real audience yet, the extra cost might not be worth it.

And if you’re a developer who prefers to control every aspect of your environment, you may find managed hosting too limiting.

  • Beginners Testing WordPress: If you’re just learning how WordPress works, start with shared hosting. It’s cheaper, and you’ll learn more by managing things yourself.
  • Developers Who Want Full Control: Managed hosts don’t give root access. If you need to tweak server configs or run other apps, a VPS or cloud server makes more sense.
  • Low-Priority Projects: If your site is just a placeholder or rarely updated, managed hosting might be more than you need.

Typical Price Range

Most managed WordPress hosting plans are priced by site count, storage, or monthly traffic.

Plan Type Approx. Cost What You Get
Starter (1 site) $15–$30/mo Backups, updates, SSL, support, CDN
Small agency (2–5 sites) $40–$100/mo More storage, traffic, and extra tools
Enterprise or WooCommerce $100+/mo Custom limits, support, and performance tuning

Pricing varies widely. What you pay often depends more on traffic and site size than just feature checklists.

Recommended Hosts to Consider

Here are a few managed WordPress hosts worth looking into. Each one offers slightly different features, pricing, and setup styles.

All of them are focused on making WordPress easier to run, especially for non-technical users.

Host Starting Price Best For
Kinsta $30/mo High-performance hosting with clean UI
Pressable $19/mo Built by the makers of WordPress.com
Hostinger $15/mo Designers, freelancers, and simple client sites
Rocket.net $30/mo Speed-first hosting with built-in edge caching
SiteGround GoGeek $15/mo Semi-managed option with cPanel-style access
WordPress.com Business $25/mo All-in-one WordPress hosting with built-in tools

A Note on WordPress.com

Unlike traditional hosting, WordPress.com offers a complete platform where WordPress is already installed and configured. You don’t get server access, but you do get a simplified experience.

Updates, backups, and security are all handled for you. The Business and Commerce plans allow plugin and theme uploads.

Best for: Users who want minimal setup and don’t need full backend control.

Final Thoughts

Managed WordPress hosting isn’t for everyone. But it’s ideal if you want better performance, fewer problems, and support from people who understand WordPress.

If your site is growing or your time is better spent on content than maintenance, it’s worth the price. You can always start small and scale later. The point is to spend less time fixing things and more time publishing, building, or selling.

Related Topics


8 CSS & JavaScript Snippets for Creating Sticky Elements — Speckyboy

8 CSS & JavaScript Snippets for Creating Sticky Elements — Speckyboy

Modern websites often feature extensive scrolling. Long pages are common on desktop devices, but are even more frequent on mobile screens. The practice creates usability challenges for tasks like navigation and referencing important information.

That’s where “sticky” design elements come in handy. They allow users to scroll without losing access to your site’s menu. You can also use them to keep ads in view, attach social media sharing buttons to the viewport, or create fun special effects.

Implementing a sticky element can be simple, as CSS has a dedicated position property for this function. JavaScript can be used for building more robust features. As usual, there are several methods to achieve your goals.

We searched the CodePen archives to find interesting examples of sticky elements in use. Below, you’ll find various options that enhance the user experience. So, get stuck in your easy chair and be inspired by these code snippets!

Pure CSS Header Animation to Sticky Navigation

Created by Amit

Sticky headers are among the most popular use cases. On Chromium browsers, this snippet uses CSS to transform a tall and narrow header into a full-screen bar upon scrolling. Unsupported browsers receive a narrower, taller, sticky header. Keyframe animation is used to create smooth transitions. The feature is useful, lightweight, and attractive.

See the Pen Pure CSS header animation to sticky nav by Amit

Sticky Responsive Sidebar Navigation

Created by Areal Alien

Sidebar navigation can also take advantage of staying put during scrolling. Hovering over the sidebar expands the navigation to include text labels – it works on mobile too. However, you might also reserve this concept for large screens and use the traditional “hamburger” menu for mobile.

See the Pen Sticky responsive sidenav by Areal Alien

CSS Sticky Table Header & Column

Created by Mike Golus

Long HTML tables can be a pain to read. You have to memorize the column headers to understand the context. Sticky headers make even the busiest tables easier to read. Using position:sticky (and a few other tricks) on the first row and column enables scrolling without losing sight of key information. The examples in this Pen demonstrate how it’s done.

See the Pen CSS Sticky Table Header and Column by Mike Golus

Long Scroll Sticky Sections

Created by Burmese Potato

Here’s a unique way to denote the various sections of a long page. Scroll down the page, and the episode number (displayed in the left column) sticks until you reach the end of the section. The snippet combines sticky positioning with the calc() property on the container’s height to keep the number in view. This little bit of CSS adds a nice touch to the user experience.

See the Pen Pretty Sticky by Burmese Potato

Just Another Sticky Section Layout

Created by Misala

Sticky design elements can also be used to show off product features. Scroll down this page and watch as featured text and videos change. The layout occupies the entire screen viewport and is responsive for mobile devices. It’s a high-end feature sure to capture a user’s attention.

See the Pen just another sticky section layout by misala

Multi-Navigation Sticky Bars & Layout

Created by Den

This snippet asks the question: What if you have more than one navigation bar? The first bar is sticky by default. Scroll past a few sections, and a second sub-navigation bar lines up underneath. That second bar also features a neat frosted glass look as content scrolls underneath.

See the Pen Sticky layout + filters #2024 by Den

Sticky Video with CSS @container scroll-state()

Created by Jhey

We’re seeing more websites implement sticky videos, where the presentation sticks to the bottom corner upon scrolling. It allows users to view the rest of your content without losing sight of the video. Here, CSS container queries are used to reposition the video player. Use the included config panel to see how different settings impact the animation effects.

See the Pen CSS @container scroll-state() faux PiP video by Jhey

Dynamic Sticky Sidebar Component

Created by Ryan Mulligan

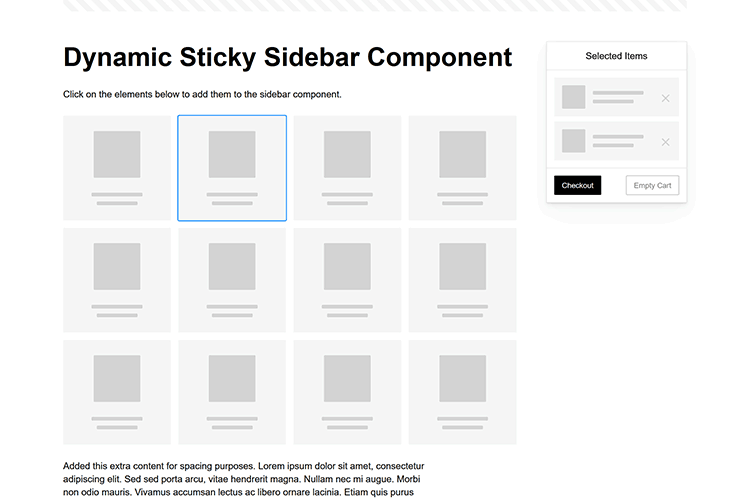
Features like shopping carts are a perfect fit for sticky sidebars. The UI makes it easier for shoppers to keep track of their cart and, most importantly, finish their purchase. This sidebar widget keeps track of cart contents and sticks to the screen while you scroll in the page content area.

See the Pen Dynamic Sticky Sidebar Component by Ryan Mulligan

Stick With What Works in Your Designs

We may think of sticky elements as being used for site headers and navigation. However, the examples above show that they can do much more. There are so many creative possibilities for informing and entertaining users.

What’s more, CSS can do a lot of the heavy lifting for you. Several snippets in this collection don’t require a single line of JavaScript. Still, it’s nice to know you can add some DOM manipulation when needed.

We hope this collection sparked your imagination! Check out our CodePen collection for even more sticky snippets.

Related Topics


Learn How to Build a WordPress Block Theme Style Variation — Speckyboy

WordPress block themes offer plenty of flexibility. You can make style and layout changes within your web browser – no coding knowledge is required. They can also include extras like block patterns and style variations.

Style variations give you a head start on design. They allow us to create multiple color and typography combinations. They also house custom block styles defined in the Site Editor. Anything in a theme.json file can also be included in a style variation.

This is handy for web professionals and users alike. Choose the variation that suits your needs and start building your site.

Creating a custom block theme style variation is easier than you think. The entire process takes place in the WordPress Site Editor. A simple variation can be built in minutes.

So, follow along as we build a style variation! We’ll show you how to point and click your way to a custom design.

Style Variation Project Requirements

The requirements for building a custom style variation are minimal. You’ll need:

We don’t recommend using a production website for this process. A staging or local WordPress installation is the safer way to go.

Let’s Build a Style Variation

Now, it’s time to start building! Log in to your WordPress website and follow the steps below.

Step 1: Open the WordPress Site Editor

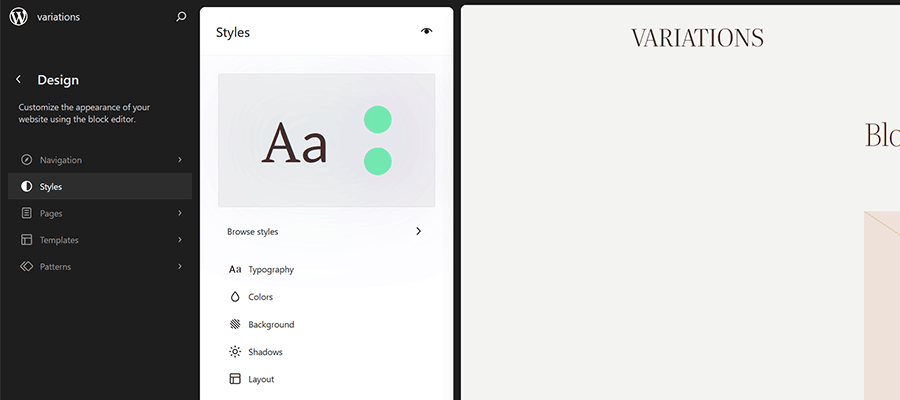
First, navigate to Appearance > Editor in the WordPress admin to open the Site Editor. Then, click the Styles link in the left sidebar.

The Styles panel includes links for Typography, Colors, Background, Shadows, and Layout. You’ll also find a Browse Styles link that displays available style variations for the theme.

Finally, the Blocks link allows you to customize individual block styles across the site.

Learn How to Build a WordPress Block Theme Style Variation — Speckyboy

Step 2: Change Your Theme’s Styles

This step is all about personal preference. Work your way through the Styles panel and start making changes.

Color and typography are the most obvious changes, but you can take things further. For example, you can change the layout width and spacing. Plus, every block included with WordPress can be customized. Add margins, padding, borders, or custom CSS.
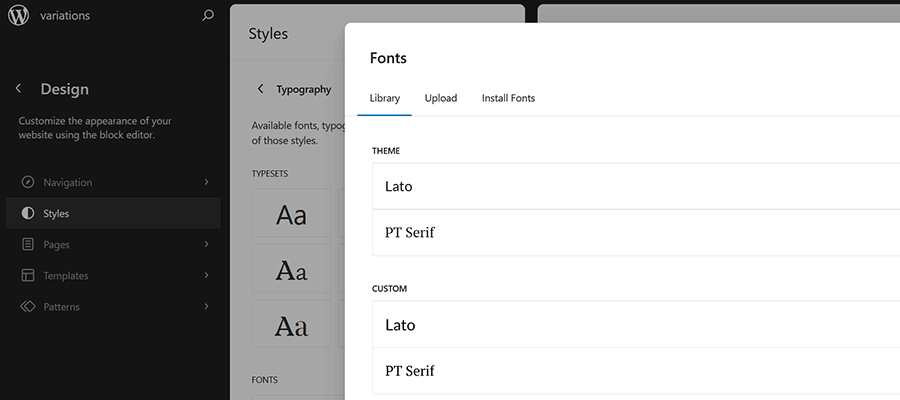
We added custom fonts to the Twenty Twenty-Five block theme.

We covered the basics in our variation, including:

  • Created a custom color palette;
  • Installed new fonts from Google Fonts;
  • Added custom spacing for the Group and Paragraph blocks;
  • Changed the look of the Button block;

The result is an earthy look that aims for simplicity. But you can do as much or as little as you like. Just remember to save your changes when done.

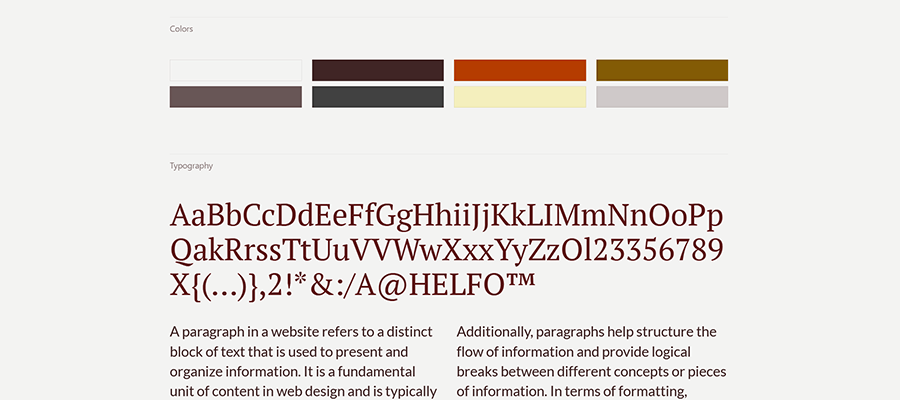
The custom color and typography of our style variation.

Step 3: Save Your Style Variation

Our next task involves saving our custom style variation. This functionality is part of the Create Block Theme plugin.

The feature is located within the Site Editor. Here’s how to find it:

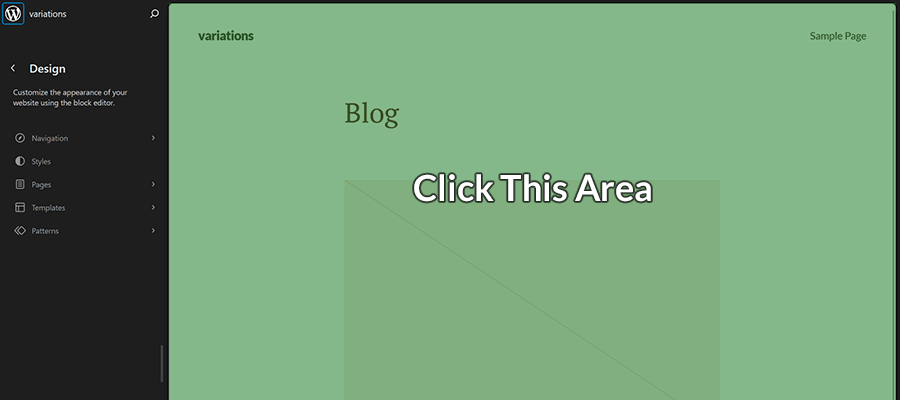
  1. While in the Site Editor, click on the right panel, highlighted in green below:

Click on the right panel of the Site Editor to access the Create Block Theme settings.

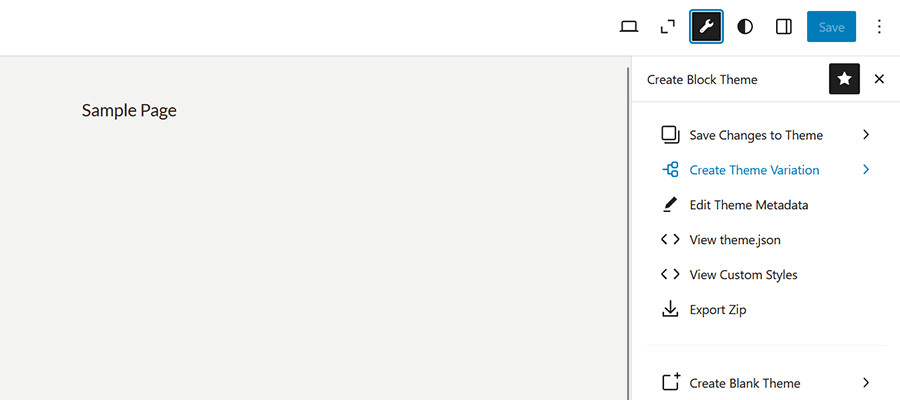
  1. Click the wrench icon on the upper right of the screen and select Create Theme Variation:

The Create Block Theme menu in the WordPress Site Editor.

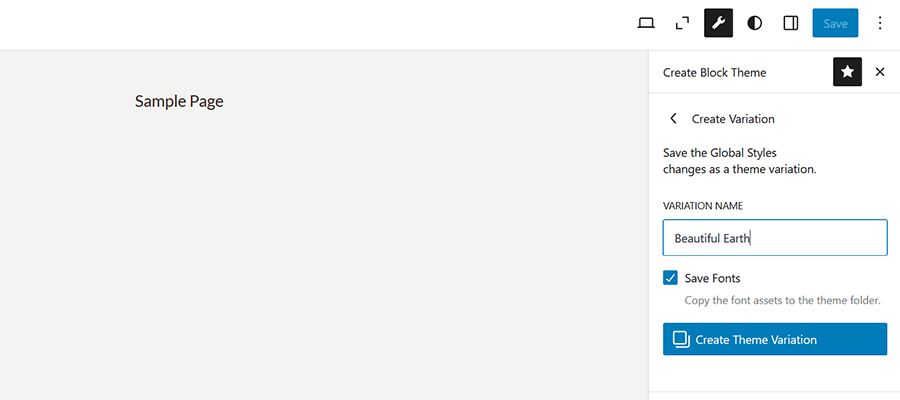
  1. Name the variation and ensure the Save Fonts box is checked. We’ll call ours “Beautiful Earth.”

We saved our custom style variation.

  1. Click the Create Theme Variation button to save the settings.

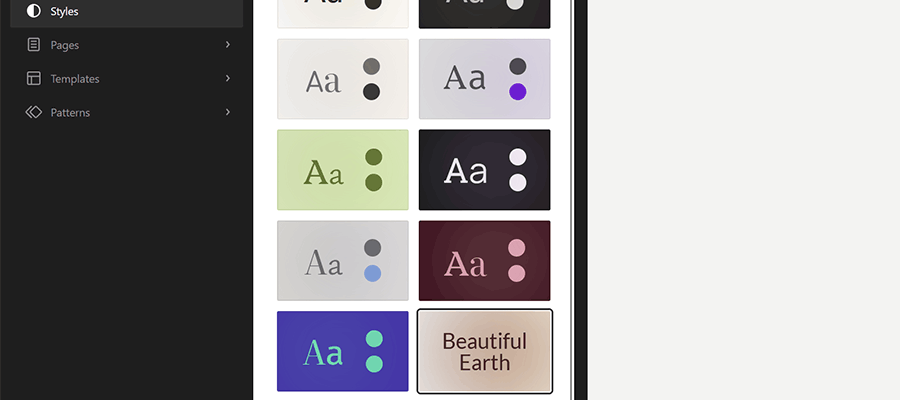
Once saved, the new variation is added to the list in the Browse Styles area of the theme editor. Hovering over the variation reveals its name.

Our custom style variation is now available in the Site Editor.

How to Use Your Style Variation on Another Site

Style variations are portable and can be used on multiple websites. The process involves copying the generated JSON file and adding it to the desired site.

  1. Locate the style variation’s JSON file in /wp-content/your-theme/styles/
    Replace your-theme with the name of the theme you’re using (ours is twentytwentyfive).

    For reference, our JSON file is called beautiful-earth.json

  2. Copy your style variation’s JSON file.
  3. On your new website, paste the file into /wp-content/your-theme/styles/ – you may need to upload the file via SFTP or your web host’s file manager.
  4. You’ll now be able to choose the style variation within the Site Editor.

About Custom Fonts

Earlier, we mentioned the ability to add custom fonts to a style variation. It requires a few extra steps to work when moving your variation to a new site.

  1. Locate the custom fonts you added at /wp-content/themes/your-theme/assets/fonts/
  2. Copy each font’s respective folder.
  3. Paste the font folders into the same directory on your new site. Once again, you may need to upload them.

Give Your Block Theme a Custom Look

Style variations are a convenient way to add personality to your block theme. You can build them to suit your project requirements.

They also act as a starting point for designers. You can continue to add custom styles after applying a variation. The changes you make will be saved in the site’s database.

There’s also an option to reset the styles to the variation’s defaults. That makes it easy to experiment without losing the key elements of your design.

The best part is that style variations don’t require coding expertise. That puts custom design within everyone’s reach.

Related Topics


How to Onboard Your Clients With WordPress — Speckyboy

WordPress powers websites of all sizes and across industries. As such, the content management system (CMS) has a diverse user base. People from all walks of life use it to publish, sell, and share their ideas.

That poses a challenge for freelancers and agencies. Educating clients on the finer points of WordPress is a personal affair. We must tailor our message to match our audience.

New users are of particular importance. WordPress, like all software, has a learning curve that can be overwhelming to some. There are obstacles for those wanting to manage their website.

So, how do we effectively onboard clients? Here are some tips to help you help them.

Streamline the Site Management Experience

One key to successful training is building a website that’s easy to manage. The good news is that WordPress is flexible. You can create a site management experience geared for your clients.

The first step is to build features that don’t require expertise to manage. For example, create page layouts that are resilient and not easily broken. Use the WordPress locking feature to prevent blocks from accidentally being deleted or moved.

The rule of thumb is: If it’s a pain for you to update, it’s too hard for your client. Remember that in all you do.

Then there’s the WordPress admin area. It’s easy to get lost in the many navigation items and dashboard widgets. We can reduce this by assigning a less privileged user role. For example, an Editor account will see fewer menu items and have limited access to site-breaking settings. Some available plugins make the dashboard a friendlier place for clients as well.

Taking these steps greatly reduces the learning curve. And you can do it before your client logs in for the first time.

How to Onboard Your Clients With WordPress — Speckyboy

Get to Know Your Client’s Comfort Level

Take time to get to know your client. You’ll learn a lot about them during the project’s strategy, design, and build phases.

For instance, try to gauge their comfort level with technology. Are they good with gadgets? Does their job require the use of online tools? Do you notice them struggling with technical tasks?

This information will help you design a training process that meets their needs. You can determine potential roadblocks and how to avoid them.

Clients who are inexperienced with technology generally need a bit more hand-holding. That means focusing on the basics, like logging in and navigating within WordPress. Then it’s time to tackle the likes of the Block Editor.

Meanwhile, you can gloss over the basics when training someone with WordPress experience. A short overview won’t hurt, but you can spend more time on other areas.

Educating clients isn’t a one-size-fits-all proposition. Personalize the experience as much as possible.

Personalize your training session to meet your client's comfort level.

Focus On What Clients Need to Know

WordPress is a vast subject, and your knowledge may run deep. That doesn’t mean your clients have to know it all. It’s probably better that they don’t.

Why? Managing their website is yet another thing on a client’s to-do list. They don’t have the mental bandwidth to learn the history of WordPress or how everything works.

Thus, your training should focus on what they need to know. Think about the tasks they’ll perform and the areas of WordPress they’ll use most. This is the best way to spend the bulk of your training session.

For example, a client who publishes press releases will need to understand WordPress posts and taxonomies. Details such as uploading featured images and choosing post categories are important.

Meanwhile, a client who wants to create photo galleries will need to understand the workflow. Focus on the gallery plugin you’re using or building native galleries in the Block Editor. Other aspects of the task, like image optimization, are also worth discussing.

The idea is to provide relevant information while avoiding topics that will overwhelm your clients. You only have so much time for training, so make every second count.

Focus your training on the tasks your clients will perform.

Provide Reference Materials for After Training

Training clients means filling their heads with instructions. There’s only so much knowledge that can be absorbed in an hour. Inevitably, some things will be forgotten when they try to do it themselves. Infrequent tasks can also lead to missing the finer details the next time they log in.

Reference materials help clients to refresh their knowledge. It’s something they can look to when they have a question. It may even save you from a panicked email or two. That alone makes it worth your efforts.

The most obvious item is a recording of your training session. If you use an app like Zoom, record the meeting and post it online (get your client’s permission first). You can also use an AI notetaking app to email a summary of the meeting. It’s a nice touch and will come in handy.

Screencasts are also a helpful resource. Record yourself performing relevant tasks and put them on a private page. Your clients can see exactly how things are done. You can even reuse them for different clients if the subject is broad enough.

There’s also plenty of WordPress tutorials available. Sites like the official Learn WordPress courses offer videos for users of all experience levels. And YouTube is full of videos highlighting various tools and techniques.

Reference materials are helpful and a way to increase revenue. Add the cost of creating tutorials to your site-building packages. It’s an extra service that benefits everyone.

Reference materials like video guides come in handy for clients.

Be a Friendly, Open Guide

The final ingredient to onboarding clients has little to do with technology. It’s more about being a patient and kind teacher. That, as much as anything, will help your client learn more effectively.

There are a few simple rules:

  • Explain concepts and instructions in plain language.
  • Go slowly and avoid unnecessary steps.
  • Ask your client if they have questions and leave room for them to ask.
  • Show empathy and put yourself in their shoes.
  • Provide positive feedback.

We get it, you’re busy. Client training is one of many tasks you need to finish. Regardless, don’t forget the human touch when teaching.

Remember, a positive training experience also strengthens your relationships. Clients won’t hesitate to recommend you to others and will stay with you for years to come.

Patience and empathy help ensure successful client training.

Use Your Expertise to Empower Clients

Content management systems such as WordPress allow clients to manage some or all aspects of their website. It’s a powerful tool for connecting them to the world.

Many will need a helping hand along the way; that’s where we come in. Web professionals act as guides to the software’s functionality. We show clients the whys and hows so they can accomplish their goals.

Teaching clients is rewarding but challenging. Every person has a different learning style and experience level. Not everyone “gets it” right away.

However, a little preparation can create positive results. Take time to understand your client’s comfort level with technology. Determine what they need to know about WordPress. Provide resources they can reference later. Most of all, exercise patience when teaching.

Together, you’ll help them gain the skills they need to flourish. They’ll feel empowered, and you’ll have that warm, fuzzy feeling inside!

Related Topics


Can AI Site Builders Make WordPress Easier? — Speckyboy

Getting started with WordPress is challenging. You install the app, log in, and… then what? Many first-time users face this conundrum – the next steps aren’t obvious.

The content management system (CMS) becomes easier as you navigate its learning curve. But it’s worth wondering how many people give up before they reach that point.

Technology may have a solution. AI-powered site builders are starting to infiltrate the market. They aim to make it easier for non-developers to build a website by answering a few questions.

Perhaps they sound like yet another attempt at a DIY tool, something else to replace web designers. This makes sense on the surface. However, AI has the potential to break down some longstanding barriers to using WordPress. If so, they could be useful to professionals and novices alike.

With that in mind, let’s explore the potential of combining AI with WordPress. We’ll look into the future and make a few guesses as to what’s to come.

WordPress Lacks a Great Onboarding Experience

Before we dig into AI’s potential to help WordPress users, we should define the problem that needs to be solved. Logging into WordPress for the first time is like being dropped into the wilderness.

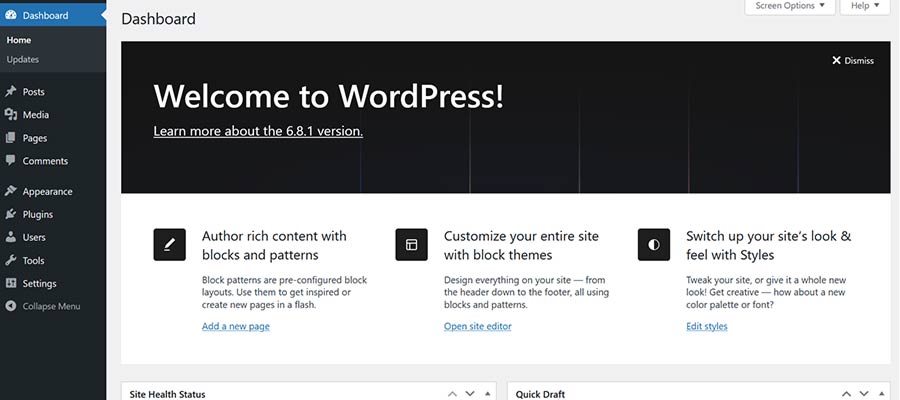
There’s a welcome message at the top of the dashboard and a hefty menu on the sidebar. Both will lead a curious user to explore. However, some may be overwhelmed by the number of options.

Plus, they’ll need to know at least something about these aspects of WordPress:

  • Where to find and install themes and plugins.
  • How to edit their theme via the Site Editor (block themes) or Customizer (classic themes).
  • How to use the Block Editor to create pages and posts.
  • Any site settings they need to change.
  • Best practices for security and performance.

Learning WordPress requires commitment. The default onboarding doesn’t put people on that path.

It’s also a burden on web professionals. Setting up a new site means a lot of repetitive tasks, and we’re also responsible for training clients to use the software. All told, we spend significant time doing things other than site building.

Better onboarding could make all the difference.

Can AI Site Builders Make WordPress Easier? — Speckyboy

How AI Could Improve the User Experience

In broad terms, an AI site builder is an onboarding tool. Its mission is to learn about your website needs and produce something relevant. So far, the results of these tools have been mixed.

Good or bad, the result isn’t a finished product. It’s a foundation to build upon. We can take what’s there and go further, whether via “chatting” with a bot or doing it ourselves. But the story doesn’t have to end there.

The potential lies in catering to various niches. The current generation of builders tends to focus on non-developers, people who want to build a quick and cheap website. They’re a one-size-fits-all proposition.

However, there’s room to make these tools more specialized. For instance, a site builder aimed at professionals may focus on things developers want. That could include pre-configured website blueprints that install a theme, plugins, and other custom tweaks.

Consider the time we spend getting ready to build a website. The right tool could do these tasks for us, saving time and money. A simple text prompt could check several steps off our to-do list.

AI is already splitting into several subgenres. We have models trained for coding, education, and business. Adding tools for freelancers and agencies follows this trend.

Meanwhile, tools for non-developers also have greater potential. They may recommend plugins (or categories of them) based on industry or other user input. Perhaps uploading a logo helps AI create color and typography schemes.

In addition, these tools can go beyond the initial site build. AI might also help users learn to create and manage content. A tool could provide tips and relevant content from the Learn WordPress archives. They could perform routine checks to keep WordPress as secure as possible.

AI site builders aren’t necessarily doing these things today. However, service providers will recognize the opportunity to do more. A little imagination will go a long way.

An AI site builder could benefit WordPress novices and professionals.

An Opportunity to Improve WordPress for All

The term “site builder” may make you cringe. We won’t blame you – these tools have a checkered history of spotty quality and dubious value. Besides, web professionals aren’t their target market.

That could change as more AI-powered products come online. For example, WordPress.com recently released a tool that will reportedly become part of the self-hosted (WordPress.org) version. Such an open-source app could be tailored to all sorts of interesting uses.

The idea of a site-building tool could be turned on its head soon. If done right, it could solve one of the most frustrating aspects of learning WordPress, not to mention a productivity boost for web developers.

Let’s hope AI helps us take the next step toward making WordPress easier for everyone.

Related Topics


40+ Best Free Lightroom Presets for Photographers in 2025 — Speckyboy

Presets are pre-configured settings that can be applied to photos in Adobe Lightroom. They’re a quick and easy way to improve your photos with various effects without having to adjust each setting manually. Anyone can create and share presets, allowing for endless options for editing your photos.

The best thing about Lightroom presets is that they can save you time in your editing workflow. Instead of spending hours tweaking settings and experimenting with different effects, you can simply apply a preset and see how it looks. If you’re a photographer, designer, or someone who works with digital photos, Lightroom presets can be a valuable tool in your toolbox.

One of the great things about Lightroom presets is that they’re not just limited to desktop editing. With the rise of mobile photography, presets are also available for mobile versions of Lightroom. This means you can edit your photos on the go and achieve professional-looking results without carrying around a heavy laptop.

One thing to note is that presets are different from LUTs. The main difference between LUTs and presets is that LUTs apply a specific color grading or effect to your photos, while presets adjust the individual settings in Lightroom to achieve a specific style or aesthetic. LUTs are less flexible, while presets offer more customization options.

Finding the best Lightroom presets can be challenging because you need to sift through many lower-quality options. This extensive collection highlights some of the best free Lightroom presets you can download. With the right presets and a little practice, you can create stunning photos.

If you’re new to Lightroom or presets in general, there are plenty of resources available to help you learn. You could start with our very own collection of Lightroom tutorials.

Film Effect Lightroom Presets

With these Lightroom presets, your digital photos can take on a stunning film-like quality. While the effects may be subtle, they can bring out the beauty of your photos and give them a timeless aesthetic.

Cinematic Photo Effect Lightroom Presets

Free to Download

With this free set of eight Lightroom presets you can quickly recreate the intriguing effects found in arthouse movies. From moody and atmospheric to stark and cinematic, these free presets offer various dramatic effects that can transform your photos with just a few clicks.

40+ Best Free Lightroom Presets for Photographers in 2025 — Speckyboy

Film Emulation Lightroom Presets

This Lightroom preset will meticulously replicate the aesthetic qualities of iconic films from Kodak, Fujifilm, and Agfa. This one-click wonder immerses your photography in a rich tapestry of retro styling, giving each shot a timeless charm.

Film Emulation Lightroom Presets presets addon

Retro Film Lightroom Presets

Offering ten vintage-inspired portrait photography styles, these Lightroom presets blend today’s moments with yesterday’s retro style. They are perfect for photographers looking for a light, nostalgic touch.

Retro Film Lightroom Presets presets addon

Fuji Astia Lightroom Preset

Free to Download

Fuji Astia is an underrated gem in Fujifilm’s lineup. This free preset will subtly make your photographs beautiful and is incredibly useful when you want flattering and natural tones.

Fuji Astia free lightroom preset

35mm Film Lightroom Preset

Free to Download

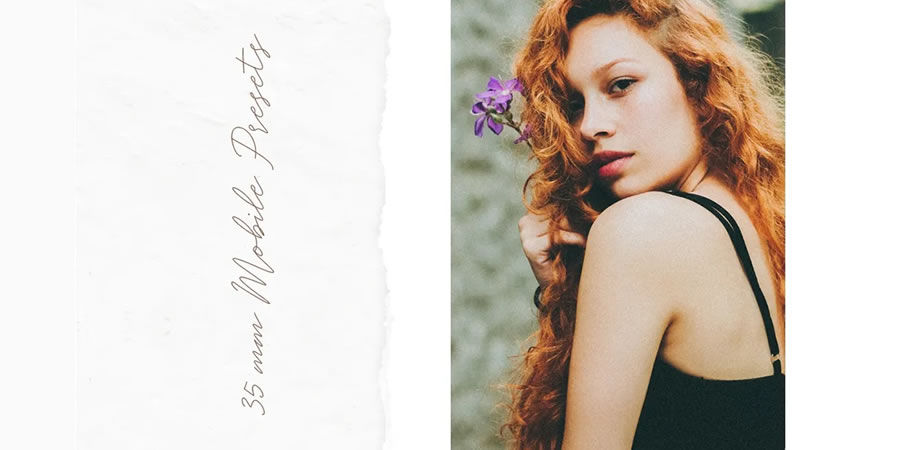
The 35mm collection of free presets will add subtle graininess and color edits to your photos, giving them a classic cinema look and feel. They will add a touch of dreaminess to your shots.

Free 35mm Film Desktop Lightroom Preset

Vibrant Fujifilm Lightroom Preset

Free to Download

This free Lightroom preset will give your shots that vintage-inspired Fujifilm color effect everybody loves. It adds a little extra brightness and vibrancy that will make your photos look amazing.

Free Vibrant Fujifilm Lightroom Preset

Portrait Lightroom Presets

Whether you want to improve the styling of your portrait photography or make your selfies a little better, these Lightroom presets are the solution you need. They will all add a professional touch to your photos.

Instagram Selfie Lightroom Preset for Desktop & Mobile

Free to Download

This free Lightroom preset can take your self-portraits to a new level of professionalism. With its natural look, this preset will add a touch of refinement to your photos and capture your best self in stunning detail.

Selfie Mobile Desktop Application free lightroom preset

Minimalist Portrait Lightroom Presets

Minimalist Portrait is a collection of Lightroom presets for portrait photographers who want to envelop their subjects in minimalism and warm tones. With a focus on natural light, this preset subtly provides a clean, modern aesthetic.

Minimalist Portrait Lightroom Presets presets addon

Skin Tone Lightroom Presets for Mobile & Desktop

Free to Download

Designed to preserve the natural tones of your subjects’ skin, these free presets can give your portraits a polished and professional look.

Skin Tone free lightroom preset

Portraiture Lightroom Presets

Free to Download

Transform your portraits with these dynamic Lightroom presets. Each one blends and optimizes light, tone, and color for different scenes and conditions, producing a distinct aesthetic perfect for headshots, selfies, and studio portraits.

Portraiture free lightroom preset

Portrait Photography Lightroom Preset

Free to Download

This powerful Lightroom preset will add a touch of raw, edgy energy to your portraits. With just one click, you can have a gritty, urban aesthetic.

Free Portrait Photography Lightroom Preset

Seasonal Effect Lightroom Presets

No matter the season, these Lightroom presets will give your photographs a refined color effect. With subtle adjustments that don’t overpower your photos, these presets will improve the mood and style of your photos.

Split-Toning Lightroom Presets

Free to Download

Transform your photos with these nine stunning Lightroom split-toning templates. Split toning can give your shots a new level of sophistication by adding different colors to the highlights and shadows of your photos.

Moody Landscapes free lightroom preset

Autumn Color Boost HDR Lightroom Preset

Free to Download

This free HDR Lightroom preset will make your autumn photos come alive. Designed to work on the dynamic range and colors of your fall shots, this preset can bring out the best in your photos with just a few clicks.

Autumn Color Boost Free HDR Lightroom Preset

Autumn Forest Desktop & Mobile Lightroom Presets

Free to Download

This free Lightroom preset collection will add a touch of moodiness to your forest and nature photos. Small but mighty, these presets create striking effects, creating an immersive atmosphere.

Autumn Forest Desktop Mobile free lightroom presets addon

High Dynamic Range Effect Lightroom Presets

One of Lightroom’s greatest strengths is its ability to expand the dynamic range of your photos, bringing out detail in even the most challenging lighting conditions. While the latest version introduces a new HDR merge feature, it requires multiple exposures of the same scene. Fortunately, these presets can create an HDR-like effect with just a single photo, allowing you to quickly achieve stunning results.

HDR Pro Lightroom Presets

The HDR Pro collection includes ten presets, such as black & white, sepia, saturated colors, and shadow effects. Perfect for bringing out the intricate details and contrasts in your photos.

HDR Pro Lightroom Presets presets addon

Cinematic HDR Lightroom Preset

Free to Download

This cinematic HDR Lightroom preset will take your landscape and nature photos to the next level. It is perfect for adding drama and beauty to your outdoor shots by adding depth and contrast to your photos.

Free Cinematic HDR Lightroom Preset

Black & White HDR Lightroom Preset

Free to Download

Designed to work on the deep, beautiful blacks in your photos, this HDR preset makes it easy to apply a range of stunning black and white effects to any photo.

Black White HDR Lightroom Preset

Color Effect Lightroom Presets

Lightroom offers various options for working with color. You can add vibrancy to dull photos, create a vintage aesthetic, and adjust colors in highly creative ways. All of these presets will allow you to add creative color effects to your photos quickly.

Urban Soot Lightroom Preset

Free to Download

Urban Soot is a free collection of ten Lightroom that will add an atmospheric and cinematic feel to your street photography. They’re very simple presets, but effective.

Urban Soot Lightroom Preset free

Cyberpunk Color Effect Lightroom Preset

Free to Download

Transform night photos with this free Lightroom preset that will give your shots a cyberpunk twist. Whether you want to add an edgy and futuristic feel or create a striking and dramatic effect, this preset is perfect.

Cyberpunk Color Effect free lightroom preset

Blvck Paris Black Lightroom Preset

Free to Download

Inspired by the dark and luxurious style of the BLVCK PARIS clothing brand, this preset is the perfect tool for photographers who want to add a touch of sophistication and drama to their urban shots.

Blvck Paris Black free lightroom preset

Cyberpunk Lightroom Presets

Immerse your photography into the future with these Cyberpunk Lightroom presets. Designed to create the iconic cyberpunk style effect, these presets give your photos a vibrant yet dystopian feel.

Cyberpunk Style Effect Lightroom Presets presets addon

City Nights Lightroom Preset

Free to Download

If you’re a photographer looking to improve your cityscape night shots, this free preset is what you need. This quick and easy preset will greatly improve the colors and tones of your darker night shots.

City Nights Lightroom Preset free lightroom preset

Flames Mobile & Desktop Lightroom Preset

Free to Download

This free preset will quickly transform your shots with a soothing and warm aesthetic. It provides the perfect starting point for creating photos that truly capture the essence of your subjects.

Flames Mobile & Desktop free lightroom preset

Vivid Brown Lightroom Presets

Free to Download

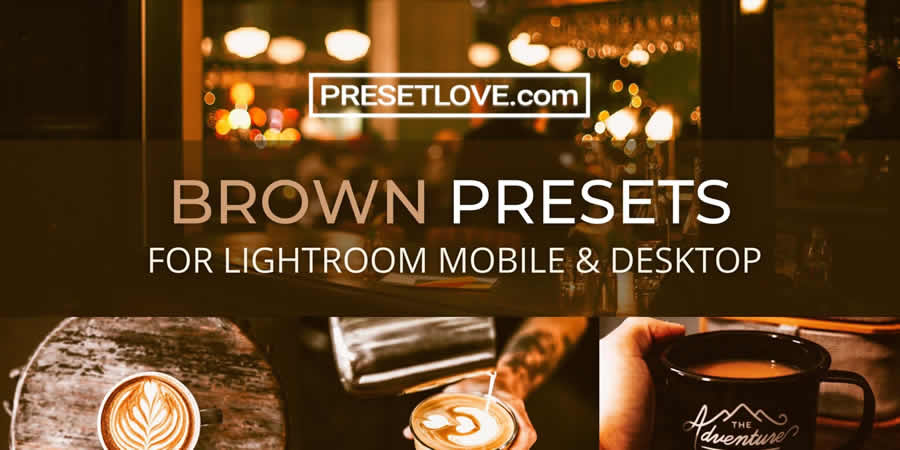
Are you looking for a preset to add a touch of elegance and warmth to your photos? These brown Lightroom presets are just what you need. Perfect for portraits, they quickly transform your photos with a warm aesthetic.

Vivid Brown free lightroom preset

One Click Wonder Lightroom Preset

Free to Download

Are you struggling to find the perfect style for your photos? Look no further than this versatile Lightroom preset. Designed to give your editing process a head start, it includes the most common adjustments to transform a RAW file from flat to stunning.

One Click Wonder Lightroom Preset

Bright, Colorful & Vibrant Lightroom Presets

Free to Download

Are you looking to add energy and vibrancy to your photos? Look no further than these free Lightroom presets. Designed to brighten your pictures with vivid color accents, these presets are perfect for photographers who want to add a touch of excitement to their shots.

Bright Colorful Vibrant free lightroom presets addon

Edgy & Intense Lightroom Presets

Free to Download

Do you want to add an edgy or intense effect to your photos? Check out this collection of fifteen Lightroom presets. They’re designed to help you create photos that capture your subjects with boldness and intensity.

Edgy Intense free lightroom presets addon

B&W Effect Lightroom Presets

Converting a color photo to black and white in Lightroom is fairly easy to do, but the results can be lackluster without additional adjustments.

To make your black and white photos truly stand out, you need these Lightroom presets. You can transform your photos into striking monochromes with just a few clicks.

Black & White Deluxe Edition for Lightroom

Dive into classic monochrome with Black & White Deluxe Edition. These presets are ideal for photographers looking for professional-grade black and white effects. They will transform your shots with timeless elegance and nuanced contrasts.

Black & White Deluxe Edition for Lightroom presets addon

Contrast Noir Lightroom Preset

Free to Download

Black and white doesn’t have to mean boring. Contrast Noir converts your images to monochrome with added punch. It’s ideal for helping make an impact, even without color.

Contrast Noir Black & White Lightroom Preset

B&W Berkeley Mobile & Desktop Lightroom Presets

Free to Download

This preset will not only convert your photos to black and white but also give them a charming vintage effect. It is easy to apply and customize.

B&W Berkeley Lightroom Preset Mobile Desktop

Nostalgia Effect Lightroom Presets

These Lightroom presets are the perfect solution if you’re looking for a vintage or retro aesthetic. They can quickly transform your photos, giving them a classic and timeless appeal.

Dark Vintage Lightroom Presets

The Dark Vintage Lightroom presets are perfect for bloggers and photographers. They add a moody, vintage touch to your photos, ensuring each snapshot tells a story.

Dark Vintage Lightroom Presets presets addon

Vintage Objects Lightroom Preset

Free to Download

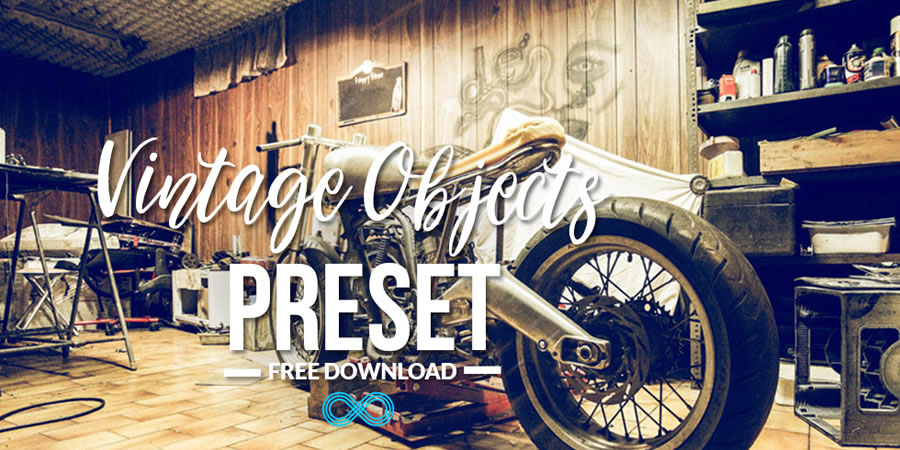
This free Lightroom preset has been created to enhance eCommerce photography, especially when selling on Etsy. It will give your products a vintage or antique effect to your photo, creating a warm look and feel.

vintage objects retro antique free lightroom preset

Warm Retro Mobile & Desktop Preset

Free to Download

This collection of free Lightroom presets will add a warm, vintage feel to your photos. They’re perfect for portraits, landscapes, and more.

Warm Retro Lightroom Preset

Adventure Lightroom Presets

These travel and adventure Lightroom presets are for those who love to explore and document the world around them. They offer a range of stunning effects that can add depth and drama to your travel photos.

Lightroom Presets for Travelers & Bloggers

Free to Download

Created for travelers, this collection of 14 free Lightroom presets will bring your beautiful landscape photos to life and make them truly memorable.

Travelers & Bloggers free lightroom preset

ARTA Traveling Presets for Lightroom

These Lightroom presets, created for modern travelers, will sprinkle contemporary colors throughout your photos. They’re ideal for travel and lifestyle bloggers.

ARTA Traveling Presets for Lightroom presets addon

The Tropics Travel & Nature Lightroom Presets

Free to Download

The Tropics is a collection of 11 free presets for travelers that add green and yellow tones to your photos, giving them an instant tropical look and feel.

Tropics Travel Nature free lightroom preset

Astro & Space Lightroom Presets

Take your Astro and space photography to the next level with these Lightroom presets. Designed to bring out the beauty of the cosmos, these presets offer a range of effects that will add depth, contrast, and vibrancy to your photos.

Astrophotography & Night Sky Desktop & Mobile Lightroom Presets

Free to Download

If you’re looking for a preset that will bring out all of the tiny little details of our universe, then these ten free Lightroom presets are what you need. They have been specifically created for Astro and long-exposure photography.

Astrophotography Night Sky Desktop Mobile free lightroom presets addon

50 Galaxy LUTs Pack for Lightroom

Journey to the stars with this space photography preset pack. Explore the cosmos and let your photos capture the beauty of our galaxy. A must-have for celestial enthusiasts!

Galaxy LUTs Pack for Lightroom presets addon

VSCO Lightroom Presets

These VSCO Lightroom presets replicate the aesthetics of analog film photography. They offer various color schemes and tones, allowing you to apply film-inspired effects quickly.

Cinematic VSCO Lightroom Presets

Transform your travel, lifestyle, or portrait photography with these VSCO Lightroom presets. They are perfect for photographers looking for a professional aesthetic.

Cinematic VSCO Lightroom Desktop Mobile presets addon

VSCO Beauty Lightroom Presets

Transform your portrait photography with these VSCO portrait presets. With matte textures and subtle grain, you can give your portrait photos a dramatic, warm, and soft aesthetic that will add depth and character.

VSCO Beauty Lightroom Desktop Mobile presets addon

How to Install Lightroom Presets

Importing and applying a Lightroom preset to a photo is a simple process. Here are the steps:

  1. Open Adobe Lightroom: Launch Lightroom on your computer.
  2. Import Your Photo: Import the photo you want to edit into your Lightroom library. You can do this by clicking the Import button and selecting the photo from your computer.
  3. Navigate to the Develop Module: Click on the Develop module in the top-right corner of the Lightroom interface to access the editing tools.
  4. Open the Presets Panel: In the left panel, click on the Presets tab to open the Presets panel.
  5. Locate & Expand Preset Groups: In the Presets panel, you’ll see a list of preset groups (folders) on the left side. Expand the preset group that contains the preset you want to apply.
  6. Preview the Presets: Hover your mouse over different presets within the group to see a preview of how they will affect your photo.
  7. Apply the Preset: Click on the preset you want to apply to your photo, and Lightroom will instantly apply the preset’s adjustments to your photo.
  8. Fine-Tune the Edit (Optional): After applying the preset, you can make additional adjustments to your photo using the editing tools.
  9. Export or Save the Edited Photo: Once you’re satisfied with the edits, you can export the edited photo or save it to your Lightroom library.

How to Create a Lightroom Preset

Creating your own Lightroom presets allows you to apply consistent and customized edits to your photos with just a click. Here’s a step-by-step guide on how you can create your own presets:

  1. Edit a Photo: Open a photo in Lightroom that you want to use as the basis for your preset.
  2. Apply Edits: Make the desired adjustments and edits to the photo’s exposure, color, tone, and other settings until you achieve the desired look.
  3. Access Develop Module: Click on the Develop module to access the editing tools.
  4. Open Presets Panel: In the left panel, find the Presets tab and click on it to open the Presets panel.
  5. Create New Preset Group (Optional): Right-click on an existing preset group or click the + button to create a new preset group (folder) to organize your presets.
  6. Create New Preset: Right-click within the Presets panel or click the + button in the group you created to create a new preset.
  7. Name Your Preset: Give your preset a descriptive and memorable name that reflects the adjustments you’ve made.
  8. Choose Settings to Include: In the New Develop Preset dialog box, check the boxes next to the settings you want to include in your preset. This can include adjustments like exposure, contrast, highlights, shadows, color balance, and more.
  9. Save Your Preset: Save the preset by clicking the Create button.
  10. Apply Your Preset: Open another photo in Lightroom and navigate to the Develop module. In the Presets panel, find the group you created and click on your custom preset to apply the saved adjustments to the new photo.
  11. Fine-Tune & Adjust: If needed, adjust the settings on the new photo to ensure that the preset works well across different images and lighting conditions.
  12. Save & Organize: As you create more presets, you can organize them into different groups to keep your workflow efficient.
  13. Export & Share (Optional): If you want to use your presets on another computer or share them with others, you can export the preset files and import them into different Lightroom installations.

Related Topics


How to Add Custom Style Variations to WordPress Blocks — Speckyboy

The WordPress Block Editor is infinitely extensible. For instance, you can build custom blocks to suit your needs or create block patterns for faster page building. But that’s only part of what’s possible.

You can also create custom style variations for WordPress blocks, augmenting what’s included in a default installation. This feature puts you in control of block design and helps establish a consistent look. It also means you don’t have to settle when using core blocks.

In addition, custom styles can be used as much or as little as you like. You can even make them the default when a block is added to a page. Thus, custom block styles are appropriate for a variety of use cases. They serve as the finishing touch to your website projects.

Today, we’ll show you how to add custom styles to a WordPress block. This guide will take you from concept to completion. When finished, we’ll have a real-world example to use as a basis for your ideas. Let’s get started!

What You’ll Need to Create a Custom Block Style Variation

First, we’ll start with the basic ingredients for creating custom block styles. You’ll need:

  • A WordPress website (preferably a staging or local environment).
  • A theme with a functions.php file or a custom plugin to house your code.

You’ll also want to review the official block styles documentation. It covers several methods for implementing them on your site.

We’ll use a local site for development with the latest version of WordPress and the Twenty Twenty-Five default theme. Our example will use the register_block_style() function in a custom plugin, keeping things tidy and allowing us to expand in the future.

Example: Add a Custom Style Variation for the Button Block

In this example, we’ll create a custom style variation for the Button block. The Twenty Twenty-Five theme comes with two variations for the block: Fill and Outline. They’re a bit plain, so let’s jazz things up!

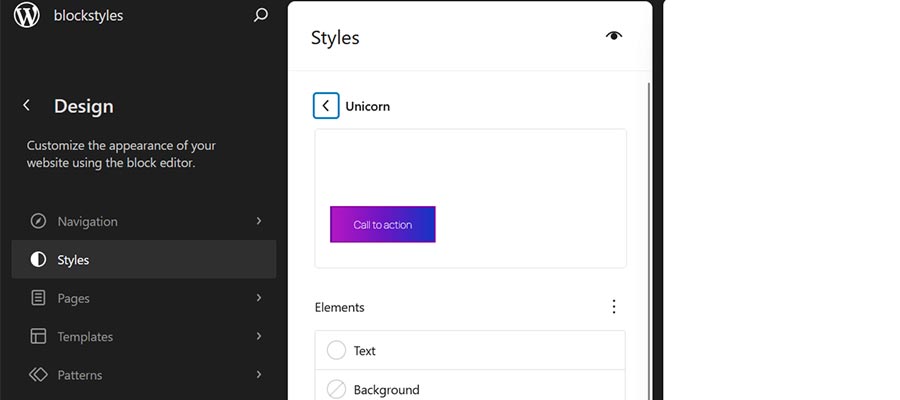
Our style variation will be called “Unicorn.” It will feature bold typography and a colorful background.

Step 1: Create a Custom WordPress Plugin Wireframe

We’ll store our block variation in a custom WordPress plugin wireframe. It’s a single file with a function called mcbv_register_block_styles() to include the styles.

Step 2: Add the register_block_style() Function to Register and Define Block Styles

The next step involves adding the register_block_style() function to our plugin. This function provides a few ways to define our block styles via the following properties:

  • inline_style: Adds inline CSS via the PHP function.
  • style_handle: Calls an existing stylesheet file containing the styles.
  • style_data: Adds an array of styles to the PHP function. It also makes custom styles compatible with the WordPress Site Editor.

We like the ability to edit the style variation in the Site Editor, so we’ll choose the style_data option. For more information, refer to the Block Styles documentation.

We defined custom styles for the button’s border, color, and typography. Other options are available and depend on the block you’re styling. View the Core Blocks Reference for more details.

You can also find examples of block style variations in the Twenty Twenty-Five theme. Go to the theme’s folder and navigate to: /styles/blocks/

Step 3: Install and Activate the Custom Plugin

It’s time to install and activate the custom plugin we’ve built. Save the plugin file (my-custom-block-variations.php) to: /wp-content/plugins/

Then, visit the WordPress dashboard and navigate to Plugins > Installed Plugins. Find “My Custom Block Variations” in the list and activate it.

If all goes well, you can start using the block style variation.

Step 4: Test the Block Style Variation

Finally, let’s see how our block style variation looks. Does it fully represent the sparkle of a unicorn?

  1. Create a new WordPress page on your test site and add the Buttons block.
  2. Click on the button to select it.
  3. Navigate to the Styles tab in the right column.
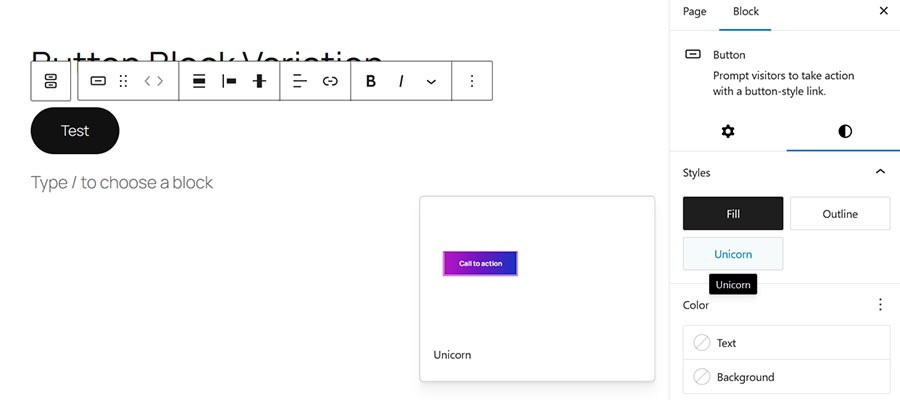
  4. There is now an option called “Unicorn” under the Styles heading. Hovering over the option will show a preview.

How to Add Custom Style Variations to WordPress Blocks — Speckyboy

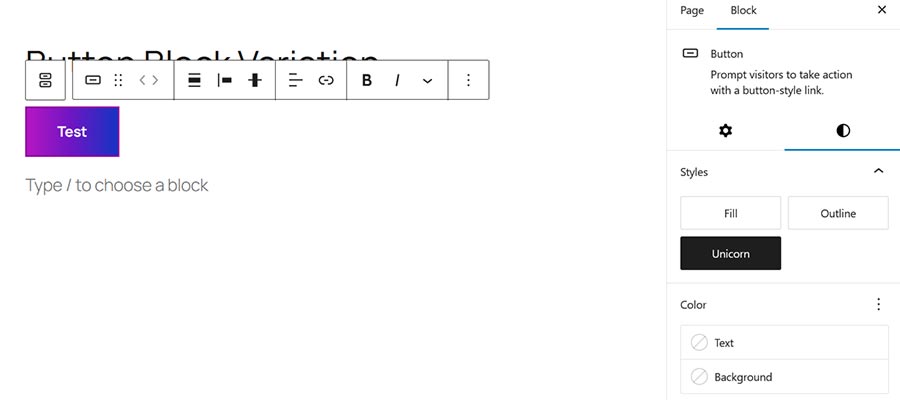
  1. Click on Unicorn, and the button styles will be applied.

The custom style is applied to the button block.

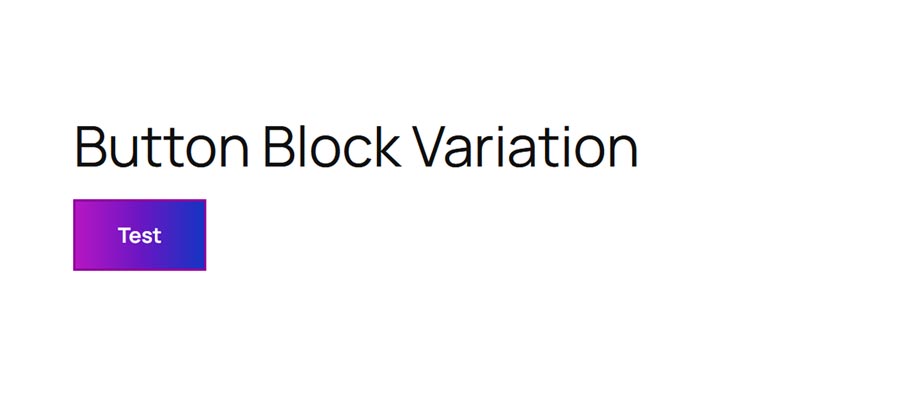
  1. Save the page and view it on your website. You should see a colorful button.

Our block style variation is shown on the front end of the website.

The results are breathtaking. We’re now ready to spread visual joy to our site’s visitors!

In addition, the variation is also available in the Site Editor if you’re using a block theme:

  1. Navigate to Appearance > Editor.
  2. Click on Styles in the left panel.
  3. Click on Blocks in the middle panel.
  4. Find the Button block and click on it.
  5. Click on the Unicorn style variation and start customizing.

We can edit the style variation in the WordPress Site Editor.

Add a Personal Touch to WordPress Blocks

Style variations are a fun way to add personality to your WordPress website. You can use them to create anything from a button-downed corporate look to something more vibrant. They’re also a nice addition for theme developers wanting to provide more style options.

Plus, there are multiple methods for implementing these custom styles. They can be added via JSON or PHP to match your workflow. You can add them to your existing theme or build a new plugin, as we did above.

There are so many possibilities! Experiment with block style variations and see how they can enhance your next project.

Related Topics


15+ Best Free Graffiti Fonts for Urban Designs in 2025 — Speckyboy

Graffiti, with its roots in urban culture, makes its mark on design with its unique style and expressive power. Its vibrant colors, bold lines, and power to express strong messages make it a popular design style.

For designers, graffiti fonts offer an urban aesthetic that can bring a project to life in ways few other elements can. They draw inspiration from the streets, reflecting the boldness of the wall art in many cities worldwide.

They can transform a simple message into a visual experience with layers of depth and emotion. Whether for branding, advertising, or digital art, graffiti fonts means embracing urban culture.

We have collected our favorite graffiti fonts here. And best of all? They are free to download and use! They can all be used in personal projects, but some can also be used in commercial projects.


Free to Download

Hosp is an excellent choice for any modern project that needs a bold and brave aesthetic. This graffiti font includes uppercase letters, numbers, and punctuation characters. It’s free for personal use.

15+ Best Free Graffiti Fonts for Urban Designs in 2025 — Speckyboy

Free to Download

This font comes in three different styles, and you can use it when you need that graffiti look but still want to maintain legibility. The font is free for personal and commercial use and has desktop and web font licenses.

Free Sprite Graffiti Font

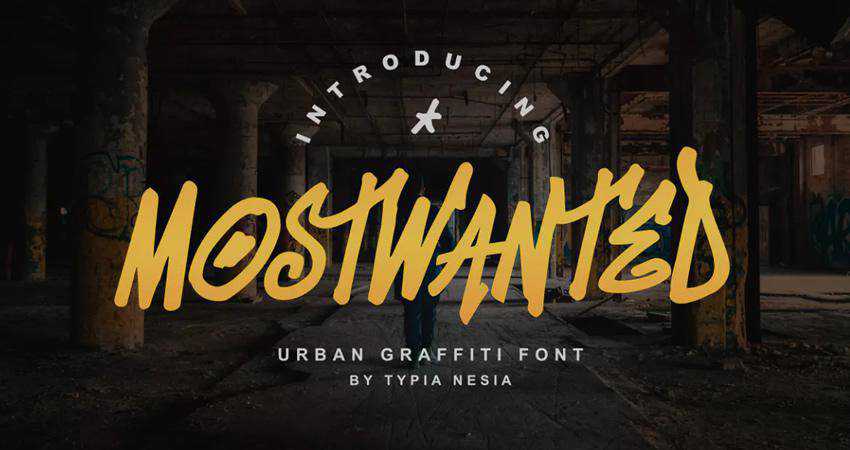
The MostWanted Graffiti font is an urban font with both uppercase and lowercase letters. You can mix and match them to create a unique design.

MostWanted Graffiti Font

Free to Download

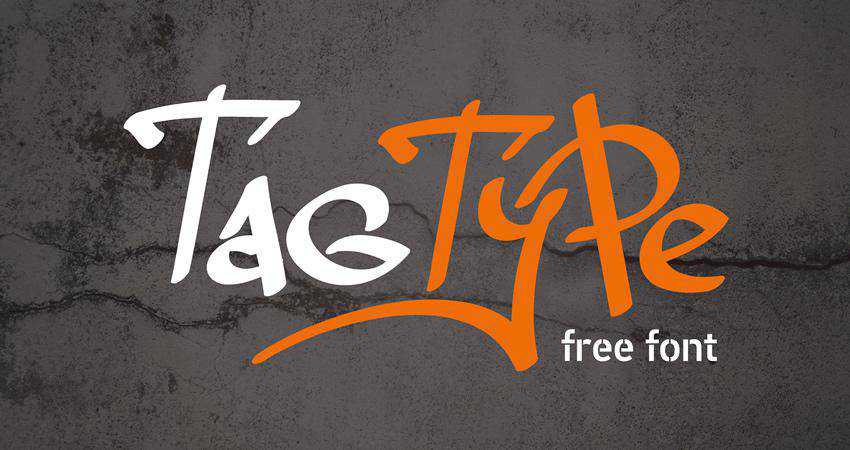
Tag Type features uppercase and lowercase letters. It is free to download and use in personal projects. The font also includes punctuation and Cyrillic characters.

Tag Type Free Font

Free to Download

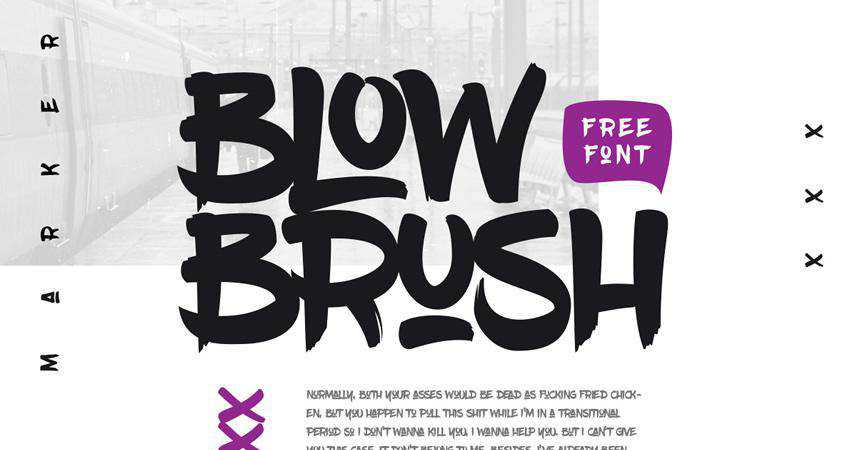
BlowBrush is a handwritten, marker-style font that’s perfect for any project that needs boldness. The free font has a complete set of uppercase characters, numbers, 22 ligatures, and a selection of special characters.

Free BlowBrush Font

Free to Download

This free font is an excellent choice for movie poster designs. It includes a complete set of characters and can be used in personal and commercial projects.

Free Graffiti Front Font

Free to Download

This Grafitti font is available in both black and white and colored versions. You can also download it as a PNG file and use it on personal and commercial projects.

Free The Graffiti Font

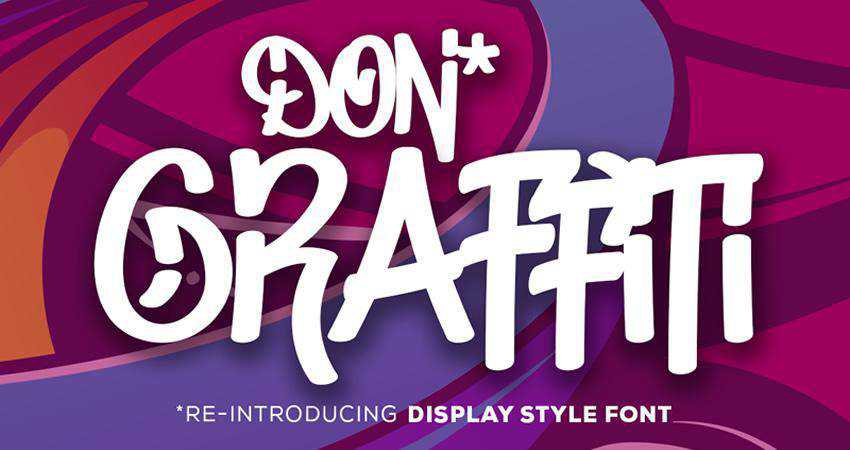
Free to Download

This font has been inspired by old-school graffiti. It’s free for personal and commercial projects and is an excellent choice for movie posters, displays, magazine covers, and headlines.

Free Don Graffiti Font

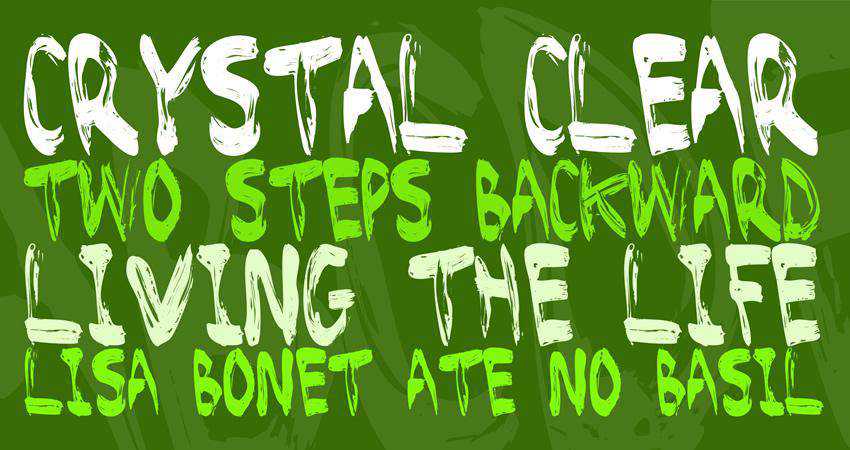
Free to Download

The Brushed Font is free for personal use and includes uppercase letters, numbers, and punctuation characters.

Free Brushed Font

Free to Download

This graffiti font includes regular and slanted versions. It has a rough look and feel, so it’s an excellent choice for retro design projects. It includes standard and alternate character sets and multilingual support.

Free Humblle Rought Font

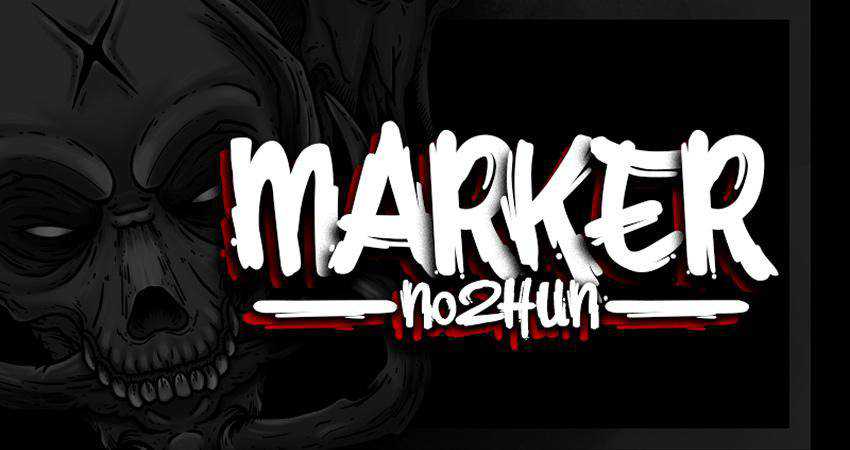
Free to Download

The Marker No2Hun font is free for personal use and includes uppercase and lowercase letters, numbers, and punctuation characters. Some alternates are also available.

Free Marker No2Hun Font

Free to Download

The Fusterd Brush font has an elegant look and feel. It can be used for personal and commercial projects. The font has uppercase and lowercase letters, numbers, and stylistic swashes.

Free Fusterd Brush Font

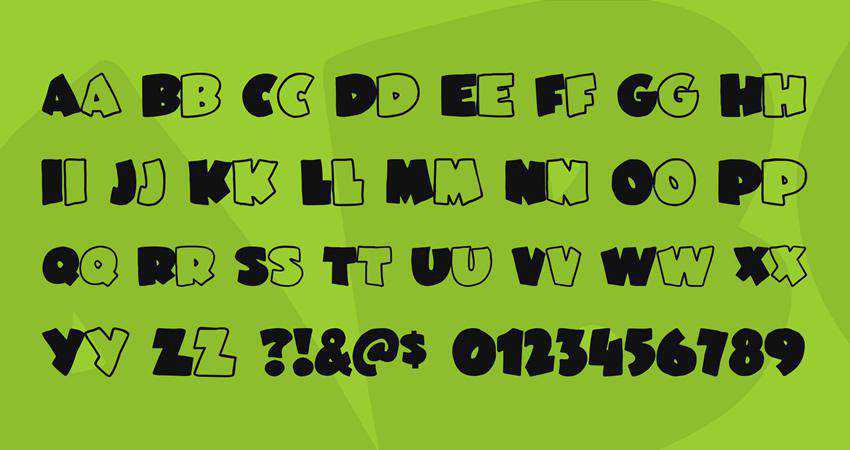
Free to Download

JuneBug is a playful, graffiti-style font perfect for any design project that’s aimed toward a younger audience. It includes uppercase and lowercase letters, numbers, and punctuation. The font is free for personal use.

Free JuneBug Font

Free to Download

The Vindica Rebel Brush is an uppercase font with matching numerals and punctuation characters. It’s an excellent choice for apparel or poster design.

Free Vindica Rebel Brush Typeface

Free to Download

Hoodson Script is a bold graffiti font that would be an excellent choice for poster, headline, or apparel design. It’s free for personal use.

Free Hoodson Script

Graffiti Font FAQs

  • What are Graffiti Fonts?
    They are a unique style of font that draws inspiration from street art and urban culture. They capture the bold nature of graffiti spray painting.
  • Why Use Graffiti Fonts?
    They’re great for adding a street-style edge to your designs. Whether you’re working on a poster, a flyer, or digital content, graffiti fonts can give your project a touch of urban styling.
  • Are Graffiti Fonts Suitable for All Types of Projects?
    They work best for projects that need a bold and unconventional look. They aren’t suitable for formal or corporate designs.
  • Can I Use Graffiti Fonts in Logo Design?
    Yes, for the right brand or project, graffiti fonts can create a excellent logo. They’re particularly great for brands that target a youthful audience.
  • How Legible are Graffiti Fonts?
    While they’re artistic, some graffiti fonts may sacrifice readability for style. It’s best to use them for short text like titles, headers, or bold logos where clarity is less important.
  • Can Graffiti Fonts Be Paired with Other Font Styles?
    Pairing a graffiti font with a simpler font can create a nice contrast. Just make sure the overall design remains cohesive and legible.

A Streetwise Attitude

Graffiti fonts bring a rebellious and artistic feel to your design projects. Their bold strokes offer a brave choice for designers looking to break away from convention.

They add a streetwise attitude and will transform typography into a form of art that captures attention and amplifies messages with an edgy style.


Related Topics


How to Guide Your Clients to the Best WordPress Solutions — Speckyboy

There’s more than one way to accomplish your design and functionality goals with WordPress. You’ll find multiple themes and plugins to choose from. And writing custom code is always an option.

It’s wonderful to have choices. However, it can also be overwhelming – especially when working with clients. You want to find the best solutions while minimizing future headaches. Oh, and they also have to fit within a budget.

Our clients may also tilt the scales when choosing a path. For example, perhaps they see a shiny new plugin they want to use. Maybe you review it and aren’t as impressed. What then?

Guiding clients to the best WordPress solutions is part of our job. That means educating them on the options and offering sound advice. Doing so improves project outcomes and strengthens your client relationships.

Let’s look at some tips for pointing your clients in the right direction.

Pay Attention to Your Client’s Needs

The first step is to be a good listener. After all, we can’t help our clients find the best solution if we don’t know what they need.

It’s a critical puzzle piece yet it’s also challenging. A client not well-versed in technical jargon may not give an accurate project description and things may be more complicated than they realize.

For instance, they may want to sell products online. But have they considered things like payment gateways, shipping, or customer accounts? They’ll need plugins or services that cover these tasks and there are many options to choose from. They run the gamut in quality and price.

That’s why it pays to dig a little deeper. Ask plenty of follow-up questions and give them space to answer. This dialog is key to understanding their project requirements.

Once you have enough information, you can move on to researching options.

How to Guide Your Clients to the Best WordPress Solutions — Speckyboy

Finding the Best Plugins and Themes for the Job

We have plenty of opinions on the “best” plugins and themes. But that doesn’t necessarily make them the best fit for your project.

Websites aren’t a one-size-fits-all proposition. Clients have different goals and budgets. What’s perfect for one site may not be right for another. Thus, it takes work to find the right options.

Some clients are happy to let us choose for them. Their trust in your expertise makes the process a little easier.

But that’s not always the case. Hands-on or enterprise clients want to hear the pros and cons of an approach. Sometimes multiple stakeholders are involved. Effective communication is vital, as you’ll need to convince them.

Either way, there are key factors to help you make the best possible choice:

Does It Meet the Project’s Short-Term Needs?

The plugins or themes on your list should meet the project’s short-term goals. A 100% match isn’t always necessary. If it doesn’t do everything out of the box, there should be a path to accomplish them.

WordPress themes are generally flexible and extensible. So, it’s about finding a solid foundation to build upon. Coding knowledge or experience with the WordPress Site Editor can fix any shortcomings.

Plugins can be more challenging. Some, like WooCommerce, are built to be extended. However, some smaller plugins may not have the same level of add-ons or documentation.

Consider What Might Change in the Future

Getting your project off the ground is one thing. But how might it evolve? Your client may want to add more features or refine their website workflow. The solutions you choose now will impact these future changes.

Thus, a plugin or theme that locks you into a narrow path complicates things. You might be stuck with a solution that can’t grow along with client needs. That leads to living with less or, even worse, switching to a new product.

It’s impossible to predict every change. But you can look at a solution and determine if it’s “future-ready.”

Review Pricing and Support Policies

A free product may do what you want. But what happens when you need support? Will it still be around in a few years?

Commercial products also come with questions. Some provide more in-depth support. And that low promotional pricing could disappear when it’s time to renew your license.

It’s good to know these policies from the start. That sets the expectation level for you and your client. Look for products that match your budget and expected support requirements.

Reputation Matters

A WordPress product’s (and its developer’s) reputation means a lot. For instance, you’d likely shy away from a product with a poor record of customer service or fixing bugs. That can derail plans to invest in an otherwise-promising option.

How can you determine their reputation? Look at support forums, product changelogs, and reviews (take them with a grain of salt). Ask the opinion of other WordPress professionals. Find as many details as you can.

If your client is leaning toward such a product, give an honest assessment. Pay particular attention to those serving a critical function. You might save them from a nightmare scenario down the road.

In short, look for products that do what they say they’ll do. A developer that stands behind their product also helps seal the deal.

Discuss the pros and cons of using WordPress plugins, themes, and services.

Help Your Clients Find Success With WordPress

Freelancers and agencies must excel at more than building websites. We must also pick the right tools for the job and explain our reasoning to clients. This keeps everyone on the same page.

Doing so takes a keen eye and communication skills. First, you’ll have to determine whether a plugin or theme is a candidate for your project. From there, it’s about helping clients understand what they’re getting and why it matters.

Don’t be afraid to point out the positives and potential negatives. Both sides must be considered when making an informed decision.

You may not get every choice right on the nose. After all, some things are out of our control. But you will earn your client’s trust. That will pay dividends for years to come.

Related Topics