WordPress has come a long way from its humble blogging beginnings. With the popularization of Custom Posts Types (CPTs), WordPress has emerged to become a fully-featured CMS platform. WordPress has evolved to be suitable for any kind of content you can throw at it.
However, when creating new CPTs, WordPress only offers you the standard fields (title, editor box, etc.) by default. The limited default feature set is inadequate if you need more than what’s available from a core Post or Page post type. We can use WordPress’ native “Custom Fields” meta box, but this requires naming and the field again for each new post. We want to keep things as simple as possible for our clients (and ourselves!), and if a CPT needs to keep the same fields for every post (as is likely), then we need a more robust method for adding those fields.

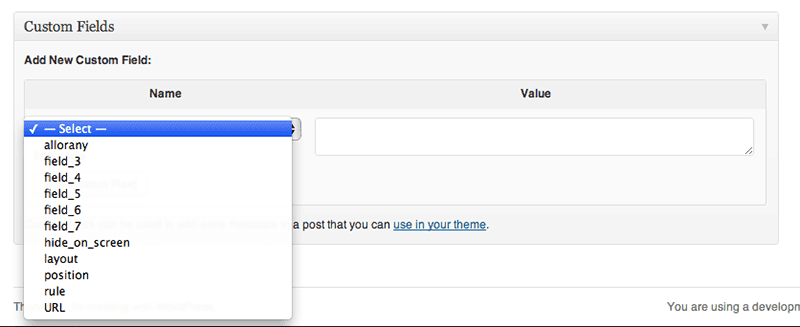
WordPress has native custom field functionality, but it’s not intuitive and is difficult to use.
Start by creating a custom post type
There are great plugins out there that can help automate this task, such as Brad Williams’ Custom Post Type UI and Scott Clark’s Pods, but I have found that these add a layer of complexity to something that is actually deceptively simple. So when creating custom post types for a new project I prefer to go right to code.
I recommend creating a dedicated plugin for the project, something along the lines of “Project CPT,” and putting all the custom post type, custom taxonomy, and any related functionality there. Why not put this in my theme’s functions.php file? Well, I could, but that would blur the line between data and presentation. My client may decide to redesign his site many times, but he would probably prefer to keep the custom post types he’s building now. Since anything that can go into a functions.php file can be made its own plugin, I prefer to separate out that accordingly.
For more on this issue, and the debate the surrounds this approach, see WordPress Custom Post Types Debate — Functions.php or Plugins?.
For this tutorial, we have a project called “The Bookworm Blog,” for which we’re going to need a “Book” custom post type. The code for that is as follows:
<?php
/*
Plugin Name: Bookworm Blog Custom Post Types
Description: Custom Post Types for "The Bookworm Blog" website.
Author: Tracy Rotton
Author URI: http://www.taupecat.com
*/ add_action( 'init', 'bookworm_blog_cpt' ); function bookworm_blog_cpt() { register_post_type( 'book', array( 'labels' => array( 'name' => 'Books', 'singular_name' => 'Book', ), 'description' => 'Books which we will be discussing on this blog.', 'public' => true, 'menu_position' => 20, 'supports' => array( 'title', 'editor', 'custom-fields' )
));
}
But what if we want more fields than the WordPress standards? I’ve enabled the “custom-fields” capability here for illustration purposes, but WordPress native custom fields are not very intuitive for our client. So we need to turn to a third-party plugin.
Download, install and activate Advanced Custom Fields
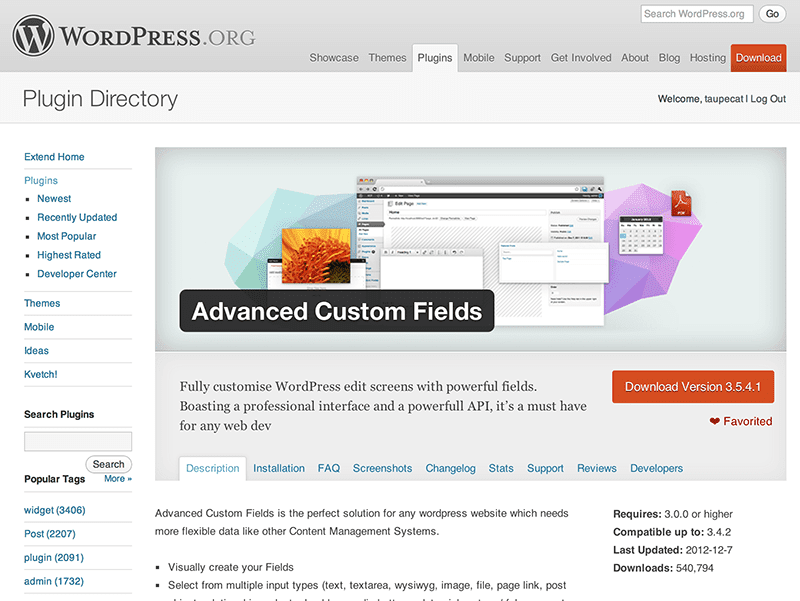
Advanced Custom Fields is a great plugin that gives you a graphical interface for building custom fields. You create sets of fields and then assign those sets to your custom post types, or really any number of criteria (but we’ll get to that a bit later). It’s free in the WordPress Plugin Directory, although you can purchase premium features such as Repeater Fields, Flexible Content Field and more.

Advanced Custom Fields, available in the WordPress Plugin Directory, offers a more robust interface for creating custom fields than WordPress’ native custom fields functionality.
Create your field group
ACF offers a full range of field types you can use in your CPT, including simple text fields, a WYSIWYG editor, image, file upload, and more.
Our “book” custom post type will use the post title for the book title and the main editor box for a book synopsis. That leaves us needing to create the following fields:
- Author: Text, with no HTML formatting
- Publisher: Text, with no HTML formatting
- Copyright date: Numeric (not a “date,” since we only want to list the year)
- Cover: Image
- Link to Amazon: Text, with no HTML formatting
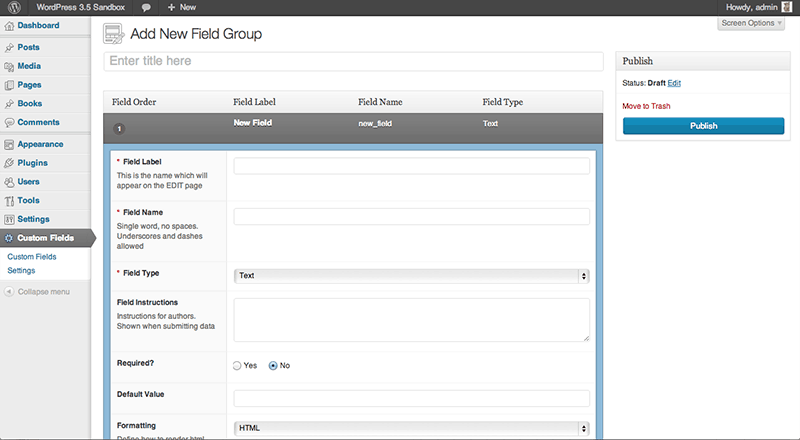
In the “Custom Fields” tab of the dashboard, click on “Add New” and create a field group called “Books.” Click “Add Field” to create the fields above as needed.

ACF allows you to define a number of different field types in an easy-to-user interface for use with custom post types, specified post categories, specific pages, and more.
Assign your field group to the custom post type
In the “Location” section, you can establish the criteria on which the field group is to appear. For our purposes, we will choose “Post Type” is equal to “book,” but you can also apply field groups based on a specific page, posts with certain categories or tags, which page template is being used, etc. When necessary, the field group will dynamically appear when the appropriate criteria are met, such as assigning a post to a particular category.
Choose your display options
In the last panel, you can configure how you want your field group to be displayed, such as in a metabox or not or whether it should be displayed in the main column or in the dashboard’s right sidebar. You can also elect to have other default WordPress inputs to be hidden when the field group is displayed.
Publish
When you are satisfied with your field group, click “Publish” to activate it. Now your field group will appear on any add or edit post screen that meets the defined criteria.
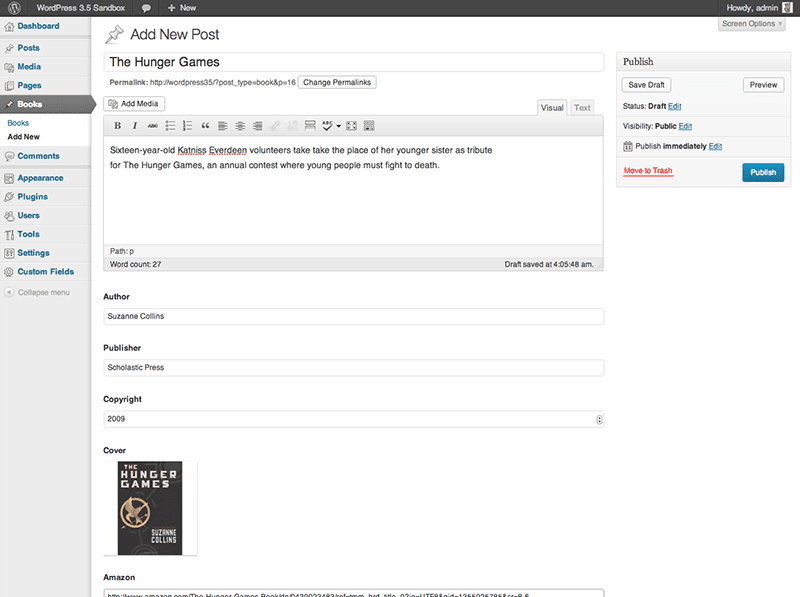
In our example, we will end up with a post add and edit screen that looks like the image below.

The “Add Post” screen for our “Book” custom post type. The custom fields we defined with ACF will appear along with the native WordPress fields.
Using Your Custom Fields
Using the custom fields you create in your template is easy. Whereas WordPress offers native template tags inside The Loop such as the_content() for content entered in the editor box, the_title() for the post title, etc., Advanced Custom Fields gives you the_field( 'field_name' ) (where ‘field_name’ is the machine-readable “Field Name” for your custom field) for displaying whatever field you wish. Should you need to return the field for further processing (rather than displaying it directly), use the get_field( 'field_name' ) function. Custom fields are also available as shortcodes.
Complete documentation on using your custom fields in your templates is available in ACF’s very thorough documentation.
Conclusion
Custom Post Types are an excellent capability of WordPress that allows it to do extraordinary things, but this power would be nothing without a robust yet intuitive method of adding custom fields. Fortunately, Advanced Custom Fields gives us the functionality that the WordPress core lacks, and can be an indispensable part of your workflow.
If you’re looking to take your programming skills to another level, check out our Techdegrees. Our faculty of tech professionals guide learners like you from mastering the fundamentals of coding to polishing the skills of a job-ready software developer. Try one of them out with a free seven-day trial today.

