Article Content
An Introduction to Looping
There’s a lot of terrific music being made right now that makes use of loops as raw material in one form or another. This type of production technique has been in development ever since recording tape became common and the adventurous musicians of yesteryear began arranging those ribbons of tape into loops. This article will focus on software tools that can be used with a Mac, Windows or iOS device in order to transform it into a powerful loop-based production environment that can be fine tuned for live performance use. These live looping tools allow for many possible performance applications; one popular style that’s developed recently is a sophisticated “one man band” situation where a single performer (or small group) can create live music on the fly that features each performer playing multiple instruments. There seems to be a large and growing community of people working on this particular approach to composition and live performance.
The ability to record and play back a loop on the fly is a capability that each of these tools will provide, and there are various forms of live looping performance that require this indispensable toolset. Some live looping tools also provide sound-on-sound overdub recording and/or multiple tracks for recording multiple loops. Most devices will also provide some form of synchronization in terms of loop length and record & playback start/stop quantization. With proper use, these synchronization tools can assist musicians in making music that features tightly connected rhythmic relationships across multiple loops.
I absolutely adore working with loops — here are a couple of examples of loop-based music that I’ve personally worked on. Hopefully this will give you some idea of what’s possible when working with loops. In this first example, I was one member of an ensemble of eight musicians performing live using Ableton Live’s built-in loop playback capabilities in the Session View. Each performer freely triggered playback and stopped playback of a large series of pre-prepared (mostly short) loops cut to various lengths. The loops were arranged into a pre-planned sequence, but the timing and timbre of each loop was improvised. Each loop start/stop point was quantized to a ⅛ note value at a BPM of 85. There was some additional live mixing, timbre shaping and some acoustic instrumentation thrown in there too. This was all done according to the instructions found within a particular musical score: the now-classic 1964 composition written by American composer Terry Riley called In C, and that project resulted in this 2010 recording:
I’ve also produced a recording that made prominent use one of the looper plugins listed below: Ableton’s “Looper.” Here again, I use pre-prepared clips — but this time they were arranged along the DAW’s linear timeline and then fed into Looper. In this case the material was drawn from flugelhorn recordings I made according to the instructions contained in Terry Riley’s 1964-1965 score Dorian Reeds. This recording is an example of what looping with sound-on-sound overdubbing can sound like. A loop of five beats long is the basis for what’s going on here. The live signal gets recorded by Looper, and five beats later it’s played back alongside the live sound. The live sound is still being recorded, but now that recording becomes embedded into the existing loop recording. This process continues over many generations, resulting in many layers being heard simultaneously. In this recording, the older loop recordings gradually fade away, as made possible by the feedback parameter (see below).
Sound-on-sound overdubbing was the first form of recording that allowed musicians to work directly with previously recorded audio while simultaneously recording new material. There were various tape experiments before this development, but this particular tape recording technique was especially revolutionary. If you’re not familiar with the history behind this major development, I recommend spending some time learning about Les Paul’s contributions to this remarkable invention. Sound-on-sound overdubbing (which, by its very nature, presents the practitioner with some pretty severe challenges, as there was no way to correct a mistake once recorded) was soon transformed into the multitrack recording technology we now use today. But along the way, Paul used his invention to reel off a string of massive hits during the 1950s — his ability to record overdubs while nobody else could was quite an advantage at the time.
Common Looping Scenarios
The examples above are admittedly pretty far out in left field — which is exactly how I personally like it. But here are some additional ideas for looper setups that might be useful in your particular situation:
- A solo performer could set up one microphone or one direct-inject electronic instrument that feeds a single looper plugin that’s in sound-on-sound overdub mode. In this situation a single button can control recording, overdubbing and playback; this could be a button on a MIDI controller or it could be a specific button on your computer keyboard that has been mapped to the looper’s transport button. This is nice and simple to operate in a live situation. The live playing will be heard alongside the previously recorded loops. Alternatively, the performer could feed pre-prepared material into the looper, or it could be a hybrid of live sound and prepared material.
- The idea above can be expanded out into an ensemble scenario. In this situation, the group might elect to do away with overdubs due to the additional sound sources.
- In a live loop-capable DAW or with a multitrack looper plugin (see below), a solo performer or ensemble can set up multiple tracks with each track being dedicated to a separate instrument or sound source. This is how a typical “one man band” looper performance happens. This is a bit more complicated than using a single looper plugin, because each track will need its own dedicated button to control recording, overdubbing and playback. Additionally, the audio interface must offer a sufficient number of inputs for each sound source.
- Loop-capable DAWs like Ableton Live typically don’t support sound-on-sound overdubbing directly in the clip slot itself, but a similar effect can be achieved by spreading a single input across multiple tracks. This offers the musician greater control over the individual overdubs at a cost of a far more complicated setup — each track will need a dedicated record/playback button assigned to it. In this situation, the progressive fading out of older loops would not happen automatically like it would when using a looper’s feedback control set to a value less than 100%.
- Alternatively, each DAW track could host an instance of a looper plugin that is capable of sound-on-sound overdubbing. In this scenario, each instrument or sound source can be overdubbed indefinitely (with feedback control, if desired), and at any time the performer could switch instruments and begin looping with overdubs on a new track while the older material continues to sound, if desired.
- Live looping can be completely planned out in advance or it can be more improvisatory — or it can have elements of both approaches. Live sounds or recorded clips also do not necessarily always need to be routed to the loop recording/playback device; there can be a hybrid approach.
Essential Parameters
Transport Controls
In an effort to make looping controls as simple and playable as possible, most loopers (hardware or software) will implement a single button that will offer control over record, play, overdub and stop commands. Learning exactly how this is implemented on your device is going to be the first and arguably most important step in your looping journey. For example, in Ableton’s Looper plugin, the main transport controls are located on a single button that can be operated with a mouse or with a MIDI controller. It enters record mode on the first click. If clicked again during recording, Looper will either begin playback or it will begin a sound-on-sound overdub, depending on your settings. A double click will stop all playback. Helpfully, Looper even offers the ability to undo the last record — this is accessed by holding the transport button down for two seconds. Not every looper will behave this way, but chances are good that you’ll want to have access to all of this functionality, so I advise you to take the time to learn all of the details about your own looper’s transport controls.
Feedback
If you choose to work with sound-on-sound overdubbing while working with a looper device, the feedback control is tremendously important. It controls the level at which the recorded loop is fed back into the looper’s input. Just like on a standard delay effect, the feedback will ultimately control how many times one recording will be repeated during playback. At levels less than 100%, the older loops will progressively fade away. This feedback technique was an essential ingredient in some of the most psychedelic-sounding classics of the 60s and 70s, including works by groundbreaking American composer Terry Riley and the influential British duo Robert Fripp and Brian Eno.
DAW Synchronization Controls
One of the major advantages a computer offers to musicians working with loops is that the practice can be integrated into your DAW, and most looper software can use your DAW’s transport controls and tempo data to record loops that are cut to precise lengths in terms of musical bars and beats. Most looper devices can start recording and playback synced to the DAW’s transport, allowing live performers to monitor the DAW’s metronome for tempo reference. This type of synchronization can usually be turned off if you want to experiment with looping the way that musicians from past generations experienced it — mimicking the situation where a tape loop was strung across two separate tape machines, one set to record the live signal and the second, a distance away, set to play it back. But be warned: in this situation it’s incredibly challenging to maintain any tightly integrated rhythmic material due to the imprecise nature of the loop length, so this old-fashioned mode might be better suited to beatless genres such as ambient or drone.
Multitrack Looping
Many looping setups, especially in a computer environment, will support the recording of multiple independent loops. Exactly how this is implemented varies quite a bit from tool to tool. In some cases, a looper plugin might offer multiple inputs, with each feeding a separate loop recorder. This is nice because everything needed for performance can usually be contained in one window. In other situations, you might be using a DAW or DAW-like application that simply offers controls for spontaneous loop recording and playback on each track. True multitrack loopers will be a bit more time consuming to set up properly, as the various physical inputs must be properly routed to the software inputs for the system to work correctly.
Whatever the scenario, multitrack looping is a great tool for solo musicians or small ensembles to use when building up an arrangement that can consist of potentially many different instruments. These instruments don’t need to be played live simultaneously to be heard in concert by the audience, because the recorded loops can just play back indefinitely.
Extras
Some loopers offer some nifty extras. For example, you may be able to alter the playback speed of the loop on the fly, or some loopers will allow you to process the loop audio independently from the live signal and vice versa. It’s important to consider what features you need now alongside what you’re likely to need in the future when comparing the various looping tools on the market.
A Note About Latency
Clearly, computer-based looping offers many potential advantages that a run-of-the-mill guitar looper pedal can’t. That being said, there is one potentially devastating drawback: latency. Inherent in all computer audio systems, latency is a time delay that happens between the time you record a sound or send a MIDI command and the time the resulting sound is heard. If there’s too much latency in a live performance situation, that time delay can destroy your ability to play rhythmically. The good news is that pretty much any modern computer that’s equipped with a decent audio interface should be able to achieve latency that’s low enough to be essentially unnoticeable, depending on the complexity of the live set and the processing & memory demands therein.
So, latency must be managed by a live computer-based performer. This means that it’s important to use an audio interface that’s capable of stable performance at lower latencies. There are real differences between the various interfaces available on the market in this area, so do your homework before making this hugely important purchase. Then, once your low-latency interface is integrated into your setup, you’ll want to make sure you’re using ASIO drivers on a Windows computer. Mac computers offer standard Core Audio drivers that are inherently pretty good with latency. Then, you’ll want to load up your live set in its entirety, including all plugins, pre-prepared clips, and loopers waiting to record. Now, experiment with different buffer sizes. To a certain extent, the size of the buffer will determine your latency — larger buffers result in higher latency while lower buffers result in lower latency. If your buffer is set lower than your computer can handle, you’ll start to hear digital “junk” in the audio signal like clicks and pops. Figure out how low you need to go to find that digital junk and then increase your buffer incrementally from there to ensure a good balance between stability and low latency. If your hardware and audio drivers are working properly, you should be able to find a setting where latency is (more or less) unnoticeable and you get pristine-sounding audio.
Computer-Based Looping Software
Software that’s dedicated to looping has become more plentiful lately, spanning various platforms and formats. In the list below, I’ll offer recommendations for software tools that run as plugins inside of a DAW, full applications that are DAWs themselves and apps that run on iOS devices.
Plugins
Running a looper as a plugin in a DAW is an approach with some serious benefits. In addition to the usual live looping techniques we’ve discussed so far, a DAW environment can host all kinds of pre-prepared material that can be used in addition to (or as an alternative to) a live input. That material in the DAW can be routed to the looper plugin or not, depending on your needs.
Looper by Ableton
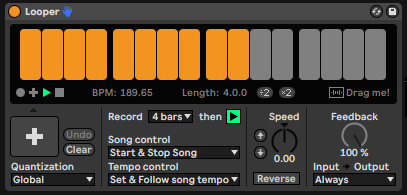
This is a classic looping device — one plugin among a suite of outstanding plugins included with Ableton Live. As such, this is a great way to get into computer-based looping. It’s included in every paid edition of Ableton Live, including the relatively inexpensive “Intro” edition. Ableton itself offers additional powerful looping functionality that’s built into the Session View (see below). There’s nothing flashy about Looper, but it covers all of the basics. It offers in-DAW synchronization, sound-on-sound overdubbing, feedback control and an un-synced mode. There are even a few nifty extras like pitch control for the loop, a button that plays the loop backwards, and it offers the ability to export the loop as a new audio file that can be immediately integrated into the DAW. Note that as a stock Ableton Live device, this plugin will only run in the Ableton Live DAW.
MSuperLooper by MeldaProduction
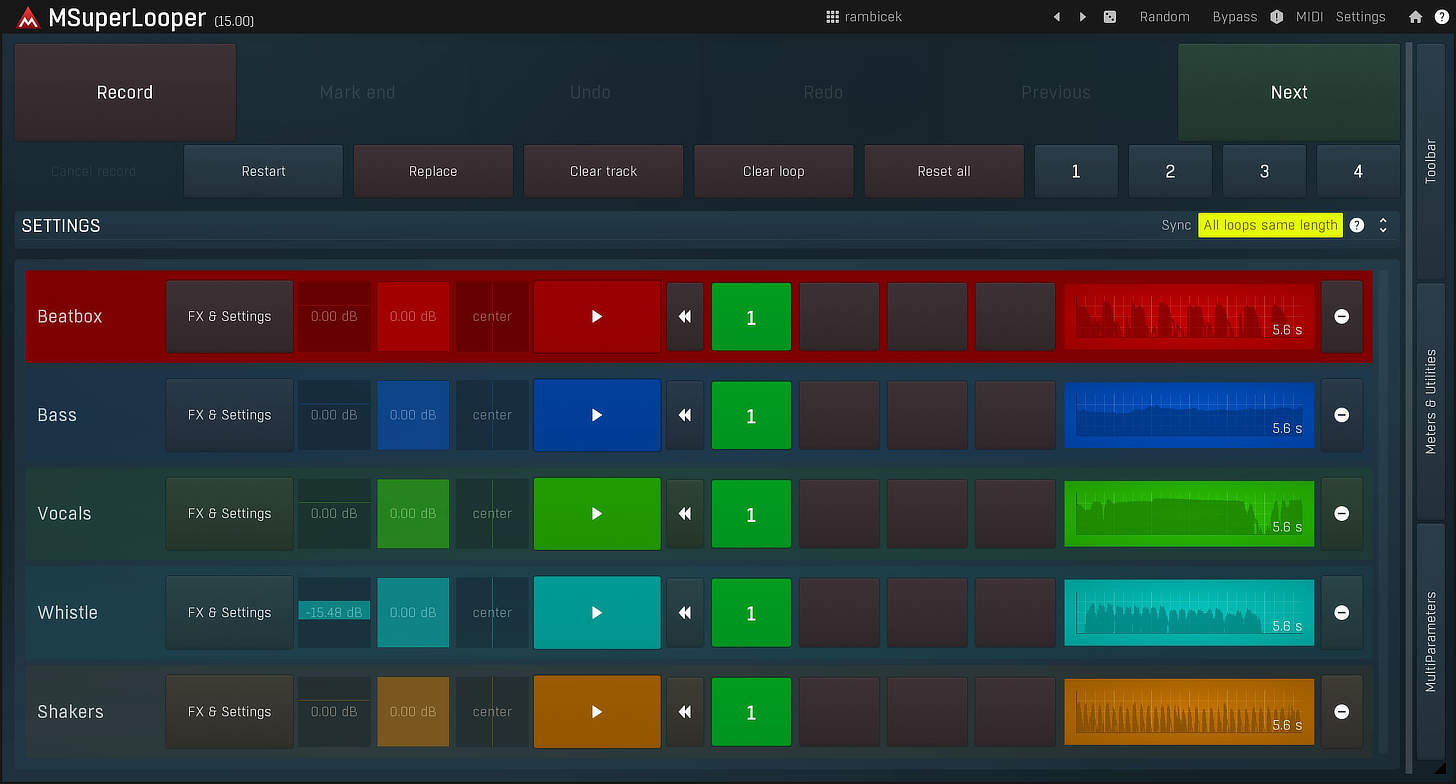
A powerful and feature-rich plugin, MSuperLooper is easily the most comprehensive plugin looping tool on the market. It’s DAW-like in its architecture: it provides 16 independent tracks with each track offering four slots for individual loops to be recorded into. Playback of these slots can be switched on the fly. This grid-based approach shares a lot of functionality with Ableton’s Session View (see below). Another powerful DAW-like feature offered here is the ability to process each track’s loops using MeldaProduction’s effects plugins in both serial and parallel configurations. Even better, each loop can be routed to a separate track in your DAW, opening up the possibility of processing each loop with your DAW’s effects, third party plugins or even outboard gear.
Nearly any looping scenario you can imagine is going to be covered here. As a comprehensive tool with many features, there’s a bit of a learning curve to take into account — at least if you want to achieve full mastery of the tool. This is also a tool that’s been graphically optimized for touchscreen hardware — this could be a big bonus if your hardware supports it.
DAWs Suitable for Live Looping
There are a handful of DAWs that offer built-in loping tools suitable for live use. If you already have one of these DAWs or have been thinking about buying in, this could be a great place to get started.
Ableton Live
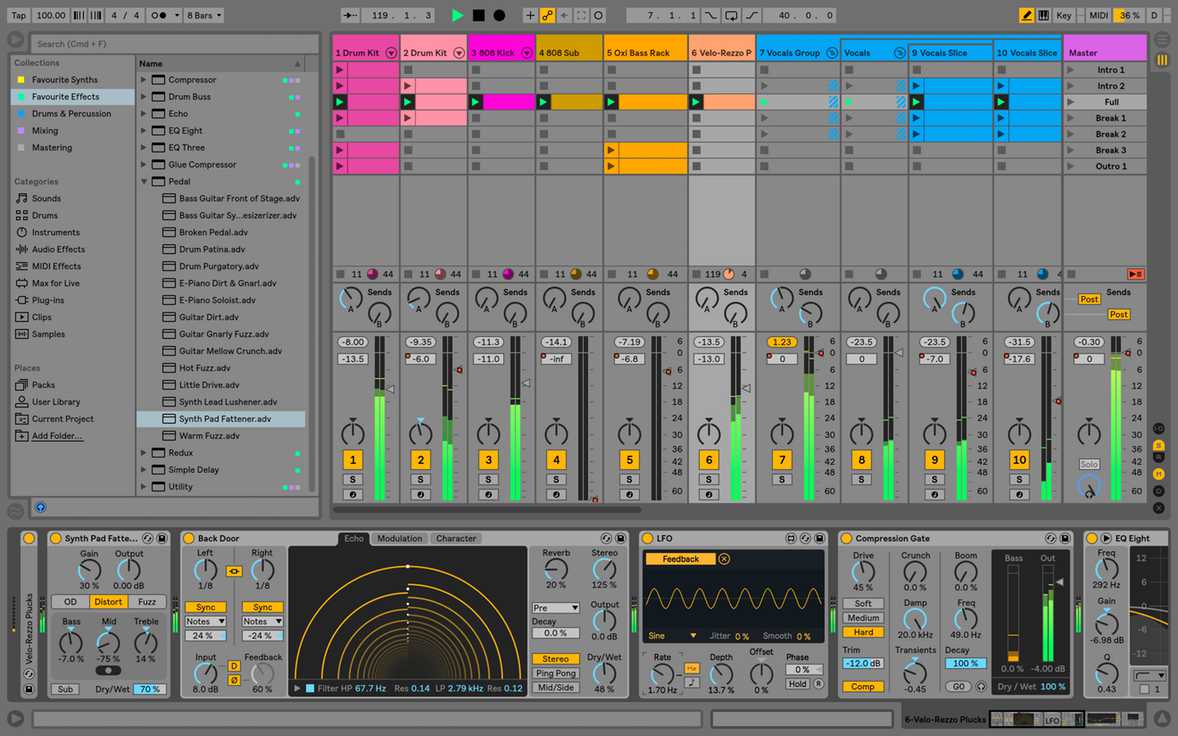
Ableton’s Session View pretty much upended the entire DAW market; it’s still among the most revolutionary developments in music technology to date. It’s the Session View that provides the “live” functionality from which the DAW derives its name, and one of the possible live applications for this technology is looping. This can certainly include the Looper plugin mentioned above, but that plugin isn’t mandatory for live looping to happen in the Session View.
While the Session View resembles a spreadsheet upon first glance, within those cells lie exciting looping tools. Each and every cell in the Session View can be set up to record a live input on the fly and then immediately play it back without stopping. This simple technique can then be spread across as many cells and as many different tracks as you need for your performance. You can also integrate as much pre-prepared material as you care to include.
ADVERTISEMENT
Ableton is a fully mature DAW at this point, so it includes a robust suite of virtual instruments and effects that can be deployed in a looping situation, if desired.
LiveLoop Pro
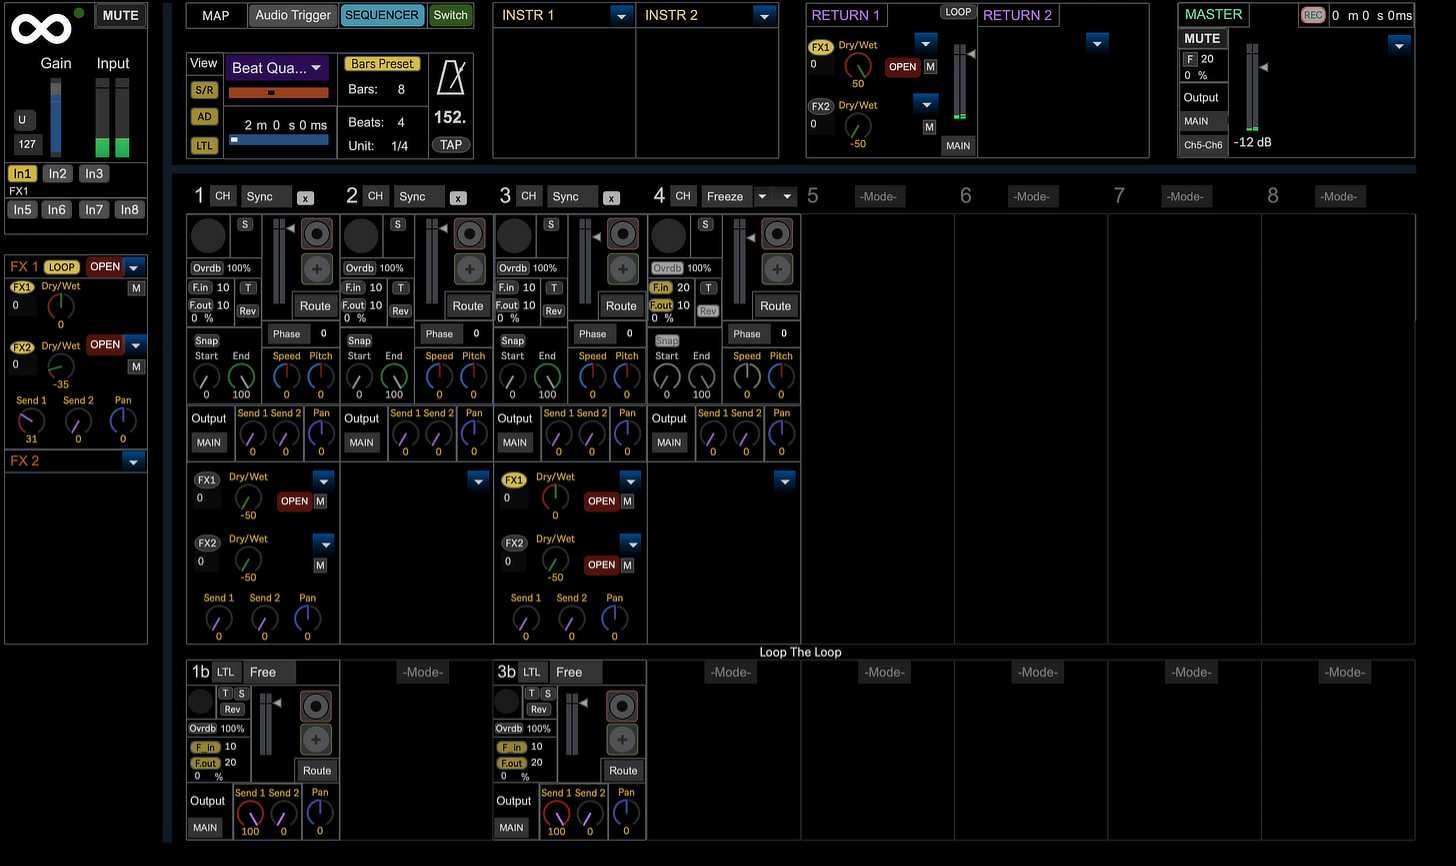
While the other DAWs mentioned in this article are all meant to support a wide range of production styles, LiveLoop Pro is a 16 track DAW that was developed from the ground up with looping as its main focus. This is software that’s bound to appeal to the more experimentally-minded loop practitioner, as the DAW includes some interesting and esoteric features that are rarely found in other applications:
- Each loop can have a unique time signature & length, but the loops can still be synchronized to a shared clock source. If you want to explore polyrhythms in your looping, this feature is for you.
- There’s a real-time online collaboration tool built-in.
- A variety of external synchronization protocols are supported, including Ableton Link and MIDI clock. This opens up all kinds of collaborative possibilities, and it allows the software to be integrated with a wide range of external hardware.
- The synchronization of loops can be internally phased, a technique originally developed by American composer Steve Reich.
These unusual features are integrated alongside the usual looping features.
This is a very interesting piece of software, but it’s a bit rough around the edges right now. Stability and responsiveness both seem to be strong, but the user interface could stand to be streamlined and there are a number of supporting things (such as the associated YouTube channel, which desperately needs some attention) that could really enhance the user experience with a little more development. From what I can tell, the program was mainly developed by just one man: Spanish born, Netherlands-based Josep Garcés. As such, this is an impressive achievement. To be honest, I’m really hoping that this app does well enough to warrant further development, because I would absolutely love to see what this could become with some additional investment. As it stands, this is an innovative, fully featured & usable tool with some funky quirks, a dense and sometimes unintuitive user interface and a steep learning curve. But if you need those unusual features I mentioned above, this might be the tool for you.
Others
Ableton’s Session view has been so successful that it has now been copied (yes — copied) by other companies. Because of this, the looping functionality described above is now (more or less) available in other DAWs including Apple’s Logic Pro, Bitwig and MOTU’s Digital Performer. If you already own one of these DAWs or if you prefer them for one reason or another, you’ll be able to use them in a looping scenario. By the time you read this there will probably be other DAWs that have copied Session View functionality too.
It’s also worth noting that other DAWs that haven’t gone out of their way to copy Ableton’s Session View are still capable of loading one of the looper plugins mentioned above, and these DAWs can still provide looping value through what they provide in terms of instruments and effects, among other things.
iOS Looper Apps
An iPad and/or iPhone are attractive hardware options for the live looper. They can’t be beat in terms of portability, and iOS was designed from the ground up with stable, low-latency audio as a priority. As a result, music-making apps have flourished on this platform — including some outstanding looping apps. It used to be that there were two main problems with relying on iOS for serious music production or live performance tasks: it was difficult and clunky to get various apps to communicate with one another, and processing power was limited. Those two issues have largely been remedied with the arrival of AUv3 plugins and with multicore 64 bit processors now standard on all new iOS hardware devices. If you’re wanting to perform live with loops and you’re starting from scratch in terms of hardware, iOS devices are worth a serious look. I wouldn’t say that the platform has completely caught up to Mac and Windows for all music production situations, but if your needs are specific to certain production and performance styles, an iOS device might be just the thing for you.
Loopy Pro by A Tasty Pixel
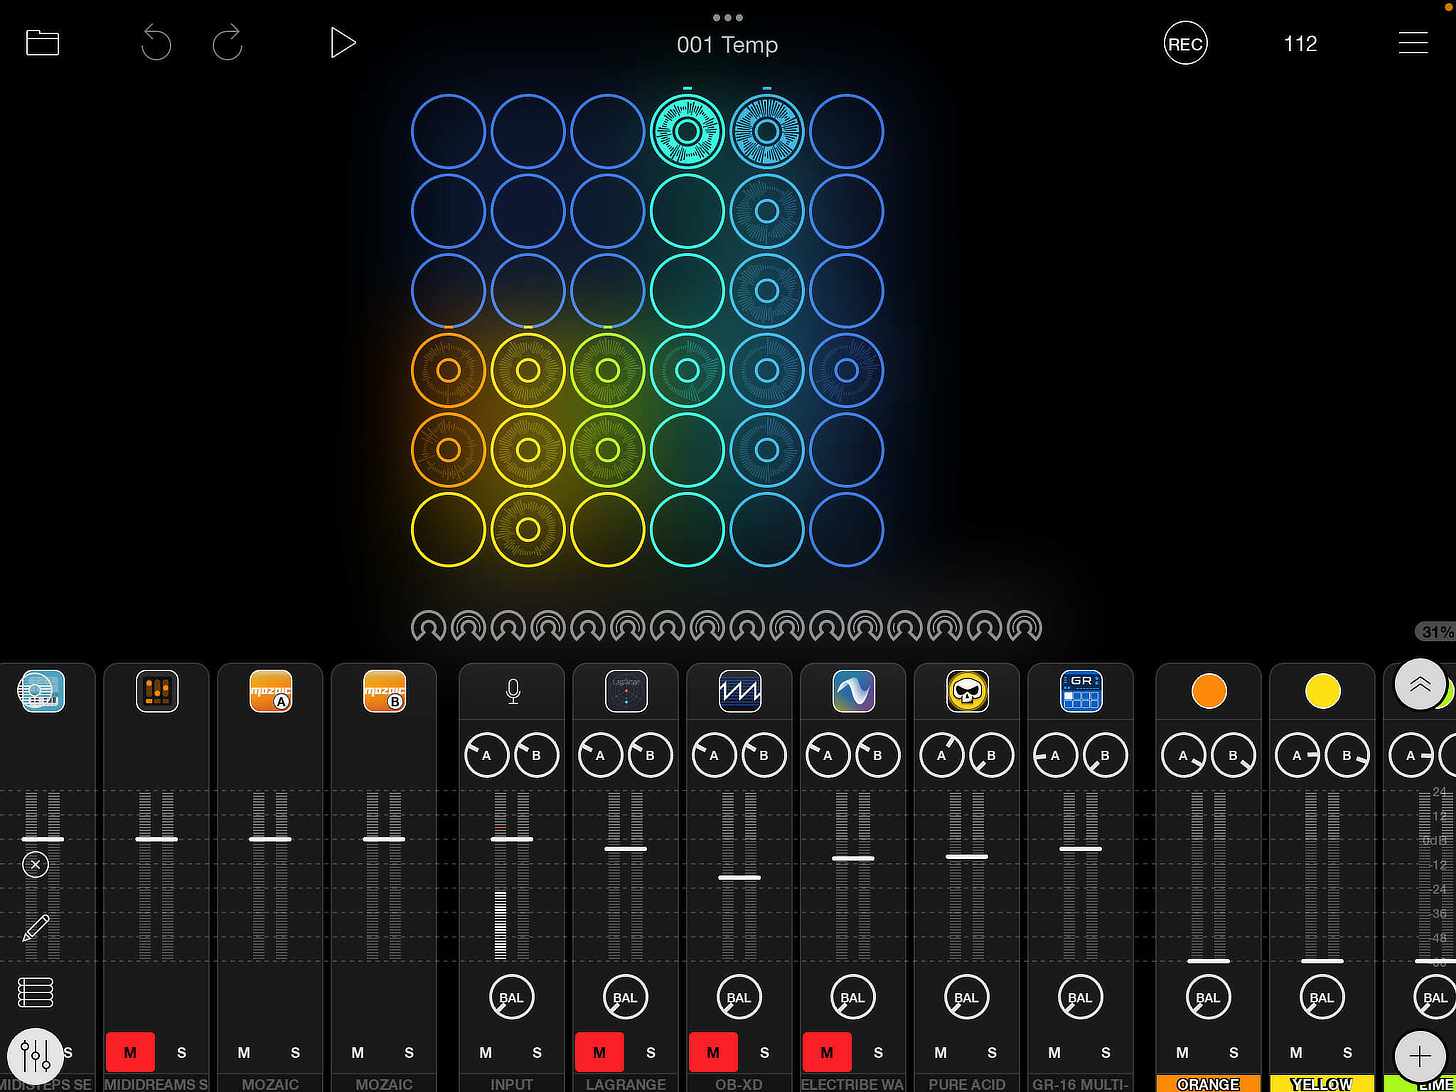
This app alone proves that iOS can be an outstanding platform for live looping and music production. Filled to the brim with exciting features, Loopy Pro goes well beyond the standard functionality found in most loopers. With a main interface reminiscent of Ableton’s Session View grid, Loopy Pro also features a traditional linear sequencer, AUv3 instrument and effect hosting capabilities, an excellent mixer with flexible signal routing and a full suite of tools for live performance.
That linear sequencer is a major addition here, and with this addition Loopy Pro now must be considered to be among the top iOS DAWs on the market — though it certainly remains one that’s focused on looping. Additionally, this is an app that’s polished and very attractive to look at. It’s great to see talented and dedicated developers introducing outstanding music production apps like this one.
Quantiloop Pro by Stephan Marx
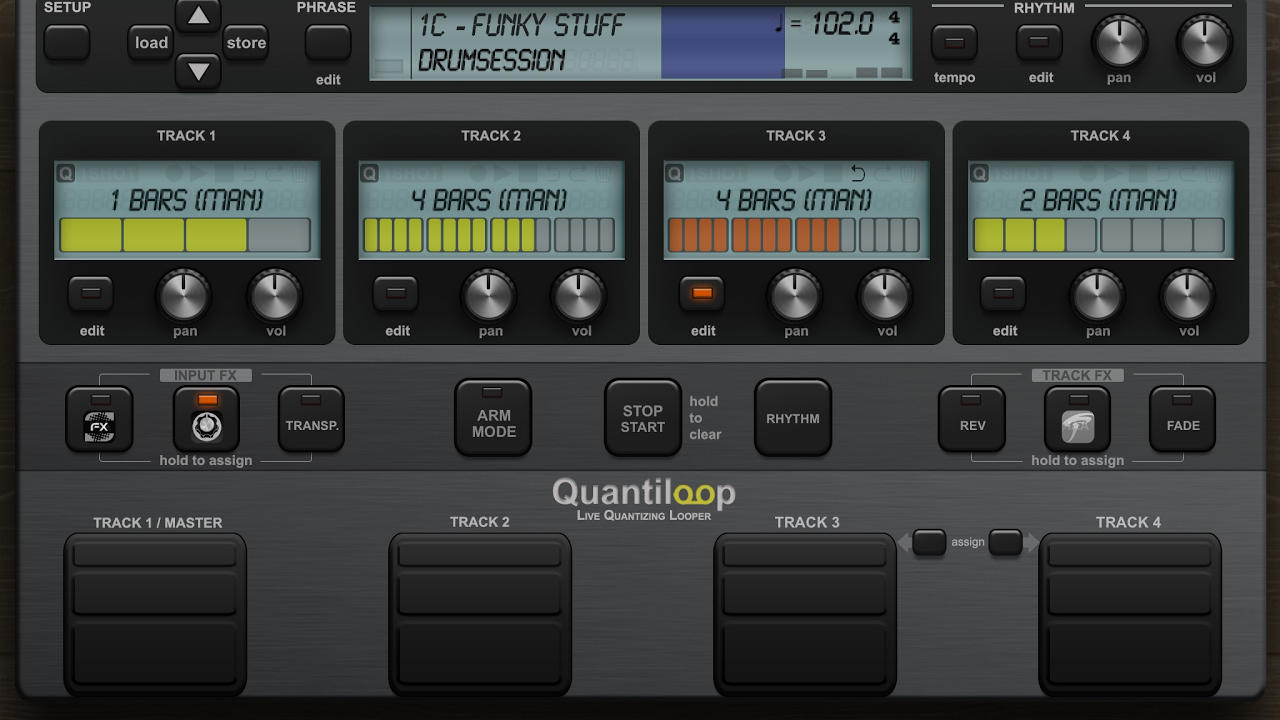
Working with this app couldn’t be simpler or more straightforward. If you’re coming to iOS looping after previously using hardware loopers, but you’d like to take advantage of the power that software offers, this might be the app for you. It’s designed to mimic the appearance and behavior of a typical looper pedal, plus there’s some nice extras that the software provides. At its core is a four track looper with each track offering identical functionality. If you want to start looping with minimal technical hurdles, give this one a look.
Conclusion
Looping is a lot of fun, but it also offers a particular sound that you can’t really achieve any other way. It can be hypnotic and mesmerizing due to it’s mixture of predictable sounds and newly introduced sonic material. And the fact of the matter is that this is a method of musical instruction you can engage in right now, on your own. No coordination is required with anyone else. So what are you waiting for? Pick up one or more of these loopers and make some music!


